Sp8Ball’s Mod Thread (Stealing Other Poster’s Ideas Since Mid-2010)

oh man. I've got dropbox. It's legit. 2GB is free, and it syncs data almost in real time across windows, mac, iPhones. It's ridiculous, and free.

I've been using it to share docs with my dad down in florida. We use it all the time. It's insane.

If it's OK with you guys, I'd like to sleep, eat the occasional meal, and avoid a divorce.
 
Modification: Interior LED Accent Lights

Pilot 14” LED light strips ($24.99 for a 2-pack, Pep Boys - you'll need 4 total strips to do front and rear footwells)
Add-a-Circuit
Also need: some speaker wire, small zip/wire ties, and switch if you want to turn them off

Difficulty Scale (1 to 10): Six (because I hate wiring stuff up, and I’m no good at it…but Antman’s involvement lowered this to a 3)

Sp8ball’s Personal Intimidation Factor (1 to 10): Five (mitigated to a “three” by Antman offering to help, but there’s the fear that it’ll look “ghetto”)

Install Time: 3+ hours, because Antman and I are getting to be good friends so we B.S. a lot, and we played with his daughters for a bit, and I had to clean up spilled heat wraps

Reason for Doing It: To do something fun that looks cool and no one else had done (that I know of…but if you have, post your pics!)

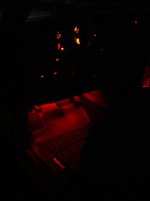
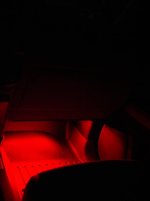
Benefit: Just to look cool, but also illuminates footwells at night. And red light doesn’t hurt your night vision.

Cons: Mrs. Sp8ball could approve, and simultaneously call you a dorky 16 year old.

Other Products Considered: Various LED light strips and bulbs...or just leaving things well enough alone.
_____________________________

Alright…this one isn’t going to fly with everyone. This one was definitely done for fun, and might not be something that everyone wants to do. I thought this might be pushing the limits of “good taste”, or might make it look too “ricer”, or may be the first one that got the ire of Mrs. Sp8ball to boil over a bit.

But…none of that happened. In fact, everyone I’ve shown it to (including people who think I’m weird for modding my truck) have found themselves surprisingly enthusiastic about it. I think it’s just “different” so people think it’s cool.

I found myself driving around and running errands all weekend after sunset – on purpose – just to bask in the glow of my latest mod. (and yes, I mean that literally)

But at the same time, I’m going to install a simple switch this afternoon, mounted in one of my “blanks” by my left knee, to give me the ability to turn it off if it gets to be too much one day.

Mad props to Antman, again. I keep having crazy visions, but he’s the one who’s crazy enough to go “YES, we ABSOLUTELY can do that!”…and then invites me over, lets me use his garage, and then does 90% of the work. He says I’m brave to make my vehicle a “guinea pig” for him to play with, but I know it’s in good hands.

[Note: Last big post had Antman’s arms in it…this one has my hands. But I’m not working, you’ll notice – I’m doing things like “holding a part”, or “fishing a wire”. I barely helped at all, and instead held things and took pictures. I feel like an invalid or something. But I also don’t want to screw things up.]

[Note #2: I forgot my camera when I went to Antman’s house. So I called the lovely-and-beautiful Mrs. Sp8ball, and she packed our 6-week old in the car and drove the 1-mile stretch to deliver it. She even got out of the car to meet Antman. That showed me two things: (1) she wanted to know who this man was who was ripping the body moldings out of our truck, and (2) she is thinking this whole taking-pictures-and-putting-write-ups-on-the-internet thing has some value, if she was willing to deliver the camera.]

Again, this write-up is going to be picture heavy for the same reasons as before: A picture is worth a thousand words, and I have 30-some pictures to post (again). That’s 30,000+ words I don’t have to write.

So, let’s get started!

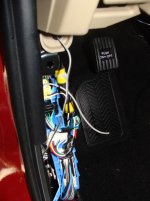
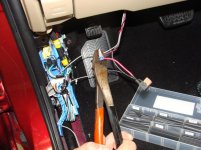
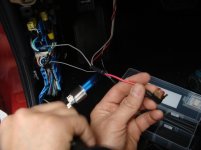
Get yourself an “Add-a-circuit” type connector to plug into your fuse and add another circuit.
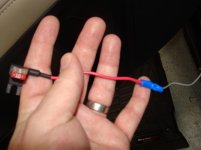
DSC05177.jpg

We wanted to have the accent lights only come on when the headlights were on, so we checked out the fuse box cover to get the lay of the land.
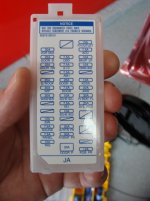
DSC05223.jpg

We decided to tap into the “Tails” fuse, because those only come on when the Parking or Head lights are on, which is what we wanted to do. And it has a 10A capacity, which fits with what our Add-a-circuit could handle.
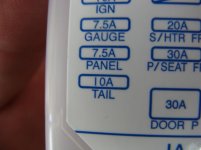
DSC05224.jpg

It should be noted that you can’t use your fuse box cover anymore once you connect the Add-a-Circuit.

IMPORTANT: See that yellow-wrapped wire. Don’t mess with those. Don’t tie anything to them. Don’t cut them or work too harshly around them – they are your airbag wires.
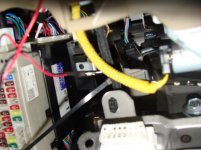
DSC05178.jpg

You will need a ground for your lights. The next two steps walk through using the location we identified for our ground.

.

 

Attachments

  • DSC05177.jpg
    DSC05177.jpg
    52 KB · Views: 3,968
  • DSC05223.jpg
    DSC05223.jpg
    73.2 KB · Views: 4,502
  • DSC05224.jpg
    DSC05224.jpg
    47 KB · Views: 3,964
  • DSC05178.jpg
    DSC05178.jpg
    74.5 KB · Views: 3,794
Modification: Interior LED Accent Lights (cont.)

Remove the cover (mine was tan in color) by your left ankle (driver’s side). You first need to remove this fastener by unscrewing it from the back of the housing.

DSC05185.jpg

Those red and black wires in the right of the picture are coming from the LED strips which are just hanging there as a "fit test", which are on the underside of the dash equipment (more on that later).

DSC05186.jpg

Also, see this piece of weatherstripping? Leave the metal clip on it. When you go to put that front piece back on, clip the molding/trim piece to the weatherstripping clip first, and then snap and secure the molding back onto the car. (this is the passenger side, but it’s the same on both sides)

DSC05227.jpg

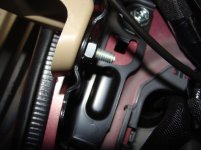
You’ll see this bolt behind the housing. This is where we mounted our ground. (more on that later)

DSC05188.jpg

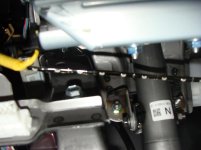
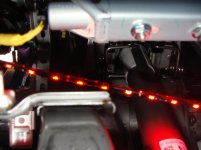
Figure out where you want to mount the first LED strip under the driver’s side of the console. Keep it free from your feet, and elevated to avoid inadvertently ripping it down when you get in the car or while you’re driving. Remember that this is accent lighting, so it can go way up in the dash and still be effective. One other thing: we noticed that the LEDs run down a side of the strip, not down the middle. So be sure that the LEDs are on the side of the strip that faces in the right direction for your tastes.

DSC05179.jpg

Loosely wire the LED strip to some speaker wire, and connect that wire to the fuse set-up and ground to test it out.

DSC05183.jpg

.
 

Attachments

  • DSC05185.jpg
    DSC05185.jpg
    38.8 KB · Views: 3,751
  • DSC05186.jpg
    DSC05186.jpg
    106.5 KB · Views: 3,760
  • DSC05227.jpg
    DSC05227.jpg
    63.5 KB · Views: 3,747
  • DSC05188.jpg
    DSC05188.jpg
    66.9 KB · Views: 3,724
  • DSC05179.jpg
    DSC05179.jpg
    55.3 KB · Views: 3,781
  • DSC05183.jpg
    DSC05183.jpg
    60.4 KB · Views: 3,760
Last edited:
Modification: Interior LED Accent Lights (cont.)

Once that works, you can start running wires from these connections to the other points where you want accent lighting in your car. I elected to put them in the first and second rows, which meant they went under the dash and under the front seats, respectively.
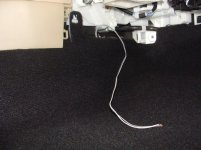
To route them to the bottoms of the front seats is pretty easy, and the coil structures under the seat make great mounting points.

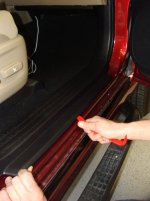
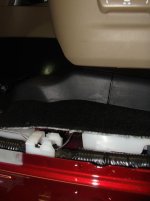
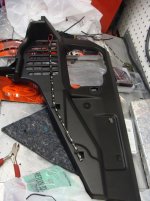
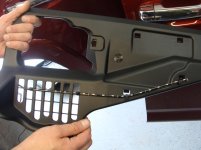
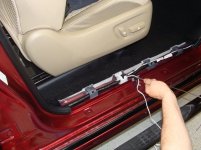
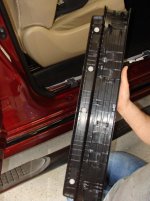
Remove this plastic sill plate –it just pops off. This is us doing the passenger side, but you get the point.

DSC05226.jpg

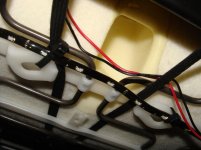
We attached the LED strip under the driver seat.
[Note: This picture is from the back seat on the driver’s side, looking forward in the car. See how the LEDs are on the far side of that strip? When we lit this up at night, the rear footwell on this side was dimmer than the passenger side, and there was light coming out from the driver’s seat towards the pedals. We ended up taking this strip out, flipping it around so the LEDs were facing TOWARDS the camera, and it was much better (i.e. brighter).]

DSC05191.jpg

Fish the wire through from the side (you’ll see where in a couple of pictures).

DSC05196.jpg

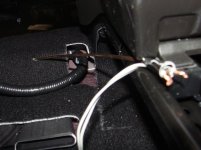
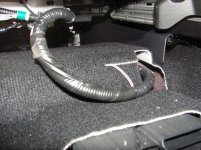
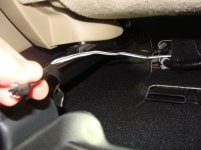
Make sure you have a good bit of slack in the wire and hook it up to the LEDs. Secure with electrical tape or shrink wraps. Use this slack to secure the wire to the existing wire bundle, because that black bundle travels with the seat. Move your seat around and make sure there’s plenty of play in the wire.

DSC05198.jpg

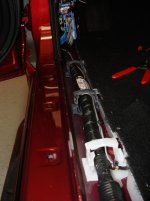
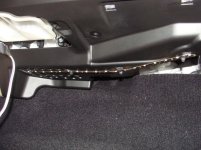
Here’s where the wire comes out under the (now removed) door sill. Route it down the channel back to the front of the car.

DSC05199.jpg
DSC05201.jpg
 

Attachments

  • DSC05226.jpg
    DSC05226.jpg
    71 KB · Views: 3,894
  • DSC05191.jpg
    DSC05191.jpg
    79.1 KB · Views: 3,732
  • DSC05196.jpg
    DSC05196.jpg
    80.4 KB · Views: 3,757
  • DSC05198.jpg
    DSC05198.jpg
    123.6 KB · Views: 3,860
  • DSC05199.jpg
    DSC05199.jpg
    59.9 KB · Views: 3,715
  • DSC05201.jpg
    DSC05201.jpg
    68.6 KB · Views: 3,737
Modification: Interior LED Accent Lights (cont.)

Route the wire behind this section with all the wires/connections, making sure you have enough wire left to attach it to your original LED connection (with the “add a circuit”). Cut any remaining wire.

DSC05202.jpg

Route another speaker/electrical wire from the driver’s side to the passenger’s side. There are small plastic trim pieces behind the center console that snap out where you can route it.

DSC05205.jpg
DSC05207.jpg

The entire bottom of the passenger-side dash (under the glove compartment) pops out, so you can take that off to more easily mount the LEDs. Just yank it down!

DSC05208.jpg
DSC05209.jpg

It should be noted that these particular strips have a silicone/gel feel to them, so they are particularly pliable. That makes the use of wire ties a pretty good option, because the ties dig into them (be gentle-ish) and grip them in place very well.

Then you pop the under-dash trim piece back in place and wire it to the wire you passed through the middle console earlier in this post. (If you’re doing rear footwell lights as well, add an additional wire (long) that will be routed to the underside of the passenger seat for the rear passenger-side footwells.)

DSC05210.jpg
 

Attachments

  • DSC05202.jpg
    DSC05202.jpg
    81.2 KB · Views: 3,802
  • DSC05205.jpg
    DSC05205.jpg
    62.3 KB · Views: 3,754
  • DSC05207.jpg
    DSC05207.jpg
    104.4 KB · Views: 3,779
  • DSC05208.jpg
    DSC05208.jpg
    95.3 KB · Views: 3,698
  • DSC05209.jpg
    DSC05209.jpg
    73.8 KB · Views: 3,699
  • DSC05210.jpg
    DSC05210.jpg
    117.4 KB · Views: 3,717
Modification: Interior LED Accent Lights (cont.)

You now have three lights wired, with one to go (if you’re doing the rear footwells – if you’re just doing the fronts, you can skip this).

Your passenger-side footwell should look like this, with that wire being the wire that’s ready to go to the underside of the passenger seat:

DSC05211.jpg

You’re now done with all the wiring that will be connected to the fuse, so you can go ahead and finish that section off to get the “power” part of the wiring in place.

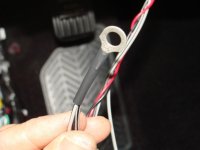
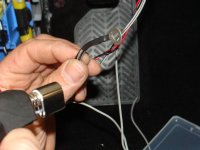
Find a good terminal connector that will fit under the nut in our previously identified mounting bolt. Connect your ground wires to it, and shrink wrap them to keep the connection tight and protected.

DSC05213.JPG
DSC05216.JPG

Wire all of your power wires together with a connector that will allow them to be connected to the “add-a-circuit”. We used this blue junction thingy.
(note the nice, organized box of heat shrink sleeves in the background)

DSC05219.JPG

Add in the “add-a-circuit” and crimp down for a good connection. (again…note the nice, organized box of heat shrink sleeves)

DSC05220.jpg

We put heat shrink sleeves on everything to protect the connections. It’s cheap, and highly recommended! Again, notice the nice, neat collection of sleeves.

DSC05221.jpg
 

Attachments

  • DSC05211.jpg
    DSC05211.jpg
    102.6 KB · Views: 3,709
  • DSC05220.jpg
    DSC05220.jpg
    115 KB · Views: 3,705
  • DSC05221.jpg
    DSC05221.jpg
    59.8 KB · Views: 3,670
  • DSC05213.JPG
    DSC05213.JPG
    69 KB · Views: 3,688
  • DSC05216.JPG
    DSC05216.JPG
    83.3 KB · Views: 3,696
  • DSC05219.JPG
    DSC05219.JPG
    135 KB · Views: 3,752
Last edited:
Modification: Interior LED Accent Lights (cont.)

Plug the “add-a-circuit” into the fuse box in the “Tail” slot. Loop your grounding connection to the bolt and tighten it down with the nut.

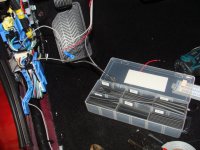
Make sure that connection is tight before you test it out. Why? Because if your ground is not tightly connected, the lights won’t work. And if the lights won’t work after you made all of the connections “final” with shrink wrap and the like, you might panic.

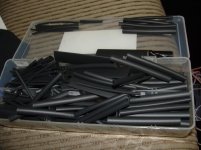
And if you panic, you might knock something over. Like a container full of shrink wraps.

DSC05225.jpg

OK, enough of that. Now you just have to route the wire under the passenger seat and tuck the wires away, connect up that final LED strip, and you’re done!

Fish the wire from the side, to the underside of the passenger seat.

DSC05228.jpg
DSC05230.jpg

Secure the LED strip to the coils under the seat (like under the driver’s seat), and make sure the LED lights are on the correct side of the strip.

Connect the speaker/electrical wire that you fished through to the LED strip, leaving enough slack to attach to the black wire bundle (like under the driver’s seat). Make solid connections and shrink wrap them tight.

Attach the wire to the black wire bundle and move the seat to see how the wire travels.

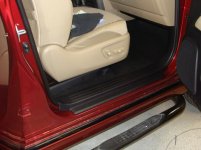
Once you’re satisfied, route the wire nicely through the channel under the door sill.

Pop the door sill back in place (on both sides). They have these white pegs that line up with holes in the metal body – they just pop right in with a good push.

DSC05232.jpg
DSC05233.jpg

Test the lights by turning the ignition on and switching to the two modes that put your Tail lights on – “Parking” or “Headlights”.

And you’re done!
 

Attachments

  • DSC05225.jpg
    DSC05225.jpg
    93.2 KB · Views: 3,710
  • DSC05228.jpg
    DSC05228.jpg
    97.8 KB · Views: 4,092
  • DSC05230.jpg
    DSC05230.jpg
    83.9 KB · Views: 3,881
  • DSC05232.jpg
    DSC05232.jpg
    97.3 KB · Views: 3,718
  • DSC05233.jpg
    DSC05233.jpg
    76.1 KB · Views: 3,697
Last edited:
Modification: Interior LED Accent Lights (cont.)

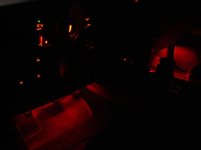
Not the greatest pictures, but I hope you get the idea…

Driver and Passenger footwells (front row):

DSC05234.jpg

Driver’s side footwell:

DSC05235.jpg

Passenger’s side footwell:

DSC05239.jpg

Taken from the back seat of the front and second row, passenger side:

DSC05241.jpg

Is this cool? I think so. People like it. It might be a novelty thing. Who knows? Antman and I are adding a switch (mounted in one of the black “blanks” near the Parking Assist button, by the driver’s left knee) to give me the option of turning them off. But for now, I like it a lot! It adds a little “oomph” at night, for sure.

(Note: Kids love them)

(Note: Wives think they’re cool…but then call you a 16-year-old dork)
 

Attachments

  • DSC05234.jpg
    DSC05234.jpg
    18.4 KB · Views: 3,669
  • DSC05235.jpg
    DSC05235.jpg
    16.1 KB · Views: 3,661
  • DSC05239.jpg
    DSC05239.jpg
    18.4 KB · Views: 3,651
  • DSC05241.jpg
    DSC05241.jpg
    12.5 KB · Views: 3,673
"We may also attempt to tackle another semi-perplexing issue: the ground-illuminating lights on the bottom of the driver and passenger side doors. Antman has an SR5 with the leather package, and he has these lights. I have the cloth interior, and I don't have them. So we're going to see if the wiring harness and other components still "dwell" inside the door of my truck, so I can install these lights after-the-fact."

^^ Very interested in this one^^
Your thread is awesome, keep up the good work (writting), lol.
Thanks
 
whats up with that plastic box of black pipes? Or is that shrink wrap for the wires? You didn't really talk about it in the description. :lightsaber: hahaha
 
whats up with that plastic box of black pipes? Or is that shrink wrap for the wires? You didn't really talk about it in the description. :lightsaber: hahaha
yeah, those shrinkwraps.. :P

he actually says
And if you panic, you might knock something over. Like a container full of shrink wraps.
 
Last edited:
whats up with that plastic box of black pipes? Or is that shrink wrap for the wires? You didn't really talk about it in the description. :lightsaber: hahaha

I was going for "inferred" humor. (that's "inferred", not "infared", despite the red glowing lights in the project)

By showing the box being very neat in the previous pictures (some haven't posted yet) - and then saying "don't panic or you might knock something over" and showing a messy box - I was showing people that the lights didn't work, one of us panicked, and in our rush to react knocked over the neat box of wraps.

(jokes aren't funny when you have to explain them)

I edited the text right before the "messy box" post in an attempt to clarify.
 
yeah, those shrinkwraps.. :P

he actually says

In fairness to Johnny Utah, I made that edit (to add "like a box of shrinkwraps") after his posting.

I figured out why I couldn't get those three pictures to post...so i corrected the problem and they're there now. Might make the whole thing make more sense!
 
I was the panicking idiot. Ok? Simple circuit, everything done, hit the switch. Nothing. Mind raced, nothing else mattered, shrink wrap was in the way. My friend organized them again for me though...
 
In fairness to Johnny Utah, I made that edit (to add "like a box of shrinkwraps") after his posting.

I figured out why I couldn't get those three pictures to post...so i corrected the problem and they're there now. Might make the whole thing make more sense!

YES! Saved by the bell! Thank you professor! :banana:

EDIT: yeah, that text wasn't there earlier. hahaahaha. Makes sense now. haha
 
:dammit:
I was the panicking idiot. Ok? Simple circuit, everything done, hit the switch. Nothing. Mind raced, nothing else mattered, shrink wrap was in the way. My friend organized them again for me though...

:dammit:

I absolutely, 100% wrote that in a purposefully vague manner so that no one would know who tipped over the shrink wrap! It was INFERRED that I, sp8ball, scourge of the message board, had done it.

I had your back!
 
Last edited:
:dammit:

:dammit:

I absolutely, 100% wrote that in a purposefully vague manner so that no one would know who tipped over the shrink wrap! It was INFERRED that I, sp8ball, scourge of the message board, had done it.

I had your back!

wait, so someone actually did knock over the shrink wrap? hahahahaha lol :reddance:
 

Members online

Forum statistics

Threads
278,316
Messages
3,554,105
Members
248,016
Latest member
Advally Service

Trending content

Back
Top