Sp8Ball’s Mod Thread (Stealing Other Poster’s Ideas Since Mid-2010)

Modification: Door Handle Changeout (cont.)

DRIVER’S SIDE FRONT DOOR:
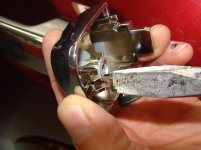
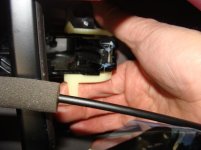
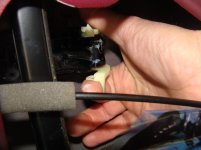
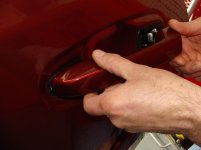
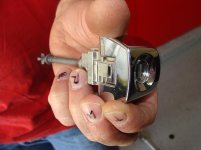
One small nuance about the front driver’s side door is the locking mechanism. We thought this might be a tripping point, but it really wasn’t. Following the same instructions as above, the locking mechanism and door handle cover just slide out as a whole unit.
DSC05460.jpg

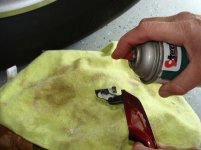
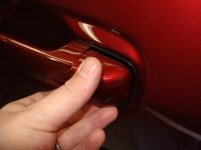
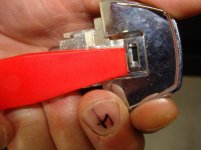
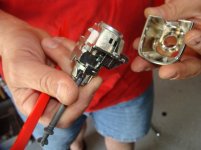
With some slight pressure on the tab, you can release the lock from the door handle cover, and paint it or reinstall your color-matched door handle cover.
DSC05461.jpg
DSC05463.jpg

REINSTALLING FRONT DOOR HANDLES:

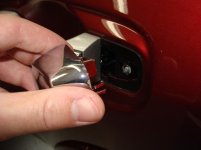
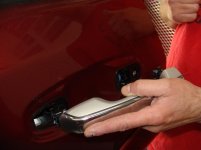
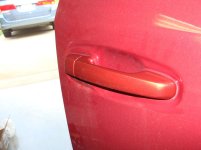
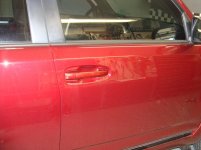
You literally just reverse the above process. Hit the new part with some grease on it’s pivot point (you’ll see the grease on the OEM ones when they come out). Slide the main handle into the door the opposite of the way you pulled it out. It’ll seat and give you a good indication that it’s in. Flip the yellow clip back towards the handle housing to secure it, and close up the plastic shield by pushing the adhesive back together. Put the door handle cover back in place, and secure with the Torq screw. Cover up that hole, and things should look like this:
DSC05340.jpg
DSC05341.jpg


REMOVING REAR DOOR HANDLES:

Both rear door handles will come off in an identical fashion, as there’s no locking mechanism with which you have to fiddle around. Again, the instructions are very similar to the front doors, but the door handle cover comes off differently.

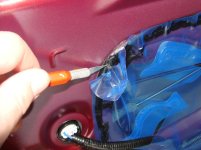
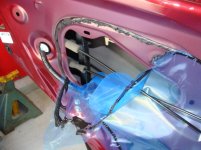
So, we’re once again going to cut into the adhesive (not the plastic) to reveal the inside of the door.
DSC05429.jpg
DSC05430.jpg
 

Attachments

  • DSC05460.jpg
    DSC05460.jpg
    59 KB · Views: 9,180
  • DSC05461.jpg
    DSC05461.jpg
    81.8 KB · Views: 9,061
  • DSC05463.jpg
    DSC05463.jpg
    62.2 KB · Views: 9,052
  • DSC05340.jpg
    DSC05340.jpg
    70.7 KB · Views: 9,071
  • DSC05341.jpg
    DSC05341.jpg
    75.2 KB · Views: 9,080
  • DSC05429.jpg
    DSC05429.jpg
    86.5 KB · Views: 9,084
  • DSC05430.jpg
    DSC05430.jpg
    87.7 KB · Views: 9,046
Modification: Door Handle Changeout (cont.)

REMOVING REAR DOOR HANDLES, cont.:

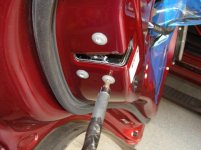
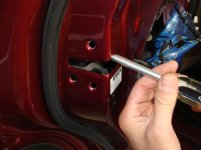
Now, you will see three Torq screws around the door latch. These get removed.

DSC05431.jpg

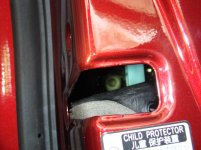
That will allow the latch to flop around inside the door. That’s OK, because you want to push it down enough to see the Torq screw behind it…which is the screw for the door handle cover. Here you can see the latch has been pushed downward, and you can see the silver of the screw in the background.

DSC05442.jpg

Back out that screw – but realize that it’s seated and won’t come all the way out (there’s a catch, which is good, because it prevents you from dropping the screw into the door). You’ll feel when it’s all the way out.

Reach in with a flat head screwdriver and GENTLY press the two tabs holding the cover in place in the direction shown. Remember that this is plastic, and too much force will bend or break those tabs.

DSC05444.jpg

While pushing on the tabs to release the door handle cover, gently work the door handle cover from the other side to pull it from the vehicle.

DSC05445.jpg

Here’s that yellow clip. As pictured here, it’s “closed” and holding the door handle in place. See how Antman has simply grabbed it with his finger?

DSC05447.jpg

A pull of the finger, and now the yellow clip is “open”. See the difference?

DSC05448.jpg

Once again, we’re simply pulling the handle away from the door and towards the rear of the truck, and the door handle should come right out.

DSC05449.jpg

And your rear handles are now removed!
 

Attachments

  • DSC05431.jpg
    DSC05431.jpg
    81.1 KB · Views: 9,046
  • DSC05442.jpg
    DSC05442.jpg
    97.1 KB · Views: 9,026
  • DSC05445.jpg
    DSC05445.jpg
    51.7 KB · Views: 8,996
  • DSC05447.jpg
    DSC05447.jpg
    65.7 KB · Views: 8,976
  • DSC05448.jpg
    DSC05448.jpg
    62.9 KB · Views: 8,997
  • DSC05449.jpg
    DSC05449.jpg
    53.6 KB · Views: 8,972
  • DSC05444.jpg
    DSC05444.jpg
    70.4 KB · Views: 9,002
Modification: Door Handle Changeout (cont.)

REINSTALLING REAR DOOR HANDLES:


As we discussed in the “Reinstalling Front Door Handles” section, you need to grease the pivot points of the incoming handle.

DSC05450.jpg

Slide the handle in, with pressure going forward (towards the front of the vehicle) and into the door. You’ll hear the handle seat itself.

DSC05451.jpg

Once installed, flip the yellow clip back to its locked position.

Simply pop the rear door handle cover in place.

DSC05452.jpg

Reach in and retighten the Torq screw that holds the door handle cover in place.

DSC05453.jpg

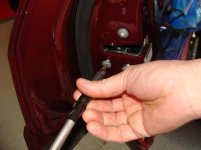
Reattach the door latch with the three Torq screws on the outside edge of the door.
DSC05454.jpg

Hopefully, you have something that looks like this when you’re done!

DSC05459.jpg
 

Attachments

  • DSC05450.jpg
    DSC05450.jpg
    78.1 KB · Views: 9,063
  • DSC05451.jpg
    DSC05451.jpg
    51.2 KB · Views: 8,968
  • DSC05452.jpg
    DSC05452.jpg
    49.3 KB · Views: 8,976
  • DSC05453.jpg
    DSC05453.jpg
    64.2 KB · Views: 8,974
  • DSC05454.jpg
    DSC05454.jpg
    59.3 KB · Views: 8,946
  • DSC05459.jpg
    DSC05459.jpg
    78.9 KB · Views: 8,975
I'm not as "no-chrome" as you are, but I gotta say that looks great. It's the way it should have looked.
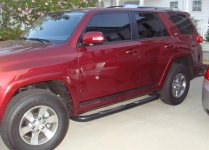
As usual, nice detailed writeup.
 
Last edited:
And the wife-y approval/dork-o-meter rating (including the door handle LED mod)? If I'm stealing thunder for your LED mod write up, please delay in answering.
 
And the wife-y approval/dork-o-meter rating (including the door handle LED mod)? If I'm stealing thunder for your LED mod write up, please delay in answering.

Low on the dork meter, and she was impressed. Less impressed than I hoped (the light is subtle, and I think she was expecting more...but i wanted subtle!), but she likes it.
 
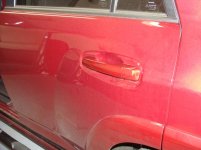
you got a picture of the whole care with the door handles changed out? I know you do..post it! :trophy:

Here...I'll try to get a better one tomorrow if I can. This one has lots going on in the reflections and what-not.

DSC05531.jpg
 

Attachments

  • DSC05531.jpg
    DSC05531.jpg
    76.2 KB · Views: 3,112
Very informative... I will use this thread when my TE handles arrive. Thanks for posting and all of you two's dedicated hard work. The updates on this site have to be just as tedious as the mod itself - saved me a headache, again thanks. :hatsoff:
 
Are there connections for the light at the bottom of panel like the Limited has? You mentioned earlier on this thread that you will check if the harness is there for a plug-n-play mod. Thanks
 
Are there connections for the light at the bottom of panel like the Limited has? You mentioned earlier on this thread that you will check if the harness is there for a plug-n-play mod. Thanks

Excellent question. I believe our initial analysis says "no", but I can't remember if we checked while we had the door panels off...
 
I checked it out and they are not there. Even the harness in the drivers kick panel is different, which is where I tapped into the wiring for my footwell lights. I'm afraid Toyota didn't make it easy in this case. I'm pretty sure I can figure out a way though...
 

Members online

Forum statistics

Threads
278,316
Messages
3,554,106
Members
248,016
Latest member
Advally Service

Trending content

Back
Top