Sp8Ball’s Mod Thread (Stealing Other Poster’s Ideas Since Mid-2010)

Modification: Interior Door Handle LEDs, cont.

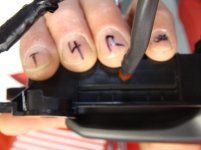
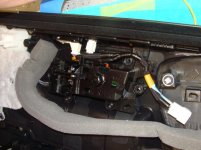
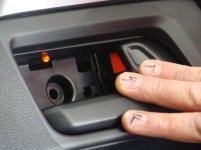
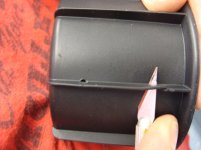
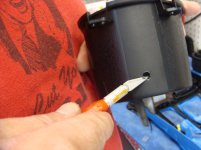
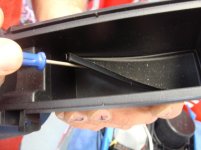
Here is the top of the interior door handle assembly. See that groove/slit just above Antman’s thumb? In the Limited, that’s the slit through which light cascades down onto the handle. This is where we’re going to drill our hole for our LED.
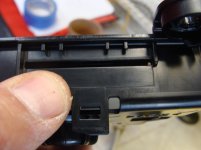
DSC05357.jpg

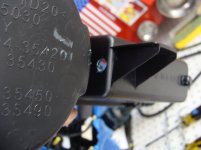
Here’s the plastic piece at the rear of the assembly, that also covers one of the three screws that you have to remove to take off the door panel. Have it handy, because your hole will need to be placed in such a way that it doesn’t interfere with the installation and seating of this piece back into its original location.
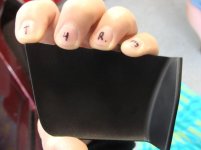
DSC05358.jpg

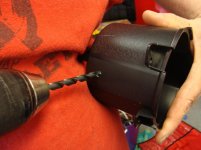
To seat our particular LED correctly, we need a 13/64 hole.
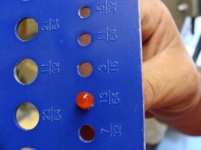
DSC05359.jpg

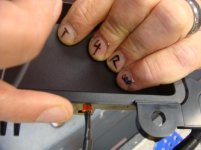
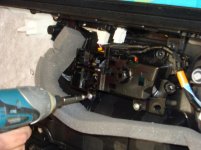
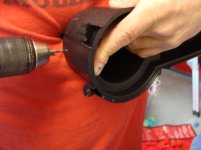
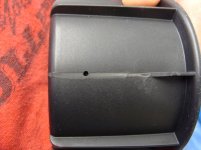
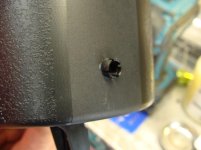
Drill the hole in the top of the door handle assembly, taking care about alignment and location. Don’t get it too close to the slit – or you will cause the LED to seat funny, and may crack the piece. Having the hole too close to the rear of the assembly may also interfere with the installation of the cover piece (shown two pictures earlier).
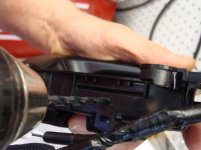
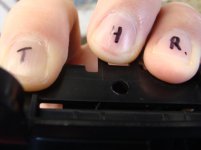
DSC05360.jpg
DSC05361.jpg

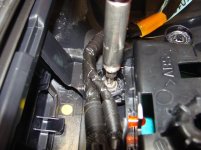
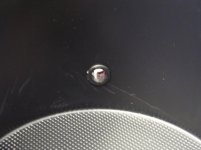
Insert the LED into the hole.

DSC05363.jpg

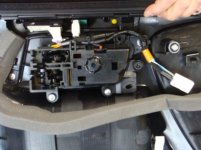
Looking inside the door handle assembly, look to see if there’s any excess/binded plastic that needs to be removed. We removed ours by gently cutting it away.
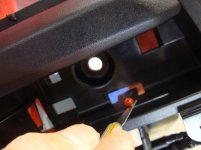
DSC05365.jpg

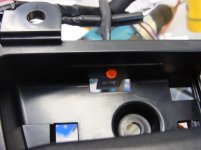
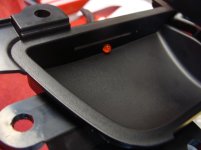
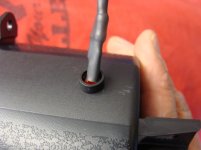
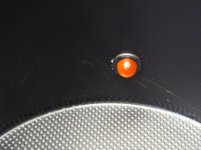
Installed and cleaned up!
DSC05366.jpg
 

Attachments

  • DSC05357.jpg
    DSC05357.jpg
    57.6 KB · Views: 13,195
  • DSC05358.jpg
    DSC05358.jpg
    46.2 KB · Views: 13,118
  • DSC05359.jpg
    DSC05359.jpg
    51.7 KB · Views: 13,157
  • DSC05360.jpg
    DSC05360.jpg
    58.9 KB · Views: 13,137
  • DSC05361.jpg
    DSC05361.jpg
    42.1 KB · Views: 13,135
  • DSC05363.jpg
    DSC05363.jpg
    51.4 KB · Views: 13,112
  • DSC05365.jpg
    DSC05365.jpg
    77.4 KB · Views: 13,128
  • DSC05366.jpg
    DSC05366.jpg
    66.2 KB · Views: 13,128
Modification: Interior Door Handle LEDs, cont.

Perform a fit test with the aforementioned rear cover plate to make sure it will install and seat around/under the LED.

DSC05368.jpg
DSC05369.jpg

Now, on to the wiring! Fun!!
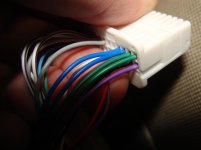
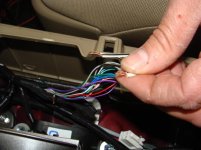
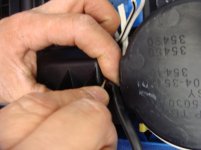
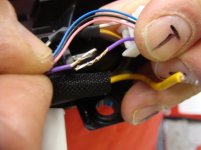
Take your wiring harness and isolate the purple wire and white/black-stripe wire. Then, cut these two wires.

DSC05370.jpg
DSC05371.jpg

In our set up, the yellow wire was power/positive, and the yellow/black-stripe was negative. These went with the purple and white/black-stripe, respectively. Add some solder to both ends of the cut wires, make the connections, and heat wrap them together for excellence.

DSC05372.jpg
DSC05373.jpg
DSC05374.jpg
 

Attachments

  • DSC05368.jpg
    DSC05368.jpg
    60.6 KB · Views: 13,084
  • DSC05369.jpg
    DSC05369.jpg
    57.6 KB · Views: 13,105
  • DSC05370.jpg
    DSC05370.jpg
    82.9 KB · Views: 13,161
  • DSC05371.jpg
    DSC05371.jpg
    68.6 KB · Views: 13,175
  • DSC05372.jpg
    DSC05372.jpg
    62.6 KB · Views: 13,056
  • DSC05373.jpg
    DSC05373.jpg
    59.1 KB · Views: 13,062
  • DSC05374.jpg
    DSC05374.jpg
    66.8 KB · Views: 13,019
Modification: Interior Door Handle LEDs, cont.

Replace the door handle assembly in its location on the door panel.

DSC05377.jpg

Replace the four(?) screws removed during the removal of the assembly.

DSC05378.jpg
DSC05379.jpg

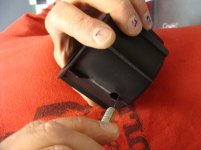
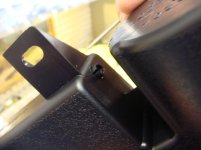
In the two locations where we cut out the plastic from the plastic welds, we elected to insert two self-tapping, SHORT screws into the soft plastic. This helps secure the door handle assembly, but also serves to tighten the whole assembly down to prevent the “gapping” we showed in the earlier picture.

DSC05379a.jpg
DSC05379b.jpg

Plug the wiring harness back into the door plug

DSC05380.jpg

Turn on the car and test the LED. Because these lights are tapped into the controls that turn the window up/down button lights on, they should come on with the ignition. We recommend doing this BEFORE you reassemble the door, so you can easily gain access to the area again if it doesn’t work!

DSC05384.jpg

Once reinstalled, the final product should look like this:

NEED NEW PIC OF FINAL PRODUCT, since the one I have showed the big gap that I had to fix! (I will edit this post and insert the pic tonight)
 

Attachments

  • DSC05377.jpg
    DSC05377.jpg
    94.9 KB · Views: 13,111
  • DSC05378.jpg
    DSC05378.jpg
    73.4 KB · Views: 13,042
  • DSC05379.jpg
    DSC05379.jpg
    70.3 KB · Views: 13,081
  • DSC05379a.jpg
    DSC05379a.jpg
    92 KB · Views: 13,012
  • DSC05379b.jpg
    DSC05379b.jpg
    110.7 KB · Views: 13,054
  • DSC05380.jpg
    DSC05380.jpg
    44.8 KB · Views: 13,057
  • DSC05384.jpg
    DSC05384.jpg
    59 KB · Views: 13,016
Modification: Cupholder LEDs

Three LED lights (see previous post about making LEDs), some speaker wire, and steady hands: About $10.

Difficulty Scale (1 to 10): Five, because you have to get into console area, remove some pieces for modification, drilling, etc.

Sp8ball’s Personal Intimidation Factor (1 to 10): Two, because Antman was helping and he had already done it. (Rose to a 9 when we were using a soldering iron and butane torch around my cloth seats…)

Install Time: 1 hour

Reason for Doing It: To give the interior yet another nice lighting touch. Helps define the black cupholders at night.

Benefit: Good, subtle lighting at a very reasonable price.

Cons: Getting to the pieces.

Other Products Considered: None.
______________________________________________________________________________________________________

The third and final mod undertaken during the Antman/Sp8ball Mod Party and Family BBQ, this is another “Antman Original”. I can’t emphasize how cool it is to have someone literally right around the corner who has the balls to do these mods on his own, so I can just ride his coat-tails, have him teach them to me, and get these killer results with little stress. I just hope that anyone undertaking these mods finds these write-ups to be half as helpful and informative as it is to have a personal Antman.

(enough of that! – sounds like some weird man-crush or Antman fetish)

On to the final mod…the cupholder LEDs.

Now, when I first heard about these – and saw that you had to (SPOILER ALERT! SPOILER ALERT!) drill into the rubber cupholder inserts to make it work, I was hesitant, and just about convinced myself not to do it. But once I saw them in Antman’s truck, I was sold.

First things first…you have to get to the underside of the cupholders!

Remove your shift knobs. These are removed by simply unscrewing them.

DSC05467.jpg

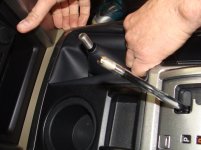
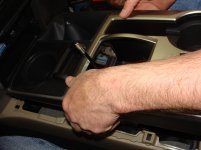
Then you’re going to place your fingers under one corner of the center shifter console cover, and another inside the “well” that houses your 4WD shifter.

DSC05468.jpg

Pull up on it with a decent (but not gorilla-like) amount of force to pop the clips. Don’t pull too hard/high, because there’s a wiring harness still connected to the truck.

DSC05469.jpg

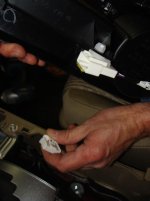
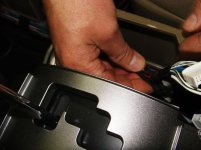
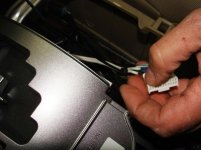
Unclip the wiring harness by pushing on the clip and separating them.

DSC05470.jpg

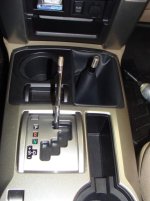
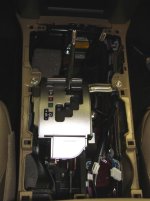
The center shifter area of your truck will look naked, like C3PO in “The Phantom Menace”.

DSC05473.jpg
dsc5474.jpg

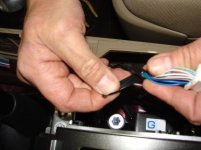
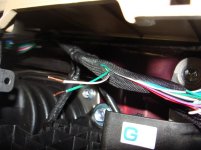
Unwrap the wire bundle.

DSC05475.jpg
 

Attachments

  • DSC05467.jpg
    DSC05467.jpg
    82.9 KB · Views: 13,237
  • DSC05468.jpg
    DSC05468.jpg
    76.9 KB · Views: 13,215
  • DSC05469.jpg
    DSC05469.jpg
    71.2 KB · Views: 13,148
  • DSC05470.jpg
    DSC05470.jpg
    44.9 KB · Views: 13,186
  • DSC05473.jpg
    DSC05473.jpg
    68.3 KB · Views: 13,212
  • dsc5474.jpg
    dsc5474.jpg
    42 KB · Views: 13,601
  • DSC05475.jpg
    DSC05475.jpg
    67.3 KB · Views: 13,107
Last edited:
Modification: Cupholder LEDs, cont.

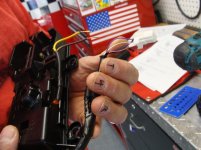
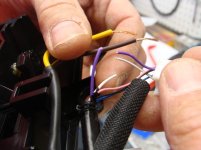
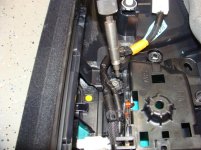
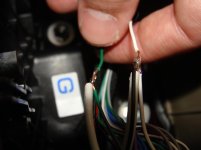
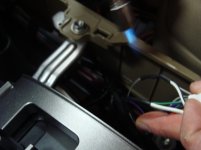
See the green wire in the upper right hand corner? (there’s actually two of them, but we just need one) That’s the one we’re going to cut into, along with the white/black-stripe.

DSC05476.jpg
DSC05477.jpg

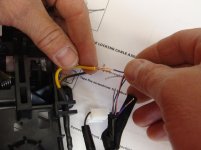
Take your wire from your LEDs (our striped wire was negative), and connect up with the wires from the 4Runner, bringing all three wires together. {Note: By getting tied into these wires, the cupholder LEDs are going to be on whenever your lights are on, not all the time like the door handle LEDs}

DSC05478.jpg
DSC05480.jpg

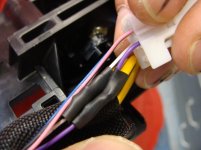
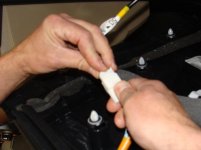
Heat shrink wrap to secure and protect the connection. BE CAREFUL!! This has to be done inside the truck, so you’re doing this near your seats!

DSC05481.jpg

Reapply fabric wire bundle holder and tape to wires.

DSC05484.jpg
DSC05485.jpg

This completes the “inside the truck work”, for now, and we can start to work on the center console pieces and cupholders on the workbench.
 

Attachments

  • DSC05476.jpg
    DSC05476.jpg
    48.2 KB · Views: 13,207
  • DSC05477.jpg
    DSC05477.jpg
    84.9 KB · Views: 13,155
  • DSC05478.jpg
    DSC05478.jpg
    81.6 KB · Views: 13,216
  • DSC05480.jpg
    DSC05480.jpg
    46.6 KB · Views: 13,118
  • DSC05481.jpg
    DSC05481.jpg
    51.4 KB · Views: 13,039
  • DSC05484.jpg
    DSC05484.jpg
    87.5 KB · Views: 13,137
  • DSC05485.jpg
    DSC05485.jpg
    97 KB · Views: 13,116
Modification: Cupholder LEDs, cont.

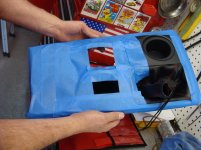
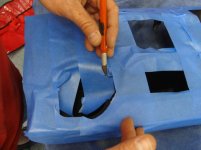
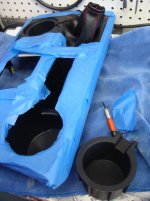
Tape off the top of the center shifter console, since it’s that silver stuff that scratches easily. GENTLY cut out a hole for the cupholder and pull out the rubber insert.

DSC05488.jpg
DSC05489.jpg
DSC05492.jpg

There’s two clips that hold these wires in place. We’re showing the wiring free of the clips here, with the clips next to the spots where they were once held.

DSC05493.jpg

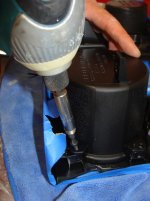
Remove the six screws around the cupholder assembly that mounts it to the center console piece.

DSC05495.jpg

Remove the cupholder and rectangular tray.

DSC05496.jpg

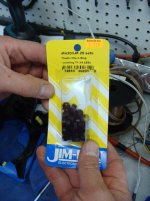
We used mounting clips and rings to secure our LEDs in this application. (Didn’t need them on the door because of the way they were mounted)

DSC05498.jpg

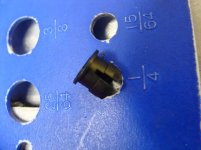
To mount these clips, we need to snap them into a ¼” hole…

DSC05500.jpg
 

Attachments

  • DSC05488.jpg
    DSC05488.jpg
    93.9 KB · Views: 13,048
  • DSC05489.jpg
    DSC05489.jpg
    76.3 KB · Views: 13,056
  • DSC05492.jpg
    DSC05492.jpg
    94.8 KB · Views: 13,041
  • DSC05493.jpg
    DSC05493.jpg
    84.1 KB · Views: 13,053
  • DSC05495.jpg
    DSC05495.jpg
    86.2 KB · Views: 13,080
  • DSC05496.jpg
    DSC05496.jpg
    92.4 KB · Views: 13,016
  • DSC05498.jpg
    DSC05498.jpg
    82.8 KB · Views: 13,043
  • DSC05500.jpg
    DSC05500.jpg
    83.3 KB · Views: 13,034
Modification: Cupholder LEDs, cont.

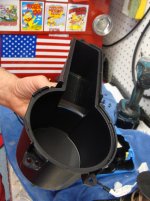
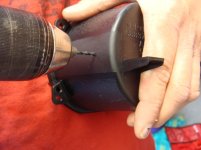
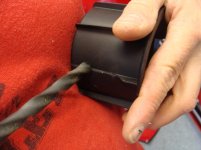
Drill a pilot hole into the cupholder. Recommend that this hole be in the rear (as it sits in the car) and centered for the best looking setup. Also, you want to make sure it isn’t too close to the BOTTOM of the cupholder for two reasons. (1) So it doesn’t get covered up by the bottom of the rubber insert, and (2) so if there’s a small liquid spill in the cupholder – from condensation or whatever – it won’t flood the hole location.

DSC05501.jpg

Now insert the rubber insert into the cupholder, and drill a pilot hole into it, using the pilot hole in the plastic shell as the guide. This will index the hole.

DSC05502.jpg

Unlucky! When we drilled the pilot hole into the rubber insert, we hit one of the rubber ribs! No worries, we’ll just cut that rib away (we’ll need to get rid of it to make room for the LED anyway).

DSC05503.jpg
DSC05505.jpg

Now drill your ¼” hole into the plastic shell of the cupholder, using the pilot hole as a guide (naturally).

DSC05506.jpg

Clean and de-burr the edges of the hole to allow the LED clip to seat cleanly.

DSC05507.jpg

Insert the LED clip.

DSC05508.jpg
DSC05509.jpg
 

Attachments

  • DSC05501.jpg
    DSC05501.jpg
    68.9 KB · Views: 13,069
  • DSC05502.jpg
    DSC05502.jpg
    57.8 KB · Views: 13,046
  • DSC05503.jpg
    DSC05503.jpg
    69.5 KB · Views: 12,998
  • DSC05505.jpg
    DSC05505.jpg
    80.1 KB · Views: 12,999
  • DSC05506.jpg
    DSC05506.jpg
    89.5 KB · Views: 13,027
  • DSC05507.jpg
    DSC05507.jpg
    83.4 KB · Views: 12,978
  • DSC05508.jpg
    DSC05508.jpg
    66.4 KB · Views: 13,011
  • DSC05509.jpg
    DSC05509.jpg
    51.2 KB · Views: 12,992
Modification: Cupholder LEDs, cont.

Seat the LED in the clip.

DSC05510.jpg
DSC05512.jpg

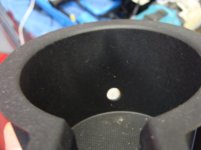
Drill the hole out of the rubber insert. NOTE: You can go one size smaller in drill bit size, as the rubber insert will only see the tip of the LED. You may also want to taper the opening of the hole to encourage light to pour out, rather than being “spotlighted” out of the hole.

DSC05513.jpg

Clean up the edge of the hole. This is important, because this is the hole people will see! (ya know, if they take a close look at your cupholders and stuff)

DSC05516.jpg
DSC05517.jpg

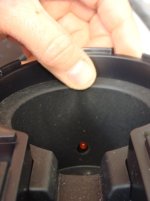
Fit test the Rubber insert over the LED.

DSC05518.jpg
 

Attachments

  • DSC05510.jpg
    DSC05510.jpg
    62.9 KB · Views: 13,024
  • DSC05512.jpg
    DSC05512.jpg
    58.5 KB · Views: 12,973
  • DSC05513.jpg
    DSC05513.jpg
    87.2 KB · Views: 12,992
  • DSC05516.jpg
    DSC05516.jpg
    68.6 KB · Views: 12,972
  • DSC05517.jpg
    DSC05517.jpg
    48.6 KB · Views: 12,942
  • DSC05518.jpg
    DSC05518.jpg
    48.4 KB · Views: 12,917
Modification: Cupholder LEDs, cont.

Pry the rubber insert from the bottom of the rectangular tray. (note: Mrs. Sp8ball used my truck to run errands last week when I rode my motorcycle to work…and this tray has three discarded gum wrappers and two (wrapped) peppermints in it now. Grrr…)

DSC05519.jpg

Drill a hole in the back of the rectangular tray. Again, this can be tricky because of the angle, but try to get it high enough that the LED won’t hit the rubber insert when it’s reinstalled.

DSC05520.jpg

Insert clip to hold LED.

DSC05521.jpg

Insert LED. You need to carefully maneuver and push the LED into the clip without breaking the wires. The long, thin, stiff connectors coming off of the LED will bend if you’re gentle, so you can make this “turn”.

DSC05522.jpg

**DO THE CUPHOLDER BY THE 4WD SHIFTER THE SAME WAY YOU DID THE OTHER ROUND CUPHOLDER!**

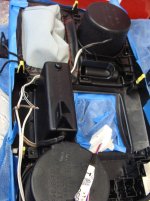
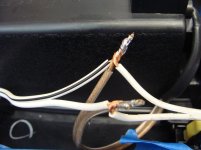
Things should look like this when all the LEDs are installed. We have soldered all three wires from the three LEDs together to prepare them for mating with the vehicle. You’ll see we used thick gauge speaker wire from the LEDs…but when you put three of them together and then try to use solder…it sucks. Soaks up a ton of solder.

DSC05523.jpg
DSC05524.jpg

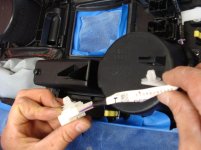
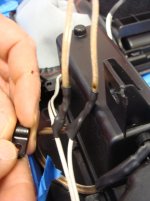
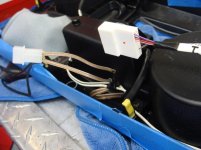
We opted to wire a quick-disconnect type fitting to those three LED wires, so that if we had to remove the center shifter console in the future, we wouldn’t be faced with a situation where we disconnected the original wiring harness, but had these LED wires still connected, which would stop us from removing the center console completely. This way, we can disconnect the original harness AND this new connection, allowing us to completely remove the center shifter console (the way Toyota intended!).

DSC05525.jpg
DSC05526.jpg

Remove the blue protective tape from the console, plug the electrical connections back together, snap the center console back in place, and replace your shift knobs…and you’re done!
 

Attachments

  • DSC05519.jpg
    DSC05519.jpg
    66.3 KB · Views: 13,014
  • DSC05520.jpg
    DSC05520.jpg
    61.3 KB · Views: 12,930
  • DSC05521.jpg
    DSC05521.jpg
    58.4 KB · Views: 12,949
  • DSC05522.jpg
    DSC05522.jpg
    55.1 KB · Views: 12,949
  • DSC05523.jpg
    DSC05523.jpg
    97 KB · Views: 12,987
  • DSC05524.jpg
    DSC05524.jpg
    67.8 KB · Views: 13,000
  • DSC05525.jpg
    DSC05525.jpg
    66.2 KB · Views: 13,000
  • DSC05526.jpg
    DSC05526.jpg
    79.1 KB · Views: 13,041
Last edited:
Modification: Cupholder LEDs, cont.

Here’s what they look like after installation. You can see the one in the rectangular tray is exposed, but the one in the round cupholder is not…because of the rubber insert in the round cupholder.

DSC05527.jpg

DSC05528.jpg
 

Attachments

  • DSC05527.jpg
    DSC05527.jpg
    65.2 KB · Views: 12,078
  • DSC05528.jpg
    DSC05528.jpg
    65.8 KB · Views: 12,089
Very good! Hopefully your job is in documentation and organization because if it is, you will go far! You two (you and Antman) make a good team. I probably will not do any of your mods to my 4Runner but I will refer to this thread when I need info on interior parts removal such as door panels and console and also the light bulb replacement. Since this thread now has 31 pages it might be nice to start another thread with the first post listing and linking all of your mods in sequence. Just a thought or maybe modify your first post in this thread to include links. Again great job.
 
I took my lady out to dinner last friday, (Uncle Julios Rio Grand) We finished dinner, had a lovely time by the way, so as i'm pulling out of my spot, there is this salsa red T4R waiting to grab my spot. The first thought that came to my mind when i looked in the rear view mirror was, "Oh, i guess sp8ball made the drive down to northern virginia and is here and is going to the Rio Grand Cafe too"

hahaha


:trophy:
 
I took my lady out to dinner last friday, (Uncle Julios Rio Grand) We finished dinner, had a lovely time by the way, so as i'm pulling out of my spot, there is this salsa red T4R waiting to grab my spot. The first thought that came to my mind when i looked in the rear view mirror was, "Oh, i guess sp8ball made the drive down to northern virginia and is here and is going to the Rio Grand Cafe too"

hahaha


:trophy:


Did you look at the antenna? ALWAYS look at the antenna!
 
After reading all of these responses to the question, I think I am throwing mine on the market too. I would rather get Reata all dolled up and ready for a little camping anyways.

Thanks to all of you,

I'm a little late to this conversation, but I did the exact same thing. I was a motorcycle nut, devouring magazines and planning trips. Once my son was born, I lost all interest. I was riding and the thought of getting hit and never seeing my family again was the nail in the coffin. I left the bike on the centerstand (BMW R1150R) for 2 years and finally donated it to a good cause (silent auction). I have no desire to ride or get the itch even if I see a Ducati or another BMW.
 
So I will have to keep my eyes open for you - I am about 2 minutes away from that shopping center- we should all have get-together at Costal Flats...Still trying to find a stubby antenna...
 
I love reading this post!! I will also do the rear camera switch and some other things that you posted. I just wanted to say thank for you step by step post. Keep up the good work! By the way, I saw in your older post that a few people from the forum live around you. You made a comment about a getting together. If you guys decide to meet up let me know. I live in Wilmington,De About 2 hours from Baltimore. Like you said it would be a good picture.
Thanks again!
 
I love reading this post!! I will also do the rear camera switch and some other things that you posted. I just wanted to say thank for you step by step post. Keep up the good work! By the way, I saw in your older post that a few people from the forum live around you. You made a comment about a getting together. If you guys decide to meet up let me know. I live in Wilmington,De About 2 hours from Baltimore. Like you said it would be a good picture.
Thanks again!

Yeah - I would love to do that. Antman lives - literally - a mile and a half away from me. I could jog to his house (and probably should).

If you guys can't tell already, it's been a rough two weeks. Baby stuff, baseball season kicking off (for the 7 year old), work's been crazy, just spent 3 days in Utah, grad school and the subsequent commencement last weekend (though I'm not officially finished for another month), Mrs. Sp8ball's grad school work...UGH!

I haven't even seen Antman in a couple of weeks! (don't worry...we text)

But...we're hitting a smoother patch.

I believe Antman will be getting together with Mrs. Sp8ball and I tomorrow to walk her through the Kappa Speaker install. Then he and I will take on the 12v-always-on switch in the near future, and install his Gobi rack next weekend! So...we are coming out of the dark soon enough.

And that MAY allow us an opportunity to facilitate a discussion about a get-together. I say "facilitate" because I have no idea how to put one of those together.

Just don't schedule anything for next weekend...I have NKOTBSB tickets. :repuke:

One other thing...

Over the last two weeks, Mrs. Sp8ball has said:

"Is there a way to make it louder?" (after driving it the day I took my motorcycle to work)...and inquired about how much a new Magnaflow would cost.

"No...you don't need to get rid of it. I kinda like it. Just limit how much you ride it." (about the motorcycle, when I told her I was going to sell it)

"You need a black roof rack since you got rid of all the other chrome." (today...and then listened when I told her about the BajaRack I want)

"I'm glad you changed the door handles - it was the best thing you've done to make it look more manly." (note: she WAS pro-chrome)

"Why do you want me to do the speaker thing? Are you desperate for people to keep looking at your thread on that silly website? Are you going to ask me to be in a bikini? I'll do it, and you can put me on your thread - but I'm not going to be in a bikini. I just had a kid." (weird conversation that she started - and ended, without me saying a word - in the car today)
 
Last edited:
Have fun at the show! My wife wants to go see NKOTB also. I just told her about the show. So I'm sure she will be looking for tickets. Keep me in mind about the get together. It would be nice to head south for the day. Definitely will find a sitter for the kids.

Using Tapatalk
 
Last edited:

Members online

Forum statistics

Threads
278,315
Messages
3,554,104
Members
248,016
Latest member
Advally Service

Trending content

Back
Top