
TonyB66's Ownership -> Build Thread (2000 Limited)

The manual radiator and auto radiator are basically identical externally except the manual one doesn't have the tranny cooler line fittings. The plastic just goes across.

I also have a champion I havent installed yet. Not sure which runner to put it in.

Mark, thanks for the follow-up here from that tranny thread. With no auto tranny plumbing at the bottom of your manual's radiator, maybe the innards are different too. If the capacity is more than the auto's radiator, that would seem to confirm it. A "bigger" radiator with more capacity and surface area would be nice...

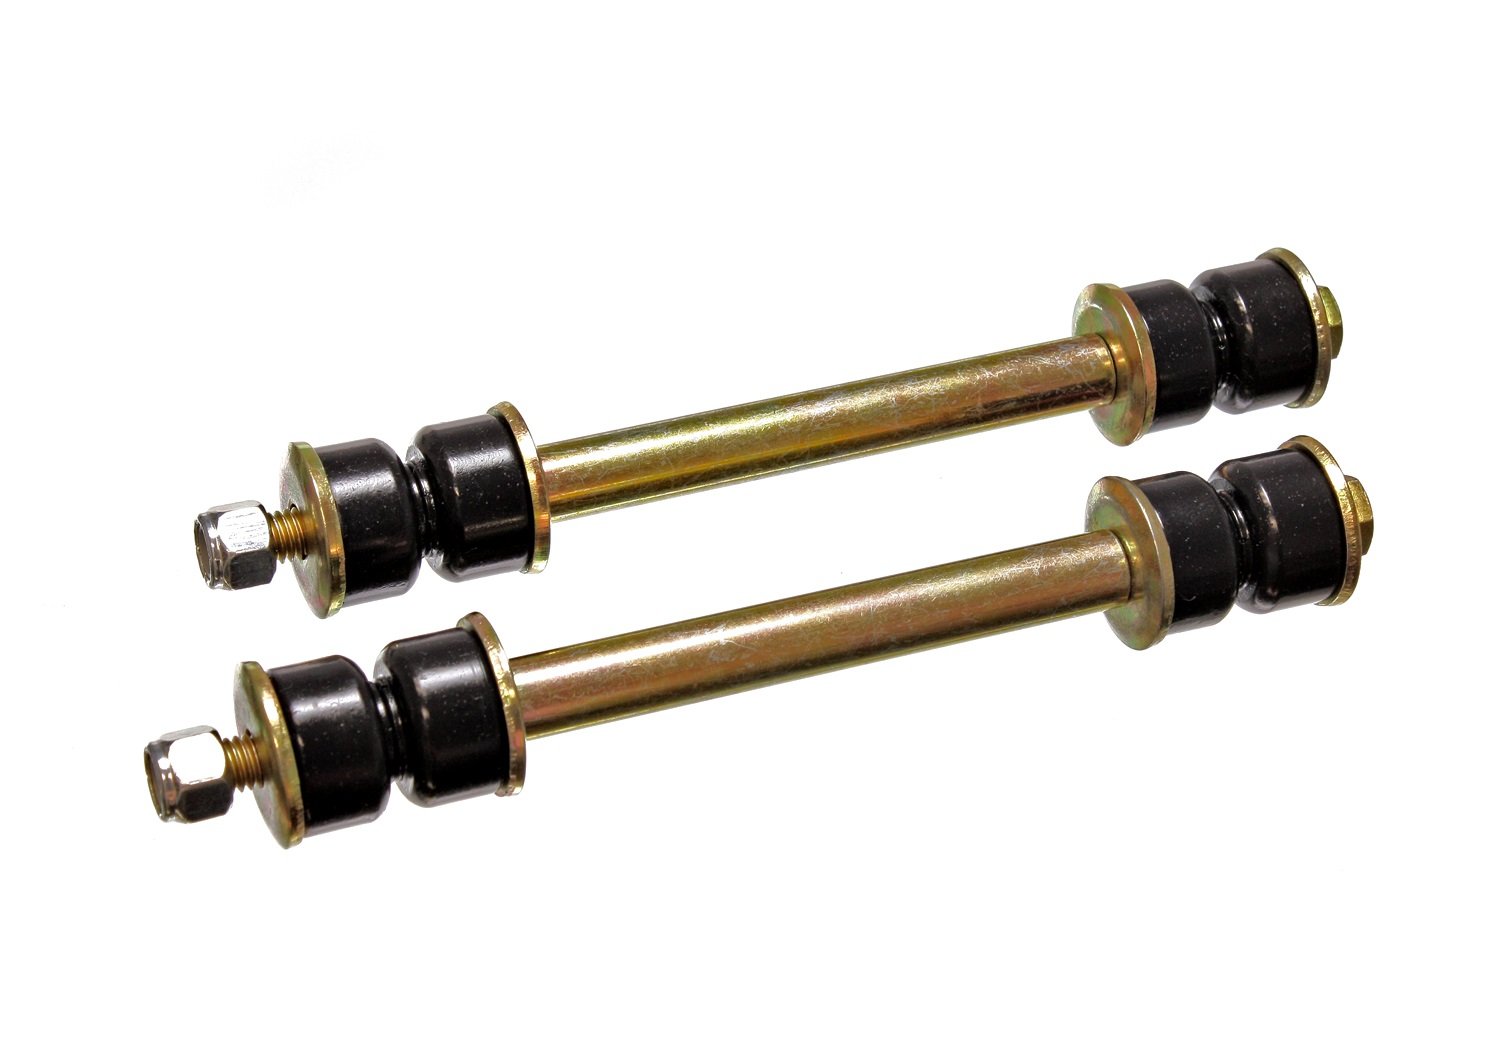
Note to myself regarding rear sway bar end links:

Diameter of opening for top mount = 14mm or .55"
Inside width of that bracket = 41mm or 1.61"

I am contemplating:

1/2" grade 8 bolts, 8-10" in length (2)
1/2" Heim/rod-ends (2)
1/2" ID (a tad bigger) sleeves/spacers/bushings, 4" long (2)
Corresponding nuts and washers

Sway bar thickness where secured = 6mm or .24"

Anyone have a good place to find these sleeves? My web searches have not been all that productive... I believe due to the search terms used.

I'd make use of the ES poly bushings, jut bore them out a little...
 
Last edited:
The manual radiator core is the same (on the 4Runner). The extra volume (0.1 or 0.2 gallons, I think?) comes from the missing cooler in the bottom tank.

Try Mcmaster-Carr for your hardware. Use the search term standoff or coupling nut. Both can be similar.

-Charlie
 
The manual radiator core is the same (on the 4Runner). The extra volume (0.1 or 0.2 gallons, I think?) comes from the missing cooler in the bottom tank.

Try Mcmaster-Carr for your hardware. Use the search term standoff or coupling nut. Both can be similar.

-Charlie

Thanks Charlie for those terms. I was indeed searching McMaster-Carr, and others, but not with those terms. Hopefully I'll get some better results... Thanks again.

EDIT/ADD: Looks like standoffs and coupling nuts produce threaded solutions. Hmm... I guess that could work too, and be desirable actually. Was thinking non-threaded.

This so far is the "best" I've found:

Steel Bushing / Sleeve 3/4" OD x 1/2" ID x 4" Long 1 Pc CDS DOM | eBay

Sleeve for A-Arm on Yerf Dog Spiderbox Kart (Designed for 1/2" bolt) | 06299S | BMI Karts And Parts
 
Last edited:
tgreenwood75 kindly availed himself over PM. The length of his bolts for about a 2" lift are 8 1/2". His sleeves / spacers are 3 1/2".

After visiting all of the local hardware stores and even calling not so local ones, none had grade 8 bolts in the needed lengths of 9-10", whether 3/8" or 1/2". Online is fine of course, but I was hoping to get these local and start...

Grade 8, 1/2" hardware almost happened, but I decided that it was probably not best to drill-out my 3/8" ES poly bushings to that diameter. And since I need to buy more of the bushings anyways, at 16 bucks for the entire kit, I went that route instead.

https://smile.amazon.com/gp/product/B000CN5GPY

61Xdt53MIRL._SL1500_.jpg


Once the springs settle and the rear ride height known, I'll purchase grade 8 3/8" bolts at the proper length.

Connection to the rear sway bar will be done as tgreenwood75 described - with a Heim or rod end. I will instead use a 3/8" ID Heim to accept the 3/8" bolt with an oversized shank of 1/2" through the sway bar. There is not exactly a lot of selection of such oversized rod ends. The shank thread length is 1 3/8". With a couple of nuts, washers and of course the sway bar itself (less than 1/4"), I should be fine, using about 1" of those threads...

McMaster-Carr

60645k852l.gif


Looks like 40 bucks will be the cost for this pair of rear end links. When I step-up to grade 8 bolts and nuts, that should add about another 20 bucks...

With our Tahoe trip in early April, less than a month a way, a biz trip in between and other obligations, I don't think I'll tackle the front suspension, wheels/tires and corresponding alignment until afterwards.

This came yesterday.

90njLbX.jpg


RvNQRQW.jpg


rFUV22O.jpg


No instructions, but it seems common sensical of course. Not sure what that metal clip is for on that bottom fan blade though. Maybe a weight of sorts for balancing, not sure...

I'll work on physically mounting the fan next. As for the electrical, not sure yet how I will do that. Still thinking of the constant power that would normally go to the seats...

When the fan is not being used, which will be most of the time, I imagine the tranny cooler will take a bit of a hit with its cooling capabilities due to the fan obstructing flow. Given that I'm seeing much lower temps than stock, this looks to be a worthwhile trade-off...
 
Last edited:
Once I held the tranny cooler fan in place, I soon realized that I really need to do a dry fit of the winch. I felt it would fit of course, but I wanted to see if I could situate and remove the winch with the fan mounted. It is possible, but not by much. I need to lower the winch into the bumper almost vertically on the driver side, then carefully swing it as its lowered into place.

PkAgeNr.jpg


yk4laWr.jpg


yDHTZbQ.jpg


As far as mounting the fan, I didn't do that today. I was hoping I could use those stainless steel zip ties through the cooler, but there is no space for those to slide through, like fins on a radiator. I wish the fan had a metal housing instead of plastic. I will give it some more thought...

With the new end links coming tomorrow, I completely removed the old ones. I filed them away in the 4Runner box with the pieces I salvaged from the rear shocks...

YY6aYkL.jpg


0hoPR0q.jpg


Also, I heard back from Curtis at DuroBumps. He said that his product was designed to be used without the factory conical bumps within the rear springs. That said, those can remain, especially for those people who want an extra 3/8" to 1/2" of lift. I will leave mine in for now, but I have concerns that I'll have too much rake, negatively impact my headlights, until I can lift the front...
 
I decided to not install the tranny cooler fan at this time, so I snugged the cooler back up; and will give it more thought later...

I got the universal end links and oversized shank Heims on Monday.

kKvxjNT.jpg


I picked-up some galvanized washers and nuts (4) for the Heims which are grade 8 as I couldn't find any fine thread ones (1/2" - 20) otherwise. This is what I will install, likely tomorrow.

istHm1Q.jpg


I finally tightened those nuts on top of each rear shock. I got them as tight as I could, which will hopefully be tight enough. Working alone, I needed a way to prevent rotation.

61naj9D.jpg


ORe8WSJ.jpg


On each side, the closest part of the shock to the inside of the wheel (bottom, near adjustment knob) is about 3 1/4" apart. Once driving, I will check periodically to make sure they are not rotating. With no rear sway bar connected, I just drove around our circular driveway. With about 125-150 pounds in the back, here is how she sits now.

HKvKTv1.jpg


Rear sway bar end links tomorrow or Friday, then I think I will seal my sunroof (thanks Brian)...
 
Last edited:
The rear sway bar end links are installed. A 1/2" bit was needed to remove a tiny amount of material in the sway bar ends to make room for the 1/2" Heim shanks.

JiuoVC4.jpg


I alcohol cleaned afterwards and painted. I did not use the 3/8" washers on both sides of the top mount as planned. Doing so does not leave sufficient thread for the nylock nut, and the bushings just don't set well with the washers and that bracket.

snJdt8I.jpg


While I cranked pretty tight on the 1/2" Heim nuts, I applied somewhat less force to the bolt, namely the bushings that get compressed. Got them snug, but not to the point of deformation. tgreenwood75 shared that he too didn't overly squeeze the bushings also...

I broke-out the blue fingernail polish again so I can more easily determine if any of these fasteners are loosening-up...

5bVypL7.jpg


ZGAhveM.jpg


With no added weight in the rear, the rear sway bar is a little above being parallel to the ground and LCA. With increased weight, it moves closer to parallel. The 4 1/4" sleeves looks to be a very good choice for the 891 springs.

jUiFpId.jpg


The PCK has that bar damn near perfectly flat.

GxdJiz6.jpg


Will start on the prep for sealing the sunroof next...
 
Looking great Tony!

Your attention to detail in those end links, as with everything you do, is admirable. I am glad to see that the length on those was just about perfect for you and that it all went together smoothly.
 
Looking great Tony!

Your attention to detail in those end links, as with everything you do, is admirable. I am glad to see that the length on those was just about perfect for you and that it all went together smoothly.

You were clearly the inspiration for me doing these, and you shared your experiences too, which was helpful. Thanks much.

I believe the only difference is the Heim, where I went with a 3/8" with oversized 1/2" shank. Once the springs settle and I figure-out my loads, I'll shorten the sleeves as necessary and I'll replace the bolts and nuts with grade 8 ones...

I'm actually contemplating something in the rear that will add weight, and if so, that will come soon.
 
So, when are you going to get it dirty? ;):

-Charlie

That's what it's all about Charlie. I so can't wait.

It will get a little off-road use during our Tahoe trip in about 3 weeks, but I'm not looking to take it anywhere taxing until after the front Kings, SPC UCAs and new tires and wheels get installed. Those will be priority after Tahoe.

I suppose I'm somewhat sentimental, but I'll be taking the 4Runner to the family property atop Summit road (Santa Cruz Mountains). The last time I had a 4x4 (FJ-40), and was off-road, that was the place. There are likely downed trees that I'll need to cut and remove from the "road", which is likely overgrown. Oh, I'll want to install the winch too.

She'll get plenty dirty on that trip.
 
Thanks Mike. Always good to hear from you. It's nice to see it coming-together. It has been a balancing act the last 1 1/2 years for sure...

Well, I was going to devote some time today to sealing the sunroof. While I still might do so, we all got woken-up about 5:30 am due to the 4Runner's alarm. I ran down there in my robe, flashlight, some protection, grabbed the fob and hit the unlock button to stop the beeping. I imagine that is how one is supposed to deactivate the alarm. I never made the time to educate myself on the factory alarm...

I found no signs of entry or attempted theft. We do have large turkey vultures that sometimes land our roof, so I thought maybe one might have landed on the roof rack. I saw no indication in the condensation though, but it was hard to tell on the rack itself. I opened and closed the doors, then hit the lock button on the fob, arming it again.

I get back in the house, tell everyone to get back into bed, do so myself, and it goes-off again! This time I brought the fob with me, so I ran to a nearby window to deactivate it (unlock). Felt bad for the neighbors...

No way I activate it again at this point, yet it sounded like it self-activated with a quick beep. I hit unlock and opened the rear door, turned-off the dome light and went back inside. So much for sleeping-in a little on Saturday.

Any ideas, please do share.
 
Is your key fob aftermarket? I had a very similar issue with mine.

I bought an aftermarket key fob off eBay and it was working fine initially. After a year, the alarm system became wonky. Whenever I locked the truck or unlocked, the alarm would go off.

Happened like several times before I figured out the key fob was the trouble maker. I took the black casing off and pressed the lock button directly on the circuit board and the alarm would just go off. Clearly, the fob was bad; in the trash can it went. Bought a used OEM key fob and haven't had the issue since.

Solid progress so far. Love all the thought you put into the transmission cooler and fan install.
 
Thank you both for the quick replies!

Sucks knowing I'll be tired the rest of the day and was low on sleep to begin with...

The fob was my first "mod", I suppose on page one of this thread. This is what I got, along with a new fob battery.

https://smile.amazon.com/gp/product/B00KTHXYO8/ref=oh_aui_search_asin_title?ie=UTF8&psc=1

Never thought it could be the fob... I'll open it up later. Thanks again.

EDIT/ADD:

After further review of that link above, what I bought, it's the case only, no internals. So, I have the original fob, circuitry-wise....

Found this:

RS3000 Toyota Vehicle Intrusion Protection

If there is other or better documentation on the factory alarm, kindly share.

While under the 4Runner yesterday, the key fob stuffed under my waistband, I somehow did something that caused a long continuous beep. Any ideas? I then realized that I likely pushed something on the fob while rolling-around, I selected the unlock button to stop that prolonged beep. I wonder if that might have something to do with it...
 
Last edited:
Sunroof Sealed

First, I think the alarm mystery is solved. I opened and closed all of the doors and realized that one of my little ones didn't close a door completely. I noticed this after closing the door I left open on purpose and when I attempted to engage the alarm, it just did a long beep. I saw that another door was slightly open, and after closing it, I was permitted to set the alarm. So, I wonder or hope that might be it...

I then got busy on the prep for sealing the sunroof. After cleaning with some water and allowing it to dry...

zRG5cyy.jpg


OgxtvIU.jpg


I moved the 4Runner to the side of the house to get some shade, but soon the sun arrived there too. Working with 100% silicone, I wanted consistency, ideally all shade on this 70+ day.

uIeXejv.jpg


Found a good spot on the driveway.

ZK8BSM1.jpg


After using the leaf blower to get the area clear of any dust and tree droppings, I got the supplies ready.

2rkXsNo.jpg


I found one tube to be plenty. It's curing now, but here's how it looked just before removing the tape, which I began right after finishing with the silicone, which took about 15-20 minutes. Taping took about an hour or so...

zth2NDU.jpg


There is some very minor clean-up on the glass, which I'll take care of later with a razor blade. The paint looks to have none. Aesthetically, removal of the tape pulled some silicone off (cures fast), not from critical areas, but doesn't look as nice as I'd ideally want. Since I very much want the sunroof completely removed at some point, and something welding up there instead, I just care if it works well in the interim.

Oh, to make sure I or anyone else doesn't attempt to open the sunroof...

3j6bs6t.jpg


udY56lc.jpg


From inside, all still looks the same...

jqns0A1.jpg


Brian, thanks for the inspiration to do this!
 
Last edited:
Thank you both for the quick replies!

Sucks knowing I'll be tired the rest of the day and was low on sleep to begin with...

The fob was my first "mod", I suppose on page one of this thread. This is what I got, along with a new fob battery.

https://smile.amazon.com/gp/product/B00KTHXYO8/ref=oh_aui_search_asin_title?ie=UTF8&psc=1

Never thought it could be the fob... I'll open it up later. Thanks again.

EDIT/ADD:

After further review of that link above, what I bought, it's the case only, no internals. So, I have the original fob, circuitry-wise....

Found this:

RS3000 Toyota Vehicle Intrusion Protection

If there is other or better documentation on the factory alarm, kindly share.

While under the 4Runner yesterday, the key fob stuffed under my waistband, I somehow did something that caused a long continuous beep. Any ideas? I then realized that I likely pushed something on the fob while rolling-around, I selected the unlock button to stop that prolonged beep. I wonder if that might have something to do with it...

Gotcha. So, factory OEM Toyota key fob internals, with aftermarket shell.

I would say if this happens again, (hope it doesn't!) to look into the red panic button on the key fob shell.

I have a hunch that the red button is possibly putting a little too much pressure on the internal circuit panic button causing it to go off even by pressing other buttons on the fob(hope that makes sense?). It's an aftermarket key fob shell, and while it looks the same as OEM, there are slight differences in the mold design, enough to possibly cause a problem like what you are experiencing.
 
Gotcha. So, factory OEM Toyota key fob internals, with aftermarket shell.

I would say if this happens again, (hope it doesn't!) to look into the red panic button on the key fob shell.

I have a hunch that the red button is possibly putting a little too much pressure on the internal circuit panic button causing it to go off even by pressing other buttons on the fob(hope that makes sense?). It's an aftermarket key fob shell, and while it looks the same as OEM, there are slight differences in the mold design, enough to possibly cause a problem like what you are experiencing.

Well, if that's the case, a simple test would seem to be having the fob out-of-range. Tonight, it's bedside, too far from the 4Runner. If the alarm only goes-off when the fob is near, you might be onto something. Actually, now that I think about it, when it activated that second time, I was in the bedroom, far from the 4Runner. I'm guessing it's not the panic button or fob... Time, as always, will tell.
 
My sunroof used to leak, and I've thought about sealing my sunroof but I like using it to vent the cab (rear tilt-up) but then, magically, it stopped leaking for some reason; so I never sealed it. Looking forward to hear how that works out long-term. :D

The alarm in my 3rd Gen was aftermarket/dealer installed and I never had a fob, but in my experience they are more trouble than they are worth and everyone tends to ignore car alarms anyway. The install of mine was so invasive (so many wires involved) that I chose NOT to uninstall it for now - as long as the truck works.

BTW, really nice job on the swaybar end links. Why not just use '95 4runner front links in the back? They are taller than our 3rd Gen links, but yours look stronger. I bookmarked your post if I ever need to revisit mine. :thumb:
 

Members online

No members online now.

Forum statistics

Threads
278,316
Messages
3,554,120
Members
248,016
Latest member
Advally Service

Trending content

Back
Top