TonyB66's Ownership -> Build Thread (2000 Limited)

Thanks chiming-in. Seems rather commonplace. So.... did you end-up re-booting, perform the stretch, just get a new axle, nada?

until now, nothing, and if the inners hadn't ripped i probably wouldnt do anything until they became a problem.

i ordered the boots and picked up a couple spare OE axles.
Doing the TBU this weekend so i will probably go ahead and reboot the ones on the 4R then eventually rebuild the spares.
thanks to [MENTION=118331]norcalassassin[/MENTION]'s info i ordered the 930 boots for inners and OE outers that i'll do the stretch mod on.
 
Last edited:
until now, nothing, and if the inners hadn't ripped i probably wouldnt do anything until they became a problem.

i ordered the boots and picked up a couple spare OE axles.
Doing the TBU this weekend so i will probably go ahead and reboot the ones on the 4R then eventually rebuild the spares.
thanks to [MENTION=118331]norcalassassin[/MENTION]'s info i ordered the 930 boots for inners and OE outers that i'll do the stretch mod on.

Since my previous post, I went through the 13 pages of your build. It was on my list to read for some time. Wow. You are an inspiration. You tackled so much right from the get-go! Nice to see the support of the wife too...

If no rips on my inners, I will simply monitor them. I actually just read the post by norcalassassin about those boots. Thanks for mentioning those!
 
Since my previous post, I went through the 13 pages of your build. It was on my list to read for some time. Wow. You are an inspiration. You tackled so much right from the get-go! Nice to see the support of the wife too...
haha well thank you, just decided to dive into the deep end and though i've had a lot of fumbles along the way its panning out. mostly just needed it running by the move so i could daily it once in UT and sure enough its been pretty damn solid since. :dance:

Love what you're doing here too man, i was curious about utilizing the spare area and your setup is definitely just what i was looking for!


If no rips on my inners, I will simply monitor them. I actually just read the post by norcalassassin about those boots. Thanks for mentioning those!
yeah i'd just check em once in a while and listen for clicks or pops. one of mine clicks a bit but its probably pretty dry in there by now.
 
Last edited:
haha well thank you, just decided to dive into the deep end and though i've had a lot of fumbles along the way its panning out. mostly just needed it running by the move so i could daily it once in UT and sure enough its been pretty damn solid since. :dance:

Love what you're doing here too man, i was curious about utilizing the spare area and your setup is definitely just what i was looking for!

yeah i'd just check em once in a while and listen for clicks or pops. one of mine clicks a bit but its probably pretty dry in there by now.

Sorry for the delayed response. Had an unplanned biz trip and prep for it the last couple of days...

As with Tim's videos, showing the fumbles or mishaps along the way can be equally illuminating and educational! Kudos on doing so and the humility...

That space in the rear between the frame rails, I remain very satisfied with the storage gained and the overall outcome. For those who won't be keeping a spare there, I highly recommend doing something in that spot...

Not much to report progress-wise. I cleaned-up that grease from the CV joints.

ad0jNTQ.jpg


am79SyB.jpg


I took a couple trips around the circular driveway, and I already see a bit starting to ooze out under the clamps (inner boots, outer ones). I was hoping with the diff drop in place that would not happen...

I got the winch body situated.

rKmO3Si.jpg


I spent some time scouting-out locations for the control box.

XwuzEvz.jpg


There are two mounting positions on the body. I was hoping the side mount would fit within the bumper, but it does not. The center mount is not practical. I don't mind hacking-up my grille, but even so the control box would be recessed so deep into the grille, there would access problems for the switch and remote control port. So, I am left with a remote mount...

I forgot who it was in another thread, but he has the same bumper, and I can see why he chose here.

LY43fJB.jpg


I think I'll go with it tucked up high like this...

E9IHgm0.jpg


I'll make some bracket and/or metal zip tie into place, not sure sure yet, but I'm pretty sure that's the spot...

That should leave me sufficient space below for some lighting.

oUcFL1t.jpg


Mother's Day weekend, so I'll be spending time with the family and my mom, so maybe not much will get done until next week...
 
Last edited:
Another weekend, and just some minor updates...

Last week I went to help my mom at her rental where the tenants left on somewhat short notice. It's a historic Tudor style home, over 100 years old. She grew-up there, so a lot of memories for her. In the detached garage, I found my first car project, one that I never finished.

eCZ9Xv7.jpg


A kit car, modeled after the BMW M1, on a modified VW pan ('69 with IRS), gull-wing doors... Had this project in high school, then stopped, on purpose. The way I was driving then and as young man, I grew convinced I would have killed myself in that thing. Plus, argued with my dad about the power plant, as he wanted to stay VW (1776, 1835, 1914...). I had other crazy ideas, but we somewhat agreed on a rotary, I think the 13B. Oh well, brought back some memories to see it. I will likely sell it, although part of me wants to finish it, just for the sake of it, like I don't have enough crap to do!

Oh, I had to drive my 4Runner to that house, with no alignment. Not fun. Had to stay in the slow lane on the freeway, big rigs passing me. My mom was mad, but I wanted to help her, Mother's Day weekend and all...

When I got home, I noticed that just a bit more grease left those inner boots. I drove it again a few days later to THD, virtually none came-out. I decided to reinstall the front skid plate. Looks to be just under 1/2" of clearance.

OyTVk72.jpg


I never showed the 1.3 gallon collapsable water container. It will go in that rear storage area I created when we go on trips. I will fill it with distilled water, which we have on tap in our kitchen...

eqt8SHQ.jpg


https://smile.amazon.com/gp/product/B07FW557D4/ref=ppx_yo_dt_b_asin_title_o09_s00?ie=UTF8&psc=1

Had a few recent deliveries.

gzze74k.jpg


mPhFXGp.jpg


DKPPFqF.jpg


I think this will be my fourth set of the LED headlights I will have tried. Easy enough to experiment with and get a full refund if not satisfied. Already installed them, but did not try yet. I will not do a lumen or lux testing on these (using that app)... 31 bucks, so not too bad.

https://smile.amazon.com/gp/product/B07PZ9RTF6/ref=ppx_yo_dt_b_asin_title_o00_s00?ie=UTF8&psc=1

The marker lights are the same ones used as turn signals earlier. I really like them because they are also reflectors. At five bucks each, that's nice also.

https://smile.amazon.com/gp/product/B0784VWMXV/ref=ppx_yo_dt_b_asin_title_o01_s00?ie=UTF8&psc=1

Figured I'd put them in either of these two spots. The holes are too small though and the hole saw is not as fine toothed as I'd like.

PHbdH9z.jpg


I hoped this set-up would work, but it moved to much. That's a tennis ball jammed behind the 2x4.

XE0jQZi.jpg


Can't see the holes I'm working on in this photo, but I then tried this, and it is more stable.

y7zioEx.jpg


The pilot hole elongated though, and it's just not working well. Again, a fine tooth hole saw would be better. All over the place...

9MH1qZi.jpg


Unless someone has a good idea, I'll likely just ream it out with an abrasive stone rotary bit in a drill.

 
The pilot hole elongated though, and it's just not working well. Again, a fine tooth hole saw would be better. All over the place...

9MH1qZi.jpg


Unless someone has a good idea, I'll likely just ream it out with an abrasive stone rotary bit in a drill.

Clamp something on the front (piece of wood or metal) and then drill through that and then into the bumper. That will help keep it aligned once you get to the metal of the bumper. Hope that makes sense.
 
Clamp something on the front (piece of wood or metal) and then drill through that and then into the bumper. That will help keep it aligned once you get to the metal of the bumper. Hope that makes sense.

Thanks for chiming-in. I follow you. It seems I'd be working blind though in trying to pick my spot. I'd want this new larger hole to include the hole that's there now... Hmmm... Maybe if I can trace the circle from inside the bumper onto this material that's clamped to the outside, then remove the material and drill a small hole through the center of the circle, that will mark the spot. If I can find a way to clamp the material well, I think this will indeed work. I would likely need a small mirror to make sure I have the material in right spot (pilot hole in the center of the existing hole) before I clamp it. I believe a 2x4 will be too thick for the depth of the hole saw, but I'll check tomorrow. I have thinner stuff though... Thanks again.

The lights come with a hole template, 2 3/8" diameter. I transferred this onto some thicker material, broke-out some red fingernail polish marked-up the hole.

P3U3AhJ.jpg


I then moved the template over to the other side and realized that hole is larger, and it seems the correct size to receive these lights! I thought I had measured before, and that why I thought these lights would fit here too. I must have measured that hole. I just assumed the other side was the same, the correct size for these and most 2" markers. So, it looks like I just need to get that one side enlarged...

1H7IG9H.jpg


With more odd May rain tomorrow, not sure I'll have a chance to get this or any other work done.
 
well that's weird haha but at least a little easier.

I've never tried to use a holesaw on plate like this but can only imagine. Like you said, that bit looks too coarse for metal but who knows. I would've probably already started grinding outward.

good luck and keep it up!
 
Scott (weekendclimber), you made this much easier! I had a hole saw that fit perfectly.

KCVSJXk.jpg


This was the set-up.

6XJik7T.jpg


A couple batteries later...

iWGnGyB.jpg


After some clean-up with a file, rubbing alcohol and paint.

4isd7ib.jpg


As I said earlier, the other side is larger, but still too small. These lights specify a hole size of 2 3/8". I find using a 2 1/4" hole saw perfect. This other hole measured 2 1/8". It was tight, but I was able to slide a 2 1/8" hole saw into a 2 1/4", and enlarged the other opening.

8CPCroM.jpg


8btzfPa.jpg


These will be for running lights, and I'll make those connections later...

BGg8tGA.jpg


The other more inward holes are both 2" diameter. I think I might just keep those open for airflow reasons. If I did want to put lights in those spots too, I have 2" of depth to work with due to the winch just behind.

For those interested in Baja Design lights, I got those from Northridge 4x4. With a discount code, it was $182 delivered. I didn't see anything better after looking for a couple months....
 
Last edited:
Sweet!! All those hours watching AvE on YouTube paid off!! :cheer2:

For sure Scott. If down in the south Bay Area, let me know!

With the discount code still good, I decided to get the Baja Designs combo lights. These are a mix of the wide cornering (42 degrees) and spot (9 degrees).

Squadron-R Sport, Pair Driving/ Combo LED | Baja Designs

587803_l_1.jpg


I like how compact these are, lifetime warranty, IP69, legit 3,000+ lumen output, and a really nice wiring harness and connectors too... And made in the USA! 180 bucks.
 
Last edited:
I'm going to make it to one of [MENTION=120071]mtbtim[/MENTION]'s BBQ's hopefully this year. Would love to shoot the breeze with everyone there!!

I missed the last one, but should be able to make the one this summer. The wife and youngest will be abroad, so if I can find someone to watch the oddest, I'll be there. Would be great to see you and your truck in-person!

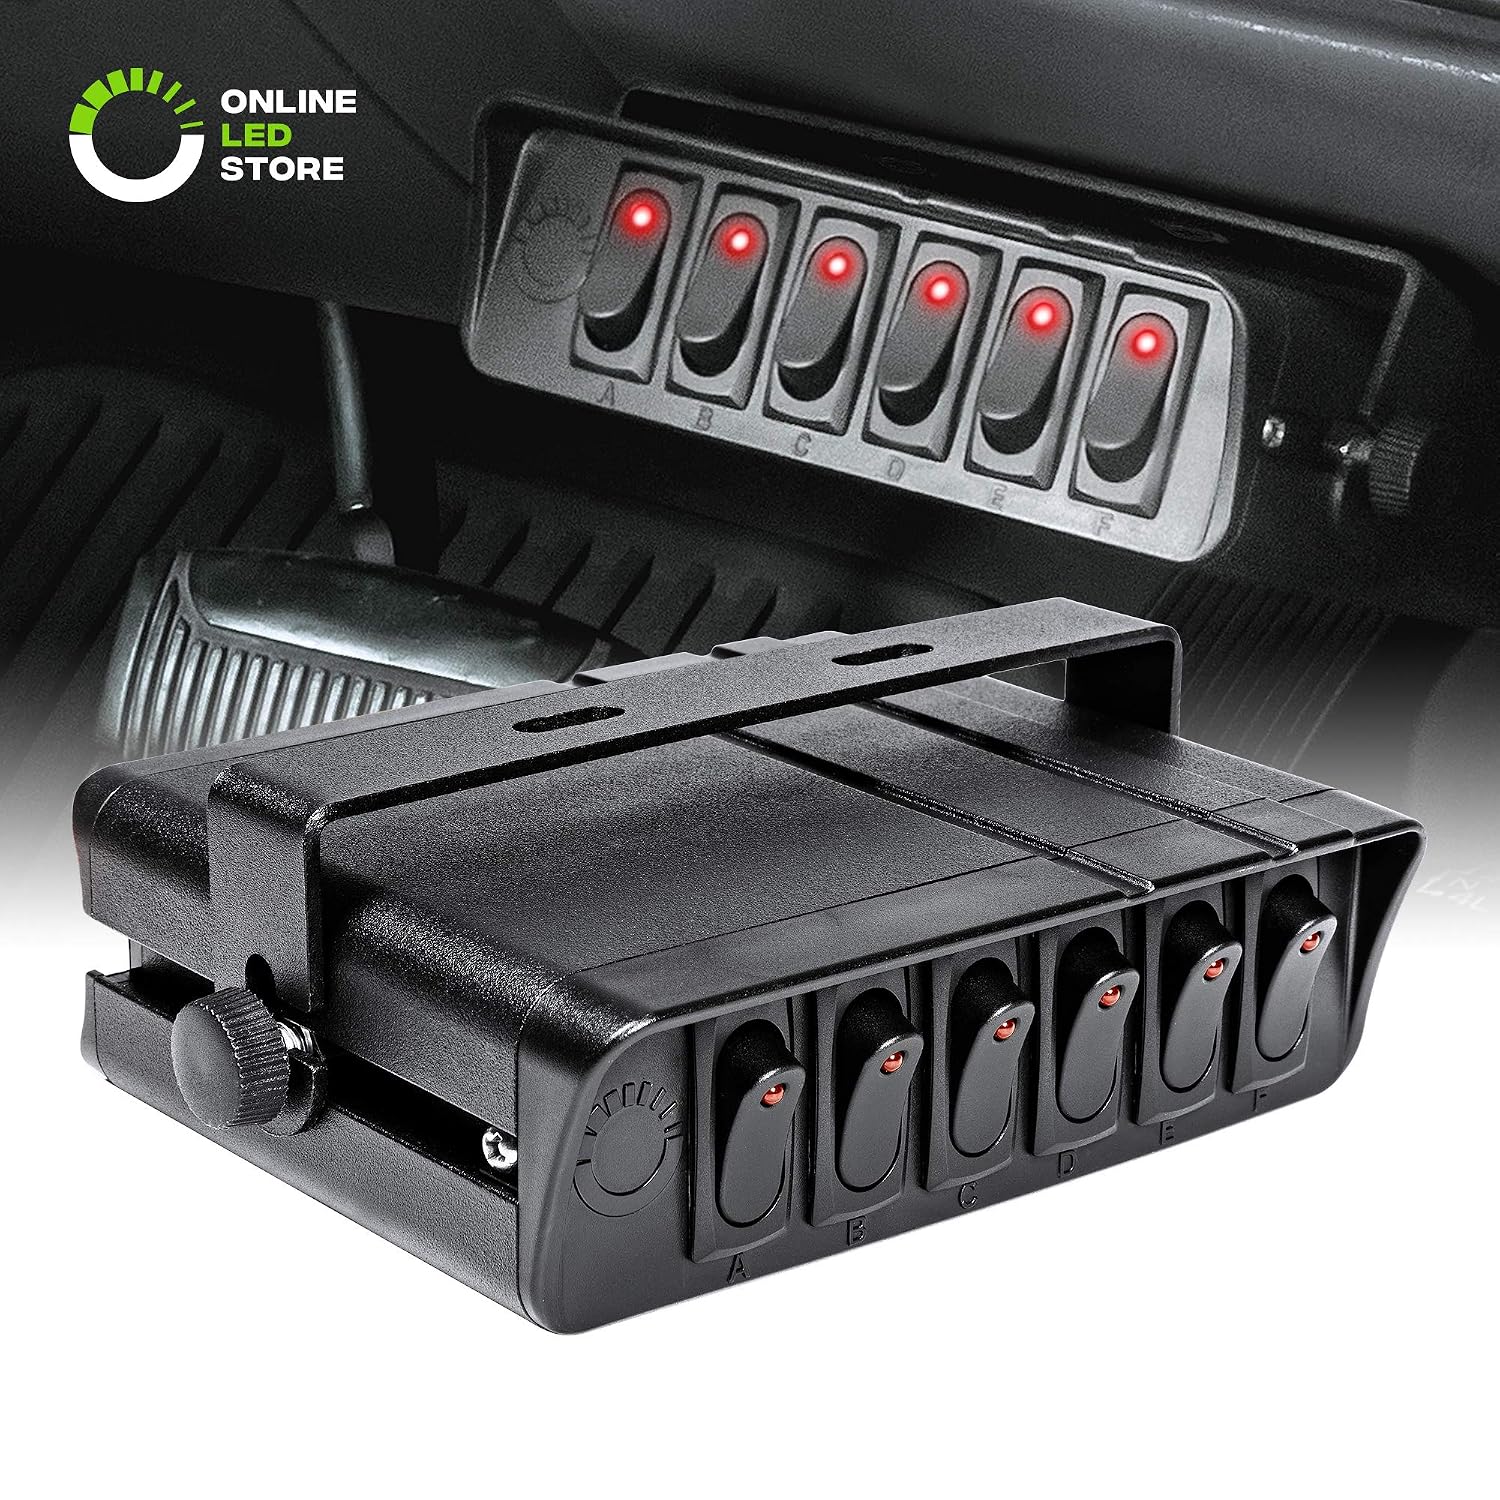
Electrical goodies still arriving, more tomorrow, including this switch box.

91TD1Wx9LML._SL1500_.jpg


https://smile.amazon.com/gp/product/B07M9X7N74/ref=ppx_yo_dt_b_asin_title_o00_s00?ie=UTF8&psc=1

Likely under the seat, here.

Sp5B20a.jpg


I believe 6 will be enough for what I want, quite likely:

1 = Wide Cornering Lights
2 = Driving/Combo Lights
3 = Spot Lights
4 = Rock Lights
5 = Rear Lights
6 = ATF Fan

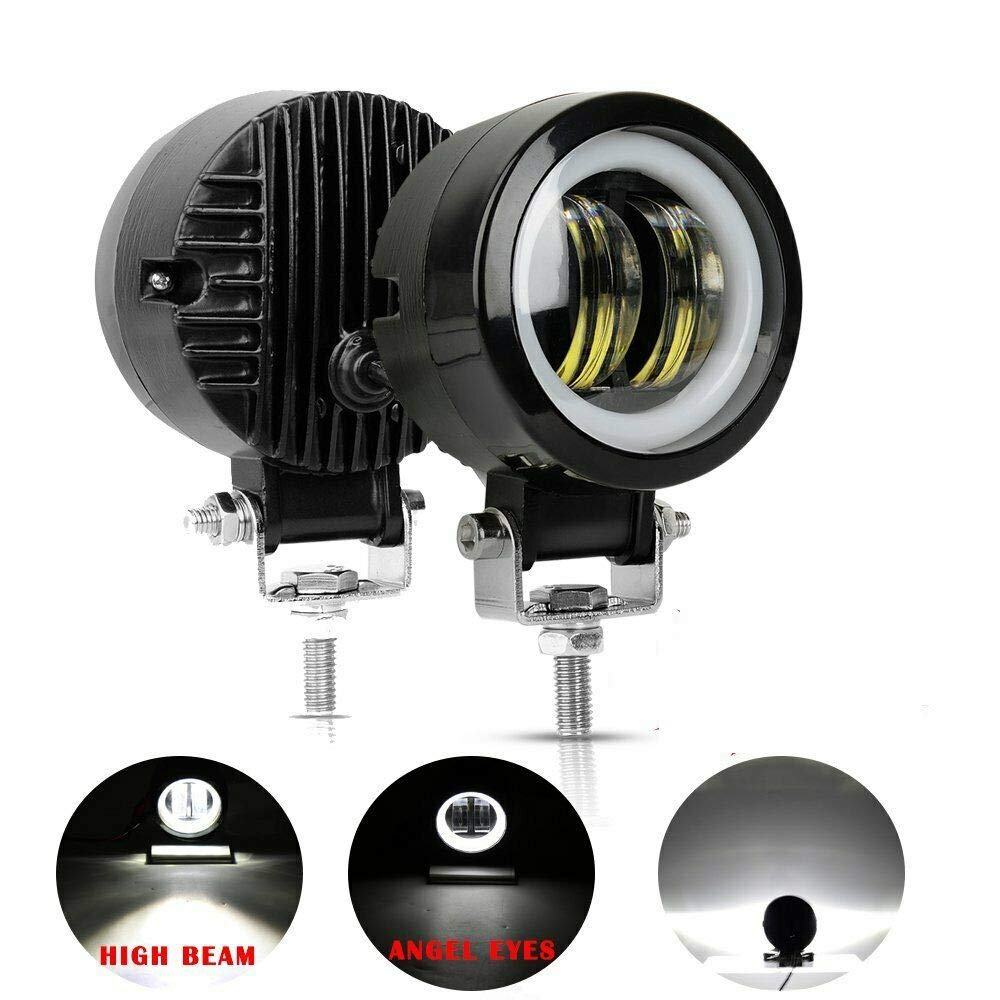
I decided to use the two inner most holes for road fog lights, activated on the steering column tree.

BGg8tGA.jpg


These are less than 2" front to back, so will fit in the space in front of the winch. At 30 bucks, I'm not expecting Baja Designs quality, but we'll see...

61NZccpIXLL._SL1000_.jpg


Off topic, but figured I'd share... I've been busy the last few days doing a recast on our home mortgage. I found that very few people know about recasting and not all lenders offer such. By making a lump sum principal only payment, I was able to reduce our monthly payment, quite a bit. Zero change in terms, namely the interest rate remains the same, pretty dang low at 3.375% and the term period remains unchanged. Zero fees. Going tomorrow to sign a form to put it into effect for the next payment. Eye-balling retirement in a couple years, and monthly expenses are part of the planning of course. The next principal only payments made will do the usual, shorten the term period, which is important too! Pretty happy about it and thought I'd share as I'm sure others can benefit from a recast also...
 
I like how compact these are, lifetime warranty, IP69, legit 3,000+ lumen output, and a really nice wiring harness and connectors too... And made in the USA! 180 bucks

I just checked the link and they are now $229. Inflation is real man!
.
 
Baja Designs Squadron-R Sport, LED Driving/Combo Lights

Placement considerations...

Outside the hoop:

cq7SN8V.jpg


RYiYSSW.jpg


Ba7DLoF.jpg


Inside the hoop:

WOpiXY3.jpg


4bh5Y60.jpg


U5z1sDQ.jpg


Unless anyone convinces me otherwise, I'm leaning toward inside the hoop. There it does block, slightly, the airflow into the heat exchangers. Looks to be an inch or so inward on one side, and maybe a couple inches on the other. They are better protected within the hoop, which I like. On the outside, they block the headlights, just barely, but I'm sure in no meaningful way. They would block those rectangular turn signals I added, more so than if mounted inside the hoop. Input welcome...
 

Members online

Forum statistics

Threads
278,316
Messages
3,554,120
Members
248,016
Latest member
Advally Service

Trending content

Back
Top