Urban assault's '99 4runner build

Dakota Digitial

Great post! I will be adding this to my list of upcoming mods. I tried for a month or so after my lift to get a similar device to correct for the 285s.

The instructions that I tried to use had me cutting the blue/grey wire at the ECU. Signal was to come from the ABS ECU, to box for modification, then out to ECU. The net effect was that my speedo quit working on my little test runs up and down the street.
 
Holy crap all that wiring is intimidating! Thanks for the write up!! This is going to be a huge help. :cheers:
It's not bad. Basically a few wire taps. I know what you mean though. I was a little hesitant to start donkey'n around with the ECM. Well worth it though. Hopefully your setup is similar. Let me know what you find.

Great post! I will be adding this to my list of upcoming mods. I tried for a month or so after my lift to get a similar device to correct for the 285s.
The instructions that I tried to use had me cutting the blue/grey wire at the ECU. Signal was to come from the ABS ECU, to box for modification, then out to ECU. The net effect was that my speedo quit working on my little test runs up and down the street.
Thanks!
I'm not familiar with the Abbott but it looks similar. If just refining the speed signal then it seems you should be able to put it in-line with the grey/blue wire.
Make sure you get a good 12v source. If using the ABS ECU yellow wire then just tap into it. Don't disconnect it. Find a good ground for the box and should be good. Keep the ABS ECU plugged up and running with the exception of the grey/blue wire. That would be similar to my setup at least. The Dakota box has a little green LED on it to let you know that it has good power and flashes when it is receiving a speed signal. Helped take some of the guess work out of the setup. Good Luck!
 
WOW dude thank you so much for trail blazing on this one and nice job on the detailed write-up. I will never forget you. :hail:
 
First, CONGRATULATIONS on your second child!! He looks like a healthy little boy, which is all you can really ask for.

I've been reading your updates but there's so much detail/info in the last few posts, combined with the fact that I've spent limited time on the forum lately, that I haven't had an opportunity to really digest everything you've been doing w/the rig.

That full floater kit is such a cool mod for these things. I've always been a little jealous of Dirtco's, and now I've got yours to drool over too. I'm curious, when your rear axle broke, how did you get your rig out of there and back home? Did you have to have it towed, or did you just limp it back to base? I'm looking forward to reading your full write-up, assuming you can ever find time to put it together with a 2nd little one in the house. You'll notice that since we had ours I've done exactly ZERO writeups.

The new rack is looking pretty good on there, and those were some nice little tweaks you added.
 
First, CONGRATULATIONS on your second child!! He looks like a healthy little boy, which is all you can really ask for.
I've been reading your updates but there's so much detail/info in the last few posts, combined with the fact that I've spent limited time on the forum lately, that I haven't had an opportunity to really digest everything you've been doing w/the rig.
That full floater kit is such a cool mod for these things. I've always been a little jealous of Dirtco's, and now I've got yours to drool over too. I'm curious, when your rear axle broke, how did you get your rig out of there and back home? Did you have to have it towed, or did you just limp it back to base?[/B] I'm looking forward to reading your full write-up, assuming you can ever find time to put it together with a 2nd little one in the house. You'll notice that since we had ours I've done exactly ZERO writeups.
The new rack is looking pretty good on there, and those were some nice little tweaks you added.

Thanks! The time management is definitely a delicate, choreographed, balancing act. It doesn't always work, but I try to stay flexible and keep everything in perspective. The last few projects have made me appreciate the work you put into your write-ups.
'Broken rear axle shaft' was the initial trail diagnosis. The symptom was power to 1 rear wheel, even when locked; and when I hi-lift jacked the rear end up, the passenger side spun freely, despite the truck being in 'Park'. Normally, in 'Park' the rear wheels would rotate opposite of each other. However, the passenger side was spinning as if there was no contact with the diff. So I knew it was either diff or axle shaft. There was no noise from the diff, and the magnetic drain plug was clean. "Must be the axle." After a quick mental review of the rear axle setup, with the bolt-on backing plate pressed onto the axle, rather than a c-clip setup, I drove it back to the park entrance. With it lifted, I again looked, listened for any diff damage. None detected. With the rear locked, it drove normally. Rear unlocked was no power, nothing, like it was in neutral. I opted to not pull the shaft at the park, because I did not have brake fluid with me and would have had to disconnect the drum and then bleed after re-install (do not have to worry about that now, with the FF conversion). I did a short test run down the street, then re-checked everything. I decided to at least try to limp it home. Thanks to [MENTION=67110]RedDragonATL[/MENTION] for staying on standby. I made it home without incident, then pulled the shaft.
I was surprised to find the shaft intact. The only evidence was a small step-down of the splines on the last 1/2" of the shaft. I pulled the diff and found that the sleeve of splines the PS axle rides in had split in 1/2 allowing the rear axle to spin freely (I posted a pic a few pages back). The Full Float became priority #1 since I was going to need a new axle anyway and wasn't about to replace with the same setup. I am just glad that the spider gear made a clean split and didn't fragment. If it had fragmented, then I would have needed a trailer to get it home.
Thanks again!
 
I haven't updated in a while, though I have checked a lot of small projects off the list:
New radiator, New transmission cooler, made a 4 bank switch panel in the ash tray location, added a 3 bank switch panel in place of the factory 2 bank on the drivers side dash, custom TRD sticker, New fog lights, new rock lights, and had 2 big off road trips to Adventure Off Road in Tennessee, and Gulches Off Road Park in South Carolina.

I've been really bad about taking pics lately, but I will get some. In the meantime here are a few wheelin' pics:


I will upload some project pics tonight.
Thanks!
 
I recently added and upgraded some lights and have plans for a few additional electronic goodies. However, I wanted to clean up some wiring moving forward.
I added a Blue Sea Accessory fuse box. I originally wanted to add this on the drivers side firewall, though space is tight. Especially with the manual proportioning brake valve I added with the rear full float setup, and the EVAP box.
All this was based on an idea I remember seeing in [MENTION=63060]rickashay[/MENTION] 's build. Thanks!
There is much more room on the passenger side. I bent up a piece of scrap metal and used some existing bolts for attachment.
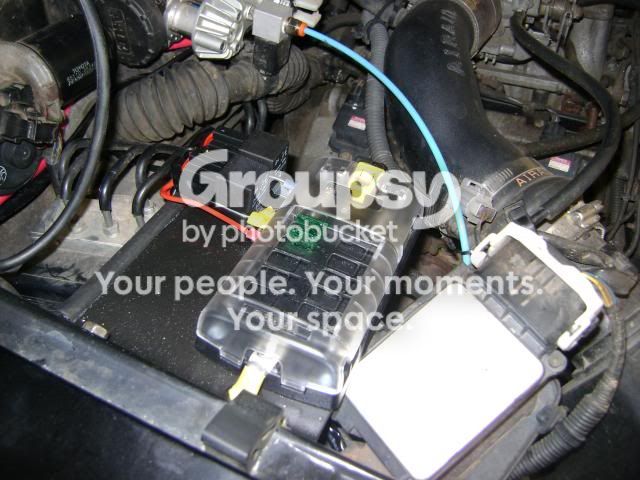
I've since added a few more things, but this pic gives you the idea. Fuse and relay management.

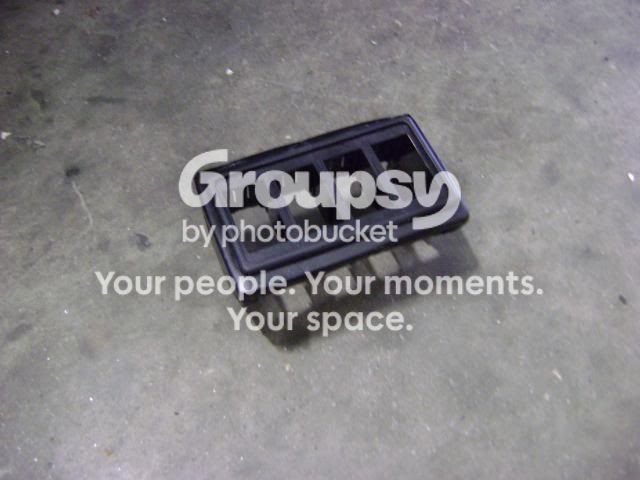
So, new goodies need switches. I don't need an ashtray, and my CB is in my center console. The ashtray is prime real estate. I made a fiberglass block in the same fashion I made the in-cab winch control box.
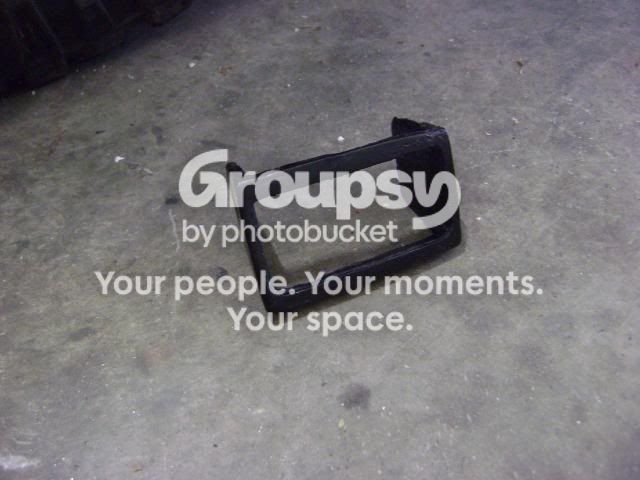
I used switch housings from OTRATTW.

I also expanded the 2 bank switch on the drivers side dash to a 3 bank panel. Also, I color matched it to the dash.

I've seen the 3 switch idea a few times and I can't remember where I saw it first. It may have been [MENTION=58830]JWaldz[/MENTION] but correct me if I'm wrong.
I tried to take a few pics of the finished product tonight but the flash was washing it out. I will take some daytime pics tomorrow.

Some of the lights include 2x2 square LED's and some LED's rock lights. I went with a package from Olympus Off Road. If you order a pair of the 2x2's you get a pair of their 3 LED Rock lights pods. I added an additional pair of the rock lights to the order so that I could have a pair of rock lights pods on each side.
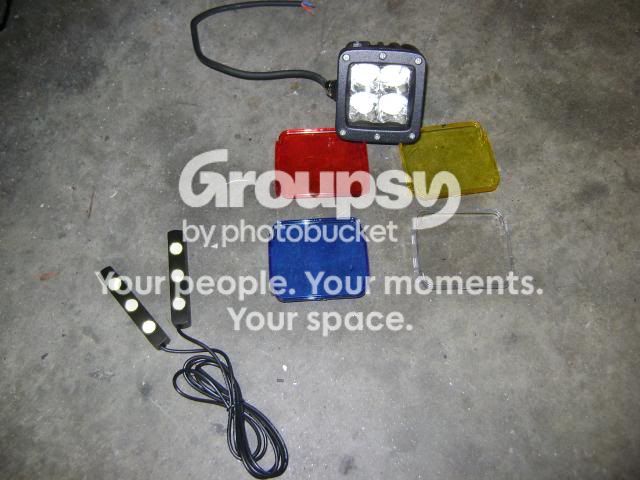
The 2x2's come with a clear lens protector, and yw, bl, rd filters. They snap on/off over the housing.
I cut some angle iron for the rock lights so that they shine down/out from the frame. I tack welded them to the frame on both sides.
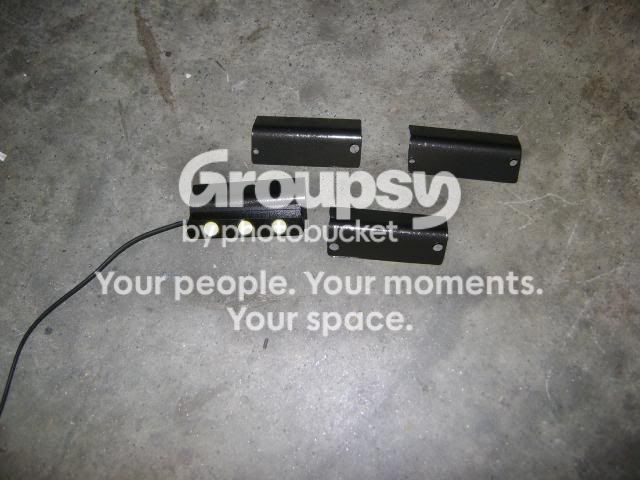
I'm waiting on some pics from this past weekend's night run at Gulches Off Road. They worked well.
More pics to come.

I'll add more pics and updates including new radiator, transmission cooler, and windshield washer bottle replace/relocate.
Thanks.

 
It might have been me but there are others that have done the same. I'm currently out of spots for new switches. Gonna have to come up with some ideas if I add anymore in the future. Love the rock lights btw!
 
35's will rip out your factory windshield fluid reservoir.

I picked up a bottle and new pump from lowrangeoffroad.com.

I drilled an additional hole in the reservoir so that I could use both front and rear fluid pumps. I used the factory grommet from my factory reservoir. Seals perfectly. No leaks.

There is a nice little cubby just in front of the air intake. I made up some metal straps and mounted to the core support using existing threaded holes.

Also did some preventative maintenance and replaced the radiator.

Super easy. 1 beer project. This link was helpful:
http://www.toyota-4runner.org/3rd-gen-t4rs/115475-how-radiator-replacement.html
Replaced radiator hoses with silicone hoses, burped the system, then had another beer, since I was disappointed it was only a 1 beer project.
Thanks!
:cheers:
 
one ahahahah, two ahahahahah, two beers ahahahahah

TheCount.jpg
 

Attachments

  • TheCount.jpg
    TheCount.jpg
    17.8 KB · Views: 1,192
Holy cow this is an awesome build! Thanks for the mention as it got me over here and drooling er' reading all of your posts. High quality stuff through and through man, that full float rear is wicked and I hope that those spendy RCV's last forever.

Fuse block looks great too ;)
 
35's will rip out your factory windshield fluid reservoir.

I picked up a bottle and new pump from lowrangeoffroad.com.

I drilled an additional hole in the reservoir so that I could use both front and rear fluid pumps. I used the factory grommet from my factory reservoir. Seals perfectly. No leaks.

There is a nice little cubby just in front of the air intake. I made up some metal straps and mounted to the core support using existing threaded holes.
:cheers:

Build is looking great man. Any chance you could share where you got you washer fluid tank? I am in bad need of one since I had to pull mine as well.

Any help would be appreciated.
 
Last edited:
Build is looking great man. Any chanxe you could share where you got you washer fluid tank? I am in bad need of one since I had to pull mine as well.

Any help would be appreciated.

I used this one:
Universal Windshield Washer Kit, Pump, Reservoir, Lines, Switch

You can re-use your factory pumps if you have them. Otherwise this kit has a pump included. I needed a new pump since my tire damaged one of the factory ones. I've seen guys do this on the cheap with everything from a bike water bottle, to $10 Auto-parts store reservoir. This kit has everything you need, especially if you need a new pump.
Thanks!
 
I used this one:
Universal Windshield Washer Kit, Pump, Reservoir, Lines, Switch

You can re-use your factory pumps if you have them. Otherwise this kit has a pump included. I needed a new pump since my tire damaged one of the factory ones. I've seen guys do this on the cheap with everything from a bike water bottle, to $10 Auto-parts store reservoir. This kit has everything you need, especially if you need a new pump.
Thanks!

Good stuff man. That is a great price. My pumps on my 97 are still good as I pulled the whole tank before it got damaged. However my 06 needs a new rear one so I can kill two birds with one purchase.

Thanks a lot for the info.

Also where did you get the silicone radiator hoses? From Low Range as well? you have the 3.4 auto correct?
 
Nice work, I've installed a 6" deck plate in to my air box so I couldn't place the reservoir where you did. Had to split it up in to two separate bottles connected by a tube. Seems to work out...

Definitely a fan of your interior work - I've replaced the switches to the left of the steering column with 2, 3-switch OTRATTW panels which I have filled up. Admittedly, yours is much cleaner! Colour matched is key.

I'm always drooling over your rig - very nice, keeping it clean. Word to the wise, add a cut off switch for your fuse block if you haven't already - I picked up a couple 120Amp Bussman Fuses off Amazon which do the trick nicely.
 
Good stuff man. That is a great price. My pumps on my 97 are still good as I pulled the whole tank before it got damaged. However my 06 needs a new rear one so I can kill two birds with one purchase.

Thanks a lot for the info.

Also where did you get the silicone radiator hoses? From Low Range as well? you have the 3.4 auto correct?

Thanks!
Yes. Silicone hoses also from Low Range.
Trail Gear Silicone Radiator Hose Kit - Engine Upgrade - 1996-2002 4Runner | Surf | SW4 - Toyota Parts
Almost an exact fit. I trimmed the hoses a little bit to match factory hoses. 3.4L, auto. Also, replaced thermostat with OEM. It was easy. I figured as long as everything was coming out, might as well sure it up.
Thanks!

Nice work, I've installed a 6" deck plate in to my air box so I couldn't place the reservoir where you did. Had to split it up in to two separate bottles connected by a tube. Seems to work out...
Definitely a fan of your interior work - I've replaced the switches to the left of the steering column with 2, 3-switch OTRATTW panels which I have filled up. Admittedly, yours is much cleaner! Colour matched is key.
I'm always drooling over your rig - very nice, keeping it clean. Word to the wise, add a cut off switch for your fuse block if you haven't already - I picked up a couple 120Amp Bussman Fuses off Amazon which do the trick nicely.

Thanks! I've been trying to maintain an updated factory look despite adding lots of toys.
I did run a 100amp fuse (also from Blue Sea) in advance of the secondary fuse box. Did you also run a cutoff in advance of the factory fuse box? Hmmmm. That's not a bad idea.
Thanks again!
 
This is a great thread, I have a lot more planned for my next third gen after reading through here. Maybe one day I'll run into you on a trail or fire road in GA.
 
Thanks!
Thanks! I've been trying to maintain an updated factory look despite adding lots of toys.
I did run a 100amp fuse (also from Blue Sea) in advance of the secondary fuse box. Did you also run a cutoff in advance of the factory fuse box? Hmmmm. That's not a bad idea.
Thanks again!

My set up includes the 'Big 3' wiring upgrade so I've got a breaker (150amp) from the alternator direct to the battery, along side the fuse block which has the same style breaker in the 120amp flavour.

The Bussman breaker is great as I can just flip the lever to whichever position I need - off if I am working on the truck etc.

Here is a picture, I spent quite some time getting it all done nicely with loom, electrical tape on the ends and zip ties to hold down the tape. All I need is a cut off switch (jeez, maybe another Bussman...) for my winch. It's currently 'hot' all the time - picture taken when I didn't have loom on my winch power.


And one of the switches just for good luck :guitar3:
 

Members online

Forum statistics

Threads
278,316
Messages
3,554,106
Members
248,016
Latest member
Advally Service

Trending content

Back
Top