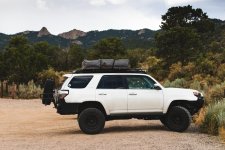
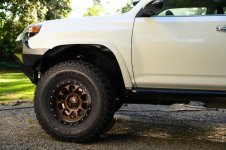
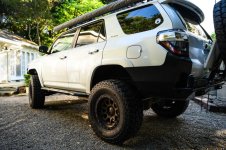
WAMPA Jr. Build

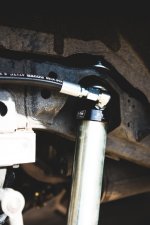
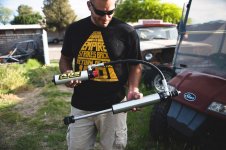
Thanks for the info on the sway bar. I’ve been looking at doing this for awhile, trying to stay away from the all pro kit. I ended up getting a Currie kit off of Summit. Anyway, nice build and thanks again for the inspiration.

Whats wrong with the all pro kit? I was made by jointly with Currie. I am just curious because i was considering ordering the kit.
 
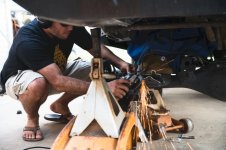
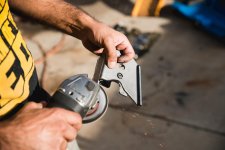
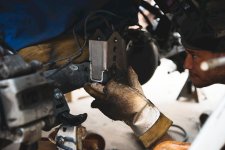
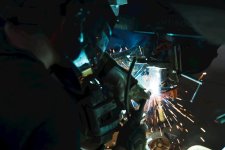
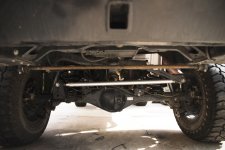
Did some work earlier this week, installed one of [MENTION=28464]eimkeith[/MENTION] panhard correction kit's, aka a rear track bar bracket. I wasn't sure how much a need there was for this on these trucks but it made huge difference, much less bobbing around turns.

Install was relatively easy. You need to unclip the abs lines and unscrew the hard brake lines in several spots. You'll also want to shield the fuel tank due to proximity.

We ended up adding a couple extra gussets, not so much that we felt the design needed it, but because we were in there already and figured why not (this isn't something you want failing.) Track bar is nearly flat now, it's really impressive.

Overall, thanks for the great product Keith, sorry if I ever doubted the need before, you were right!
 

Attachments

  • Screen Shot 2019-04-18 at 6.39.55 PM.jpg
    Screen Shot 2019-04-18 at 6.39.55 PM.jpg
    123.1 KB · Views: 676
  • Screen Shot 2019-04-18 at 6.37.24 PM.jpg
    Screen Shot 2019-04-18 at 6.37.24 PM.jpg
    89.1 KB · Views: 700
  • Screen Shot 2019-04-18 at 6.42.49 PM.jpg
    Screen Shot 2019-04-18 at 6.42.49 PM.jpg
    98.1 KB · Views: 679
  • Screen Shot 2019-04-18 at 6.45.30 PM.jpg
    Screen Shot 2019-04-18 at 6.45.30 PM.jpg
    85.9 KB · Views: 674
  • Screen Shot 2019-04-18 at 6.48.14 PM.jpg
    Screen Shot 2019-04-18 at 6.48.14 PM.jpg
    105 KB · Views: 687
Whats wrong with the all pro kit? I was made by jointly with Currie. I am just curious because i was considering ordering the kit.

Sorry, just saw this... I didn’t mean for that to infer that there was something wrong with the all pro kit. I just like to make my own stuff, plus save a few $.
 
Random updates, it's been too long so figured I should at least throw some photos up.

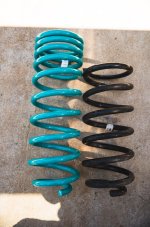
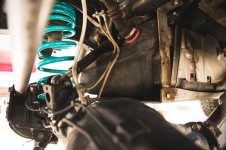
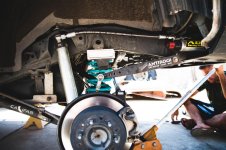
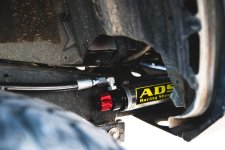
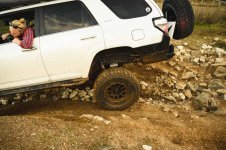
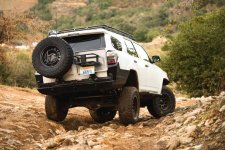
Played around with some OME linear rear coils (899's). Ride was good with my weight, but I wanted more height. Eventually came back to Dobinsons, put their new super duper heavies in, really happy with them. I had previously installed some 2" bump stop extensions, paired with 26.5" long ADS 2.5" shocks. I'll do a write-up on those at some point, but it meets my needs perfectly... extended down travel while maintaining usable up-travel so I'm not riding on my bumpstops. Tried to show how having offset rear upper controls helps clear the fuel tank as well, for those running extended down travel setups.

I know why people do it, but 3" bump stop extensions are just too much for my taste on these vehicles, and this setup still flexes like a machine.

*edit - having trouble uploading the reast of the pics, once the system lets me I’ll get them up.
 

Attachments

  • 111.jpg
    111.jpg
    122.9 KB · Views: 604
Last edited:
Here we go, I think the file sizes were too big despite being screen shots.
 

Attachments

  • Screen Shot 2019-07-16 at 2.02.40 PM.jpg
    Screen Shot 2019-07-16 at 2.02.40 PM.jpg
    62.1 KB · Views: 570
  • Screen Shot 2019-07-16 at 2.03.55 PM.jpg
    Screen Shot 2019-07-16 at 2.03.55 PM.jpg
    134 KB · Views: 554
  • Screen Shot 2019-07-16 at 2.04.33 PM.jpg
    Screen Shot 2019-07-16 at 2.04.33 PM.jpg
    53 KB · Views: 560
  • Screen Shot 2019-07-16 at 2.04.57 PM.jpg
    Screen Shot 2019-07-16 at 2.04.57 PM.jpg
    137.6 KB · Views: 572
More suspension porn.
 

Attachments

  • Screen Shot 2019-07-16 at 2.10.10 PM.jpg
    Screen Shot 2019-07-16 at 2.10.10 PM.jpg
    64.5 KB · Views: 564
  • Screen Shot 2019-07-16 at 2.14.46 PM.jpg
    Screen Shot 2019-07-16 at 2.14.46 PM.jpg
    119.7 KB · Views: 565
  • Screen Shot 2019-07-16 at 2.15.42 PM.jpg
    Screen Shot 2019-07-16 at 2.15.42 PM.jpg
    93.7 KB · Views: 562
  • Screen Shot 2019-07-16 at 2.15.55 PM.jpg
    Screen Shot 2019-07-16 at 2.15.55 PM.jpg
    93.5 KB · Views: 566
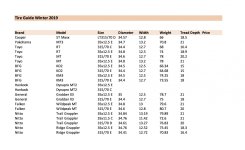
Thought I'd throw this up for anyone else.. I'm shopping 35's and compiled some tire stats. I'll update it with prices once I have them.

I was surprised to see Nitto offering their Trail Grappler in a 35x11.5, those just may be the ticket.
 

Attachments

  • Screen Shot 2019-12-10 at 6.10.11 PM.jpg
    Screen Shot 2019-12-10 at 6.10.11 PM.jpg
    117.4 KB · Views: 481
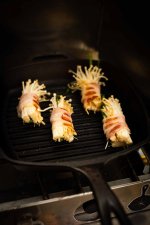
Thought I'd update the thread here with some fresh content. Did a little holiday wheeling for a new recipe demo.. bacon wrapped enoki mushrooms with garlic chive.

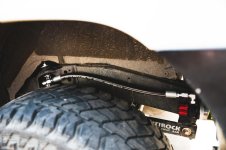
Also, an Antirock update. I had clearance issues a couple months back between the sway bar links and the new bump stop extensions I put on.. working on a solution currently. I'll update that once it's confirmed to work.
 

Attachments

  • 20191219-DSC_1926.jpg
    20191219-DSC_1926.jpg
    145.8 KB · Views: 429
  • 20191219-_DSC7549-2.jpg
    20191219-_DSC7549-2.jpg
    117.3 KB · Views: 423
  • 20191219-_DSC7592.jpg
    20191219-_DSC7592.jpg
    135.4 KB · Views: 467
  • 20191219-DSC_2045.jpg
    20191219-DSC_2045.jpg
    141.7 KB · Views: 441
  • 20191219-_DSC7600.jpg
    20191219-_DSC7600.jpg
    143.1 KB · Views: 432
Hella Micro DE Fog Light HID Conversion

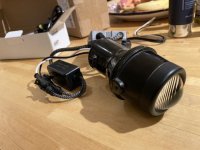
Got around to installing an HID conversion into a pair of Hella Micro DE fog lights, thought I’d post this for any interested parties.

Context: I first purchased these lights several years ago when I was running a Demello front bumper. They were recommended to me by Susquehanna Motorsports as one of the best performing street-legal fogs on the market, and they weren’t wrong. I’ve worked with them numerous times and have always been happy. Great spread and output from an H3 halogen bulb placed in a magnesium-housed projector.

Fast forward a few years and I swapped the Demello out for a 4x4Labs front bumper. Super happy with it, except their fog light pockets are more of an aux-light pocket, as the mounting tabs are positioned on an angle. This is fine for a spot or flood light, but not anything that requires a horizontal cutoff (ie street legal).

I shelved the Hella’s for awhile but found some time recently to get around to them. Picked up a DDM HID kit during Black Friday and welded some angled l-brackets together last weekend, to rotate the mounting surface horizontal from the bumper’s angled tabs.

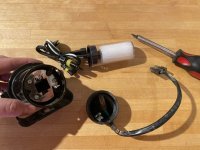
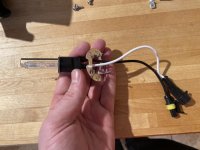
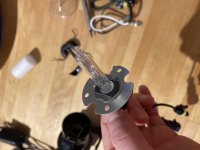
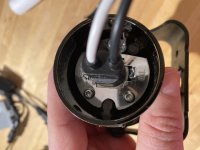
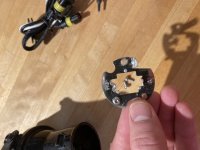
The bulb swap was easy. I wasn’t sure how smoothly it was going to go at first because H3 bulbs use the mounting plate as a grounding interface. What I ended up doing was simply removing the H3 bulb catch, unscrewed the mounting plate, and fed the HID bulb through the plate (wires first). This functionally created a mounting plate that sandwiched the HID into the back of the housing via the factory 3 screws. I was pretty happy with how this turned out.

I mention the above because I read on several 4wd and enduro bike forums of people doing an HID swap into these housings, but using bailing wire, zip ties, washers, etc to secure the HID bulb to the housing. I think the method I used above is likely both easier and more robust, time will tell.

The rest of the install was more or leas the same as any other HID install. I re-used the factory Hella relay and wiring harness, simply swapped the power connectors over to the HID harness for a plug n’ play solution.

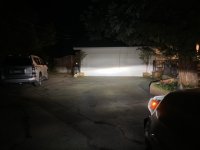
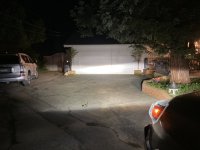
I included two iPhone shots, one with and one without the fogs on. Note the exposure wasn’t standardized, I’ll have to pull my dslr out for that and wanted to get a side by side with someone with factory fogs, for comparison. I’ve aimed the cutoff of the fogs to be slightly below the low-beam cutoff, and the increase in near and wide field lighting appears substantial. Hope that helps!

 

Attachments

  • F5795C65-4960-4D00-8010-C52E9BB6A51A.jpeg
    F5795C65-4960-4D00-8010-C52E9BB6A51A.jpeg
    107.6 KB · Views: 345
  • 35F5E24E-2A05-43DD-AC10-7DC7C377F80E.jpeg
    35F5E24E-2A05-43DD-AC10-7DC7C377F80E.jpeg
    96.2 KB · Views: 367
  • 99BD6C89-93E6-4AFF-B5E1-CCE05BA340CE.jpeg
    99BD6C89-93E6-4AFF-B5E1-CCE05BA340CE.jpeg
    68.6 KB · Views: 361
  • 84FA02F9-A509-4736-97B3-C930AA15F239.jpeg
    84FA02F9-A509-4736-97B3-C930AA15F239.jpeg
    79.2 KB · Views: 379
  • D576383C-D7DE-43A0-9EBC-EFB2A04311CD.jpeg
    D576383C-D7DE-43A0-9EBC-EFB2A04311CD.jpeg
    90.7 KB · Views: 366
  • 8D486892-0BA2-425C-99B6-FA26ECBFCF4F.jpeg
    8D486892-0BA2-425C-99B6-FA26ECBFCF4F.jpeg
    63.4 KB · Views: 358
  • 25F2B390-A784-4C9A-B048-81BBA4506A25.jpeg
    25F2B390-A784-4C9A-B048-81BBA4506A25.jpeg
    90.3 KB · Views: 372
  • F3F85BF4-0081-47F5-B36F-3F36E9D7CE53.jpeg
    F3F85BF4-0081-47F5-B36F-3F36E9D7CE53.jpeg
    80.9 KB · Views: 360
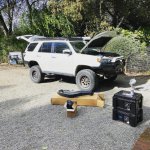
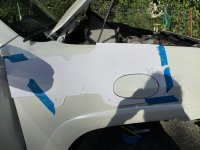
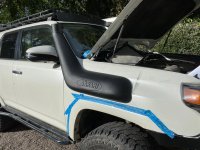
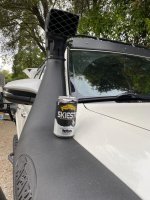
Got around to installing the snorkel, went pretty smooth overall. Only notes are that I disagree with the amount of trimming that is indicated to the factory airbox, I trimmed less than recommended and still feel like there's barely enough material to create a good seal with the snorkel's rubber hose. I'll be checking it after a few hundred miles to make sure it's still seated properly.
 

Attachments

  • 5C032D66-6A61-4E8E-8B99-1C435249D85E.jpg
    5C032D66-6A61-4E8E-8B99-1C435249D85E.jpg
    136.6 KB · Views: 293
  • IMG_4208.jpg
    IMG_4208.jpg
    125.7 KB · Views: 293
  • IMG_4210.jpg
    IMG_4210.jpg
    135.2 KB · Views: 318
  • IMG_4212.jpg
    IMG_4212.jpg
    136.8 KB · Views: 305
  • IMG_4343.jpg
    IMG_4343.jpg
    137.2 KB · Views: 303
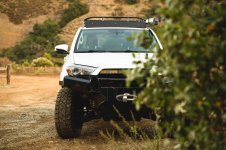
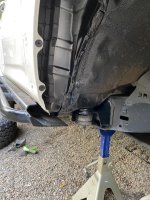
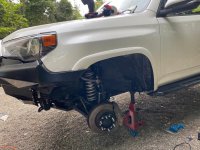
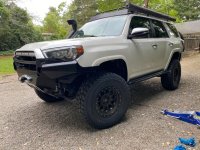
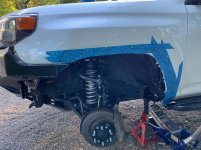
Another update, just finished initial trimming for 35's. I plan on making a youtube for this since there's a number of variables involved, but long story short I trimmed the body mount back, folded the pinch weld over, and clearance the fender flares. Once I confirm clearance the body mount will be either boxed in or relocated completely with one of the numerous aftermarket brackets.

Overall I'm loving the increase in size, didn't have to lift the truck any more and it feels like I've finally optimized the ground clearance/center of gravity ratio. Opted for Mickey Thompson ATZ P3. I've owned 3x sets of Cooper ST Maxx and love them, but with the rebate Mickey was running I couldn't turn them down, and being made by Cooper I trust they'll be quality. Almost went with Nitto Ridge Grapplers but couldn't justify the increased weight, at least not on this platform.

Also replaced an inner tie rod end while we were at it. Shout out to Custom Alignment in Mountain View, one of the best shops in the bay, bar-none.
 

Attachments

  • IMG_4965.jpg
    IMG_4965.jpg
    138.3 KB · Views: 273
  • 8fed4e54-f8e3-4eea-b575-bfc85e6d17b0.jpg
    8fed4e54-f8e3-4eea-b575-bfc85e6d17b0.jpg
    139.6 KB · Views: 274
  • 816b6aa8-0dc6-4e9d-bcf8-cff3103901cf.jpg
    816b6aa8-0dc6-4e9d-bcf8-cff3103901cf.jpg
    139 KB · Views: 270
  • IMG_4994.jpg
    IMG_4994.jpg
    140.1 KB · Views: 272
Just read thru the thread. Great build! Thanks for sharing!

Definitely looking forward to seeing what you did to fit 35s!
 
Last edited:
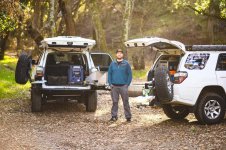
35" goodness.
 

Attachments

  • 20200424-DSC_3097.jpg
    20200424-DSC_3097.jpg
    136.2 KB · Views: 271
  • 20200424-DSC_3103.jpg
    20200424-DSC_3103.jpg
    144.1 KB · Views: 269

Members online

Forum statistics

Threads
278,312
Messages
3,554,089
Members
248,016
Latest member
Advally Service

Trending content

Back
Top