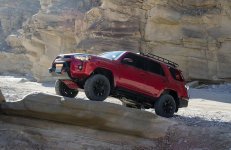
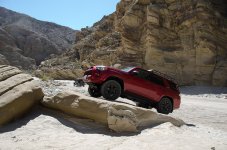
Installing the rear shocks
Time to catch up on the Warthog goings on...
Finally got time to install the Icon 2.5 adjustable rear resi shocks. A job easy enough even I could do it! Or so I thought...
Install:
* Use floor jack to jack up rear corner to let axel droop
* Take off wheel
* Use bottle jack to push up on the bottom of the shock mount a bit to release pressure on the stem bushings.
* Unscrew the top nut on the shock.
* Lower bottle jack again.
Now how to get the shock out? The stem at the top is trapped in the shock mount, the bottom wont come off because of the angle of the shock putting a lot of pressure on the bushing at the bottom hmm...
* Use crowbar to wedge the bottom about half way off.
* Use a light weight ratchet strap around the top stem and using the exposed hole of the bottom bushing and ratchet compress it. Viola!
Here is the bilstein next to the icon:
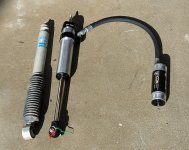
So then putting the icon in is basically the exact opposite, also using the strap to compress it (Putting the adjuster on "S" (for soft) makes that really easy)
At that pint I now need to install the resi itself using the bracket that came with it. There is a hole almost in the right spot... Almost:
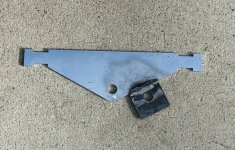
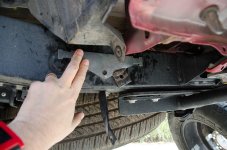
Love having the MIG around for this kind of thing. The bolts supplied didn't fit but I've removed so many stock items from the car I have a ton of stock bolts in a tin to use for things like this.
Painted up the bracket and got the drivers side one done! I bought the 2.5 boots for it from ORW on the way home from work one day.
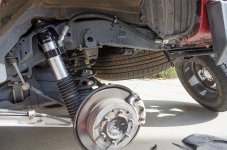
So with tire reinstalled it was time to do the Passengers side. It went really fast except when it came time to mount the bracket again. I had already welded on the extension assuming that the left and right side of the frame would be identical. HAHAHAHA!
Turns out that the built into frame mounting holes on the Pass side have no nut! ?!?! Ugh. And they aren't in the same position either. But about 6 inches away is a small access port with a plastic cap (Can be seen just under the hose connection on the resi in the above picture)
So... I carefully welded a nut to a clothes hanger, removed the plastic cap and had a friend position the nut behind the empty hole while I threaded it. Worked like a charm, cut the hanger and stuffed it inside the hole, cap back on.
Pass side done! Just another case of a welder making things SO much easier when unexpected things come up on an install.
How do they work?
Well I haven't had them out in the desert yet to really try them out. I was up at Big Bear doing some rocky trails, mostly slow stuff, not a lot to test the shocks out. SO mainly just street testing so far.
With the adjuster all the way to H (Hard) they seem to dampen down force close to the same as the Bilsteins, though not really hit them hard yet. However the rebound is WAY better than the 5100s which made my back end really bounce when I went over something that compressed them a lot.
Honestly I was hoping that the hardest setting would be a bit harder than the Bisteins, but happy with the performance driving over big dips and humps transitioning from street to parking lot that you get sometimes.
All the way at the S (Soft) setting, it's almost like the shocks aren't there

Well not quite, but super soft, the rear sway is very noticeable, but I really need to be out in the desert hauling ass over rough terrain to decide where I want to be between the two extremes. I'm keeping it on H on the street though!
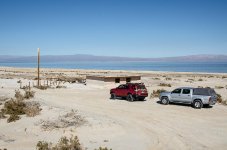
See here for a report on desert use:
http://www.toyota-4runner.org/5th-gen-t4rs/165542-warthog-build-adventure-thread-15.html#post1884457
Extra!
It's been said a few times that rebuildable coil-overs and shocks require more maintenance than just getting a decent regular "install and forget" shock like the Bilstein 5100s. So the advice goes, get the regular shocks for decent performance without the worry. (Well and they do cost a lot less to start)
Well after pulling the Pass side 5100 off the truck, only 11 months old, maybe 10 offroading trips, it was already starting to leak... whereas neither of the front coil-overs of the same age have started to leak at all.
I think that the lesson here is, if you do offroad much, you are going to wear out shocks FAST. One mile of desert offroading or mountain trailing is probably equal to 100 or more miles of road.
My old king coilovers lasted 10 years without needing a rebuild. Don't know how long the icons will go, but having to rebuild coilovers/shocks every few years isn't any more expensive or hassle than having to replace the regular shocks every 1-2 years.