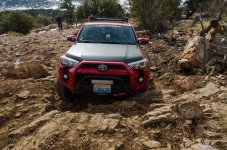
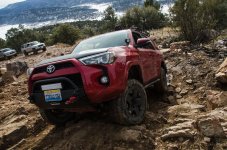
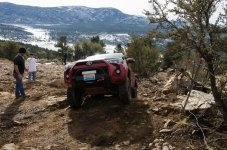
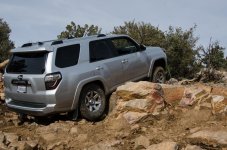
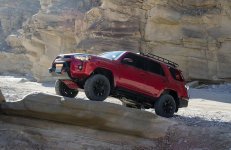
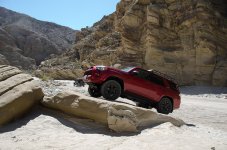
Warthog Build and Adventure Thread

I got the upper shock mounting hardware from icon today, super fast, super awesome. Thanks Icon and Wheelers Offroad!

I wan them on the runner so badly but it's so dark and I'm half burned out when I get home from work I can't see getting them on till this weekend. Grrrr... :cry:
 
I got the upper shock mounting hardware from icon today, super fast, super awesome. Thanks Icon and Wheelers Offroad!

I wan them on the runner so badly but it's so dark and I'm half burned out when I get home from work I can't see getting them on till this weekend. Grrrr... :cry:

Xmas this weekend!
 
Installing the rear shocks

Time to catch up on the Warthog goings on...

Finally got time to install the Icon 2.5 adjustable rear resi shocks. A job easy enough even I could do it! Or so I thought...

Install:

* Use floor jack to jack up rear corner to let axel droop
* Take off wheel
* Use bottle jack to push up on the bottom of the shock mount a bit to release pressure on the stem bushings.
* Unscrew the top nut on the shock.
* Lower bottle jack again.

Now how to get the shock out? The stem at the top is trapped in the shock mount, the bottom wont come off because of the angle of the shock putting a lot of pressure on the bushing at the bottom hmm...

* Use crowbar to wedge the bottom about half way off.
* Use a light weight ratchet strap around the top stem and using the exposed hole of the bottom bushing and ratchet compress it. Viola!

Here is the bilstein next to the icon:
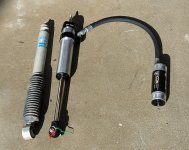
IconRear03.jpg


So then putting the icon in is basically the exact opposite, also using the strap to compress it (Putting the adjuster on "S" (for soft) makes that really easy)

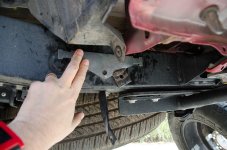
At that pint I now need to install the resi itself using the bracket that came with it. There is a hole almost in the right spot... Almost:
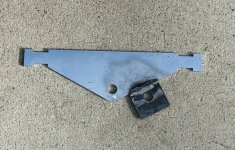
IconRear04.jpg

IconRear05.jpg


Love having the MIG around for this kind of thing. The bolts supplied didn't fit but I've removed so many stock items from the car I have a ton of stock bolts in a tin to use for things like this.

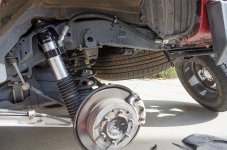
Painted up the bracket and got the drivers side one done! I bought the 2.5 boots for it from ORW on the way home from work one day.
IconRear06.jpg


So with tire reinstalled it was time to do the Passengers side. It went really fast except when it came time to mount the bracket again. I had already welded on the extension assuming that the left and right side of the frame would be identical. HAHAHAHA!

Turns out that the built into frame mounting holes on the Pass side have no nut! ?!?! Ugh. And they aren't in the same position either. But about 6 inches away is a small access port with a plastic cap (Can be seen just under the hose connection on the resi in the above picture)

So... I carefully welded a nut to a clothes hanger, removed the plastic cap and had a friend position the nut behind the empty hole while I threaded it. Worked like a charm, cut the hanger and stuffed it inside the hole, cap back on.

Pass side done! Just another case of a welder making things SO much easier when unexpected things come up on an install.

How do they work?

Well I haven't had them out in the desert yet to really try them out. I was up at Big Bear doing some rocky trails, mostly slow stuff, not a lot to test the shocks out. SO mainly just street testing so far.

With the adjuster all the way to H (Hard) they seem to dampen down force close to the same as the Bilsteins, though not really hit them hard yet. However the rebound is WAY better than the 5100s which made my back end really bounce when I went over something that compressed them a lot.

Honestly I was hoping that the hardest setting would be a bit harder than the Bisteins, but happy with the performance driving over big dips and humps transitioning from street to parking lot that you get sometimes.

All the way at the S (Soft) setting, it's almost like the shocks aren't there :D Well not quite, but super soft, the rear sway is very noticeable, but I really need to be out in the desert hauling ass over rough terrain to decide where I want to be between the two extremes. I'm keeping it on H on the street though!

See here for a report on desert use: http://www.toyota-4runner.org/5th-gen-t4rs/165542-warthog-build-adventure-thread-15.html#post1884457

Extra!

It's been said a few times that rebuildable coil-overs and shocks require more maintenance than just getting a decent regular "install and forget" shock like the Bilstein 5100s. So the advice goes, get the regular shocks for decent performance without the worry. (Well and they do cost a lot less to start)

Well after pulling the Pass side 5100 off the truck, only 11 months old, maybe 10 offroading trips, it was already starting to leak... whereas neither of the front coil-overs of the same age have started to leak at all.

I think that the lesson here is, if you do offroad much, you are going to wear out shocks FAST. One mile of desert offroading or mountain trailing is probably equal to 100 or more miles of road.

My old king coilovers lasted 10 years without needing a rebuild. Don't know how long the icons will go, but having to rebuild coilovers/shocks every few years isn't any more expensive or hassle than having to replace the regular shocks every 1-2 years. :)
 

Attachments

  • IconRear03.jpg
    IconRear03.jpg
    130.4 KB · Views: 2,094
  • IconRear04.jpg
    IconRear04.jpg
    139.2 KB · Views: 2,058
  • IconRear05.jpg
    IconRear05.jpg
    100 KB · Views: 2,124
  • IconRear06.jpg
    IconRear06.jpg
    137 KB · Views: 2,146
Last edited:
You have an amazing build man. I took inspiration on the Halo Warthog for my build which is why i got the custom TRD decal from Ghost and dipped it camo green. You're so lucky to have all these amazon spots to go wheeling!
 
Big Bear again

Last weekend I want on a trip to Big Bear with several others from T4R here. Was a really nice day, not a ton of snow but some on the shady side of things, the sunny side was all muddy.

After a long foggy drive up the 15/215 I got to the Big Bear Discovery Center. Just a bit over 2 hours. A couple others were late because not too long after I went through the drive up the 330 a car caught fire on the way up and closed the highway for a half hour. :(

Several runners, three 2014s! Also a shiny blue land cruiser joined at the last minute. Consensus was that we were going to go up Gold Mountain, a black diamond trail.. in the snow/mud. Eeep!

Something weird about going with several people, a group confidence takes over :D

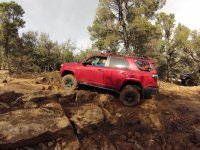
The start of the trail was interesting and mostly mellow, till we got to the first obstacle. Here is my front bumper barely missing scraping its way up a shelf:

_LA26878.jpg

Up I go!

_LA26881.jpg

And made it. Thanks almost entirely to [MENTION=111254]Klock[/MENTION] 's father "Senior" who did an excellent job of spotting for us all!

_LA26885.jpg

We lost three vehicles at this point. Two were together and one of the 5th gens, [MENTION=114132]Marcocopuffs[/MENTION] got a little damage on the rear door at about this point and decided to take it easier till he got some proper sliders.

Here is a picture taken just before the damage, and it shows how big the step up there was:

_LA26895.jpg

Almost immediately around the corner was another obstacle. VERY muddy, everyone was slipping and sliding around. I ended up having my rear end slide around sort of trapping my with a tree at my rear bumper and somewhat high centered on my gas tank skid. Just after this picture by [MENTION=111254]Klock[/MENTION] was taken I think.

GOPRO089_zpsbd91a792.jpg

After that "Senior" used a tow strap on me and gently drug me up out of my predicament.

Trail was mostly mellow from there till the third obstacle. Up hill of course and over and around some big rocks.

He finally came up with a way up them that had us going up the first set of rocks till the pass wheel was on the big rock, then moving forward and back about a foot while moving the front end over enough to get around another diff bashing bolder. Worked well and was interesting to drive, not being able to see ANYTHING then watch others go through it from the outside :D

Driving over the pointy rocks:

_LA26905.jpg

Once we got over the top we were heading into the shadow side of the mountain and there was finally the snow we came up to wheel in!

_LA26921.jpg

The way down wasn't too hard, nothing like the way up. Couple of steep spots where the truck would slide a bit on the way down, exciting :D

We made our way down to the main fire road 3N16 and headed west, going quite a bit faster, having some fun on the hard backed/slushy snow and some big puddles, then down 2N09 back down to the main road.

During the obstacle portions on the way up I engaged the air locker. I don't know if it was /necessary" but I had it on just in case. Other than the one where I slipped into a bad position and required towing out, the Warthog did really well :)

LOTS more pictures and other trip comments start here:
http://www.toyota-4runner.org/so-cal/184307-12-21-14-trip-big-bear-3.html#post1875449
 

Attachments

  • _LA26878.jpg
    _LA26878.jpg
    143 KB · Views: 2,072
  • _LA26881.jpg
    _LA26881.jpg
    143.1 KB · Views: 2,062
  • _LA26885.jpg
    _LA26885.jpg
    143.6 KB · Views: 2,041
  • GOPRO089_zpsbd91a792.jpg
    GOPRO089_zpsbd91a792.jpg
    138.5 KB · Views: 2,078
  • _LA26895.jpg
    _LA26895.jpg
    138.4 KB · Views: 2,209
  • _LA26905.jpg
    _LA26905.jpg
    140.3 KB · Views: 2,038
  • _LA26921.jpg
    _LA26921.jpg
    139.2 KB · Views: 2,122
Nice write up on the run and was good to meet you. Was a fun day and perfect weather, let's do it again sometime.
 
Damage Report!

Kind of looks like I drove through a giant puddle of paint! Ok, no damage there, already washed it all off.

PostBB1.jpg


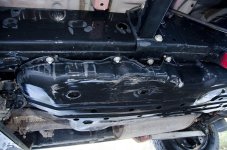
Gas tank skid... pretty well pushed in there. In the center it's pressing against the tank itself. This thing is useless. It may be the most important under armor needed so that's going next on my list of upgrades. Meanwhile I'll have to take it off and pound it out.

PostBB2.jpg


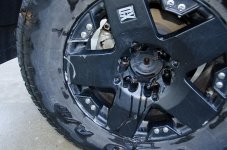
Yowch! I didn't even notice all the scrapes around the rim till I washed all the "paint" off. Ugh, I hate these wheels, not made for "wheeling" at all :(

PostBB3.jpg
 

Attachments

  • PostBB1.jpg
    PostBB1.jpg
    141.9 KB · Views: 2,047
  • PostBB2.jpg
    PostBB2.jpg
    137.1 KB · Views: 1,982
  • PostBB3.jpg
    PostBB3.jpg
    125.2 KB · Views: 2,006
Gas tank skid... pretty well pushed in there. In the center it's pressing against the tank itself. This thing is useless. It may be the most important under armor needed so that's going next on my list of upgrades. Meanwhile I'll have to take it off and pound it out.

You say it's useless. I say it did exactly what it was designed to do. But yes, that will also be the first of my heavier duty skid replacements simply because that part seems to be the lowest hanging and gets dragged more than any other part of my underside.
 
You say it's useless. I say it did exactly what it was designed to do. But yes, that will also be the first of my heavier duty skid replacements simply because that part seems to be the lowest hanging and gets dragged more than any other part of my underside.

Ha, yes, I guess it did a valiant job for what it is :) I was at one point resting the entire back end on the skid there!

I also got a very small scrape on the ring around the diff drain plug. And some new scrapes on the front skids but nothing a little paint wont cure :)
 
Borrego trip #1423

Borrego again :)

90 minutes to the freedom of off road bliss.

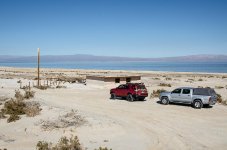
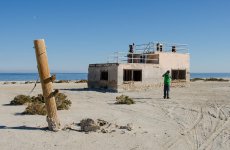
I took my 2wd friend out for some more sight seeing so nothing too tough. irst stop was the Salton Sea Test Base Salton Sea Test Base From Escondido to the SSTB is about 2 hours.

Next to one of the frequently flooded test buildings.
_LA26945.jpg


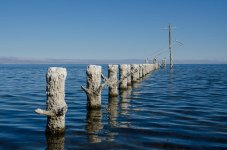
Part of the old PBY dock
_LA26957.jpg


Another test building further down the beach. Top mount was probably a radar of some kind. Had a lot of big power conduits going to it from the inside. Had a plague that said "Askania Pedestal"
_LA26967.jpg


From there we went up fish creek almost to the foot of the drop off. Purpose was to hike the canyon next to t it and find the dams and housing remnants of the old Harper ranch house.

The final half mile or so to the area I was planning on parking is a somewhat substantial 4x4 trail, didn't want to take the 2x down it so my friend parked and hopped into my truck and we went on down.

We found the dams pretty quick. Unfortunately it was getting dark and cold already. After going a ways up the canyon and not fining the cabin we turned around. Need to examine the location more and try again next time. I also want to explore Harper Flats for the Indian village site.
_LA26970.jpg


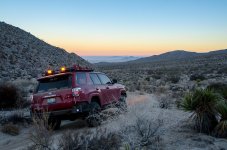
A reverse sunset, looking east as we headed back down the fish creek trail looking for a place to camp for the night.
_LA26979.jpg


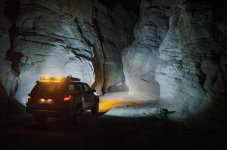
We ended up camping not far outside the entrance to Sandstone Canyon. After eating dinner I took the warthog out for some night exploring in the canyon.
_LA26991.jpg


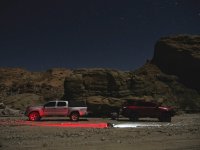
A night picture with a half moon and my RV crawler lighting up the canyon. Pic taken by my friend.
PC290140_ORF.jpg


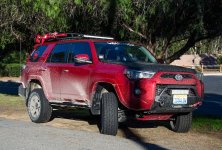
One of my first trips out to Borrego with my still very new runner, I stopped here for a pose picture at the Anticline portion of Split Mountain. I had my tires, rack and front coilovers. No bumpers, skids, lights and no rear lift yet! I stopped on our way out the next morning for an updated pic :)
_LA27002.jpg

A major cold storm, rain and snow was heading in the day we left. I skirted around Julian taking the Ranchita way back to avoid driving through too much weather. Only sprinkled a little. I parked outside when I got home and the rain over the next two days washed a lot of the dust off :)
 

Attachments

  • _LA26945.jpg
    _LA26945.jpg
    103.1 KB · Views: 1,808
  • _LA26957.jpg
    _LA26957.jpg
    116.1 KB · Views: 1,767
  • _LA26967.jpg
    _LA26967.jpg
    119.3 KB · Views: 1,885
  • _LA26979.jpg
    _LA26979.jpg
    131.6 KB · Views: 2,456
  • PC290140_ORF.jpg
    PC290140_ORF.jpg
    115.4 KB · Views: 2,004
  • _LA26970.jpg
    _LA26970.jpg
    137.9 KB · Views: 1,737
  • _LA26991.jpg
    _LA26991.jpg
    95.6 KB · Views: 1,768
  • _LA27002.jpg
    _LA27002.jpg
    131.9 KB · Views: 1,810
Last edited:
Here is a repost of the earlier poser pic.
Poser.jpg

Notice in the picture above I 'shopped out the old remnants of some kind of plaque structure or something that isn't too slightly :/
 

Attachments

  • Poser.jpg
    Poser.jpg
    138 KB · Views: 1,685
A test report on the Icon adjustable Resi rear shocks I recently installed. I now have a nearly complete Icon suspension, Front coil-overs, rear lift springs and shocks, lower control arms and UCA in shipment. The shocks were the latest piece installed and replaced my Bilstein 5100's I had on there till I could afford the rear Icons.

I finally got to test them out in the desert where they would do the most good.

The Bilsteins allowed me to lift the rear end and serviced as regular shocks, and were at least digressive to match the front lift, but they had a serious problem with allowing the rear end to rebound, hard; even jump at times if I hit something hard. Not as bad as the stock suspension, but still bad. If the rear end got compressed after a bump or landing a drop off, the springs would just launch it back in the air on rebound.

The Icons COMPLETELY nullify the rebound. It's amazing. Better than I was even hoping for after spending the money really. Taking med sizes humps and ledges and bumps offroad now the runner just smoothly runs over them with the cabin smoothly swaying and dipping, taking up the hits and controlling the rebound completely.

My poor friend in his stock Tacoma could not gauge what speed he needed to be at because he said the runner was just barely moving as it ran over things at 25-40 mph that would send him bouncing hard.

It's not long travel, but the matched front and rear Icons and springs give an amazing offroad ride and a real smooth long travel like feel up to the point where you actually bottom out anyway. :)

I settled on a setting of "8" on the resis with a medium 2 day camping gear load.
 
I've seen your signature with the pic of your 4Runner many times and always liked it and finally decided to read through the build thread. You've got an awesome truck! I really like all the modifications and the fact that you go out and use them for what they were intended for. I'm jealous of all the scenery you get to take your truck to out there, we don't have anything like that around here.

I do have a quick question. How did the plastidip on the front bumper hold up? I know you no longer have that piece on anymore, but was wondering how it held up with all the sand and other abuse being on the front bumper? Did you ever have to go back and redo it?
 
A night picture with a half moon and my RV crawler lighting up the canyon. Pic taken by my friend.
View attachment 141301

Awesome picture man, I think its crazy that you can actually see the stars in the picture. Maybe because I have never owned a quality camera.
 
I've seen your signature with the pic of your 4Runner many times and always liked it and finally decided to read through the build thread. You've got an awesome truck! I really like all the modifications and the fact that you go out and use them for what they were intended for. I'm jealous of all the scenery you get to take your truck to out there, we don't have anything like that around here.

I do have a quick question. How did the plastidip on the front bumper hold up? I know you no longer have that piece on anymore, but was wondering how it held up with all the sand and other abuse being on the front bumper? Did you ever have to go back and redo it?

There is a one inch strip of it still on there :D

It did really well. The only damage it got was one time I slammed the underside of that lip into the rough gritty desert sand going off a big hump in the road. That put a couple scrapes in it. Other than that it stood up to the normal road rocks and washing bugs off really well. I imagine I would have been redoing it every 3-4 years unless something big specifically damaged it sooner.
 
A night picture with a half moon and my RV crawler lighting up the canyon. Pic taken by my friend.
View attachment 141301

Awesome picture man, I think its crazy that you can actually see the stars in the picture. Maybe because I have never owned a quality camera.

Not too hard, just need a tripod and a camera that can take 15 or 30 second exposures. I left my tripod at home so had to rely on his pictures :)
 
The Warthog & Borrego

Like I told you before great spot ! Used to live up the hill n Ranchita , used to be a really good mexican resturant back n the day . Used to stop at the top & watch lightning strikes out in the desert & on into Mexico .
 
There is a one inch strip of it still on there :D

It did really well. The only damage it got was one time I slammed the underside of that lip into the rough gritty desert sand going off a big hump in the road. That put a couple scrapes in it. Other than that it stood up to the normal road rocks and washing bugs off really well. I imagine I would have been redoing it every 3-4 years unless something big specifically damaged it sooner.

That's good to hear. I may try using plastidip on my 3rd gen bumper then. The chrome is peeling on the front so I may try and use that to cover it up. If it needs to be redone every 3-4 years that isn't bad at all. I guess it can't hurt. Worst case I'm out only a few dollars.
 

Members online

Forum statistics

Threads
278,312
Messages
3,554,089
Members
248,016
Latest member
Advally Service

Trending content

Back
Top