Newbie Notes with Pics
Rear Daystar 1.5” Install – Newbie Notes
2008 SR5, V-6, 4x4, no Xreas
Sorry, I am not sure how to get pics in between paragraphs.
These were the instructions I was working with
REAR: very easy! Much easier with 2 people and the supplied Daystar instructions are suffice
1, Jack up rear end, jackstands in front of rear wheels on frame, wheels off. Place jack under center of rear axle
2, Disconnect lower shock bolts, pry off shock, don't be scared
3, Disconnect pan-hard bar (not sure why its called that), I only disconnected the bolt attached to the axle
4, Drop rear axle, take out springs and inverted cone bump stop thing, put rear spacer on spring, pry back in, tighten everything back up.
DONE!
Newbie Notes My Experience: Apply rust convertor and spray paint along the way.
1. 2 People or wife to help at one point just to hold bottle jack from falling.
2. Remove spare tire.
Place jack under differential and jack up vehicle to relieve weight from wheels, break lug bolts loose and finish jacking until wheels are about 2” off the ground. Remove wheels.
3. Place jack stands on each side of frame in front of rear wheels.
4. Let jack down until jack stands are engaged well, car should be very stable, check each jack stand for stability.
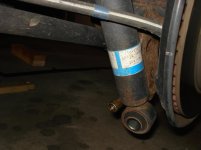
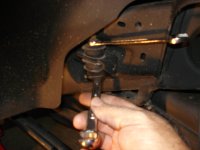
5. Disconnect shock and link arms both sides. Pics 1-2
Lower jack to let the axel droop, keep jack under diff just to support at lowest point.
At this point I did not disconnect Pan Hard Bar.
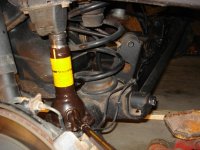
Place 2nd bottle jack on Driver side between bump stop and axel. Start turning jack by hand pushing the axel down. pic 3
Keep an eye on flex brake lines attached to axel. I pushed axel down until those were tight. This is where 2 people help, one jacking, one watching all lines.
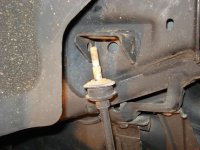
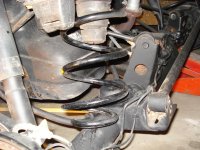
When you are down enough, your link arm bolt will be out of the bracket as seen in picture #4 and the coil spring should be easy to move and pull out.
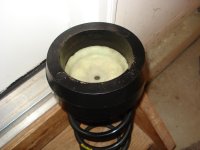
Assemble coil spring with bump on top of spring 1st, then spacer goes on top of that. pic 5
Now comes the fun part. Slip spring assemble into place while other person holds bottle jack. Squeezing it in there will flex the axel down more and you will likely loose pressure on jack. If someone else is not holding bottle jack it will likely fall. Try to get close like in picture #6. This is the position at which prying will take place to get the assembly in.
If you need to, move jack from under differential to under axel closer to opposite side.
At this point, put pry bar between axel and 2nd coil of spring and compress the spring onto the mount stay. It doesn’t take an enormous amount of force to get it up and over the hump. You may take bottle jack out of the way for this procedure. Spin spring around so that the end of last coil is against the recess stop on the bottom axel mount.
If you just can’t get it in, you may have to disconnect Pan hard Bar, it will be a pain to get aligned back up to replace bolt. The Pan Hard Bar is disconnected in this picture at the axel. You can see you get a little flex out of that, but others have done it without disconnecting.
After you pry spring into position, I put bottle jack under this side and jacked it up. Watch the link arm to make sure it goes into hole on bracket as your raising axel. Once aligned with shock, I tapped on shock with a mallet and installed shock bolt. Guide link arm into bracket, attach nut and tighten. The passenger side will be easier and there is more room to work.
Repeat procedure on passenger side. I was able to get passenger side out by myself and put it back in by myself. I used bottle jack to push axel down, but I could then remove jack and push down axel and pry spring assembly with spacer in with jack removed.
Remember to spin coil until end of last coil is against stop in lower mount. Jack everything up and connect shock and link arm.
Pan Hard Bar:
If you disconnected the pan hard bar, it will likely not be aligned to put bolt back in.
You need to push or pull axel towards passenger side to align pan hard bolt. Strap connected to frame on passenger side and axel near bolt location got me close, but I was still about 1/8” off.
I measured from garage base foundation to center of spindle (between lug bolts) on driver side. Measure the length of bottle jack. I cut a piece of 2x4 to this length.
Place 2x4 against solid wall, place bottle jack between 2x4 and spindle. Turn jack by hand until everything will hold itself.
I now would turn the bottle jack 1 turn and check alignment. Continue 1 turn at a time until bolt goes in, Bingo! Your now ready to tightened everything up and torque.
This procedure can probably be done several ways, but this is how I did it.
Doing the lift and painting as I went, eating, corresponding with forum members for advice took me about 10 hours.
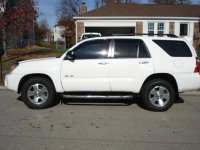
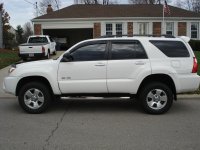
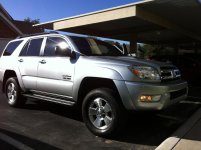
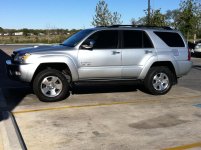
Final before and after pics coming today.
As always, allow plenty of time, patience, confir with forum if you get stuck.
Best regards, Doug





 . I'll have to keep my eye out for some FJ's and try them out.


