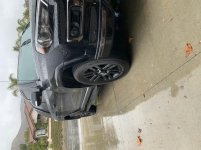
What did you do to/in your 5th Gen today?!

I have a bunch from start to finish. Here are a few
 

Attachments

  • E15454B3-0AD3-4D39-8D10-8F11A966BEE8.jpg
    E15454B3-0AD3-4D39-8D10-8F11A966BEE8.jpg
    65.7 KB · Views: 940
  • ACC4A9DD-2EAD-43CA-B12B-E3ED582B8F39.jpeg
    ACC4A9DD-2EAD-43CA-B12B-E3ED582B8F39.jpeg
    110.2 KB · Views: 955
  • 7CD08A94-21E0-49EA-B50D-5250A35DC414.jpg
    7CD08A94-21E0-49EA-B50D-5250A35DC414.jpg
    61.9 KB · Views: 941
  • E2BC9DDF-8C52-47F9-A972-F69177872E96.jpg
    E2BC9DDF-8C52-47F9-A972-F69177872E96.jpg
    59.6 KB · Views: 941
  • F754F6D1-ABF2-401F-97B6-CFECFBA62E6F.jpeg
    F754F6D1-ABF2-401F-97B6-CFECFBA62E6F.jpeg
    113.6 KB · Views: 949
  • 6A0B0A59-42E6-443F-869D-B3246C861888.jpeg
    6A0B0A59-42E6-443F-869D-B3246C861888.jpeg
    128.2 KB · Views: 958
  • DA6F5AB2-3031-4E5B-A4EE-4A864B57F9E6.jpg
    DA6F5AB2-3031-4E5B-A4EE-4A864B57F9E6.jpg
    54.8 KB · Views: 938
  • 2054C633-3C01-4DEA-B377-D943352FFD22.jpeg
    2054C633-3C01-4DEA-B377-D943352FFD22.jpeg
    120.9 KB · Views: 947
KC Highlights Installed

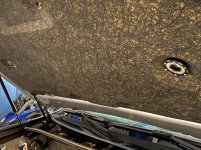
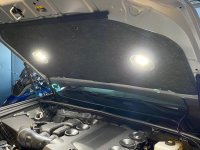
Put in some KC highlights under the hood to make up for Toyota not installing any lights to see the engine compartment. Night and day difference, worth the cost.
 

Attachments

  • E89CD331-EF0E-42E7-A63E-1F95433B90AB.jpg
    E89CD331-EF0E-42E7-A63E-1F95433B90AB.jpg
    143.9 KB · Views: 949
  • AC4A4483-9058-42BA-87DC-28B0EDE1B1B8.jpg
    AC4A4483-9058-42BA-87DC-28B0EDE1B1B8.jpg
    132.8 KB · Views: 938
I am digging this rack from Ecotechne. Low profile and clean look. Very minimal nose on the freeway as well. I was cruising around 90mph for at least 10 miles and the wind noise was very low.

<a data-flickr-embed="true" href="https://www.flickr.com/photos/191675456@N02/50856737593/in/dateposted-public/" title="4Runner New Rack"><img src="https://live.staticflickr.com/65535/50856737593_2ea9fa0fab_c.jpg" width="534" height="800" alt="4Runner New Rack"></a><script async src="//embedr.flickr.com/assets/client-code.js" charset="utf-8"></script>

<a data-flickr-embed="true" href="https://www.flickr.com/photos/191675456@N02/50856737283/in/dateposted-public/" title="4Runner New Rack"><img src="https://live.staticflickr.com/65535/50856737283_c9ef32ab60_c.jpg" width="800" height="534" alt="4Runner New Rack"></a><script async src="//embedr.flickr.com/assets/client-code.js" charset="utf-8"></script>

<a data-flickr-embed="true" href="https://www.flickr.com/photos/191675456@N02/50856732413/in/dateposted-public/" title="4Runner New Rack"><img src="https://live.staticflickr.com/65535/50856732413_37e33cc15a_c.jpg" width="534" height="800" alt="4Runner New Rack"></a><script async src="//embedr.flickr.com/assets/client-code.js" charset="utf-8"></script>

Try a piece of weatherstripping to fill in that gap between the roof and the rack. It'll be even quieter.

https://www.toyota-4runner.org/3117705-post13.html
 
Replacement Booths Ball Joints

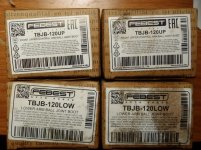
Replaced upper and lower boots on 100k miles, just preventive measure. Old wasn't torn, but inside wasn't much grease. Wiped old grease and filled with my favorite Red Lucas.
 

Attachments

  • P1200604.jpg
    P1200604.jpg
    141 KB · Views: 1,069
Last edited:
The TRD Pro rack isn’t completely useless! It would be nice if the cross bars were modular though.

Drilled a couple holes in the crossbars, used 1/2” 13 3.5” stainless bolts, some washers and spacers, and locking Hi Lift knobs. Need to get a 1/2” longer bolt to use the Hi Lift knob on the rear, but here is the result for now

t5j8VEL.jpg

[MENTION=536139]TRDHULK[/MENTION]
 
Kuat NV Base 2.0 Bike Rack

Got my new bike rack today. Feels really solid. Super clean look too.

<a data-flickr-embed="true" href="https://www.flickr.com/photos/191675456@N02/50864813826/in/dateposted-public/" title="Kuat Base NV 2.0"><img src="https://live.staticflickr.com/65535/50864813826_6dbe33045e_c.jpg" width="800" height="600" alt="Kuat Base NV 2.0"></a><script async src="//embedr.flickr.com/assets/client-code.js" charset="utf-8"></script>

<a data-flickr-embed="true" href="https://www.flickr.com/photos/191675456@N02/50864813611/in/dateposted-public/" title="Kuat Base NV 2.0"><img src="https://live.staticflickr.com/65535/50864813611_1db206a4c5_c.jpg" width="800" height="600" alt="Kuat Base NV 2.0"></a><script async src="//embedr.flickr.com/assets/client-code.js" charset="utf-8"></script>

<a data-flickr-embed="true" href="https://www.flickr.com/photos/191675456@N02/50864825411/in/dateposted-public/" title="Kuat Base NV 2.0"><img src="https://live.staticflickr.com/65535/50864825411_152d6e3fc5_b.jpg" width="666" height="1024" alt="Kuat Base NV 2.0"></a><script async src="//embedr.flickr.com/assets/client-code.js" charset="utf-8"></script>
 
Loaded up with enough clothes and gear for 10 days. Headed to AZ to pick up our expedition trailer, 2 days to get there then I'll take at least a week making my way back to Louisiana.

Sent from my SM-G986U using Tapatalk
 
This, plus about 10 good cuts on my hand. Must buy gloves.

Q8DEVic.jpg


0o8vCAu.jpg


GkjvtOf.jpg


Made a cover for the terminal block. Think that turned out well.

Need to run the three power cables tonight then hope it works.

After that, running wires for my compressor and various lights.


Looks awesome. This is one of my outstanding jobs waiting to be finished.


Sent from my iPhone using Tapatalk
 
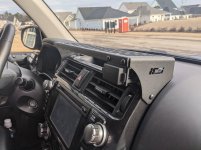
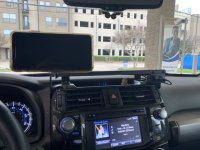
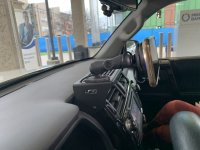
I mounted my ICS dash mount a couple of weeks ago but finally finished it the other day. Props to ICS for fixing the faulty dual power outlet!
 

Attachments

  • 0D28701E-CD5D-44C5-9D30-59937BAC44BF.jpeg
    0D28701E-CD5D-44C5-9D30-59937BAC44BF.jpeg
    100.1 KB · Views: 883
  • 07F11437-A782-40BF-97F7-3944E5B81D09.jpeg
    07F11437-A782-40BF-97F7-3944E5B81D09.jpeg
    87.2 KB · Views: 887
Got my new bike rack today. Feels really solid. Super clean look too.

<a data-flickr-embed="true" href="https://www.flickr.com/photos/191675456@N02/50864813826/in/dateposted-public/" title="Kuat Base NV 2.0"><img src="https://live.staticflickr.com/65535/50864813826_6dbe33045e_c.jpg" width="800" height="600" alt="Kuat Base NV 2.0"></a><script async src="//embedr.flickr.com/assets/client-code.js" charset="utf-8"></script>

<a data-flickr-embed="true" href="https://www.flickr.com/photos/191675456@N02/50864813611/in/dateposted-public/" title="Kuat Base NV 2.0"><img src="https://live.staticflickr.com/65535/50864813611_1db206a4c5_c.jpg" width="800" height="600" alt="Kuat Base NV 2.0"></a><script async src="//embedr.flickr.com/assets/client-code.js" charset="utf-8"></script>

<a data-flickr-embed="true" href="https://www.flickr.com/photos/191675456@N02/50864825411/in/dateposted-public/" title="Kuat Base NV 2.0"><img src="https://live.staticflickr.com/65535/50864825411_152d6e3fc5_b.jpg" width="666" height="1024" alt="Kuat Base NV 2.0"></a><script async src="//embedr.flickr.com/assets/client-code.js" charset="utf-8"></script>
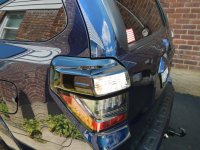
Looks like you blacked out the chrome on your tail lights the same way I did. Looks a lot better I think.
 

Attachments

  • DSCN5541.jpg
    DSCN5541.jpg
    137.2 KB · Views: 905
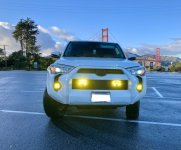
I added some Baja Designs LP6 lights behind the grill.

Looks good Mike!! Just curious which mounting bar did you use for the LP6’s. Also did you wire up to a push button switch. That what I did for my Bajadesigns led light bar. I was going this way then decided to do the light bar. Do you think the LP6’s fit good or do you think you should have went with the LP4’s? Thanks.
 
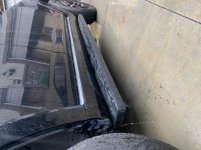
Test fitted these running boards today on my 2012 LE, surprised I got them to fit.
 

Attachments

  • C4694628-C19B-46F4-9FD8-CCA1CCBCBDB7.jpg
    C4694628-C19B-46F4-9FD8-CCA1CCBCBDB7.jpg
    130.9 KB · Views: 847
  • 3817DAB1-FD65-4B83-B35A-436D52B7254E.jpg
    3817DAB1-FD65-4B83-B35A-436D52B7254E.jpg
    133.3 KB · Views: 834
Last edited:
Put in some KC highlights under the hood to make up for Toyota not installing any lights to see the engine compartment. Night and day difference, worth the cost.

Looks great! How did you secure them to the hood? Did everything come in a kit or did you find a way to secure yourself?
 
Looks great! How did you secure them to the hood? Did everything come in a kit or did you find a way to secure yourself?

Thanks, I'm pleased with the outcome. The kit from KC comes with almost everything. What's missing are the replacement plastic pins I destroyed in the process of removing the hood insulation to route the wiring. Those and the two plastic pins I used to secure the lights, which are longer than the original plastic push pins. Here's what I ordered...

Original clips Amazon.com: Rexka Hood Insulation Retainer Clip Compatible with Toyota Lexus 90467-09050 90467-A0003 (Pack of 25): Automotive

Retaining rivet clips for lights Amazon.com: ALLMOST Pack of 50 Plastic Rivet Fastener Screw Bolt Clips for Rhino 450 660 700 Fender Hood Body qty50: Automotive
 
Last edited:

Members online

Forum statistics

Threads
278,316
Messages
3,554,122
Members
248,016
Latest member
Advally Service

Trending content

Back
Top