What did you do to/in your 5th Gen today?!

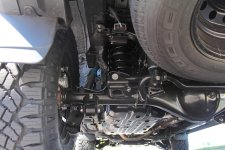
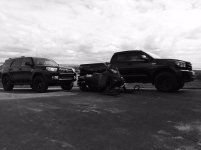
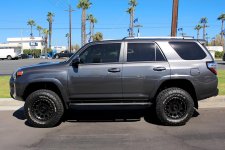
Finally got a chance to snap pics of my new suspension:

OME 885 Coils w/ Bilstein 5100's set at .85 in Front
Light Racing UCA's
Differential Drop Kit
Toytec Springs in the Back
Bilstein 5100's Rear
Goodyear Duratrac 285/70/17 on Method NV Race Wheels

I'm a happy camper :D
 

Attachments

  • IMG_9170.jpg
    IMG_9170.jpg
    138.1 KB · Views: 4,260
  • IMG_9166.jpg
    IMG_9166.jpg
    126.1 KB · Views: 1,237
  • IMG_9171.jpg
    IMG_9171.jpg
    133.2 KB · Views: 1,276
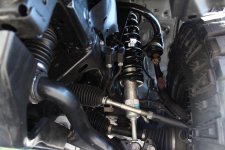
Finally got a chance to snap pics of my new suspension:

OME 885 Coils w/ Bilstein 5100's set at .85 in Front
Light Racing UCA's
Differential Drop Kit
Toytec Springs in the Back
Bilstein 5100's Rear
Goodyear Duratrac 285/70/17 on Method NV Race Wheels

I'm a happy camper :D
Lift looks sick. Just right IMO. Wheels and tires too
 
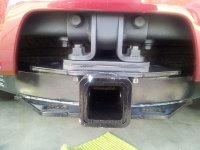
Hitch Receiver

I've been stalking long enough now.

Installed a Lexus GX 460 WD receiver on my 5th gen today.
 

Attachments

  • 20140823_115654.jpg
    20140823_115654.jpg
    133.4 KB · Views: 1,257
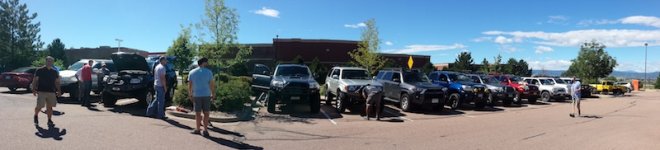
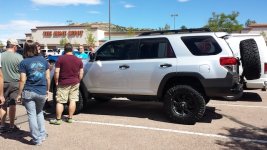
Just sharing a few pics from our meet in Colorado today, nice looking 5th gens!!!
 

Attachments

  • meetgreet.jpg
    meetgreet.jpg
    68.8 KB · Views: 1,110
  • meetgreet3.jpg
    meetgreet3.jpg
    112 KB · Views: 1,125
That old headboard is still kicking? :jaw:

Heck ya. I got it from duc at our mall crawl meetup last December. I really like it. I put muddy mountain bike stuff on the bottom all weather mat and repair kit and things I want to keep clean on the shelf. Also use it to dry damp gear without laying it on my seats. Very useful mod.
 
Had a light day!!!!

Installed:
Yellow 9005
HID 5000k H11
LED replacement for door, cargo and map lights (9 bulbs)

(did morimoto LED fogs last weekend)
 
Finished 1" Level and cleaned up the fleet, Kid hauler, Toy hauler and A$$ hauler.
 

Attachments

  • image.jpg
    image.jpg
    108.1 KB · Views: 1,073
Last edited:
forgive my ignorance... what's the difference between the lexus and toyota version?

Toyota (nor anyone that I have found to date) seem to offer a version of this type of WD receiver for the 5th gen 4Runner. Also, this hitch requires some "modification" in order to install.
 
Last edited:
My first mod to my T4R TEP! RAM iPhone mount/holder.

I just installed my first mod to my T4R! It was a simple one, but irreversible. I installed a RAM X-grip mount on my dash to hold my iPhone. You can see the final product of the mod below and my write-up is on my build page. Cheers!

f44be08a98bf64f22af48a2fd8f748c3.jpg
 
Another successful trip home, stomping around SW Colorado and some tweaks to the rig.
Taylor Reservoir near Gunnison
e3e4y8e2.jpg

Imogene summit
ata6uhuv.jpg

pymahage.jpg

Camped at the summit of engineer pass, 13k. Woke up with a bit of a headache, but stars and sunrise were amazing.
yvazumaj.jpg

Girl practicing with the new Canon T3 I got her. Great pics but I have no way to upload them haha. Need to get a laptop
yve2apum.jpg


Back in Denver I ran up to Toytec and picked up some spanners to adjust my front coilovers. Picked front up about 3/4" after bumper install. Leveled out nicely, and super easy procedure once I got a cheater pipe.
Also cut up my factory bumper to replace my headlight trim pieces and remounted my vision X light cannons after getting them back from warranty.
azaga2us.jpg

a6agy3yh.jpg

I made some brackets at work to facilitate mounting the lights down and back vaguely similar to the [MENTION=74569]SOcalTRAIL[/MENTION] mounting solution.
These lights are huge though so I just cut up my factory grill and they run through it. Not really "conventional" but I really like how it came out.
Cheers!
 
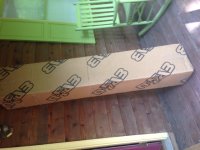
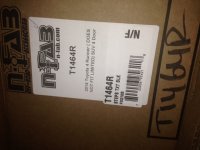
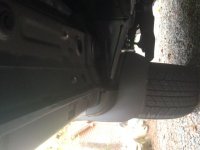
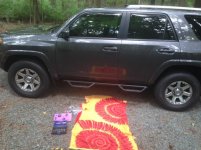
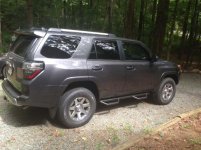
Added N-Fab Wheel-to-Wheel side steps

I Added some N-Fab Wheel-to-Wheel side steps to my Mag Grey '14 TE today. It was a simple and fun mod.

The only issue/note I would make is that when I used the 13mm socket to remove the factory bolts (per N-Fab's instructions), the bolts would sometimes move around within the socket. When I downsized to a 12mm socket to remove the factory bolts, it worked much better. Adding N-Fab bolts, locks and washers was simple with the 13mm socket per instructions.

Installation of both sides took about 30 minutes with my lady helping to hold the steps in place while I could start hand-threading the bolts. Only 5 bolts per side, 1 in the front, 2 in the middle and 2 at the rear of each tube.

I think the new steps really add to the appearance and usability of the truck! This will make it much easier for my 70 y.o. mother to climb up inside when she visits too.
 

Attachments

  • image.jpeg
    image.jpeg
    108.5 KB · Views: 1,114
  • image_2.jpeg
    image_2.jpeg
    98.4 KB · Views: 1,110
  • image_3.jpeg
    image_3.jpeg
    103.1 KB · Views: 1,112
  • image_4.jpeg
    image_4.jpeg
    99.9 KB · Views: 1,107
  • image_5.jpeg
    image_5.jpeg
    85.8 KB · Views: 1,114
  • image_7.jpg
    image_7.jpg
    51.9 KB · Views: 1,102
  • image_8.jpg
    image_8.jpg
    53.7 KB · Views: 1,115

Members online

Forum statistics

Threads
278,317
Messages
3,554,129
Members
248,016
Latest member
Advally Service

Trending content

Back
Top