What did you do to/in your 5th Gen today?!

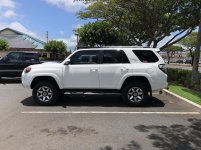
Bilstein

Couple days ago

Bilstein 5100 front and read
Daystar spacer rear
Wheel alignment
 

Attachments

  • 2B1104C9-7074-44C0-9178-A6B6C6DA40B0.jpg
    2B1104C9-7074-44C0-9178-A6B6C6DA40B0.jpg
    138.2 KB · Views: 985
Installed my Midland Radio MXT275 last night at O’Dark Thrity... so, sorry for the crappy pics...

3709283f28ab63966b51cbfb9b646ae1.jpg


74ed0417f5eb17c32527093ee1fc3582.jpg


Also installed my Rad Rubber Designs Splash Guards. The originals were in pretty bad shape after 112,000 miles...

495dfd3294b18439a4649ddd6de561d6.jpg


The passenger side originals were only missing one pin. The driver’s side was missing the entire forward panel...

9ac990d3f6ca53ba85dbd81359acc14c.jpg
 
Plastidip is junk and NEVER looks good. I don't get why people drop good money on a new truck but want to use a $6 can of garbage?

You can do good work with plastidip when you prep correctly. The trick to get it smooth is put the can in hot water for a couple minutes before you start. That loosens the plastidip in the can which makes it easier to spray. You also have to religiously clean the nozzle so theres nothing impeding the spray pattern. It would help to spray on a warmer day and then make sure nothing falls on the paint. (Standard painting practices) I mean, regular high temp automotive paint is $6/can too. The paint isnt the issue, its the technique used.

 
Shrockworks rock sliders and a full set of their skid plates. I didn't have a jack... that made it very interesting when I was doing the gas skid.

I used the bottle jack, which worked great... but reconnecting that stretchy strap was a real PITA!! Can't imagine doing it without the jack!
 
You can do good work with plastidip when you prep correctly. The trick to get it smooth is put the can in hot water for a couple minutes before you start. That loosens the plastidip in the can which makes it easier to spray. You also have to religiously clean the nozzle so theres nothing impeding the spray pattern. It would help to spray on a warmer day and then make sure nothing falls on the paint. (Standard painting practices) I mean, regular high temp automotive paint is $6/can too. The paint isnt the issue, its the technique used.

Maybe so, but it doesn't last. Just reminds me of what high school kids do to make their honda look "better". If you aren't sure you'll like it, use the dip since it comes right off and if you do like it, do it a better way. That's really the only use for dip for me. IMO, if you want to cover something long term, use vinyl or paint. Looks better, lasts longer, just better in all aspects. Yes, more expensive, you get what you pay for though.
 
Were you as disappointed at the quality of them as I was? I expected so much more out of an OEM Toyota product. They're like $20 made in china ebay junk lol. They do seem to be holding up OK so far though, I've had them on for about a year or so.
 
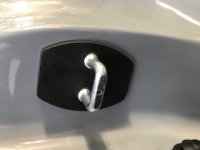
installed these mega expensive latch covers (I think all of 2.00 with shipping). no adhesive, they snap on
 

Attachments

  • IMG_0129.jpg
    IMG_0129.jpg
    17.3 KB · Views: 794
installed these mega expensive latch covers (I think all of 2.00 with shipping). no adhesive, they snap on

Such a simple thing can make such a big aesthetic difference. Would be a good idea to put a little grease back there just to avoid any standing water from causing rust. Do you have a link to them?
 
Were you as disappointed at the quality of them as I was? I expected so much more out of an OEM Toyota product. They're like $20 made in china ebay junk lol. They do seem to be holding up OK so far though, I've had them on for about a year or so.

I was a little surprised at how thin they were. Time will tell. Worse case is back to chrome which wasn’t bad as it was. I like both but think I like the Black better.
 
I guess it wasn't so much the quality, but more what we got for the $80-$90 they cost. By no means are they worth anywhere even close to that. We did buy them though so there's always that lol I guess we paid for convenience and no shitty dip job.
 
Threw on a Waterport today. Test run looks like this will be super convenient for dishes and quick rinses. Happy with initial impressions.
3b5ade24e112e37a8f74d546f8f269dc.jpg
af5f4ddafb75e6e79402c45c66f7d180.jpg


Sent from my SM-G950U using Tapatalk
 
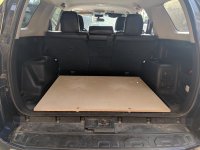
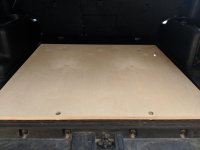
Worked on my "don't call it a goose gear" rear platform. Used 3/4" Baltic Bird plywood. This is the second iteration. Will put some herculiner on it to finish it. Still deciding how I want to proceed with this. Most likely going with the ATOverland Combo Slide and not sure if I want to do a single drawer or just go with L-track and Alu-boxes.

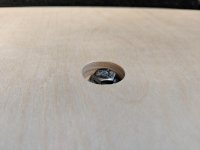
The platform is mounted to the rear cargo area using rivnuts. If you remove the carpet there are holes to insert some rivnuts. In the front there are some factory spots you can put them in and in the rear I lifted up the plastic panel and removed two of the white clips. Then opened up those holes with a drill big enough to insert 1/4-20 rivnuts. Drilled a hole over the top of the plastic trim enough to insert the bolts. I used some nylon spacers between the trim and platform to keep it level once you tighten the bolts down. Its solid, no movement, wiggle, or rattling.
 

Attachments

  • IMG_20180813_184504.jpg
    IMG_20180813_184504.jpg
    129 KB · Views: 1,030
  • IMG_20180813_184515.jpg
    IMG_20180813_184515.jpg
    126.7 KB · Views: 982
  • IMG_20180813_184525.jpg
    IMG_20180813_184525.jpg
    132.4 KB · Views: 998
B01DABFB-37B9-4EA7-822A-4DF69C19737C.jpg

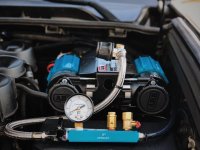
Put together an onboard air system. Saw that they make these for JKs so built one for my 4Runner. Hoses route from the manifold to all 4 wheel wells to inflate and deflate at the same time.
 

Attachments

  • B01DABFB-37B9-4EA7-822A-4DF69C19737C.jpg
    B01DABFB-37B9-4EA7-822A-4DF69C19737C.jpg
    126.8 KB · Views: 935

Members online

Forum statistics

Threads
278,317
Messages
3,554,129
Members
248,016
Latest member
Advally Service

Trending content

Back
Top