Changed out the fuel filter last night. Pretty simple, but one connection kept leaking. Ended up having to really tighten it down to stop. The 4runner seems a bit better throttle response, but it could be an illusion.
Changed out the fuel filter last night. Pretty simple, but one connection kept leaking. Ended up having to really tighten it down to stop. The 4runner seems a bit better throttle response, but it could be an illusion.
Did you use any torque specs to tighten the connection down? If so, what did you tighten it to?
Cleaned out dirty clothes, trash, empty bottles. Vacuumed the whole car, ended up cleaning my sub (the cloth collects a lot of dust and dirt). Washed it down with some water and shot the wheels with some wheel cleaner. Made sure to get the brakes good.
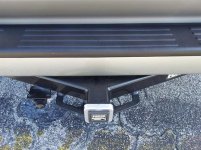
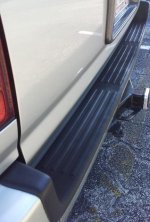
didn't do it today, but over the weekend the bumper and the strips over the wheel wheels got plasti-dipped black to match the grille and logos. This weekend it's the wheels to match. Looks good with the Desert Dune.
Did you use any torque specs to tighten the connection down? If so, what did you tighten it to?
Cleaned out dirty clothes, trash, empty bottles. Vacuumed the whole car, ended up cleaning my sub (the cloth collects a lot of dust and dirt). Washed it down with some water and shot the wheels with some wheel cleaner. Made sure to get the brakes good.
Not sure how you would torque down the fuel filter fittings? No way to get a socket on them, you have to use a wrench, preferably a flare nut wrench. I just did mine last week, and I just tightened it down until it stopped leaking.
Did you use any torque specs to tighten the connection down? If so, what did you tighten it to?
Cleaned out dirty clothes, trash, empty bottles. Vacuumed the whole car, ended up cleaning my sub (the cloth collects a lot of dust and dirt). Washed it down with some water and shot the wheels with some wheel cleaner. Made sure to get the brakes good.
Not sure how you would torque down the fuel filter fittings? No way to get a socket on them, you have to use a wrench, preferably a flare nut wrench. I just did mine last week, and I just tightened it down until it stopped leaking.
Yup what Kraze said. There is no way to attach a torque wrench so I did it till it stopped leaking. Its a very simple repair and worth it for the $27 a filter costs.
Not sure how you would torque down the fuel filter fittings? No way to get a socket on them, you have to use a wrench, preferably a flare nut wrench. I just did mine last week, and I just tightened it down until it stopped leaking.
Yup what Kraze said. There is no way to attach a torque wrench so I did it till it stopped leaking. Its a very simple repair and worth it for the $27 a filter costs.
This community is great. People can ask questions (like I did) and not get sh*t for it. Everybody is willing to lend a hand or help. Love it! Thanks guys. Can't wait to get my hands on that 4x4! So many things I want to do. I JUST WANT TO START WORKING ON A 4RUNNER AGAIN! :hurt:
Purchased some things for tomorrow's "Work on the Runner" bash.
Bought:
- Mobil 1 5w-30
- Mobil 1 Filter
- 2 Chevron Techron fuel system treatments
- Plasti-Dip (for the emblems. Not sure if i'll like it but i'll give it a shot)
In the mail:
- Fog Light kit (I need extra light!)
- TRD Decals
So tomorrow I will be doing:
- Oil Change
- Fog Light install
- TRD Decals
- Plasti-Dip emblems
Coming soon:
Timing Belt, Radiator, Water Pump ( money is ready, garage time/space, not so much. Lol)
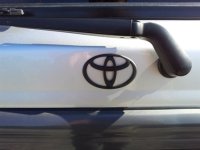
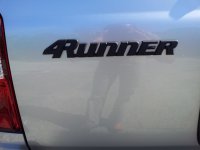
Went to town with the plasti-dip. Hit all my rear badges with it. Then I hit the plastic insert on top of the rear bumper. Looks good as new. It was all faded and nasty looking. I like the badges black. This project has been on my to do list for way too long. Glad it is done. Next I plan to hit my roof rack rails with plasti-dip to bring them back to life. Cheers.
Went to town with the plasti-dip. Hit all my rear badges with it. Then I hit the plastic insert on top of the rear bumper. Looks good as new. It was all faded and nasty looking. I like the badges black. This project has been on my to do list for way too long. Glad it is done. Next I plan to hit my roof rack rails with plasti-dip to bring them back to life. Cheers.
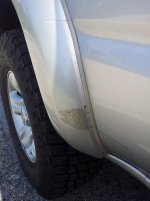
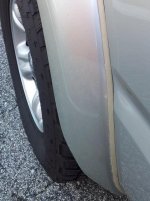
I knew that was coming. Here are a few. Also removed the clear film/adhesive from my rear flares. Stuff was looking rough. Figured since I installed mud flaps up front after I dumped my running boards, might as well. Before and after pic.
Used plasti-dip to paint badges and rear plastic bumper insert on top of bumper. Hopefully it holds up for a while. Next I plan to hit my roof rails as they are looking rough.
I purchased some spyder tail lights for my '01 from carid.com when i was installing them, the reverse light housing did not fit in the new tail light. has anyone else had this issue? the review on the website are great, but they all had '98s and '99s. Is there a difference in the reverse light housing on the '01s and '02s??
I knew that was coming. Here are a few. Also removed the clear film/adhesive from my rear flares. Stuff was looking rough. Figured since I installed mud flaps up front after I dumped my running boards, might as well. Before and after pic.
Used plasti-dip to paint badges and rear plastic bumper insert on top of bumper. Hopefully it holds up for a while. Next I plan to hit my roof rails as they are looking rough.
I gots me one of them new fangled scanguage ii doohickies. What an interesting piece of gear. Tomorrow welding together rock sliders for prep and painting-
got my 30 spline Longfields installed and assembled the rest of the front axle.
<a href="http://s25.photobucket.com/user/maloa/media/IMG_2774.jpg.html" target="_blank"><img src="http://i25.photobucket.com/albums/c82/maloa/IMG_2774.jpg" border="0" alt=" photo IMG_2774.jpg"/></a>
also sleeved the draglink and tierod. just have to weld it all up now.
<a href="http://s25.photobucket.com/user/maloa/media/IMG_2776.jpg.html" target="_blank"><img src="http://i25.photobucket.com/albums/c82/maloa/IMG_2776.jpg" border="0" alt=" photo IMG_2776.jpg"/></a>
<a href="http://s25.photobucket.com/user/maloa/media/IMG_2775.jpg.html" target="_blank"><img src="http://i25.photobucket.com/albums/c82/maloa/IMG_2775.jpg" border="0" alt=" photo IMG_2775.jpg"/></a>
Pulled this rats-nest of wires from behind my dash, any idea of what used to be back there? The previous owner just cut the wires and left them in place.
I purchased some spyder tail lights for my '01 from carid.com when i was installing them, the reverse light housing did not fit in the new tail light. has anyone else had this issue? the review on the website are great, but they all had '98s and '99s. Is there a difference in the reverse light housing on the '01s and '02s??