What Did You Do To Your 3rd Gen Today?

Status
Not open for further replies.
I used about half a gallon of dupli-color bed armor on the places I could reach with a brush.

Tomorrow I'll spray the rust and hit the front when I do the TBU
7750655e63964c853a944c05d4626efc.jpg
6e66b24fcf804ff99d258a0cc034e914.jpg
f4e2b0f2f9116e7b9bcca96370af2f88.jpg
4db215b7dd93de472df431eae93439e7.jpg
3f76e63eef6044273ef28be3d59f5b58.jpg


Sent from my iPhone using Tapatalk
 
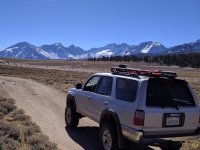
Just got back from Coyote Flats. For those interested the road is in great shape right now. Never needed low range at all. Coyote, Funnel, and Rocky Bottom are all gone. There isn't even a trickle left. Major bummer about Rocky Bottom especially.

So, since fishing those lakes was out I went back down the road and punched it to Baker Creek. A quick mile up to Hidden Lake and it was already frozen over. Damn it. Baker's at a higher elevation so I didn't even bother hiking the extra half mile or so up to it.

Sitting on a rock at Hidden while eating lunch with the wife I saw a very tiny slice of open water up near the inlet. I hiked over there and it was indeed open water. It started about five feet out, was 4-6 feet wide and about 25 feet long. There where four nice fish hanging out on the edges of the ice.

Out came the 3 weight fly rod and an olive wooly bugger. First cast landed did center of the open water. Then the fish took off. Alpine fish are as spooky as they come and I should have known better. I went back up to where my wife was sitting to grab my mini jig rig. About ten minutes later the fish where back. I got as close as I could and lobbed an orange/black jig into the water. Two seconds and it was fish on. Not huge but big enough that I was happy.

As it got close to the ice I did a quick pull and slid him over to me. About 12 or so inches. He got tossed. and I do mean tossed, back into the open water. I had to wait another 15 minutes or so for a fish to come back after that. One more 14 incher later and it was time to go home.

I've fished a lot of alpine lakes in the Sierra but Hidden had always eluded me. It's a long way in by foot and I never had a rig that could get me there on the 4x4 roads. I am so stoked to finally have a 4runner that can do what I need it to when I need it to. I'm already planning a weekend back in there in the spring. If any of you guys want in let me know.

Here's a photo of the way into Baker with the Palisades as the backdrop. Man, my town really sucks.:p
 

Attachments

  • IMG_20161105_121855.jpg
    IMG_20161105_121855.jpg
    135.4 KB · Views: 586
Spent the night last night putting my lift in. Had a lift party with the boys!
f86d01694c73960929495e16dc71eb43.jpg


Then we put these bad boys in. TRD Tundra front struts.
cb53b5462419eae6fd4b974c81ec0322.jpg

And these OME 891 coil springs.
9677b4aab3179b5513683b32363f0c62.jpg

Along with these bilstein 5100 rear shocks.
bcb6e2c9db9bc4874d61fd2b07c14787.jpg

b38981d3ddce565b66430a2ac6f597d0.jpg

Had to cut the old shocks out because of nasty top nuts that wouldn't come out even after cutting the dust shields and gripping the shafts with a vise grip.
While we were cutting out the rear shocks I got to work on the tires
b4d5fca506407e5a96bdd07df6e32572.jpg
88b720db727d23743e4f6e8af47d30a1.jpg

Some nice meaty Cooper A/T3 265/75 R16s
c59e42f518bf42966c7e4589270f759a.jpg

Side by side comparison from my original 99 springs (190k mi) to the 891 OME.
c70bc03807045fb6448c3cf336f12837.jpg

Installing the last coil spring in the rear! Say hi to Jake.
ff8a9d4b67dd947cc98c28d59015af12.jpg

7941e6dca0e784e08dc926ee09d272b9.jpg

On the ground looking pretty!
4a8c97edb9570c9a60a4f268b36b565a.jpg
31ea0447e4df6320d1841d85c4457995.jpg

Before.
f5342c3740526dadf3d334471a41e581.jpg

After (next to a crosstrek XV for effect)

I was a bit worried about the OME 891 springs being hard and not giving a good ride but boy was I wrong. They are amazing. They ride exactly like I want and they match the front struts super well. This is better than anything I expected and compared for the blown shocks and tired springs I had before it's a world of difference.

Next on the list is to get a bumper that will hang on to this that I picked up from the dealership for no money at all since it sat there for 5 years...
94df84ec6fae62e16fa7a2310e1379c8.jpg


TO BE CONTINUED...


Sent from my iPhone using Tapatalk
 
Last edited:
I finally got my Tacoma whip mod sorted out. I just needed to route the antenna cable, but had missed anyone mentioning the passenger side kick plate removal to obtain an easy visual to guide the cable through. With the kick plate removed, it was too easy. Without doing so is it quickly turns into a fools errand. Most of the popular write ups don't talk about this important detail very much.

I also picked up some Pro Comp 7069 wheels. I have very minor rubbing at full lock with my tired suspension and 265/75/16s. I think this will get sorted with my new lift and SPC Light Racing UCAs.
 

Attachments

  • IMG_20161105_150441.jpg
    IMG_20161105_150441.jpg
    87.1 KB · Views: 703
  • IMG_20161105_150314.jpg
    IMG_20161105_150314.jpg
    96.1 KB · Views: 663
  • IMG_20161105_150354.jpg
    IMG_20161105_150354.jpg
    83.7 KB · Views: 622
Last edited:
I finally got around to installing the Marlin shifter seat and socket I've had for a while. The OEM I replaced was in really good shape, so I'd guess it was replaced at some point by the original owner. I didn't expect to notice any difference, but the shifts seem to be slightly smoother. It may be the Delrin vs the stock rubber, or more likely it's just placebo, but it works for me. I plan on replacing the fluid with Redline MT-90 soon and replacing the squeaky clutch pedal bushing and she should be good to go for a bit.
 
Did my Sunday morning chore and washed...

Green 4runners look great when fresh and clean. Well.. they look great dirty too for that matter, but the color combo that you are rocking with those rad SCS Ray 10s really looks good. Those are one of my all-time favorite designs. That brushed copper wheel rocks!
 
Like the BFGs on the 7069s [MENTION=119532]Road Bull[/MENTION], I went Firestone Destination 265 75 16, on the same wheels, and rub a bit as well.

Have some 99 springs en route for the rear, waiting to see what it looks like before I do the front end.

Waiting on OEM ITR to arrive; and hopefully do inners, outers, LBJ and steering rack bushings in a weekend before the weather goes....
 
Like the BFGs on the 7069s [MENTION=119532]Road Bull[/MENTION], I went Firestone Destination 265 75 16, on the same wheels, and rub a bit as well.

Have some 99 springs en route for the rear, waiting to see what it looks like before I do the front end.

Waiting on OEM ITR to arrive; and hopefully do inners, outers, LBJ and steering rack bushings in a weekend before the weather goes....

Thank you. I have been doing the same. I have tried knock out all the important pre lift maintenance. I have done the OEM ITR/OTR, as well as OEM LBJs. I swapped out my CVs with Napas when I did my TBU. But I should do a rack bushing refresh too I suppose.
 
Did the tundra brake upgrade
0022395aaf085f88a791764e30378e36.jpg


Sent from my iPhone using Tapatalk


Is it that much of a difference to do the upgrade from stock brakes?


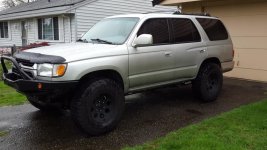
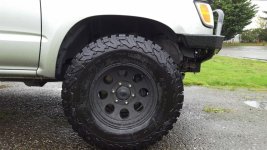
2002 T4R 3" Rough Country suspension lift, K&N intake, Method Race wheels, 33" Mickey Thompson Mud Terrain, Savage off-road front winch bumper, Warn 9000lb winch, CBI ditch light brackets, KC ditch lights.
 
more frame prep

This week I spent a couple days cleaning up the underside of my 4runner, getting it ready for surface rust treatment and prevention painting.

Used Zep 505 commercial degreaser cleaner on the remaining mud stains with scotch bright scouring pads and elbow grease.
http://www.zepcommercial.com/product/Fast-505-Industrial-Cleaner-and-Degreaser
Fast-505-Cleaner-and-Degreaser-ZU505128.png


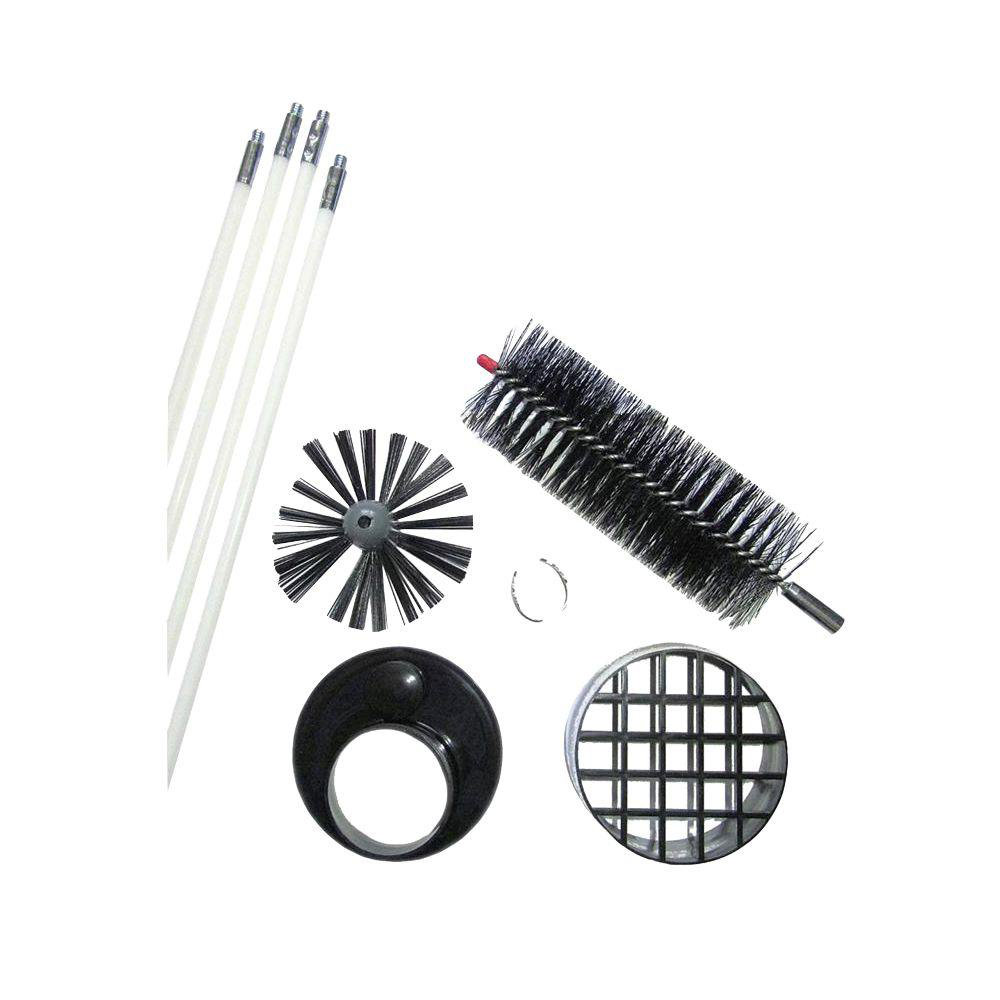
I had already hosed-out the inside of the frame (made a 'frame sprayer' using a long pex tube, attached a hose adapter at one end, screw in the other, drilled a few small 'sprayer' holes). That Zep 505 cleaner worked so well I decided to spray it in the frame and scrubbed the inside of the frame using a dryer vent cleaner kit.
http://www.linteater.com/included/
LintEater-Rotary-Dryer-Vent-Cleaning-System-RLE202.jpg


I used the smaller scrubber, ran it from the back of the truck frame opening to the front. (I have the rear bumper off right now.) Together these did am excellent job getting the frame cleaned out, ready for the Eastwood Internal Frame Coating treatment.

 
Is it that much of a difference to do the upgrade from stock brakes?


2002 T4R 3" Rough Country suspension lift, K&N intake, Method Race wheels, 33" Mickey Thompson Mud Terrain, Savage off-road front winch bumper, Warn 9000lb winch, CBI ditch light brackets, KC ditch lights.


I still need to get all of the air out of the system but it is smoother for sure. My brakes before we're very tight a strong but extremely thin.
I just wanted longevity


Sent from my iPhone using Tapatalk
 
This week I spent a couple days cleaning up the underside of my 4runner, getting it ready for surface rust treatment and prevention painting.

Used Zep 505 commercial degreaser cleaner on the remaining mud stains with scotch bright scouring pads and elbow grease.
http://www.zepcommercial.com/product/Fast-505-Industrial-Cleaner-and-Degreaser

I had already hosed-out the inside of the frame (made a 'frame sprayer' using a long pex tube, attached a hose adapter at one end, screw in the other, drilled a few small 'sprayer' holes). That Zep 505 cleaner worked so well I decided to spray it in the frame and scrubbed the inside of the frame using a dryer vent cleaner kit.


I used the smaller scrubber, ran it from the back of the truck frame opening to the front. (I have the rear bumper off right now.) Together these did am excellent job getting the frame cleaned out, ready for the Eastwood Internal Frame Coating treatment.
Genius. I've been thinking of how to "scrub" the inside of the frame before rust treating. I never thought to use a dryer vent cleaning kit. I didn't even know those existed. I always cleaned my dryer vents with a leaf blower. Well done sir! [emoji41]
Sent from my SM-G930T using Tapatalk
 
Last edited:
more work on the drawers:


skinnded the top of them to glue the plywood on. yes, i still need to trim the front and make everything even. heres my solution to folding down the rear seats:


this frame is slightly wider than the main portion. when not in use it will slide over the main drawer frame. when i need to use it as a sleeping platform, i just fold the seats down and pull out the extra frame, which will have plywood over the top as well
 
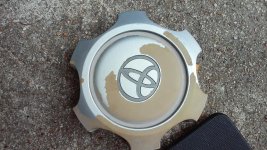
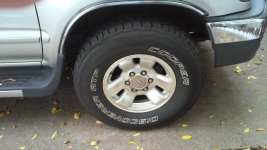
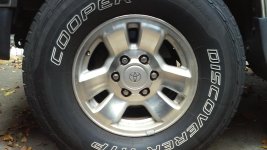
Hubcap Beautification last Saturday.

Not a perfect job, but better than it was !


Before & after:
 

Attachments

  • 20161105_102813.jpg
    20161105_102813.jpg
    149.5 KB · Views: 570
  • 20161105_093138.jpg
    20161105_093138.jpg
    134.2 KB · Views: 589
  • 20161105_102550.jpg
    20161105_102550.jpg
    134.3 KB · Views: 566
Picked up a set of SR5 fender flares for my poor naked base model.

Looks like I'm missing the front mud guards. I'm guess OEM will be hard to find, can anyone recommend an aftermarket replacement?

IMG_0433_zpspf4asla9.jpg~original
 
Status
Not open for further replies.

Members online

Forum statistics

Threads
278,316
Messages
3,554,120
Members
248,016
Latest member
Advally Service

Trending content

Back
Top