What Did You Do To Your 3rd Gen Today?

Status
Not open for further replies.
Big day, lots of things pending, but for now I'll just leave this here

5fb80351376ba806306278c8c296b213.jpg
 
Did a few things
- Replaced driver door seal with a passenger side one from the junkyard, works well so far
- Removed my running boards
- Installed by BXBuilt retrofits (took 9 months to get, so happy to finally have them)

2f9b410424b74994948e9dc4729244cc.jpg

6e066d3de4d2254201033a4e5be5c8f9.jpg

ce69816d6759c9936374934e77c8a662.jpg

3dfc16e03bf0cd70ae6c19ad5d4bd462.jpg

74faa410218fb7e8164c4f14e7ee6513.jpg


Sent from my iPhone using Tapatalk
 
It's idle

It's sitting at a dealer who could not give me a diagnosis for why there is a strong smell of gasoline when I drive it. What do I need to do to start a new thread so I can ask the forum about fuel injectors?
 
It's sitting at a dealer who could not give me a diagnosis for why there is a strong smell of gasoline when I drive it. What do I need to do to start a new thread so I can ask the forum about fuel injectors?

You'll need to post about 15 replies before you can start a new thread. It's an old forum setting that was intended to prevent bots/spam.

But you can reply to "The 3rd Gen All Questions Allowed Thread" and ask any question you'd like. Here's a link to that thread: The 3rd Gen All Questions Allowed Thread

Welcome to the forum, and best of luck!
 
Last edited:
Definitely needed to swap out my pressure vent, no flap to be found.

I've seen those 3D printed (I think?) vents before but what exactly is the purpose behind them over replacing with the stock flapper? Durability? Stops little animals getting inside? Do you know if it has the same airflow as the flappy vent?

Replacing that vent is a highly underrated bit of maintenance to do. I basically filled up my shop cleaning out the dust that was behind there with no flap it was crazy.
 
I've seen those 3D printed (I think?) vents before but what exactly is the purpose behind them over replacing with the stock flapper? Durability? Stops little animals getting inside? Do you know if it has the same airflow as the flappy vent?

They add a filter to the one-way vent, so when the vent opens, nothing comes in. My understanding is that while the original vents are technically one-way, they are flimsy enough to not be truly one-way in practice, especially over time. It's mostly an issue in dry and dusty environments.

Cabin Vent System

From the website: "Toyota designed their vehicles with cabin pressure vents, to allow the air pressure to escape when you close your doors or run the AC/heater. Without these vents, your doors would be hard to shut and your AC would barely blow. The air has to go somewhere after all! But the problem with these one-way vents is that they are down low on your rear quarter panels, and they are flimsy. It only takes a few years of off-road use to break them down. Then those one-way valves become open windows for air, water and dust to get in."
 
Last edited:
What my 3rd Gen did today

Got her smogged, next a power steering leak to be fixed. Then we’re getting on with body cosmetics, which after raising my granddaughter in it since she was 3 (now 22) it needs. She also wrecked it when a junior. Need to replace driver side mirror whole unit, bummer and driver side headlight, then paint. It’ll be good to go for another 200,000 miles. With all of your help at times. Great to be here!
 
Slowly and surely "restoring" my rig to OEM standards. I returned back to halogen headlight bulbs, new of course, and I couldn't be happier. They have way better downroad visibility than LEDs and they just look better I think. I also swapped my grille, I had installed the 99-00 grille a few years ago thinking it looked better since it was flush, and not so bulky like the 01-02 grilles. Well, I purchased another 01-02 grille from a forum user here and I plasti dipped the chrome, except the Toyota emblem in the middle. Looks fantastic and I'm much happier now. Opinions seem to change over time. Also going to purchase the rear hatch emblems that say "4Runner" "SR5" "4WD" and "TOYOTA" from another forum user on here. Going to dip those, then re-install since I debadged my truck shortly after buying it 9 years ago.

Side note, any suggestions on adhesives to use for a clean, mess-free, permanent install?
 
Slowly and surely "restoring" my rig to OEM standards. I returned back to halogen headlight bulbs, new of course, and I couldn't be happier. They have way better downroad visibility than LEDs and they just look better I think. I also swapped my grille, I had installed the 99-00 grille a few years ago thinking it looked better since it was flush, and not so bulky like the 01-02 grilles. Well, I purchased another 01-02 grille from a forum user here and I plasti dipped the chrome, except the Toyota emblem in the middle. Looks fantastic and I'm much happier now. Opinions seem to change over time. Also going to purchase the rear hatch emblems that say "4Runner" "SR5" "4WD" and "TOYOTA" from another forum user on here. Going to dip those, then re-install since I debadged my truck shortly after buying it 9 years ago.

Side note, any suggestions on adhesives to use for a clean, mess-free, permanent install?


There are a few different options. On my T100 I used the yellow glue that they sell at (I think) ACE, and it turned out great. On my 4Runner I used the same stuff and I must’ve put too much on because it mushroomed out and now you can see it surrounding the badges. I have some 3M double sided tape that I’m gonna try. (Been meaning to do it for about a year).
 
Oil change at 209000 miles

Half a bottle of Sea Foam in the crank case about 250 miles before.

Tundra engine oil filter (higher capacity than 4Runner filter, Toyota PN 90915YZZD3)

About 6 quarts of Shell Rotella T6 5w-40 Heavy Duty diesel engine oil (5.5 quarts plus about half a quart for the higher capacity filter)

But earlier this morning:
c3241e97f74cafe59f300dd53d094406.jpg
 
Last edited:
Wash n Wax my 6112's

Since they were out and disassembled.

Along with this week:
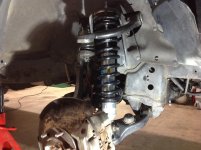
New Rack Rag joint remove flush hard lines replace return line hoses PS pump service. New rack feels real good.
CV axles drain n fill Diff.
Add 3/8" top hat spacer. Like current preload.
Adjust UCA BJ's LCA cams to increase Trac width 7/8" to match rear missed this on initial install.
Measurements stroking travel for limit straps left side full droop will bind outer CV n break stuff.

Almost done.
 

Attachments

  • IMG_0724.jpg
    IMG_0724.jpg
    130.6 KB · Views: 420
Gettin there
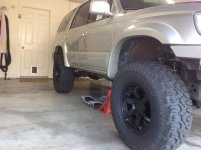
Back on 4 wheels setting level 120# of weight plates between rear wheel wells.
Adjusting Camber and Toe maintaining Caster next on the list, toe is good at the moment camber has tire on outer third of tread caster is at last alignment +-3* for the moment. Before I'll think of driving 9/10 of a mile to machine.
But then there's powering up P/S system filling Diff and a roll around on the creeper looking.

Party tomorrow!
 

Attachments

  • IMG_0725.jpg
    IMG_0725.jpg
    127 KB · Views: 401
Added the two wires to make the diff lock switch light up. Should’ve been easier but for all the wires I have in that area of the dash.

2731c020dee8bef2c348c3d20263c943.jpg
 
Last edited:
Status
Not open for further replies.

Members online

Forum statistics

Threads
278,316
Messages
3,554,120
Members
248,016
Latest member
Advally Service

Trending content

Back
Top