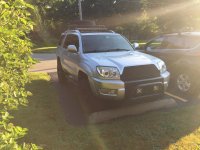
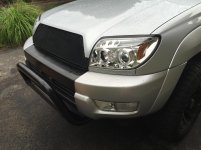
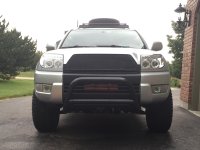
What did you do with your 4runner today?

Put it on! I want to see photos of the finished product! Nice work so far!

Alright alright! I thought I did already but I forgot I posted it on another thread for Satoshi grills...
 

Attachments

  • Photo Aug 12, 7 03 55 AM.jpg
    Photo Aug 12, 7 03 55 AM.jpg
    136.1 KB · Views: 466
  • Photo Aug 10, 12 46 52 PM.jpg
    Photo Aug 10, 12 46 52 PM.jpg
    136.3 KB · Views: 474
  • Photo Aug 10, 12 47 03 PM.jpg
    Photo Aug 10, 12 47 03 PM.jpg
    127.7 KB · Views: 490
As soon as school lets out im detailing interior and working on removing the damn wind deflectors /: plz work goo gone
!!!
 
Alright alright! I thought I did already but I forgot I posted it on another thread for Satoshi grills...

That's bad ass, and props for making it yourself from scratch. I really like the industrial look of it. People are going to be begging you to make more in no time :thumb:
 
That's bad ass, and props for making it yourself from scratch. I really like the industrial look of it. People are going to be begging you to make more in no time :thumb:

Thanks. We'll see if this first one holds up, I might consider making extra since the template is done. Just not sure how to make them efficiently...
 
Thanks. We'll see if this first one holds up, I might consider making extra since the template is done. Just not sure how to make them efficiently...
What would you think about selling the schematic so I can build my own? Only for myself, never anyone else. I would sign documents that I would never sell design in any manner.
 
What would you think about selling the schematic so I can build my own? Only for myself, never anyone else. I would sign documents that I would never sell design in any manner.

I wish I had a complete schematic! My design process went something like this...

1. Dig through my scrap steel bin
2. Find something that might work
3. Grind, weld, bend and smash until it fits where I want it...

Let me see how this holds up and I'll see if I can put something together for you.
 
Grand Falls, AZ

First post.
I bought her last month. Flew from AZ to WA, and drove it back. I did all the maintenance and repairs. Put a Daystar 2.5/1.5 spacer lift on, and took her out for the first run in the mud. It was perfect.

Uky4Dtgh.jpg

7qzFiteh.jpg
 
I drove to autozone to check engine light vsc , trac off all on and end up come with this code p0430

Hmmm. Are you real??? To many 1 time posters here lately. If you are welcome and do a google search with that code and get everything you need to know. If you are not real and just a bot that has been hitting this forum hard lately (not sure why) I am going to post to ban every first poster. Sorry, tired of trying to help people who aren't real. FYI, don't ask a question on your first post, say hi first.
 
Did absolutely nothing on the runner today.. But took a 40 for a spin.


145ede2100cd2d84b3e64d9e731fbb05.jpg
Makes me miss my Fj :/
Hmmm. Are you real??? To many 1 time posters here lately. If you are welcome and do a google search with that code and get everything you need to know. If you are not real and just a bot that has been hitting this forum hard lately (not sure why) I am going to post to ban every first poster. Sorry, tired of trying to help people who aren't real. FYI, don't ask a question on your first post, say hi first.

 
Do you have any pics of how you mounted this? I want to do this exact mod, and fortunately in my state there is no front license plate! :thumb:

Here is where I posted pics of how I mounted the first set... The only difference is I added a .75" by 3' wide straight piece of metal to mount the light bar to, and then mount to the angle iron brackets. The angle iron holes are about 24.25" apart and the mounting holes for the light bar are exactly 33" apart.

This was done with readily available parts found at lowes or Home Depot and no drilling or cutting of anything other than the lower grille.

*To pull the bolts through the ends of the lower beam I used speaker wire, because I had it handy, to go into the beam and fish out the ends, then gorilla taped the bolt (with washer) to the wire and carefully pulled back through the hole that's there (holes on lower beam facing the radiator side). Once pulled through, I unwrapped the tape, added washer and nut. You need to keep the bolt pulled out tight while adding the first washer and nut. Then another washer, angle iron, washer and nut. Then another nut just to help the second nut not back out. Takes a lot of nuts. I was not sure how hard it was going to be but with a little patience it was pretty easy.

http://www.toyota-4runner.org/2069962-post19020.html
 

Members online

Forum statistics

Threads
278,316
Messages
3,554,111
Members
248,016
Latest member
Advally Service

Trending content

Back
Top