
You are using an out of date browser. It may not display this or other websites correctly.
You should upgrade or use an alternative browser.
You should upgrade or use an alternative browser.
What did you do with your 4runner today?
- Thread starter NorthGa4R
- Start date

Mark4runnar
Member
Waxed both of them today.
2014
2022
only possible because I bought a random orbital buffer.....big time saver
2014
2022
only possible because I bought a random orbital buffer.....big time saver
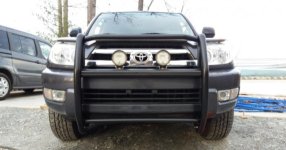
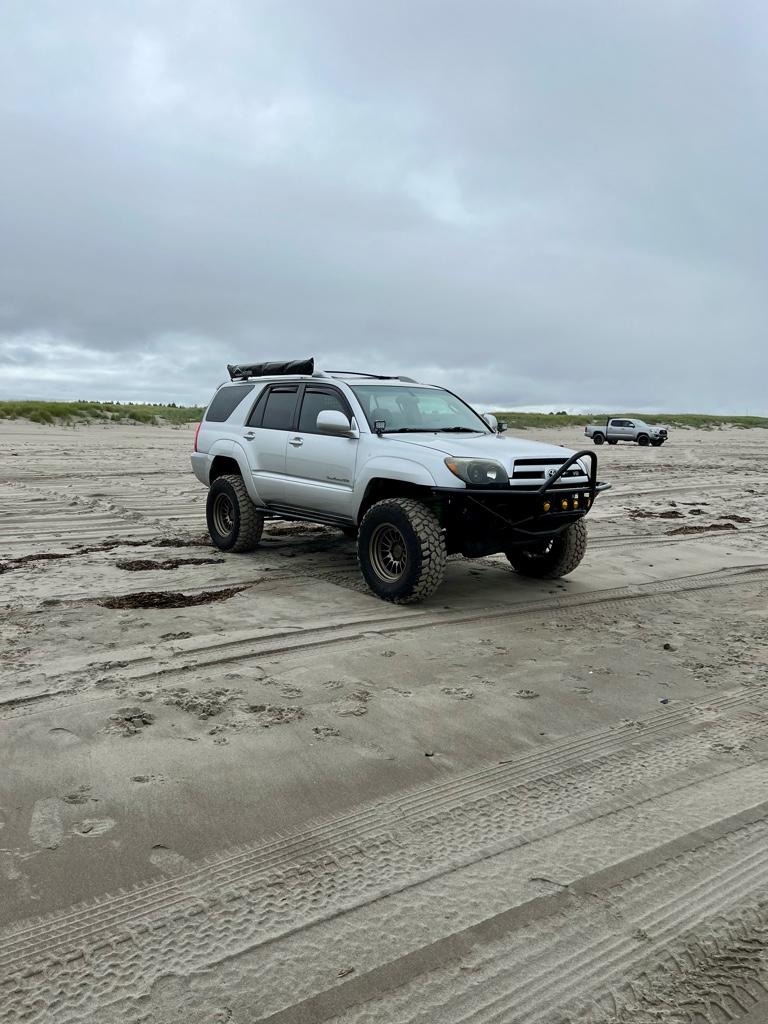
am a lil intriguied by your bush bars, did you mod the original design?..would you mind posting a full face on shot of the truck?
Was originally bars around the lights with 3 horizontal bars across those loops. Very 2000s. Blocked a lot of light and vibrated against the fender. It's stock add on brand ARIC I believe.
The lights hardly do much unless it's pitch black out and you want to see more in the woods near you.
Attachments
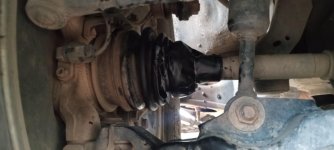
Added an upgraded, modified front right drive axle..
Not really. Just drove for a few years with a tear in the CV boot, forgot about it all the time, and then drove in deep puddles on trails for the past few weeks and then also on the highway, to make sure ALL the grease got washed out.
Heard clicking.... So I pumped about 50 or 100 pumps of grease in and wrapped in gorilla RV tape to hold me over.
Not really. Just drove for a few years with a tear in the CV boot, forgot about it all the time, and then drove in deep puddles on trails for the past few weeks and then also on the highway, to make sure ALL the grease got washed out.
Heard clicking.... So I pumped about 50 or 100 pumps of grease in and wrapped in gorilla RV tape to hold me over.
Attachments

earthrealm
Senior Member
Was originally bars around the lights with 3 horizontal bars across those loops. Very 2000s. Blocked a lot of light and vibrated against the fender. It's stock add on brand ARIC I believe.
The lights hardly do much unless it's pitch black out and you want to see more in the woods near you.
ok ggreat, i have similar brush guard....and the 3 horizontal part blocks my headlights output as well, would consider using a dremel to perform the surgery
RockCrawler21
New member
Got my timing belt done on my 05 V8 and I now have a P0011 code. Thinking maybe the timing is off? The mechanic sent pictures with both cams lined up at the “T”marks. Does anyone know the proper timing marks to align with for my year? I watched some videos and seems like they very between other vehicles and years of the 2UZFE.
Thanks
Thanks
ok ggreat, i have similar brush guard....and the 3 horizontal part blocks my headlights output as well, would consider using a dremel to perform the surgery
The headlight bars just unbolt easily. No Dremel needed! Unless you are talking about the 3 narrow ones yea.

Zero0575
Member
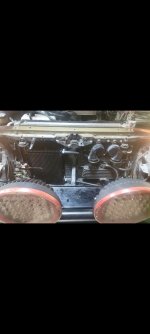
Added a second trans cooler in series with the factory one. My thinking... I replaced the factory radiator with an all aluminum KOYO radiator, which does not have a built in trans cooler. So even though I have the factory aux cooler, I wanted to make up for the capacity that was lost when getting rid of the radiator cooler. Tracking Temps with Torque Pro, I would get up to 220 sometimes sitting in traffic on hot humid days. We'll see how/if this improves. Probably overkill, but better than underkill.
Attachments

-Been a little slow to wrench with the heat, but recently swapped my rear diff oil with Red Line 75w-85. I had an extra quart just in case and needed a little bit so I pumped the remaining ~90% of the bottle around to push out any extra junk but everything looked good.
- Starting a headlight shroud blackout with amber halos from Diode Dynamics. Got SS3 pods as well to replace my fogs after my lens refinish/LED upgrade turned out to be too ineffective.
- Had an issue of a gear oil smell coming into the car when driving with windows down.. turns out the breather hose on the transfer case actuator had come off after the end split open! I trimmed the hose end and plastic wrap cover back and now it's pretty tight. I'll check if the vacuum hoses I have leftover from the engine bay will fit and replace it to end any worries there

- Starting a headlight shroud blackout with amber halos from Diode Dynamics. Got SS3 pods as well to replace my fogs after my lens refinish/LED upgrade turned out to be too ineffective.
- Had an issue of a gear oil smell coming into the car when driving with windows down.. turns out the breather hose on the transfer case actuator had come off after the end split open! I trimmed the hose end and plastic wrap cover back and now it's pretty tight. I'll check if the vacuum hoses I have leftover from the engine bay will fit and replace it to end any worries there
Last edited:

miller507
New member
After 2 years of sitting in the garage for no reason at all, decided to drop a battery in and crank her up. Did 2 cycles with spare key without the immobilizer for lubrication and 3rd cycle with the other key.
Funny how something so simple can make a man happy, gonna be fun working on her some good old shop therapy.
So far I have a seized cv joint, water in front diff and full tune up for the sake of it.
Funny how something so simple can make a man happy, gonna be fun working on her some good old shop therapy.
So far I have a seized cv joint, water in front diff and full tune up for the sake of it.
Checking on a few more things, I came back to what was 2 months ago a small oil leak on my skid plate to it having spread residue along the back portion of the skid. I also noticed I'm maybe a touch over the Full marker on my dipstick so I'll drain a little oil and drop the skid to investigate. This coincides with my recent oil change as best as I can judge, so I'm hoping its just minor. I can definitely do without smelling oil varieties for some time.
I had a leak start on one of the trans oil lines last week which quickly got worse. I replaced all of the hoses, steel lines, fittings into the trans, fluid, and filter. Everything between the rad and the trans is brand new! It only took from Friday to Sunday, with a long sanity break on Saturday. The most valuable lesson I've learned from this job is the correct way to use a bolt extractor: throw it in the trash before it snaps, grab a tap/thread chaser and drill more of the bolt out instead.
This was the wettest part of the line (ignore the rust) but I was kind of surprised it was there and not the ones that run along the crossmember up front since they were in considerably worse shape (ignore the rust).
I had started out on the 'easy' portion - replacing the hoses and steel lines. I started by the rad and worked my way down, remounting the new pipe I went to make it easier. Toyota was not very kind to me, and most of the spring clips in the engine bay were pointing in directions that made it heinous to undo with my hand, let alone reach with a compressor tool or pliers. Once all of the new pipes were in place I cut all of the hoses to fit and double checked the routing with my diagram.
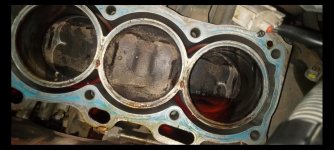
Dropping the transmission pan itself was kind of awful. I had been spraying PB blaster everywhere on everything for several weeks/months at this point but it was no help. Seven of the bolts along either side had the head come off as soon as I put a 1/4" drive ratchet on it and tried to loosen. Two of the bolts had deteriorated badly enough that the heads crumbled. Fortunately a 9mm took one for the team and tolerated a few hammer blows and the bolts came out. Here's what the inside of the trans looked like after dropping the pan. Once inside, it was smooth sailing from there, a bit of cleaning all around, a new filter, and several pounds of fipg later the transmission was sealed again. A nice reprieve from the shitshow that was disassembly was making a batch of magnet soup:
I collected as much of the old fluid as a I was able from the pan and lines and dumped it all into a 5gal bucket, and gave the old lines one last shake to get as much out. I figured even though the bucket isn't a perfect cylinder that sticking it with a ruler was 'close enough' since it had been leaking and I'd spilled anyway. I mathed out 5.87qt which was somewhere in the neighborhood of what was expected. I was able to get around a quart into the trans oil rad and lines. I filled from the top in both directions, through the top of the rad, and down through the hose that connects there. I also tried to put some in the reservoir(?) that seems to run along the passenger side of the main rad that's tapped in between the trans and trans rad on one of the lines, but it mostly filled from the other side. I'm guessing the bit of the system that's along the main rad is to help keep it somewhat pegged to the engine temp/warm it up?
The transmission itself initially took around 3-3.5qt through the fill before dripping through the check and oozing back out of the fill. I wasn't quite sure how to proceed at first being at least 2qt short. Between the imprecise measurement of what I removed and not being 100% certain on what the total capacity was, I decided to just take a deep breath and sat in the drivers seat. I ran the engine for around ~15 seconds or so which I figured was just long enough to pull the oil up out of the pan. I had done some quick Googling prior and the largest capacity I had found was for removing the whole transmission assembly which came in at something like 5.6qt. I thought this was slightly low, and figured it wasn't counting the rad and lines, but who knows. After I turned over the engine the first time, it took another 1.5qt, then I kept repeating the previous until it stopped taking more without instantly dripping.
Fortunately it was a hot day and the ambient temp reading on the sensor was 86 degrees as I began, so the reality of my level was that it was pretty close without warming up the fluid. Unfortunately I misread the range for the temp check procedure and heated it up to around 125 before I realized. In the time it took to lower back down, I relieved some stress/tension by wire wheeling all the rust I could see from where the jack stands were, forward. All in all after a lot of time doing that, I'm pretty satisfied with the structural condition of the frame outside of a few points. It'd be really cool if I could source a new front cross member with the tow points or whatever they're called, and have someone weld that in. I'll also probably need a SafeTCap on both sides of the of the frame in the blue ART201 section. There's a sizeable hole on the drivers side inner rail on the piece that goes inward toward the engine, but it looks like there's multiple layers of metal so it's not clean through yet. The passenger side is developing a hole on the outer layer. I sprayed the ever loving **** out of everything I could inside and out on, near, and in where I wire brushed with Surface Shield so hopefully that will slow the degradation a bit.
Once the transmission was back in range I cracked the check plug one last time, let out an acceptably small amount of oil and waited for it to stop. I was more or less empty on gas so after some clean up I rolled gingerly down the street to the gas station and gave it a few gallons of 91 as a treat. After which I pulled out onto the main road and went on a nice, calm test ride which also happened to be the first time driving with the sprint booster in . I drove to work today and am still leak, CEL, noise, bump, groan, pang, whine, grind, thud, and clunk free. I didn't have any of those thing's prior to the line leaks, so that's a success in my book.
Some things that were crucial during this service: Nitrile gloves, shop towels, Fast Orange, the screw on hand pumps for the fluid bottles, the gigantic GearWrench tap/die set I bought years ago and never used, crow feet wrenches (necessary for anything on this truck), and my knockoff mechanic scanner (Launch Diagun, paid for itself the first time I used it 5x over). The scanner also lets you change all the different customization settings, which is pretty handy.
Since I've not encountered a character limit yet, I'm going to continue on with my novel and include what's next. My next planned major service is to address the exhaust headers. They're rusted, the y-pipe is rusted, the cats are rusted, the flanges are rusted. I'm targeting sometime in November to give me some breathing room because it's going to be a doozy. I'm not going to DIY those since it looks like way too much effort at every step of the way, and will gladly pay a shop. Based on some things I noticed during the transmission service, at the time of doing the headers I think I would also have the engine mounts replaced? For the headers it looks like new OEM cats and DT shorties is pricey but probably best option for me from what I can tell? I have the crappy Walker Quietflow or whatever catback from RockAuto right now. I replaced that with the same thing a few months ago without realizing it until install time because the one the previous owner installed disintegrated and I lost the tail pipe. I'm not sure what I'd replace it with going forward, but the current one has already started rusting.
All in all, I'm happy, the truck seems happy, and now I get to start doing fun things like modifying the wiring. I got a HO alternator and 1/0 wiring to support a few things I'd like to do in the long term. In the short term I think I'm going to hit all the speakers. The sub blew ~2 months ago and I went without music, but just fixed it last weekend and now a door speaker is rattling. I have an aftermarket JVC headunit with Android Auto that I installed and subsequently pulled from my previous car before selling it. I was able to wire that in and retain pretty much everything except proper fade/balance control, however that won't matter once I run new wire for future new speakers/amp. The factory backup cam from 2005 looks SHOCKINGLY similar to the quality of ones from more modern cars when hooked up to a newer screen. Some other minor electrical mods I'd like to do are always hot 12v outlets (w separate toggle) because them not being that bothers me. I'd like to switch the radio over to the retained power circuit. I noticed the power windows stay on after the key is removed, and until the door is opened so I'm confident I can emulate RAP. One of the customization settings my scanner has under the rear power window options is a toggle for a "window up" function on the fob. I enabled it but the window still doesn't go up. I hear something like maybe a relay clicking from somewhere in the rear when I press the fob button while the window is down. I didn't test functionality to see if it did that with the setting disabled, but I haven't had a chance to dig deeper.
This was the wettest part of the line (ignore the rust) but I was kind of surprised it was there and not the ones that run along the crossmember up front since they were in considerably worse shape (ignore the rust).
I had started out on the 'easy' portion - replacing the hoses and steel lines. I started by the rad and worked my way down, remounting the new pipe I went to make it easier. Toyota was not very kind to me, and most of the spring clips in the engine bay were pointing in directions that made it heinous to undo with my hand, let alone reach with a compressor tool or pliers. Once all of the new pipes were in place I cut all of the hoses to fit and double checked the routing with my diagram.
Dropping the transmission pan itself was kind of awful. I had been spraying PB blaster everywhere on everything for several weeks/months at this point but it was no help. Seven of the bolts along either side had the head come off as soon as I put a 1/4" drive ratchet on it and tried to loosen. Two of the bolts had deteriorated badly enough that the heads crumbled. Fortunately a 9mm took one for the team and tolerated a few hammer blows and the bolts came out. Here's what the inside of the trans looked like after dropping the pan. Once inside, it was smooth sailing from there, a bit of cleaning all around, a new filter, and several pounds of fipg later the transmission was sealed again. A nice reprieve from the shitshow that was disassembly was making a batch of magnet soup:
I collected as much of the old fluid as a I was able from the pan and lines and dumped it all into a 5gal bucket, and gave the old lines one last shake to get as much out. I figured even though the bucket isn't a perfect cylinder that sticking it with a ruler was 'close enough' since it had been leaking and I'd spilled anyway. I mathed out 5.87qt which was somewhere in the neighborhood of what was expected. I was able to get around a quart into the trans oil rad and lines. I filled from the top in both directions, through the top of the rad, and down through the hose that connects there. I also tried to put some in the reservoir(?) that seems to run along the passenger side of the main rad that's tapped in between the trans and trans rad on one of the lines, but it mostly filled from the other side. I'm guessing the bit of the system that's along the main rad is to help keep it somewhat pegged to the engine temp/warm it up?
The transmission itself initially took around 3-3.5qt through the fill before dripping through the check and oozing back out of the fill. I wasn't quite sure how to proceed at first being at least 2qt short. Between the imprecise measurement of what I removed and not being 100% certain on what the total capacity was, I decided to just take a deep breath and sat in the drivers seat. I ran the engine for around ~15 seconds or so which I figured was just long enough to pull the oil up out of the pan. I had done some quick Googling prior and the largest capacity I had found was for removing the whole transmission assembly which came in at something like 5.6qt. I thought this was slightly low, and figured it wasn't counting the rad and lines, but who knows. After I turned over the engine the first time, it took another 1.5qt, then I kept repeating the previous until it stopped taking more without instantly dripping.
Fortunately it was a hot day and the ambient temp reading on the sensor was 86 degrees as I began, so the reality of my level was that it was pretty close without warming up the fluid. Unfortunately I misread the range for the temp check procedure and heated it up to around 125 before I realized. In the time it took to lower back down, I relieved some stress/tension by wire wheeling all the rust I could see from where the jack stands were, forward. All in all after a lot of time doing that, I'm pretty satisfied with the structural condition of the frame outside of a few points. It'd be really cool if I could source a new front cross member with the tow points or whatever they're called, and have someone weld that in. I'll also probably need a SafeTCap on both sides of the of the frame in the blue ART201 section. There's a sizeable hole on the drivers side inner rail on the piece that goes inward toward the engine, but it looks like there's multiple layers of metal so it's not clean through yet. The passenger side is developing a hole on the outer layer. I sprayed the ever loving **** out of everything I could inside and out on, near, and in where I wire brushed with Surface Shield so hopefully that will slow the degradation a bit.
Once the transmission was back in range I cracked the check plug one last time, let out an acceptably small amount of oil and waited for it to stop. I was more or less empty on gas so after some clean up I rolled gingerly down the street to the gas station and gave it a few gallons of 91 as a treat. After which I pulled out onto the main road and went on a nice, calm test ride which also happened to be the first time driving with the sprint booster in
. I drove to work today and am still leak, CEL, noise, bump, groan, pang, whine, grind, thud, and clunk free. I didn't have any of those thing's prior to the line leaks, so that's a success in my book.Some things that were crucial during this service: Nitrile gloves, shop towels, Fast Orange, the screw on hand pumps for the fluid bottles, the gigantic GearWrench tap/die set I bought years ago and never used, crow feet wrenches (necessary for anything on this truck), and my knockoff mechanic scanner (Launch Diagun, paid for itself the first time I used it 5x over). The scanner also lets you change all the different customization settings, which is pretty handy.
Since I've not encountered a character limit yet, I'm going to continue on with my novel and include what's next. My next planned major service is to address the exhaust headers. They're rusted, the y-pipe is rusted, the cats are rusted, the flanges are rusted. I'm targeting sometime in November to give me some breathing room because it's going to be a doozy. I'm not going to DIY those since it looks like way too much effort at every step of the way, and will gladly pay a shop. Based on some things I noticed during the transmission service, at the time of doing the headers I think I would also have the engine mounts replaced? For the headers it looks like new OEM cats and DT shorties is pricey but probably best option for me from what I can tell? I have the crappy Walker Quietflow or whatever catback from RockAuto right now. I replaced that with the same thing a few months ago without realizing it until install time because the one the previous owner installed disintegrated and I lost the tail pipe. I'm not sure what I'd replace it with going forward, but the current one has already started rusting.
All in all, I'm happy, the truck seems happy, and now I get to start doing fun things like modifying the wiring. I got a HO alternator and 1/0 wiring to support a few things I'd like to do in the long term. In the short term I think I'm going to hit all the speakers. The sub blew ~2 months ago and I went without music, but just fixed it last weekend and now a door speaker is rattling. I have an aftermarket JVC headunit with Android Auto that I installed and subsequently pulled from my previous car before selling it. I was able to wire that in and retain pretty much everything except proper fade/balance control, however that won't matter once I run new wire for future new speakers/amp. The factory backup cam from 2005 looks SHOCKINGLY similar to the quality of ones from more modern cars when hooked up to a newer screen. Some other minor electrical mods I'd like to do are always hot 12v outlets (w separate toggle) because them not being that bothers me. I'd like to switch the radio over to the retained power circuit. I noticed the power windows stay on after the key is removed, and until the door is opened so I'm confident I can emulate RAP. One of the customization settings my scanner has under the rear power window options is a toggle for a "window up" function on the fob. I enabled it but the window still doesn't go up. I hear something like maybe a relay clicking from somewhere in the rear when I press the fob button while the window is down. I didn't test functionality to see if it did that with the setting disabled, but I haven't had a chance to dig deeper.
Last edited:

AuSeeker
Elite Member
I had a leak start on one of the trans oil lines last week which quickly got worse. I replaced all of the hoses, steel lines, fittings into the trans, fluid, and filter. Everything between the rad and the trans is brand new! It only took from Friday to Sunday, with a long sanity break on Saturday. The most valuable lesson I've learned from this job is the correct way to use a bolt extractor: throw it in the trash before it snaps, grab a tap/thread chaser and drill more of the bolt out instead.
This was the wettest part of the line (ignore the rust) but I was kind of surprised it was there and not the ones that run along the crossmember up front since they were in considerably worse shape (ignore the rust).
I had started out on the 'easy' portion - replacing the hoses and steel lines. I started by the rad and worked my way down, remounting the new pipe I went to make it easier. Toyota was not very kind to me, and most of the spring clips in the engine bay were pointing in directions that made it heinous to undo with my hand, let alone reach with a compressor tool or pliers. Once all of the new pipes were in place I cut all of the hoses to fit and double checked the routing with my diagram.
Dropping the transmission pan itself was kind of awful. I had been spraying PB blaster everywhere on everything for several weeks/months at this point but it was no help. Seven of the bolts along either side had the head come off as soon as I put a 1/4" drive ratchet on it and tried to loosen. Two of the bolts had deteriorated badly enough that the heads crumbled. Fortunately a 9mm took one for the team and tolerated a few hammer blows and the bolts came out. Here's what the inside of the trans looked like after dropping the pan. Once inside, it was smooth sailing from there, a bit of cleaning all around, a new filter, and several pounds of fipg later the transmission was sealed again. A nice reprieve from the shitshow that was disassembly was making a batch of magnet soup:
I collected as much of the old fluid as a I was able from the pan and lines and dumped it all into a 5gal bucket, and gave the old lines one last shake to get as much out. I figured even though the bucket isn't a perfect cylinder that sticking it with a ruler was 'close enough' since it had been leaking and I'd spilled anyway. I mathed out 5.87qt which was somewhere in the neighborhood of what was expected. I was able to get around a quart into the trans oil rad and lines. I filled from the top in both directions, through the top of the rad, and down through the hose that connects there. I also tried to put some in the reservoir(?) that seems to run along the passenger side of the main rad that's tapped in between the trans and trans rad on one of the lines, but it mostly filled from the other side. I'm guessing the bit of the system that's along the main rad is to help keep it somewhat pegged to the engine temp/warm it up?
The transmission itself initially took around 3-3.5qt through the fill before dripping through the check and oozing back out of the fill. I wasn't quite sure how to proceed at first being at least 2qt short. Between the imprecise measurement of what I removed and not being 100% certain on what the total capacity was, I decided to just take a deep breath and sat in the drivers seat. I ran the engine for around ~15 seconds or so which I figured was just long enough to pull the oil up out of the pan. I had done some quick Googling prior and the largest capacity I had found was for removing the whole transmission assembly which came in at something like 5.6qt. I thought this was slightly low, and figured it wasn't counting the rad and lines, but who knows. After I turned over the engine the first time, it took another 1.5qt, then I kept repeating the previous until it stopped taking more without instantly dripping.
Fortunately it was a hot day and the ambient temp reading on the sensor was 86 degrees as I began, so the reality of my level was that it was pretty close without warming up the fluid. Unfortunately I misread the range for the temp check procedure and heated it up to around 125 before I realized. In the time it took to lower back down, I relieved some stress/tension by wire wheeling all the rust I could see from where the jack stands were, forward. All in all after a lot of time doing that, I'm pretty satisfied with the structural condition of the frame outside of a few points. It'd be really cool if I could source a new front cross member with the tow points or whatever they're called, and have someone weld that in. I'll also probably need a SafeTCap on both sides of the of the frame in the blue ART201 section. There's a sizeable hole on the drivers side inner rail on the piece that goes inward toward the engine, but it looks like there's multiple layers of metal so it's not clean through yet. The passenger side is developing a hole on the outer layer. I sprayed the ever loving **** out of everything I could inside and out on, near, and in where I wire brushed with Surface Shield so hopefully that will slow the degradation a bit.
Once the transmission was back in range I cracked the check plug one last time, let out an acceptably small amount of oil and waited for it to stop. I was more or less empty on gas so after some clean up I rolled gingerly down the street to the gas station and gave it a few gallons of 91 as a treat. After which I pulled out onto the main road and went on a nice, calm test ride which also happened to be the first time driving with the sprint booster in
Some things that were crucial during this service: Nitrile gloves, shop towels, Fast Orange, the screw on hand pumps for the fluid bottles, the gigantic GearWrench tap/die set I bought years ago and never used, crow feet wrenches (necessary for anything on this truck), and my knockoff mechanic scanner (Launch Diagun, paid for itself the first time I used it 5x over). The scanner also lets you change all the different customization settings, which is pretty handy.
Since I've not encountered a character limit yet, I'm going to continue on with my novel and include what's next. My next planned major service is to address the exhaust headers. They're rusted, the y-pipe is rusted, the cats are rusted, the flanges are rusted. I'm targeting sometime in November to give me some breathing room because it's going to be a doozy. I'm not going to DIY those since it looks like way too much effort at every step of the way, and will gladly pay a shop. Based on some things I noticed during the transmission service, at the time of doing the headers I think I would also have the engine mounts replaced? For the headers it looks like new OEM cats and DT shorties is pricey but probably best option for me from what I can tell? I have the crappy Walker Quietflow or whatever catback from RockAuto right now. I replaced that with the same thing a few months ago without realizing it until install time because the one the previous owner installed disintegrated and I lost the tail pipe. I'm not sure what I'd replace it with going forward, but the current one has already started rusting.
All in all, I'm happy, the truck seems happy, and now I get to start doing fun things like modifying the wiring. I got a HO alternator and 1/0 wiring to support a few things I'd like to do in the long term. In the short term I think I'm going to hit all the speakers. The sub blew ~2 months ago and I went without music, but just fixed it last weekend and now a door speaker is rattling. I have an aftermarket JVC headunit with Android Auto that I installed and subsequently pulled from my previous car before selling it. I was able to wire that in and retain pretty much everything except proper fade/balance control, however that won't matter once I run new wire for future new speakers/amp. The factory backup cam from 2005 looks SHOCKINGLY similar to the quality of ones from more modern cars when hooked up to a newer screen. Some other minor electrical mods I'd like to do are always hot 12v outlets (w separate toggle) because them not being that bothers me. I'd like to switch the radio over to the retained power circuit. I noticed the power windows stay on after the key is removed, and until the door is opened so I'm confident I can emulate RAP. One of the customization settings my scanner has under the rear power window options is a toggle for a "window up" function on the fob. I enabled it but the window still doesn't go up. I hear something like maybe a relay clicking from somewhere in the rear when I press the fob button while the window is down. I didn't test functionality to see if it did that with the setting disabled, but I haven't had a chance to dig deeper.
I didn't read all of your post..but I did read where you said you would like to source the front crossmember, you can get it from a Toyota dealer, here's a link to the crossmember and from one of the better priced online dealers, you might find a better price but I doubt it...
https://toyotaparts.mcgeorgetoyota....lciZ5PTIwMDQmdD1saW1pdGVkJmU9NC03bC12OC1nYXM=
Edit:....Actually I did find a better price, but it's from over seas...Dubai, United Arab Emirates, so you'll have to wait a little longer on the shipping...
https://www.ebay.com/itm/185393742437
Second Edit:...Even a better price, still the same wait...
https://www.ebay.com.my/itm/353220789702
Last edited:

Bogrun
New member
Recent Updates to Interior Blackout
Hey...It's been awhile! We have a lot to catch up on! Let's start with my progress on my interior blackout.
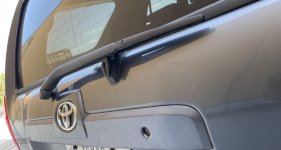
While not part of the interior, I did plati-dip the last piece of grey plastic on the exterior being the rear tailgate trim.
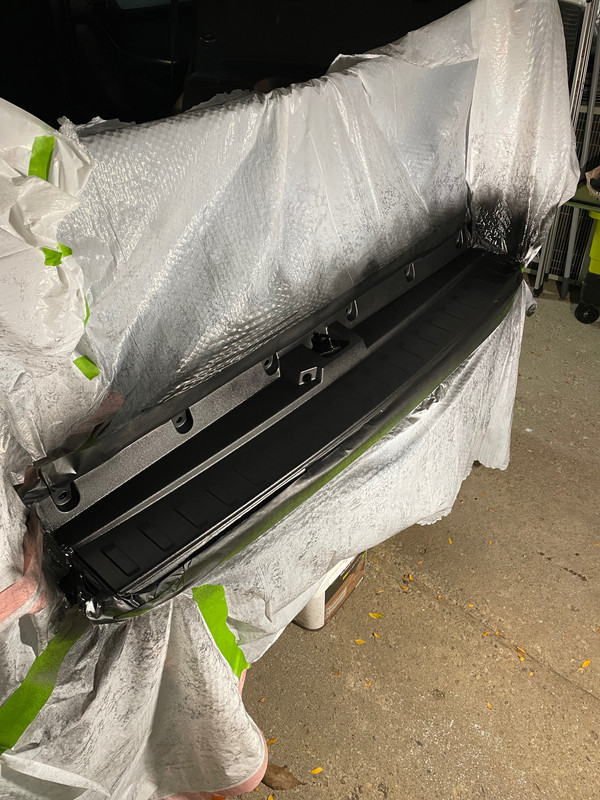
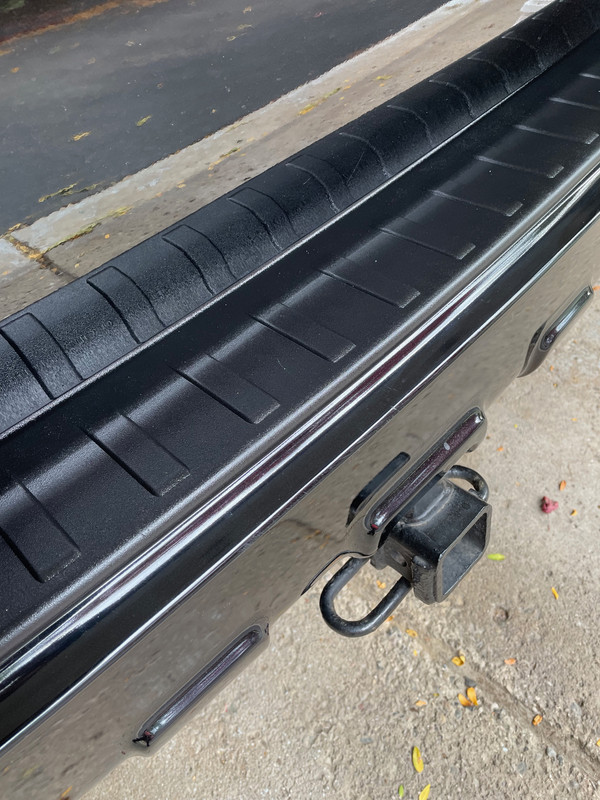
Okay, now the fun stuff, the rear seats and the Clazzio seat covers. These took a lot of extra prep painting the trim pieces and dyeing the seatbelts. I also dyed the underside so when the seats are down you don't see the grey carpet. I'm really happy with how these turned out.
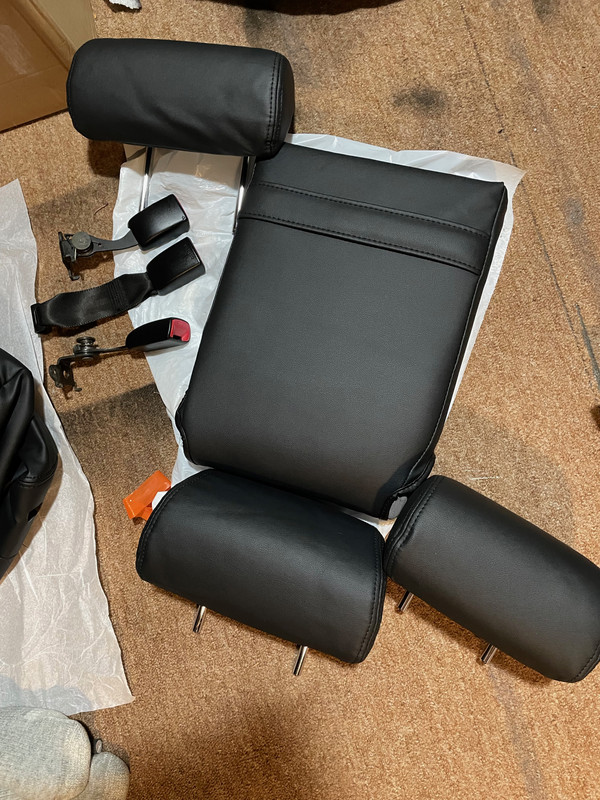
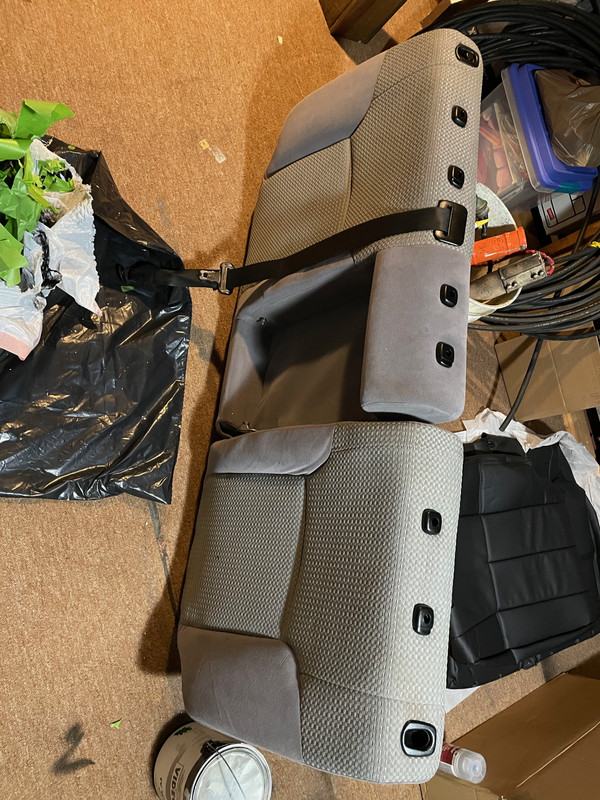
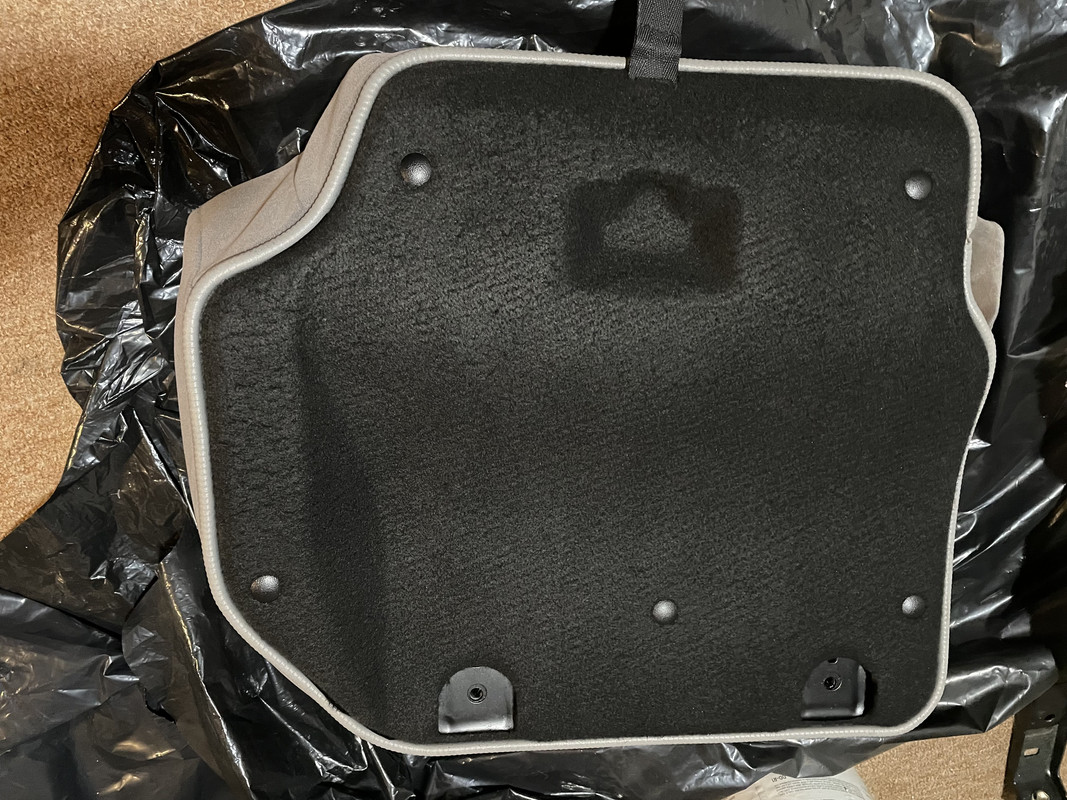
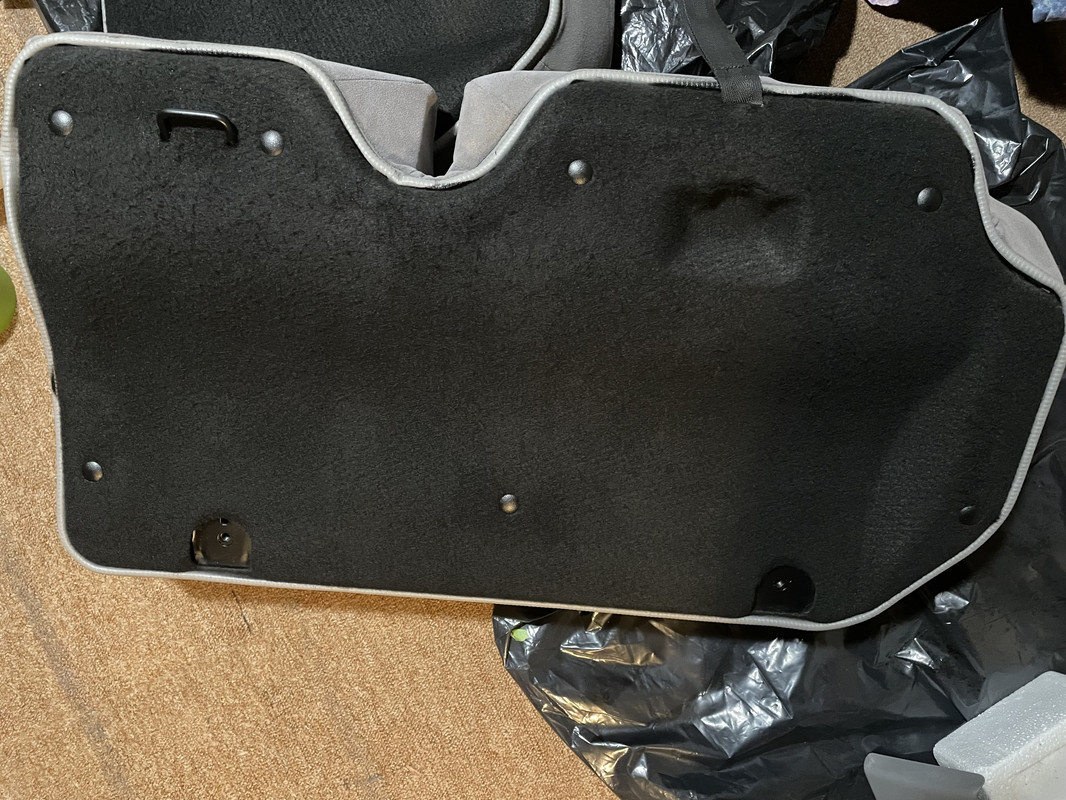
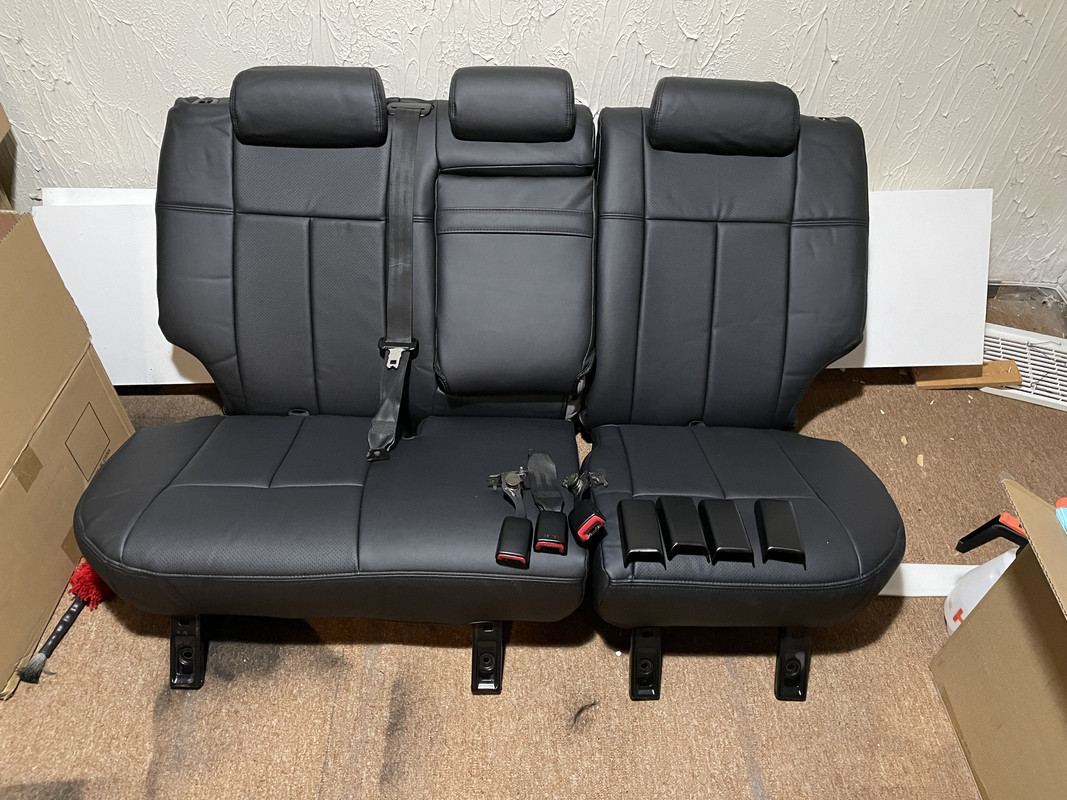
You want to see them inside the car? Well there was one more thing I needed to do before installing them...
Hey...It's been awhile! We have a lot to catch up on! Let's start with my progress on my interior blackout.
While not part of the interior, I did plati-dip the last piece of grey plastic on the exterior being the rear tailgate trim.
Okay, now the fun stuff, the rear seats and the Clazzio seat covers. These took a lot of extra prep painting the trim pieces and dyeing the seatbelts. I also dyed the underside so when the seats are down you don't see the grey carpet. I'm really happy with how these turned out.
You want to see them inside the car? Well there was one more thing I needed to do before installing them...
Bogrun
New member
Carpet Replacement (Blackout)
I couldn't call the interior blacked out without having black carpet could I?
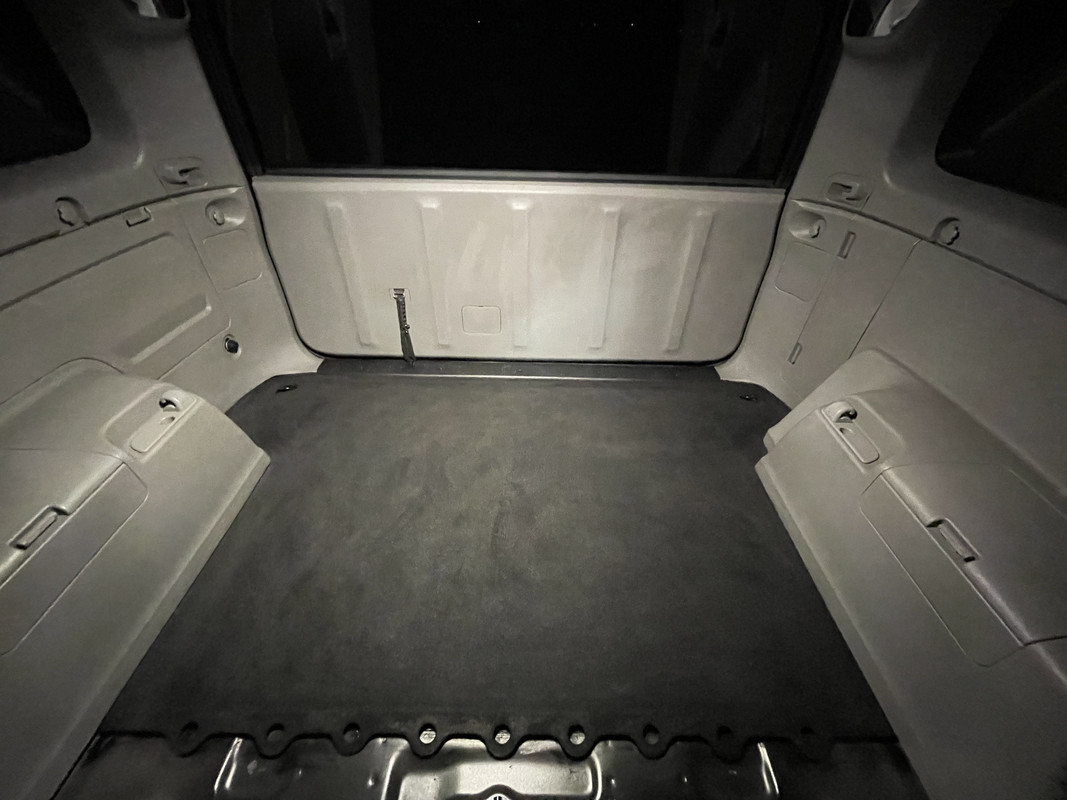
I started with the rear cargo area. This carpet can be removed but I chose to leave it in. I used dye in a condiment bottle to squirt dye on the carpet and then agitated it heavily with a nylon brush. This made an absolute MESS on the interior trim but luckily it was easy to clean with alcohol. And it's going to be black anyways I guess.
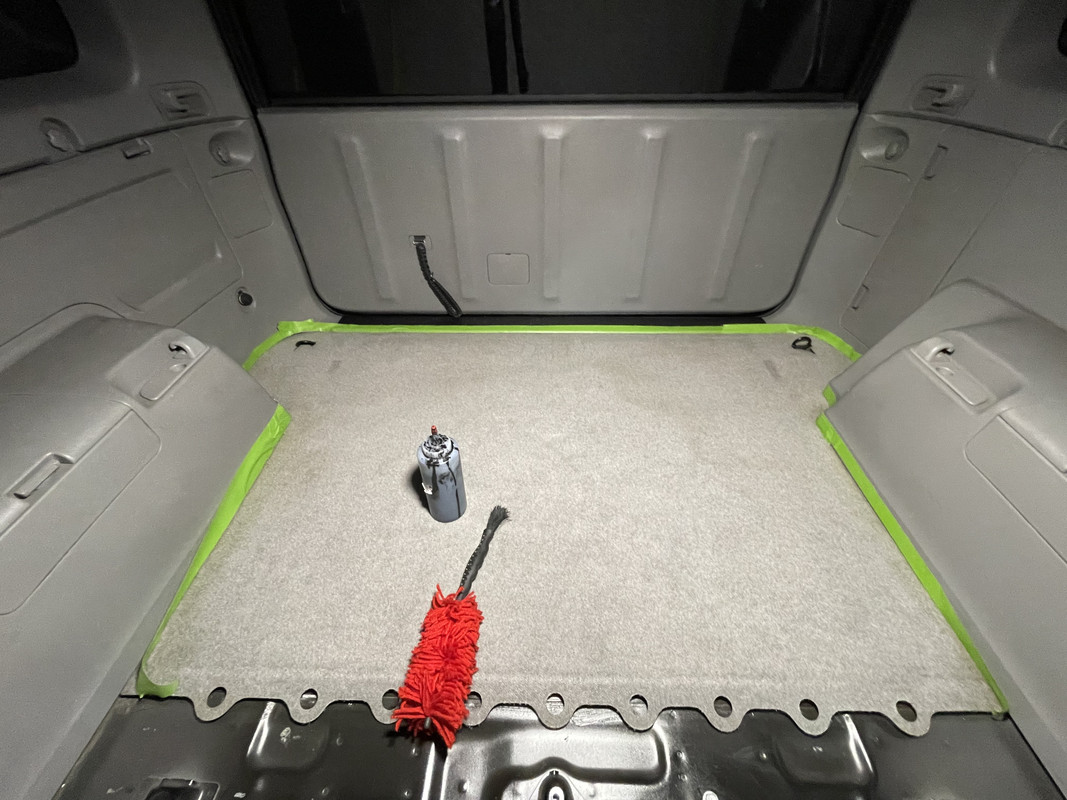
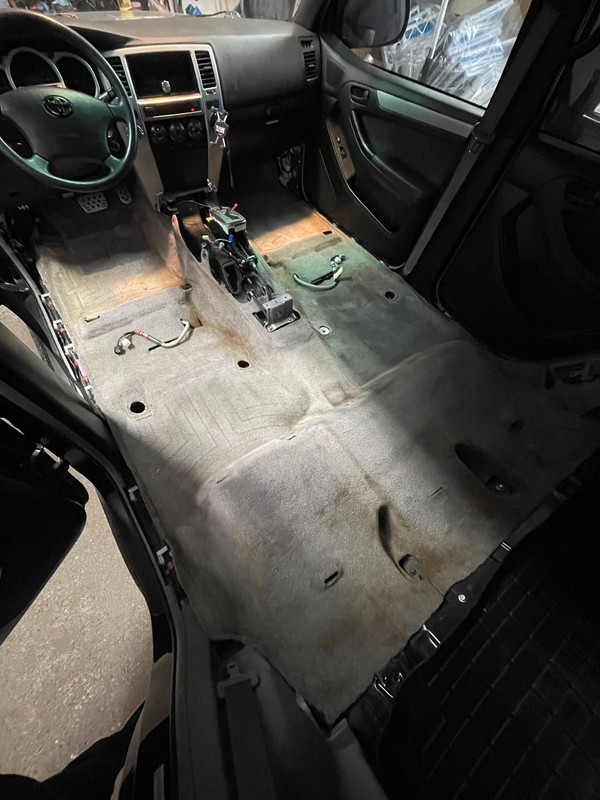
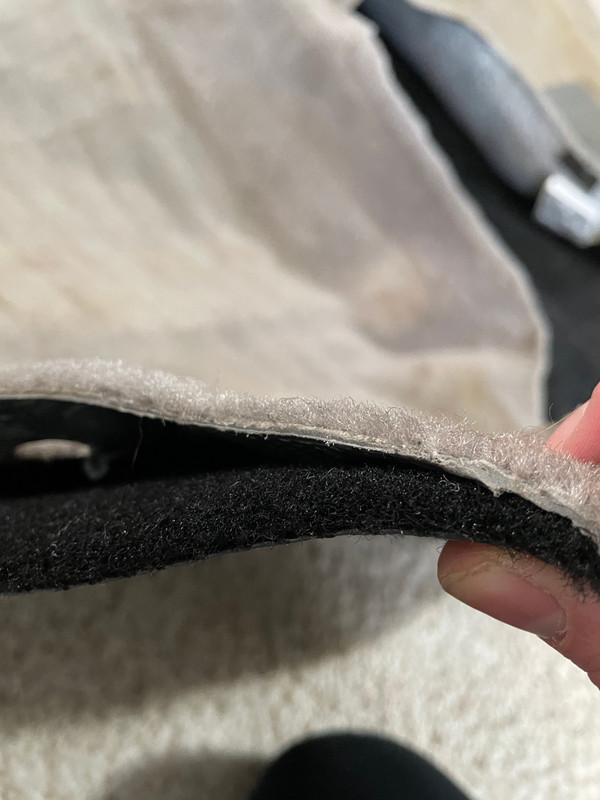
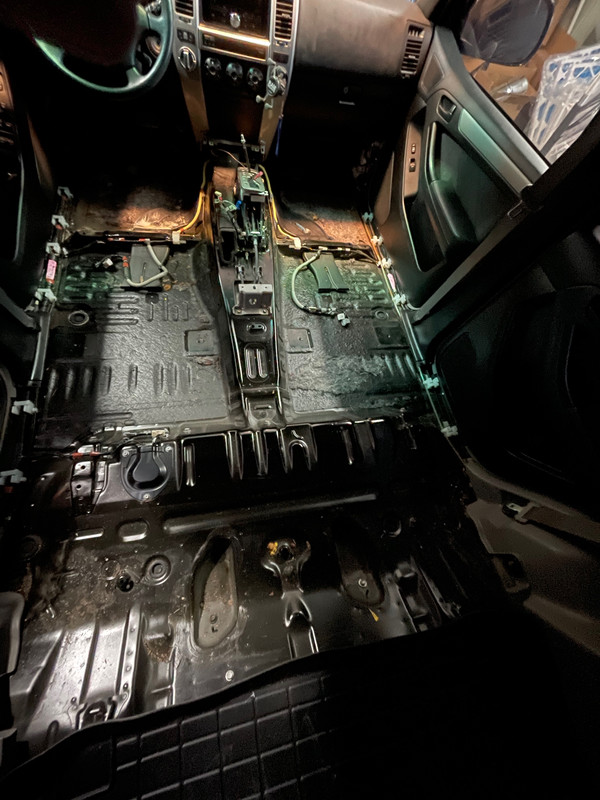
Now the rest of the carpet... I chose to replace the carpet instead of dyeing it. I chose the ultra plush version and you can see it's twice as thick as oem. I also sound proofed the entire floor and covered it with closed cell foam for heat insulation. Installing the carpet was a major pain. Cutting all the holes for the seats, wiring, and vents is extremely tedious and time consuming.
If you're going to do this, it's imperative you buy molded carpet and to take it a step further, you should also buy whatever sound proofing layer the factory will add to the carpet. It will help it retain it's shape much more. Getting the carpet to fit in the back is the most challenging part because of all the curves.
Did I like doing this? No.
Was it worth it? It's hard to deny, the black carpet finished the entire front of the 4Runner and I'm incredibly happy every time I open the door. There's only 4 pieces left and my interior blackout will be complete! (Until I decide to do my headliner)
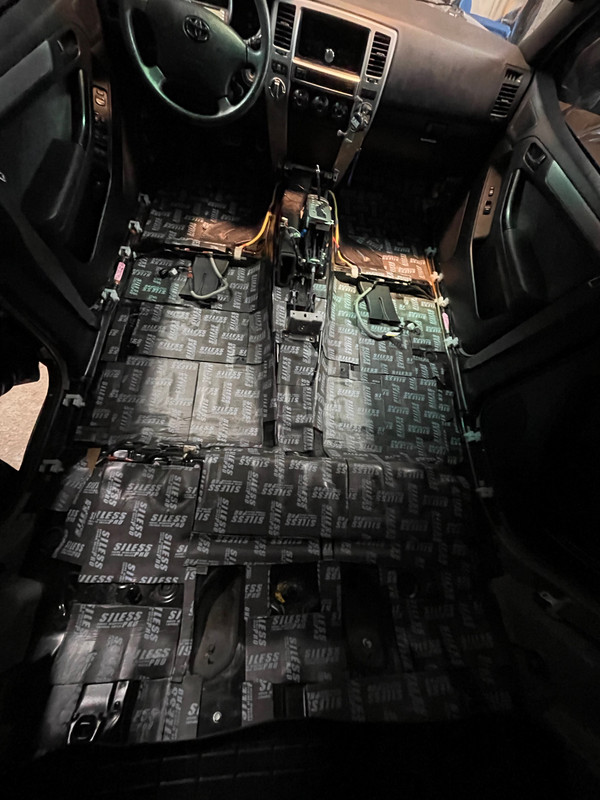
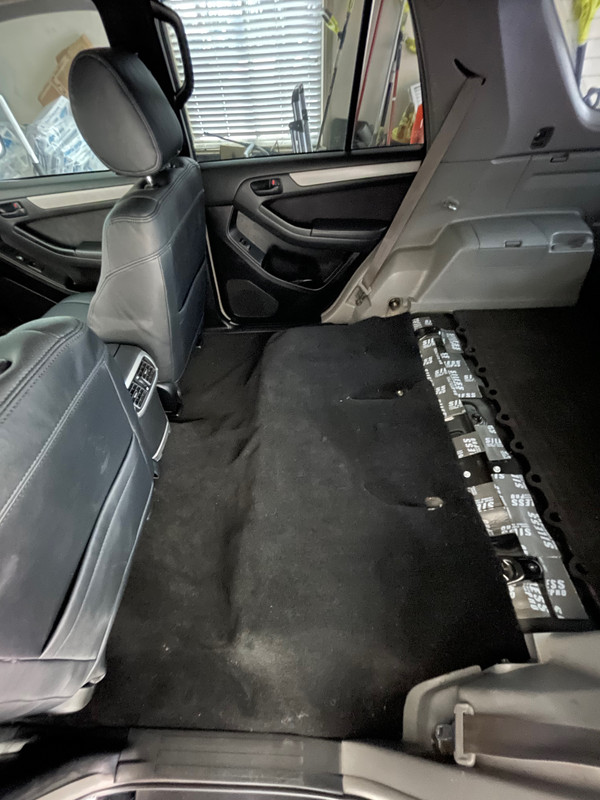
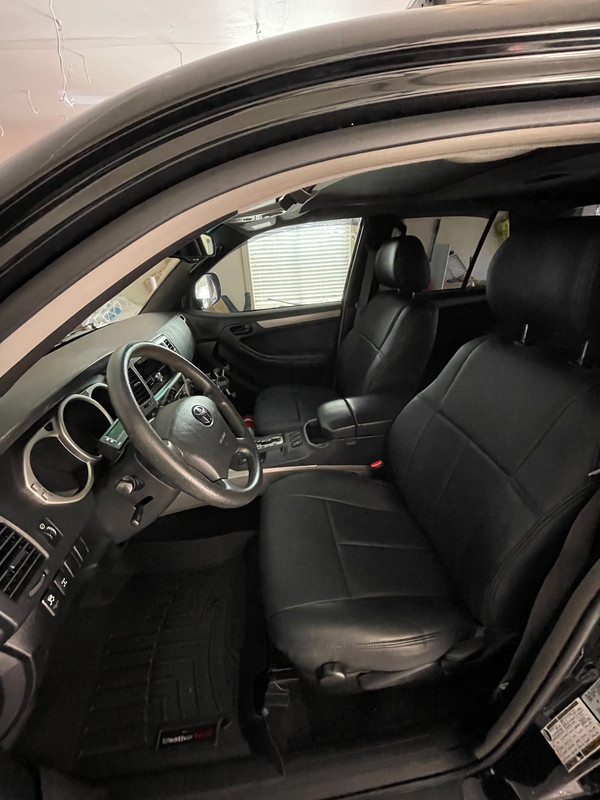
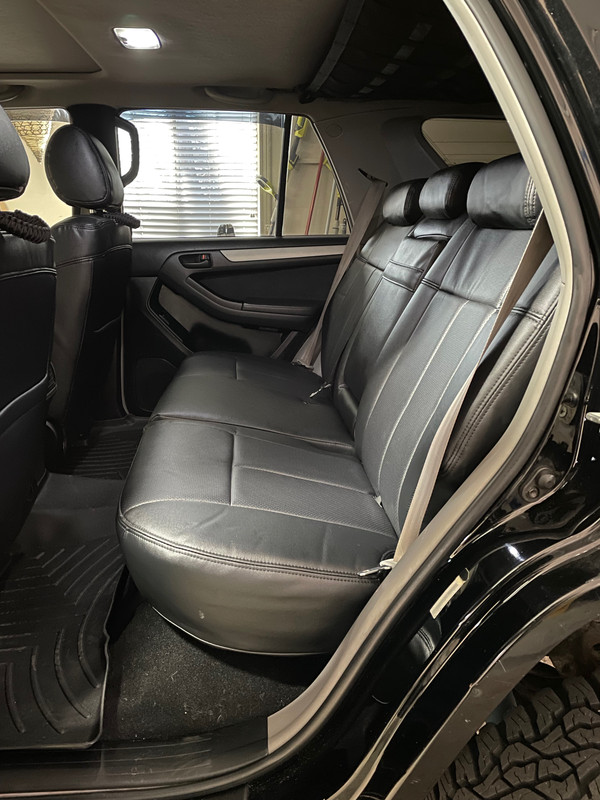
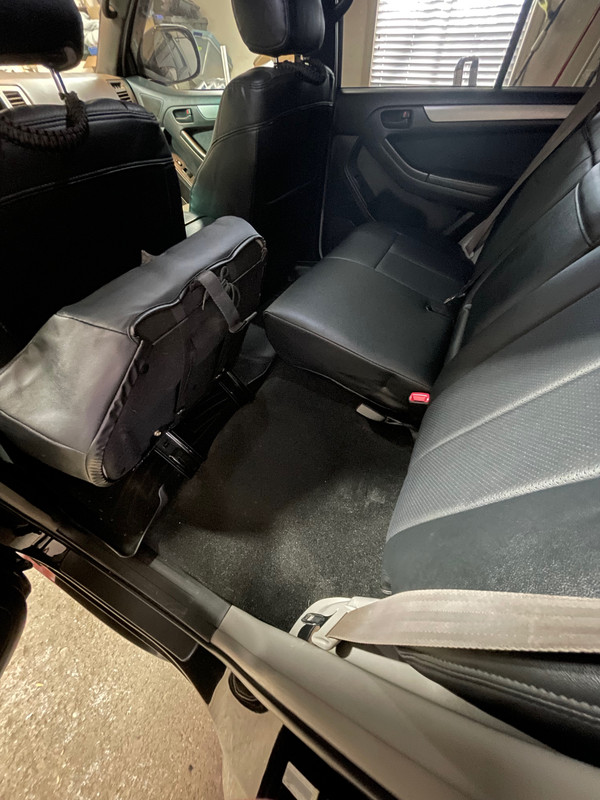
I couldn't call the interior blacked out without having black carpet could I?
I started with the rear cargo area. This carpet can be removed but I chose to leave it in. I used dye in a condiment bottle to squirt dye on the carpet and then agitated it heavily with a nylon brush. This made an absolute MESS on the interior trim but luckily it was easy to clean with alcohol. And it's going to be black anyways I guess.
Now the rest of the carpet... I chose to replace the carpet instead of dyeing it. I chose the ultra plush version and you can see it's twice as thick as oem. I also sound proofed the entire floor and covered it with closed cell foam for heat insulation. Installing the carpet was a major pain. Cutting all the holes for the seats, wiring, and vents is extremely tedious and time consuming.
If you're going to do this, it's imperative you buy molded carpet and to take it a step further, you should also buy whatever sound proofing layer the factory will add to the carpet. It will help it retain it's shape much more. Getting the carpet to fit in the back is the most challenging part because of all the curves.
Did I like doing this? No.
Was it worth it? It's hard to deny, the black carpet finished the entire front of the 4Runner and I'm incredibly happy every time I open the door. There's only 4 pieces left and my interior blackout will be complete! (Until I decide to do my headliner)
I couldn't call the interior blacked out without having black carpet could I?
Dang! Looks nice! The carpet was one thing I did not want to tackle in mine so everything else is black but the carpet lol. I still need to pull my carpet and sound deaden the floor though, helps so much for keeping the heat out. Clazzios also look good, I can't bring myself to put pleather in mine though since it gets pretty hot in Sacramento. At least the Sport Edition seats are already black :jump:
Bogrun
New member
Dang! Looks nice! The carpet was one thing I did not want to tackle in mine so everything else is black but the carpet lol. I still need to pull my carpet and sound deaden the floor though, helps so much for keeping the heat out. Clazzios also look good, I can't bring myself to put pleather in mine though since it gets pretty hot in Sacramento. At least the Sport Edition seats are already black :jump:
Thanks! I've actually been surprised at how cool the interior still stays. Having ceramic tint on my windows and using a windshield reflector probably explains most of it but I don't get burned getting in the car and there hasn't been a noticeable difference in how hot the car feels. But I've been doing this in such small increments I may very well be the frog in the boiling pot!
The fun part you'll discover if you decide to sound deaden the floor is almost none of it is flat! Meaning every piece will need to have reliefs cut in order to prevent air pockets. The sound deadening took me 2 days and the entire carpet replacement took me a week. I took PTO from work to do it because it's my only car! :wacko:
Similar threads
- Replies
- 15
- Views
- 4K


