C4 Fabrication
New member
The canvas cover looks like a good option! Seems to git really nice and looks good too. Is Piper an American Pitbull Terrier mix? Shes pretty!


The canvas cover looks like a good option! Seems to git really nice and looks good too. Is Piper an American Pitbull Terrier mix? Shes pretty!
That's awesome! I don't know how much experience you have with rescues but I found the Cesar Milan (dog whisperer) books super helpful. I implemented a lot of his philosophies on mentally rehabbing ours and it really worked. When we got her she was skittish just like you described, was food aggressive and didn't like kids. Now she is my 3 year old daughters best friend and sleeps next to my 11 month old sons crib. She has turned into the best family dog we could have hoped for.
Thanks Caleb! Not sure what all the mixes are for Piper, exactly, but as far as my homeowner's insurance company is concerned, she's a lab mix. :hatsoff:
Also check out the sponsor list on the right side of the page, i have officially become a sponsor on the forum!

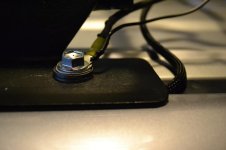
This install was fairly straightforward. I decided to mount the compressor on the passenger fender wall using the existing M6 tapped holes. In order to use the existing holes, I made a butch plate out of 0.125” Aluminum. We tend to have scraps laying around the machine shop of my company.
For piece of mind, I mounted 1 of the bolts through the compressor foot, butch plate, and into the fender wall. This provides a very secure and rigid mounting method. The other 3 feet were mounted to the butch plate using M6 bolts and nylock nuts. Finally, there is 1 more M6 bolt going through the butch plate into the fender wall.
I need to add some additional photos, but here was the sequence for mounting the compressor:
1) Measure and drill holes in the butch plate
2) Remove the 2 top-oriented Allen screws holding the compressor to the mounting feet
3) Loosen the other 2 Allen screws enough to allow the compressor to be flipped 180 onto it’s back (think like opening a clamshell)
4) Install M6 bolts and nuts to secure 3 of the mounting feet to the butch plate, leaving 1 foot free to be bolted to the fender wall
5) Remove air filter box to provide working space
6) Secure butch plate to fender wall using qty 2 M6 bolts (1 will go through the remaining mounting foot)
7) Rotate compressor back up and re-install 2 Allen screws to secure compressor to mounting feet
8) Tighten lower 2 Allen screws
Wiring:
Follow the directions on the wiring and you should be fine. I ran into a little trouble because I hooked the black wires to chassis ground. They actually need to go to the battery negative terminal. I believe this is because the ARB compressor is a DC motor.
I routed the wire harness along the firewall and secured it to an existing wiring harness using zip ties. Once it was routed, I cut the excess wiring. Since I used the Bussmann relay and AOB switch, I did not need the harness connector with the red, black, green, and yellow wires. I ended up using that as my wiring harness extension to move the OEM wiper heater switch to the right of the steering column
Hook all red wires together and connect to Bussmann relay output.
Hook all black wires together and connect to negative battery terminal.
I left the pressure switch relay intact and in the wiring harness.
It works like a charm! It takes me 10 minutes to inflate my 4 LT265/70R17 BFG AT KO2’s from 15psi to 39 psi.

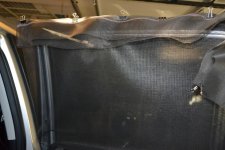
Hey [MENTION=130932]wild_turkey[/MENTION], how grippy is the Canvasback liner? Does your dog seem to slide around much back there? For some reason my furry friend refuses to sit down when the car is moving - too much to see - and his paws slide on other fabric liners I've tried. I'm currently leaning toward WeatherTech since I know it's grippy, but I also have 3rd row seating so Canvasback is an intriguing option.
I still like them better for a few reasons:
1) You can pull 1 seat of the 3rd row up and still have cargo protection on the other half that is down
2) It provides protection over the back of the 2nd row when it is folded flat and the entire surface is flat (cargo mat has a ridge, which would be uncomfortable if you were sleeping back there)
3) You can ask them to provide cutouts for the cargo hooks at no additional cost
I think you may have sold me. We just got back from a muddy hike with a car full of 2 dogs, 4 adults, and an infant. Needless to say, the 4Runner is nasty and I'll be investing in (most likely) a Canvasback ASAP. Thanks for the review!
Ordered a ARB CKMTA12 on the GB and need to have it installed. Would love to see more pictures of how and where you have yours installed.
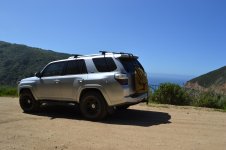
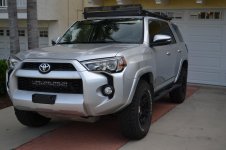
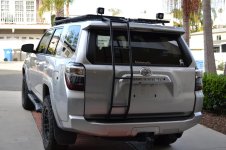
Clean looking truck!
I've been meaning to do this mod just for peace of mind, but we've been in a sustained drought in CA. El Nino has showed up this year, so definitely time to take care of this.
Kit List:
- 10' Fuel Line Hose, 5/16": $17
- Toyota part 90404-51319 (Union): $10
- Toyota part 90930-03136 (Breather) $5
- Stainless steel hose clamp (x2): $2.50 for 4
- Enough zip ties to hold it all together
- Teflon tape
So for $35, it's definitely nice to be safer. One thing to note is the size line to use. Some say 1/4", 5/16", and 3/8". I bought the 3/8" initially and I was not happy with how easily it slipped on the union and it was very loose on the breather. I took it back and got 5/16" line. You really only need 8', but I used 9' and left slack in the fender for a future lift and more wheel articulation.
I'm not going to document much here because I basically followed [MENTION=65614]Antman[/MENTION] and located the breather in the driver side tail light compartment. Antman Rear Diff Mod Tail light
I also followed [MENTION=129593]MTN4RNR[/MENTION] on his advice routing the line. MTN4RNR Rear Diff Breather Mod
The reason I chose here over the others was:
1) No drilling/cutting required
2) No part of the mod comes inside the rig
3) Taillight is pretty easy to remove (2 nuts, unclip the wire harness, and pull like hell straight back)
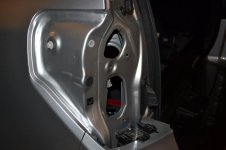
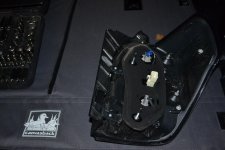
Here are a couple of pics of the tail light area. The white clip at the top of the rear fender is what holds it in tight, so you'll want to put your left hand there when you're pulling. You can see the 2 studs on the tail light where you have to remove the nuts. Pretty easy, but nice to have a picture so you know you have everything off before pulling.
I was pretty much finished and about to zip tie the new breather inside the tail light compartment when I dropped it. NOOOOOO! <Expletive Deleted> <Expletive Deleted> <Expletive Deleted>
So what should have been <1 hr turned into 2+ trying to fish it back up with my telescoping magnet. I should have just pulled the fender off, but you know how it gets when you're frustrated...mind doesn't think clearly.
Anyway, super cheap and easy mod that I would recommend tackling when you have some downtime.
Going to do this Mod. Do you think both hoses (Diff/locker breather) will fit in the Tail light compartment?
T-coupler! Sounds like a plan. Thank you for the help!
Actually, that may or may not work. I didn't have an E-Locker to route, but I thought that I saw a coupler used in another build. Check out this link MTN4RNR Breather Mod where [MENTION=129593]MTN4RNR[/MENTION] used 2 breathers. They will both still fit in the taillight compartment.