Zombie Truck 2.0 MPAV Build!

Small update:

I just replaced my Lumbar Motor under warranty. My Extended Warranty covers power seat motors, so I would urge those of you who have extended warranties on your vehicle and bad lumbar supports, to have warranty cover it.

Small side note, so it seems I may have misdiagnosed my lumbar motor... it looks like the lumbar motor teeth and the lumbar arm gears got siezed when I must have hit a big bump or something. So basically I have an extra Lumbar Motor laying around that works great. Morale of the story? If you can have warranty cover it, do it! Second, maybe the lumbar mechanism is stuck from a good bump rather than a bad motor.

Post Note-
$500+ For a god damn motor!? Its a pretty stout, powerful little motor, but its no where near $500+ worth! I mean really!
 
I seem to have forgotten to mention it. But to give you guys a heads up on what's been going on. Six weeks ago some f#^%@!$ broke into our satelite shop (the one my co-worker and I work out of, working on the used cars for the dealership) and pried open our toolboxes and ran off with our tools. Total damage was roughly $6100 on my end and $43k on my coworkers end. 5 weeks later the insurance company finally gets back to us after delaying as much as they could with this BS claim of 40% ProRating my tools, yes you read that right... the insurance company is trying to prorate LIFETIME WARRANTY tools... so I am in the process of fighting them and just signed with Snap-on to finance $6300 for new tools and toolbox (They were very nice to work with me, I am buying $8k in equipment for $6.3k, they really made an effort to help me out) out of my pocket.

Its been stressful and infuriating and has actually hurt my modding plans for the 4Runner. I had hoped that I could cut back on the spending this year to build up enough cash to hopefully pay off the truck this year. But thanks to this theft and a bunch of other crap in my life my project schedule is all f#@%!d up.

So probably not gonna have any big updates or mods too soon, unless I can manage to do it for a good price. I plan on doing my timing belt at 100k (@ 95k now) so I may document that for you guys.
 
Wow that sucks. That's a lot of tools to be taken in one night. I know Snap On can be expensive but what does $49k worth of tools look like? Seems like you couldn't fit all that in one truck or van. Or maybe they made multiple trips.
 
Wow that sucks. That's a lot of tools to be taken in one night. I know Snap On can be expensive but what does $49k worth of tools look like? Seems like you couldn't fit all that in one truck or van. Or maybe they made multiple trips.

Keep in mind we claimed our toolboxes also because they were damaged. a large toolbox like my co-worker's is easily 10~15k. Also they broke open the cabinet he used to store all his diagnostic gear. For the most part they were all in cases, they also used chairs and anything with wheels to cart them out...
 
So here's an update on the rig for you guys.

As you may have remembered back in february-ish I was having issues with the brake pedal being too soft. Eventually bleeding it something like seven times seemed to have corrected the issue somewhat and I left it at that. About a month ago I put new brake pads front and rear and did a brake flush and bleed on the vehicle and since them my brake pedal feel has degraded into the "GM Zone" as I like to refer to it. If you've ever driven a GM truck, you know what I mean by their brakes being soft feeling.

Back in February I spoke with the factory and found out that there is no diagnostic procedure to verify that the Hydraboost system (the big MC/ABS/Booster assembly) has failed. The only way the factory "diagnoses" the units is by eliminating everything else in the system. (Yet in TIS we have an 11 page section for tearing down and rebuilding the entire unit.) So with the factory telling me to replace the unit, I had my warranty go ahead and buy the $2400+ ($1800-ish online) part and 3hrs of labor to replace it. Interestingly enough, I placed the order yesterday morning, and before I went to work today at 0930 the part was here already, makes you wonder how often these things fail if the warehouse is able to ship them so fast!

Anyways, its pretty easy to replace the unit, the biggest challenge is that the unit itself is HUGE, something like 12inch cubed and weighs about 20lbs. Also the upper left nut that secures the booster to the firewall is going to be a pain to get off for you and you may have to move the fusebox and a module bracket to get it done right.

Here's a picture of the old unit:


Also, since this was done under Extended Warranty I get to keep the old unit! Which provides me the unique opportunity to tear the unit apart and see if I can figure out ways to diagnose the unit. Also something to note, you don't really see it in the picture or the diagrams from the FSM, but according to the Parts Diagrams the unit is actually 3 main components bolted together, rather than a giant valve body with a booster attached to it. So when I get some spare time I will try to take detailed pictures and make a thread showing how to tear down the unit for you guys!
 
So, I know this really isn't a modification to my 4Runner per say. But still something I wanted to share with you guys and goes with the whole "Zombie Truck" motif.

Just picked up my nie new UTAS UTS-15 Shotgun today! This thing is nice, much better than the Keltec KSG I wanted to get earlier in the year!

Here's a picture from the net, I'll upload pictures of my new friend when I get around to them. Think of it as... Enhanced Security for the 4Runner! LoL

UTAS_UTS-15_High-Capacity_Bullpup_Pump-Action_Shotgun_Turkey_1.jpg
 
Definitely a serious Zombie neutralizer.

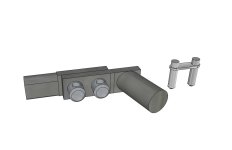
Now for the mount. Readily accessible but not readily visible. Gonna have to get creative.
 
A picture of things to come, if all works out... :zoom:
SBD-Bracket.jpg

Internet cookie for anyone that can guess what it is! :D
 

Attachments

  • SBD-Bracket.jpg
    SBD-Bracket.jpg
    46.7 KB · Views: 1,439
Last edited:
Small Update-

Installed a new set of SPC Upper Control Arms with the Spec Ride Bushings to replace the set I had installed about 2 years ago. The original set's bushings were torn to hell and back; working with SPC to have them covered under warranty, they've been really helpful and willing to work with me. So I wanted to give them a positive shout-out on their customer service in this matter.

The new UCAs went in easy enough and the vehicle feels better on handling and bumps now.
 
So I got tired of scrambling for replacement factory gravel shields, they quite literally only last me about 1 or two trips off-roading and the frame is dented and dinged from them buckling. RCI had a group buy a few weeks back and I couldn't help but scoop up a whole set for the 4Runner!

Of course I also had to order some RivNut inserts because the factory bolt holes for the gravel shields stripped out a long time ago so I had to drill them and retap them for M10 bolts (factory is M8x1.25) and then those bolts started to strip out also before the RCI skidplates got here, so I also ordered some M8x1.25 RivNut inserts to fix the frame with! I unfortunately didn't take any pictures, but the repair is pretty straight forward. Just drill a hole in the frame to the size specified by the Rivnut (in my case the hoel had to be 17/32" in diameter), then install the RivNuts using a special tool or DIY tool (Google "DIY RivNut Tool" if you're curious what that looks like.) So that part was for the most part drama free.

RCI included pretty decent instructions with their product (I wish they had a few more pictures describing one or two details, but I figured it out pretty easily) and all new hardware for their skidplates (aside from one, but I will get into that later.) The install itself should take people too long, unfortunately most of my skidplates were mangled (the gas tank was particularly contorted and difficult to removed) and the bolts were crusty so I ran a tap through them to clean them up. I did however run into one issue that has me a little upset, but I'll explain that a little further down.

First is the plates unwrapped (sorry for the crap picture, it was the end of the day and the stall is facing westward.)


The first issue I ran into is that the Transfer Case skid plate didn't come with hardware or instructions, I'll have to call RCI about that on Monday; I have a feeling it was misplaced. On a side note, they also installed protective foam sheeting between the crossmember and skid plate... even though they already assembled the two for me; which I thought was both amusing and odd.


The second issue I ran into is that my bolt-on CBI sliders are not compatible with RCI's Transfercase skidplate, the crossmember goes right where the central supports go. So I am going to talk with RCI about possible solutions and/or maybe see how much a set of modified CBI Sliders are going to cost me since I need them to relocate the central support a bit backwards.


Finally some pictures of the goods installed (at least most of them.)

Front to Back


Back to Front


One small side note, the included carriage bolts for the gas tank skid plate don't like to be super tightened (I snapped one by accident since I was cranking the bracket bolts down tight.)

Post Note-

Is it sad that the last few posts are just me bumping my own build thread? :(
 
Skids look good, sucks about the t-case skid. Hope you're able to get around spending several hundred to fix it...

Is it sad that the last few posts are just me bumping my own build thread? :(

Looks like you haven't really updated much in almost a year and a half so I would say no.

Seems like you've been too busy solving Joe DIY's technical problems... or maybe everyone is mad that you haven't finished the sway bar disconnect.
 
Skids look good, sucks about the t-case skid. Hope you're able to get around spending several hundred to fix it...


Looks like you haven't really updated much in almost a year and a half so I would say no.

Seems like you've been too busy solving Joe DIY's technical problems... or maybe everyone is mad that you haven't finished the sway bar disconnect.

:pout:

The disconnect project is on hold for now, it technically was a success; but there were some tolerance issues that needed to be addressed before it would be ready for real world testing (I mentioned most of them in the thread for the project http://www.toyota-4runner.org/4th-gen-t4rs/138892-4th-gen-disconnecting-sway-bar-set-up.html.) Between a lot of personal issues, stress at work, and some other serious stuff in my life I haven't gotten a chance to hit up Tech Shop let alone adjust the design to correct the original flaws. Not to mention I had thought about an entirely different design all together, but currently I am just at this point in my life where I just don't have the energy to do anything.

:(
 
Last edited:
Skids looks good!:thumb3:I know i love mine! Sucks about the hardware and instructions, I'm sure it was just a packaging mistake. Also i know some guys had to have the cross member notched to accommodate for there bolt on sliders, i think it's in the original thread RCI thread. Man that gas tank skid look solid!
 
I would be willing to be a test vehicle on the disconnecting sway bar setup.

I hate having to push and pull for my driving conditions.
 
Skids looks good!:thumb3:I know i love mine! Sucks about the hardware and instructions, I'm sure it was just a packaging mistake. Also i know some guys had to have the cross member notched to accommodate for there bolt on sliders, i think it's in the original thread RCI thread. Man that gas tank skid look solid!

For the life of me I cannot find this thread you're talking about. I see a lot of people mention having to notch the crossmember but I can't find any pictures or threads on the matter.
 
For the life of me I cannot find this thread you're talking about. I see a lot of people mention having to notch the crossmember but I can't find any pictures or threads on the matter.

Here ya go it's this one,it's post #152 it look's like they where notched for a set of Shrockworks Bolt on sliders i'm not sure how similar they are to yours but i know a couple of people had to do this..

http://www.toyota-4runner.org/4th-gen-t4rs/133673-*-new-heavy-duty-skid-plates-*.html
 

Members online

Forum statistics

Threads
278,316
Messages
3,554,120
Members
248,016
Latest member
Advally Service

Trending content

Back
Top