2UZ-FE R&R T-Belt & Water Pump

2UZ-FE Major Service Write Up? Yar/Nay?


  • Total voters
    161
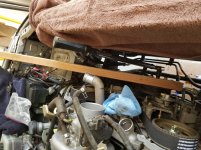
Sure enough. Autozone's 1/2 did the job along with a 2x4 to hold the pulley.

How did you use a 2x4 to hold the pulley? Did you just wedge it in there, or add something to thread into the holes on the pulley?

My homemade pulley holding tool didn't work, so I wrapped the old drive belt around it and hooked it either to the fan mount or one of the UCA mounts, depending on the direction I was turning it.
 
This is just a small "fix" to help save you roughy 1k on a new throttlebody.

When I did my Timing Belt I noticed my throttle body was leaking from one of the plugs on top, its about a grand for a new throttle body and it honestly does not affect performance, but does put your coolant at risk (OAT coolant does not like dissolved air and leaks can quickly degrade coolant's attributes.) I got mine covered unde rmy extended warranty, but a quick and simple fix is to just clean the area off very well, then apply either something like FIPG, or maybe even JB weld over the plug's edges as a "seal".

Here's a picture showing the leak, new Throttle Body's clean plug and my "fix" to the old plug.

View attachment 78011

I kept the old throttle body, because as I said its still a good part mechanically, just that small leak was the issue.


I noticed my throttle body has the same issue. Why is that plug even there? Is it removable so it can be sealed at the threads?
 
How did you use a 2x4 to hold the pulley? Did you just wedge it in there, or add something to thread into the holes on the pulley?

My homemade pulley holding tool didn't work, so I wrapped the old drive belt around it and hooked it either to the fan mount or one of the UCA mounts, depending on the direction I was turning it.

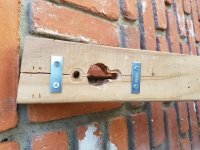
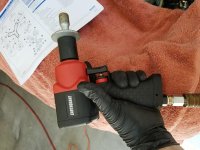
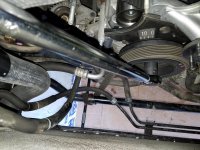
I used the Harbor Freight 1/2" stubby impact to remove the bolt. For install, I used the 2x4 with four 3" screws through the sides as well as 2 metal braces on the face. Even with all of that, it just barely held up to the strain as the pictures show it split badly. It also bent the screws I used to mount the 2x4 to the pulley. Fortunately the wrench clicked just as it was about to let go. :crazy:

I tried to use an old serpentine belt but couldn't find a way to get enough bite on the pulley -- it just slipped. Would love to see a picture of how you secured it as that might be the most strait forward way for guys to do this without any extra tool or home made jig.

My fan mount bearing was a bit noisy when spun by hand and had a slight bit of play so opted to replace it as well.
 

Attachments

  • 20170402_150211.jpg
    20170402_150211.jpg
    137.8 KB · Views: 2,841
  • 20170402_144543.jpg
    20170402_144543.jpg
    140.6 KB · Views: 2,903
  • image-20170401_152707.jpg
    image-20170401_152707.jpg
    136.7 KB · Views: 2,757
Last edited:
I used the Harbor Freight 1/2" stubby impact to remove the bolt. For install, I used the 2x4 with four 3" screws through the sides as well as 2 metal braces on the face. Even with all of that, it just barely held up to the strain as the pictures show it split badly. It also bent the screws I used to mount the 2x4 to the pulley. Fortunately the wrench clicked just as it was about to let go. :crazy:

I tried to use an old serpentine belt but couldn't find a way to get enough bite on the pulley -- it just slipped. Would love to see a picture of how you secured it as that might be the most strait forward way for guys to do this without any extra tool or home made jig.

My fan mount bearing was a bit noisy when spun by hand and had a slight bit of play so opted to replace it as well.

I made my pulley holding tool out of metal, but the screws bent and stripped out the screw holes in the pulley.

I don't have any pictures using the belt, but I can try to explain it.
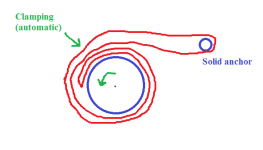
I folded the belt in half so the ribs were facing out on both sides, and so there was a tight crease at one end (this ruins the belt). I wrapped the belt around the pulley in the direction I was going to turn the bolt and hooked the other end of the belt around something very solid. The fan mount and UCA mount worked, but I was afraid of bending the fan mount despite it being a large piece of metal. The amount of force on it is like 400lbs if it's a 6 inch pulley and we're applying 200ft-lb of torque. But it seems fine. With one end of the belt hooked onto something solid, I turned the pulley so the belt wrapped around it like rope on a spool. The outer turn clamps the inner folded end of the belt to the pulley when you apply force with a wrench, so it won't slip. A diagram is attached.

The FSM warns not to turn the crank backwards, but I did a little and it didn't seem to be a problem.
 

Attachments

  • belt pulley.png
    belt pulley.png
    9.1 KB · Views: 2,767
I made my pulley holding tool out of metal, but the screws bent and stripped out the screw holes in the pulley.

I don't have any pictures using the belt, but I can try to explain it.
I folded the belt in half so the ribs were facing out on both sides, and so there was a tight crease at one end (this ruins the belt). I wrapped the belt around the pulley in the direction I was going to turn the bolt and hooked the other end of the belt around something very solid. The fan mount and UCA mount worked, but I was afraid of bending the fan mount despite it being a large piece of metal. The amount of force on it is like 400lbs if it's a 6 inch pulley and we're applying 200ft-lb of torque. But it seems fine. With one end of the belt hooked onto something solid, I turned the pulley so the belt wrapped around it like rope on a spool. The outer turn clamps the inner folded end of the belt to the pulley when you apply force with a wrench, so it won't slip. A diagram is attached.

The FSM warns not to turn the crank backwards, but I did a little and it didn't seem to be a problem.

Cool, there might be enough room on the belt to push an extension through the loose end and secure it around the sway bar or UCA. I definitely share your concern about the fan mount -- wouldn't dare try that.
 
Cool, there might be enough room on the belt to push an extension through the loose end and secure it around the sway bar or UCA. I definitely share your concern about the fan mount -- wouldn't dare try that.

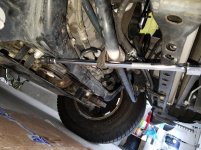
I just gave it a try and was able to easily click the torque wrench at 181ftlbs like this. For anyone that was already changing their serpentine while doing this job, this is an easy way to do it without any other tools.
 

Attachments

  • 20170405_181235.jpg
    20170405_181235.jpg
    137.7 KB · Views: 949
  • 20170405_181301.jpg
    20170405_181301.jpg
    137 KB · Views: 919
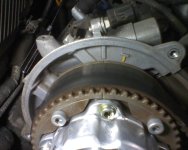
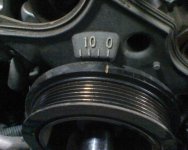
The white dot on the plastic cover conveniently lines up with the little bump on the engine block, that's what I was pointing out in the post. So if it's lined up with the white dot it should be at that mark.
just to add in some more confusion...


im doing another belt on an 08 today.

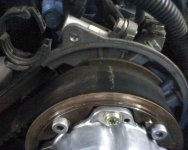
when the dimple is lined up to the crank pulley, the cams are lined up with the LINES, not the T, and the crank is on 0*, NOT on the dot. the dimple and dot do not line up..

this engine lines up identical to my 06. though it does not match any literature I have found. none of it makes any sense..

I also heard that using large binder clips to hold the belt to the cam/crank helps to make sure that nothing jumps.

We shall see...
I use large binder clips every time I can. they work great.
 

Attachments

  • 0428171101a.jpg
    0428171101a.jpg
    128.8 KB · Views: 1,161
  • 0428171101b.jpg
    0428171101b.jpg
    133.6 KB · Views: 861
  • 0428171101c.jpg
    0428171101c.jpg
    131.3 KB · Views: 901
  • 0428171137a.jpg
    0428171137a.jpg
    47.9 KB · Views: 813
just to add in some more confusion...
when the dimple is lined up to the crank pulley, the cams are lined up with the LINES, not the T, and the crank is on 0*, NOT on the dot. the dimple and dot do not line up..

this engine lines up identical to my 06. though it does not match any literature I have found. none of it makes any sense..

.

That's how it should be. The "|" is top dead center or 0 degrees. The "T" and the dot next to the crank pulley are the timing belt service position. So I guess the dimple and dot on the crank timing gear are 0 degrees.

I wasn't really able to see the dot near the crank gear (your last photo) since I couldn't get my head there, but I made my own mark on the front on the same tooth as the dimple, and I made sure everything matched the belt I took off.
 
That's how it should be. The "|" is top dead center or 0 degrees. The "T" and the dot next to the crank pulley are the timing belt service position. So I guess the dimple and dot on the crank timing gear are 0 degrees.

I wasn't really able to see the dot near the crank gear (your last photo) since I couldn't get my head there, but I made my own mark on the front on the same tooth as the dimple, and I made sure everything matched the belt I took off.
oh yes, im aware. I wasn't debating that. just addressing the fact, that the dot doesn't in fact match up with the lower dimple.

another thing I discovered on this job, the marks on the belt. previously, I have never used them. but this time I decided I would, and see wtf.

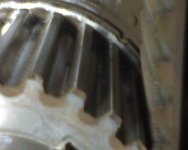
oddly enough, the crank mark on the belt doesn't line up with the above pictured dimple. there is yet ANOTHER timing mark on the crank sprocket that it lines up with. crazy. wtf was Toyota doing when they set this system up?


I had to use a mirror to see it, as its on the bottom.
 

Attachments

  • 0428171410a.jpg
    0428171410a.jpg
    132.6 KB · Views: 877
Did I **** up?

2007 4.7 V8...tried the timing belt myself,.got to belt everything lined up(lines on

cams and oil pulley to the "l" and white dot) , clockwise to 50 degrees (did not rotate back to "l" position ) .. changed

belt, didn't mark new one just lined up the factory lines with the marks on cams/

oil pulley (I did mark old belt with R cam "l", if that helps any) put tensioner and

hand cranked until the factory markings on the belt came around 4 times (1/2

ratchet proper socket with spark plugs in, felt a little resistance but I figured it

was compression and just turning a V8 but hand)


And that's where I left it...I have one more day off work and would really appreciate any advice on this.

Did I f*** my car up? because I didn't return it to 0* before taking off old belt?
Is there a way to address the issue if so?

Thanks in advance!!
 
Timing question

I just used this thread to perform my first timing belt change along with the water pump. Everything has gone well so far with the tear down and I have now installed the water pump and the timing belt. My situation is this, once I got the belt on I turned the motor over by hand to check for issues and when I finished turning my cams were lined up together but my crank gear was one tooth past my mark. It unnerved me, so I turned the crank over until it was lined up and began to fiddle with the belt around the passenger cam it made a thump like it settled on a tooth and they now are lining up. So all that being said, do I move forward now or is there something off here? Also, if my timing is off, can I simply remove the belt and turn the three pulleys independently until they line up correctly?
 
Is the OP's photo hosting site blurring the photos in addition to watermarking them? I don't recall them being blurry a few months ago.
 
This guide lost most of its value without clear photos. Are there other guides? I'm doing this in two days.

There's a pretty good guide in the Factory Service Manual :wink2:

If you need to know what you're getting into, this should help you:
https://www.youtube.com/watch?v=4dO8KW1-NQs

Also, if you don't have the crank holder tool, you can get the crank pulley bolt out with an impact once you remove the radiator and then loosen the AC condensor. At least the Milwaukee Fuel 1/2" impact fits in there.

Also, turn the crank to 50* ATDC which will move the cam gear timing marks over to the "T". The FSM states to rotate it counterclockwise 50* (BTDC) but it's easier to line everything up if it's 50* ATDC. The LH (driver's side) cam gear will want to spring back with very little force so make sure the crank is at 50* BTDC or ATDC and not TDC when removing or installing the timing belt to avoid piston to valve contact.

Besides those two things, just follow the steps outlined in the FSM and you should be good to go.
 

Members online

Forum statistics

Threads
278,316
Messages
3,554,124
Members
248,016
Latest member
Advally Service

Trending content

Back
Top