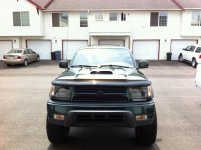
A.Wilson013's Build Thread

Status
Not open for further replies.
Finished painting last night and got them all sealed up before my doctors appointment this morning.

I was a little rushed on the passenger side due to my wife needing her car tomorrow, so I am curious how it will turn out aiming.

Here are a couple pictures, I'll mount and aim them after work today.

ene3evem.jpg

taqa4azy.jpg
 
Those pictures look awful. I swear it doesn't look that bad.... Aside from a few imperfections I would say they're visually pretty dang good. Now we just need to see how well they perform =)
 
Nice job! Those look great and it's hard to photograph headlights due to the glare. Did you go with the 3" lens? I have a set of Orbit shrouds that need to go on, but I can't find the motivation to reopen them up. Looking forward to the output shots.
 
You may have just convinced me to have a professional do it... The folks on the supra forums make it sound like it's not too difficult =(

honestly, after reading up on this, I am curious to try this now too... if you go to install it, please let me know - i'd like to come watch/help, and get a feel for doing it on my own. Or else, team tackle two rigs?
 
My output shots were clearly taken with a potato, and I apologize for that...

One shot is at ~30ft away, and one is ~8ft away.

This was just a hasty aiming with intent of being driveable this evening. Tomorrow I will complete the aiming using Rickashay's guide.

Last shot is everything assembled... The TOYTEC decal was just a feeler; it didn't feel good and is now gone. I wish folks made decals more discreet, but I guess that's counterproductive to free advertising...

This shot made me realize that the corners look terrible, and the paint is currently drying, just like [MENTION=65101]BrianSD_42[/MENTION] did with his retrofit. I must thank him, as I used his thread countess times for reference.

I wish I could afford a dang dslr.
 

Attachments

  • IMG_2201[1].jpg
    IMG_2201[1].jpg
    178.9 KB · Views: 1,464
  • IMG_2202[1].jpg
    IMG_2202[1].jpg
    147.1 KB · Views: 1,482
  • IMG_2198[1].jpg
    IMG_2198[1].jpg
    135.3 KB · Views: 1,474
Last edited:
so i think that decal would look sweet there if it was black, infact if toytec would make some of those in back im sure a few of us would buy them and put them on our rigs... [MENTION=9139]steezemcqueen[/MENTION] do it!
 

Attachments

  • toytec projector.jpg
    toytec projector.jpg
    135.3 KB · Views: 1,781
so i think that decal would look sweet there if it was black, infact if toytec would make some of those in back im sure a few of us would buy them and put them on our rigs... [MENTION=9139]steezemcqueen[/MENTION] do it!

I know they make them in blue but haven't seen a black one yet.
 
Well, I toyed with the aiming a bit more and this was the result. They're still a bit low, but I know if I were in a small car, I'd appreciate that. PLENTY bright.

a4u2ete9.jpg


4yhyqyhe.jpg


Today I drove from Dupont, WA to Sunriver, OR pulling the Fleetwood E1. Took a picture during a quick pit stop... The 4.10's were hating the 33's and trailer in the low end of each gear. Top end pulled great, and all temps were holding steady. Highest on motor was 195, highest on trans was 210.

a3u6equr.jpg
 
I cannot figure out how to multi quote on my phone...

Logan- Thanks man!
[MENTION=53337]SCRunner12[/MENTION] - I had the Morimoto 35w 5k's in for all the pictures. I now am using some OEM BMW x5 bulbs that a family member gave me... Not sure what temp they are.

Isaac - I'll pass. It was not very fun for me :-)
 
[MENTION=53337]SCRunner12[/MENTION] - I had the Morimoto 35w 5k's in for all the pictures. I now am using some OEM BMW x5 bulbs that a family member gave me... Not sure what temp they are.

BMW uses a 4300k bulb thats the perfect color imo, its the closest you can get to natural sun light

that trailer looks great behind your rig... is it yours!?
 
BMW uses a 4300k bulb thats the perfect color imo, its the closest you can get to natural sun light

that trailer looks great behind your rig... is it yours!?

I figured they were 4300. They're a smidge brighter, but I like the look of the 5k more.

The trailer is not mine. You can rent them from McChord for dirt cheap... I would be stupid to buy one. I think it's $150 for 5 days. To buy one, store it, and maintain it, I don't think it would be a good investment.
 
Any updates on that valvebody kit? I'm rather interested in installing that myself...

No updates... Took a week off down in Vegas, so haven't done much...

To be honest, I am quite intimidated by the install. It will probably be awhile before I get the thing done.


Today I installed the polyurethane sway bar bushing kits front and rear from wheelers offroad. Very easy, straight forward install. I could be imagining it, but I think it made quite a difference.
 
I washed my 4Runner the other day and found my headlights to be all fogged up. I knew my seal on the lens was good because I put 2 coats of silicone around the edge. Had to be leaking from the holes in the back. (4x screw holes and the large hole for the projector).

I decided the foil tape looked tacky, so I wanted to clean it up a bit while fixing my leaks.

First I used JB Weld Plastic Weld on the screw holes.

Next I used foil tape to seal up the hole around the projector, but did not leave any overlapping the edge.

I then took a rubber 2" PVC pipe cap from Home Depot and cut the center out of it. (Photo is one that wasn't pretty enough... I made a new one after that.)

uguvezy5.jpg


Lastly I took my heat gun and heated around the edges of the cap so it would be able to stretch to fit the size of the opening, and slid it over the opening.

End result, in my opinion, looks MUCH more clean than before.

Before:

7ebezany.jpg


After:

ese6edev.jpg
 
Last edited:
Status
Not open for further replies.

Members online

Forum statistics

Threads
278,309
Messages
3,554,075
Members
248,016
Latest member
Advally Service

Trending content

Back
Top