aemravan's build thread - project TacoRunner

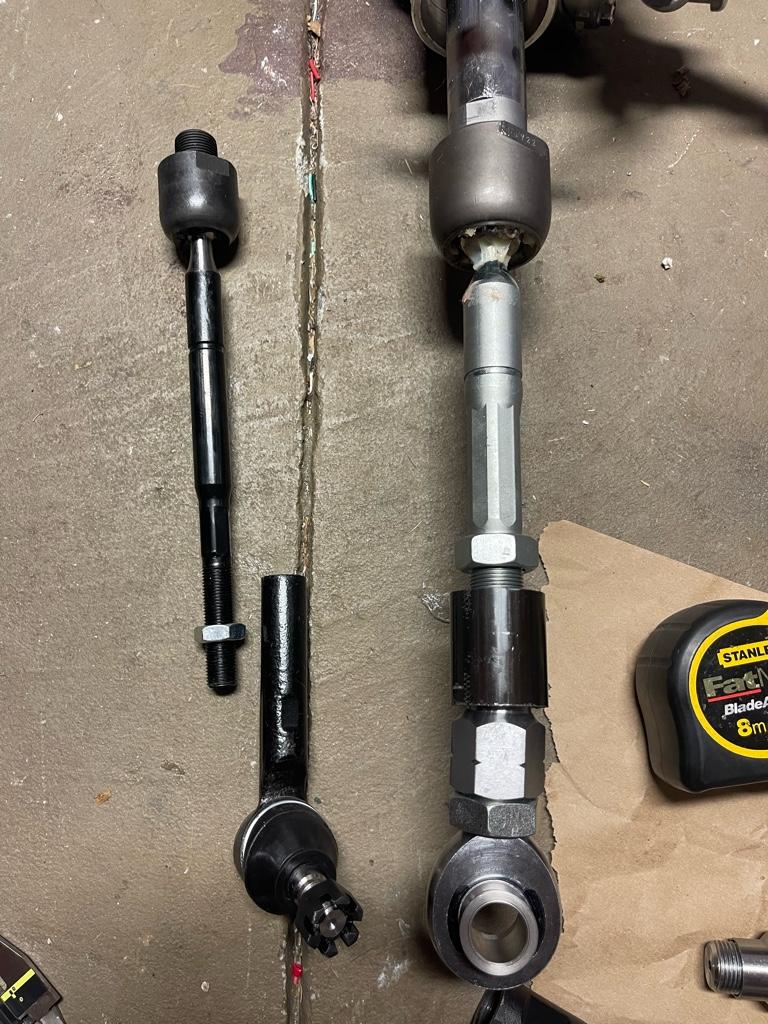
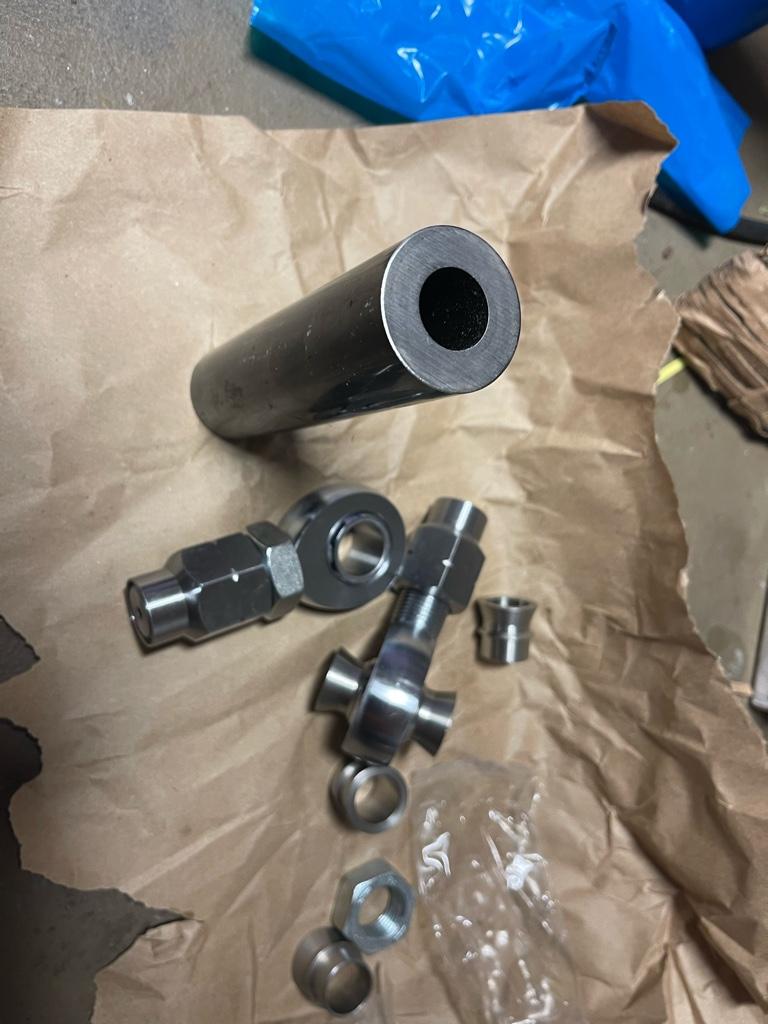
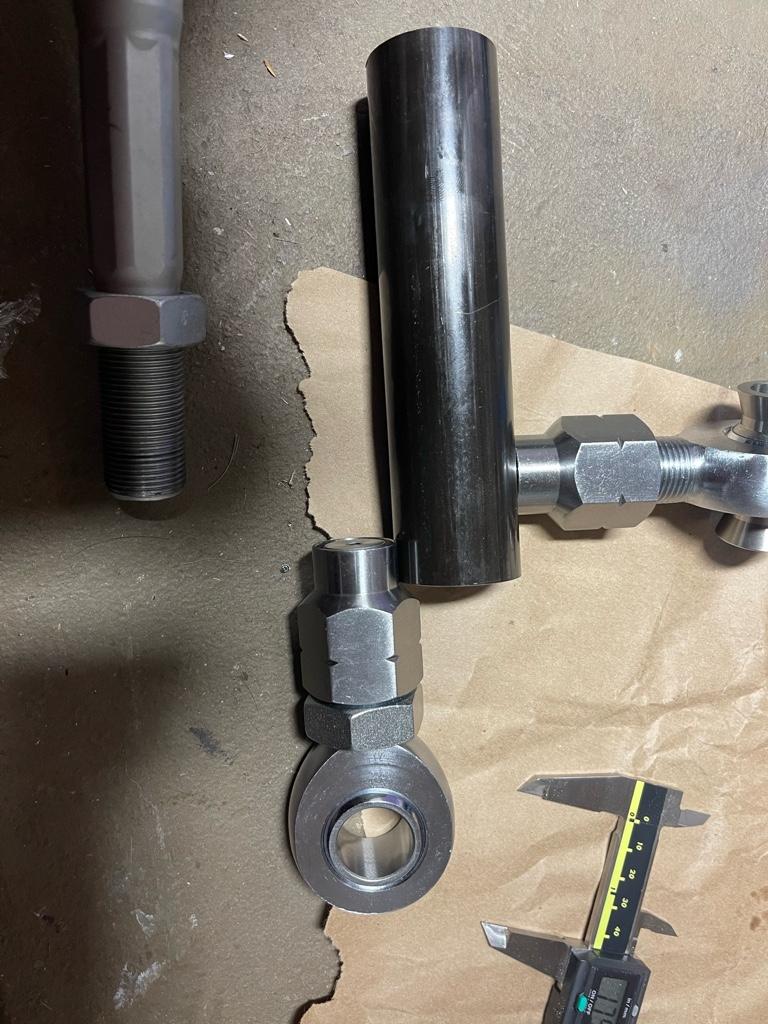
Both the Heims and DOM tubing delivered sooner than expected.. and holy beef batman.. If you thought the LC200 tierods were beefy.. wait until you see this come together..

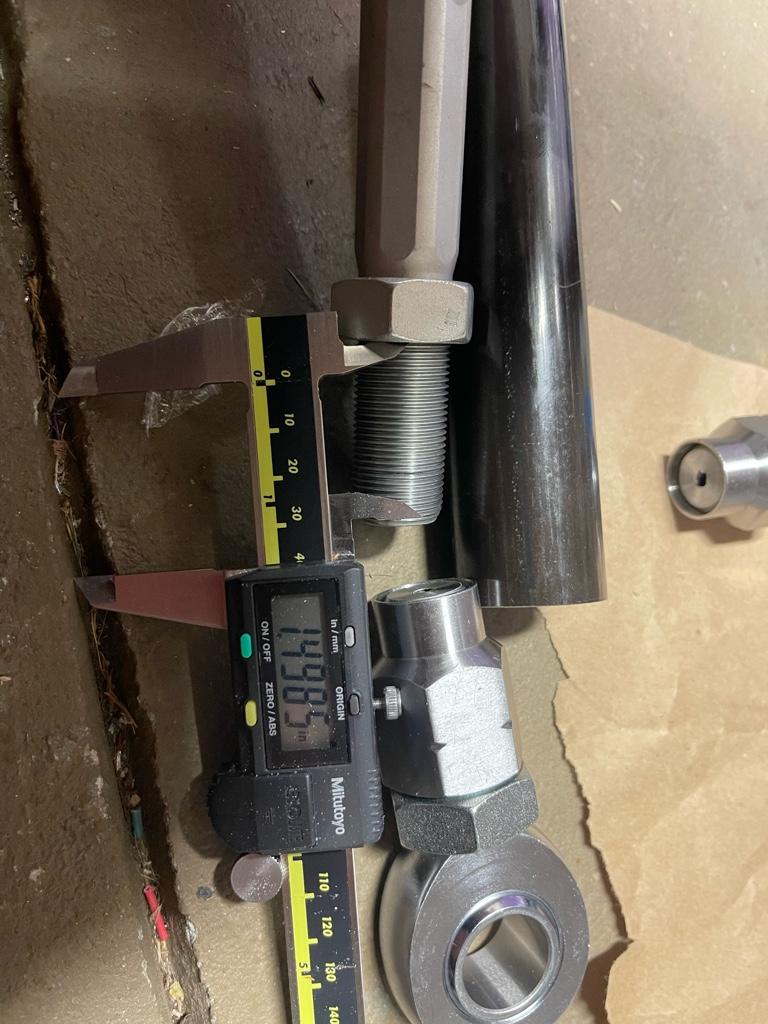
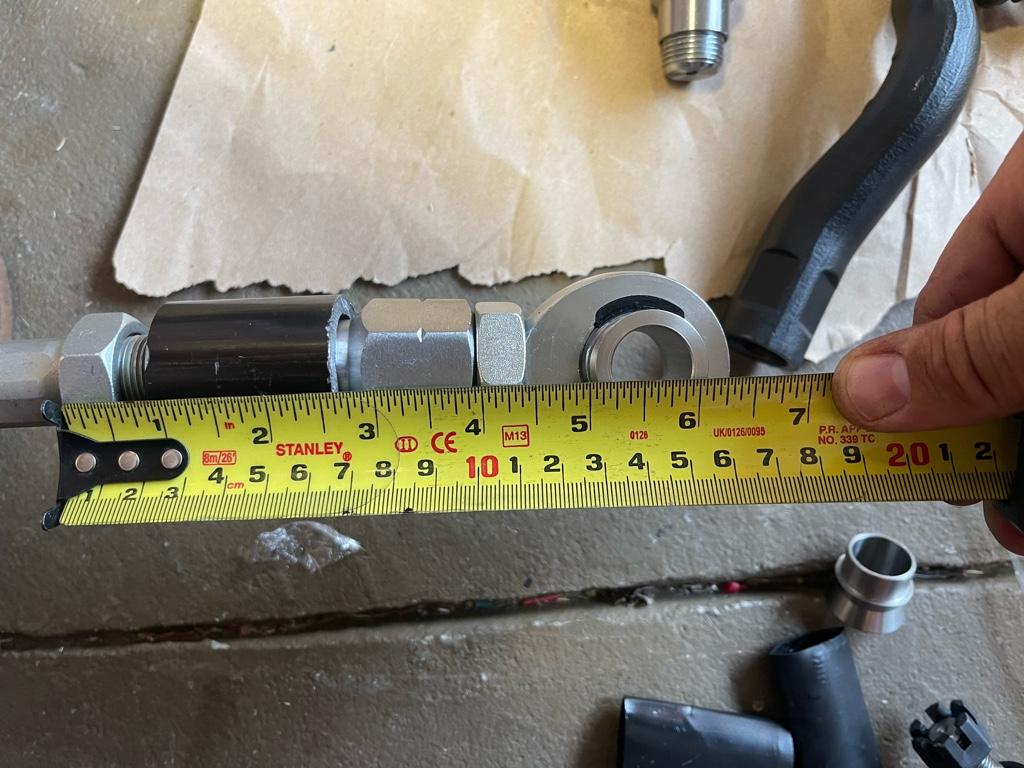
I really need to think about the size of this setup before I get to cutting, drilling and welding.. I feel like I will end up with quite a short piece of tube by the time I stack the heim, lock nut, weld-in bung, and the the tube, i'll probably have maybe a 2" piece that needs to be made up, but I need to make sure it is short enough fully screwed in to give me some toe-in adjustment. The heim joint has probably 1.5" of thread I can screw outward so toe-out adjustment isn't concerning, just need to make sure I can hit just below the minimum total width needed.
ba8ebf02fbf9dd6bfbc2584cc45647dd.jpg

658bf8d25664a33948e4e46dc20a9beb.jpg

2955500efc2f4de39a8461492f2dde00.jpg


Edit: ran out and grabbed some rough measurements and i think I should be ok.. with the inner tierod threads bottomed out on the heim joint threads I have just a bit over 2 inches of space between the inner rod lock nut an the inside of the weld bung for the heim. This is what I'm going to cut the pipe to and drill out to 1" on the welded insert side and 20.5mm on the threaded side. The heims are reverse threaded so I'll be able to easily adjust the toe without having to take everything apart which is nice, originally I was thinking of just having to either undo the heim bolt or or spin the inner tierod for adjustment, but this should work out great.

The limiting factor in this setup will be the inner tie rod threads bottoming out on the heim so I don't see a reason not to go ahead and cut the tube and get everything prepped. I'll probably give myself a bit of wiggle room on the tube and cut it to 1.75" in case I have to end up cutting down the heim threads allowing the piece to screw on further down.. we'll see. This is some super thick stuff.. really wish I had a bandsaw to cut through this but the angle grinder will work just as well.. only messier and louder lol.


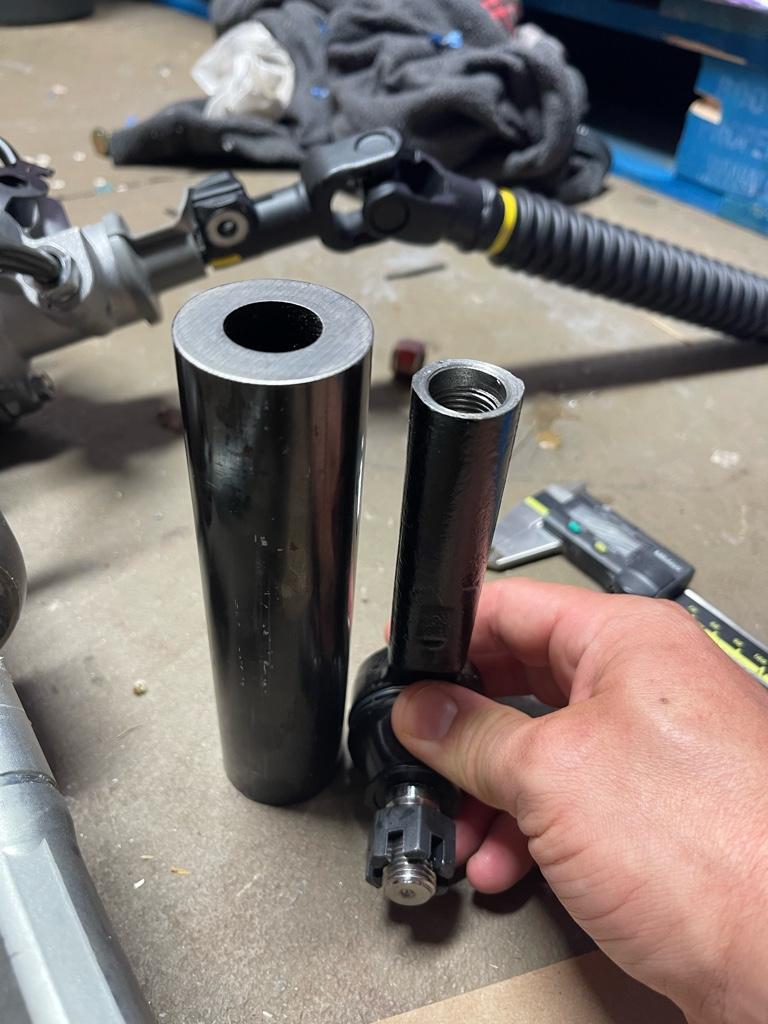
ps: fun fact.. I believe my factory tie rod could fit INSIDE of the DOM tubing.. that's the size difference in diameter we're talking here lol.
 
Last edited:
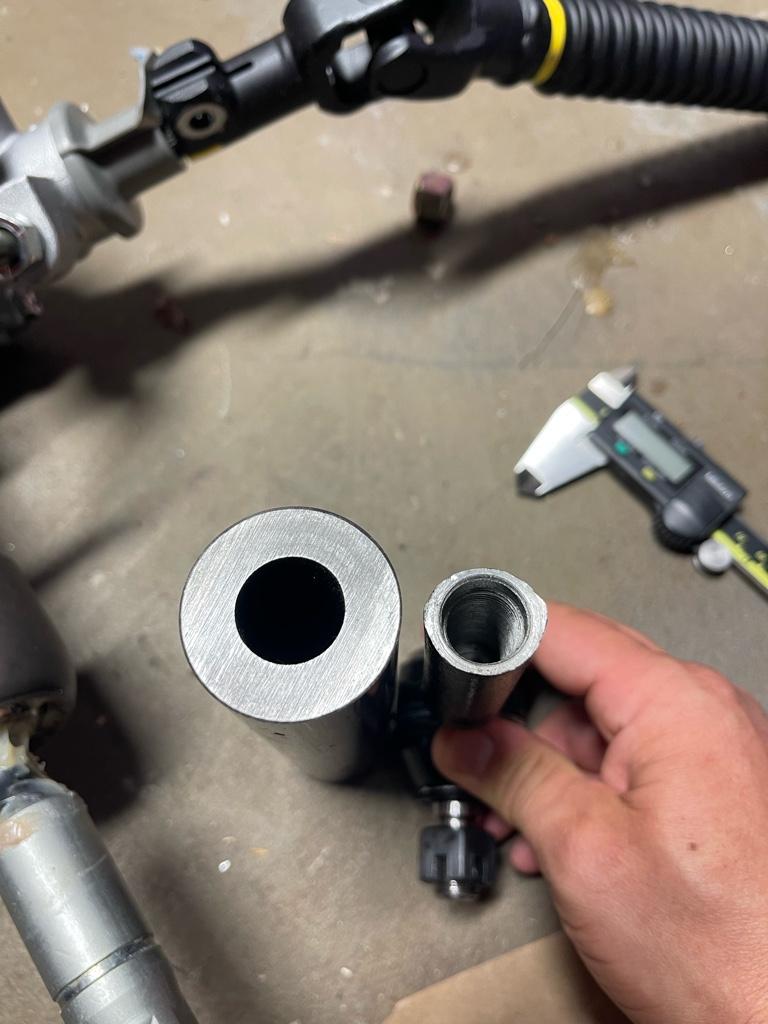
Yea.. I wasn’t wrong… the inner tie rod would certainly fit right in lol.

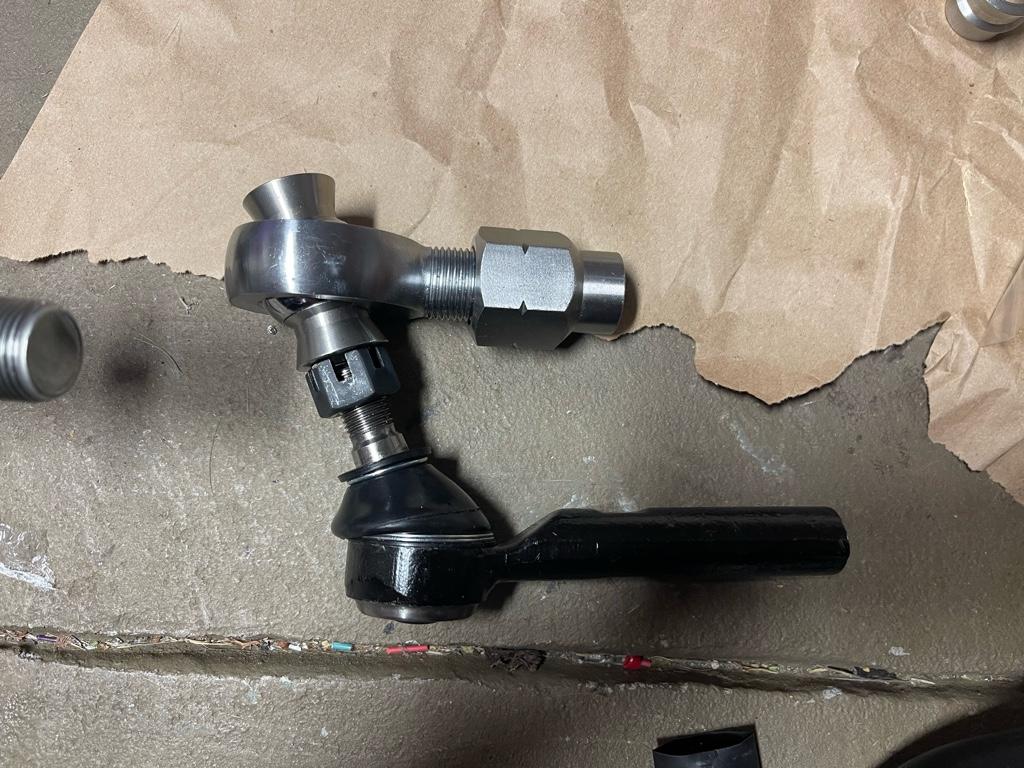
Also, my initial concern of not having enough angle on the heim was not valid. The angle meets, and maybe ever so slightly exceeds the factory tie rod
c1d0ed5074fbaacb3c8fa9bc33fba09e.jpg

b992dbc435a2cbc67ee7129e74347385.jpg

53d08dc0aa8d3b3a508c4b47d7e99349.jpg


Sent from my iPhone using Tapatalk
 
Yea.. I wasn’t wrong… the inner tie rod would certainly fit right in lol.

Also, my initial concern of not having enough angle on the heim was not valid. The angle meets, and maybe ever so slightly exceeds the factory tie rod
c1d0ed5074fbaacb3c8fa9bc33fba09e.jpg

b992dbc435a2cbc67ee7129e74347385.jpg

53d08dc0aa8d3b3a508c4b47d7e99349.jpg


Sent from my iPhone using Tapatalk
Pretty stout diameter, should be strong enough by a lot.
How is clearance on the coil over lock to lock?
 
Pretty stout diameter, should be strong enough by a lot.
How is clearance on the coil over lock to lock?


Won’t know for quite some time lol. I don’t think it will be an issue.. or at least I hope it won’t be but worst case I guess I’ll take the grinder to it , certainly enough meat there to take it down if needed.


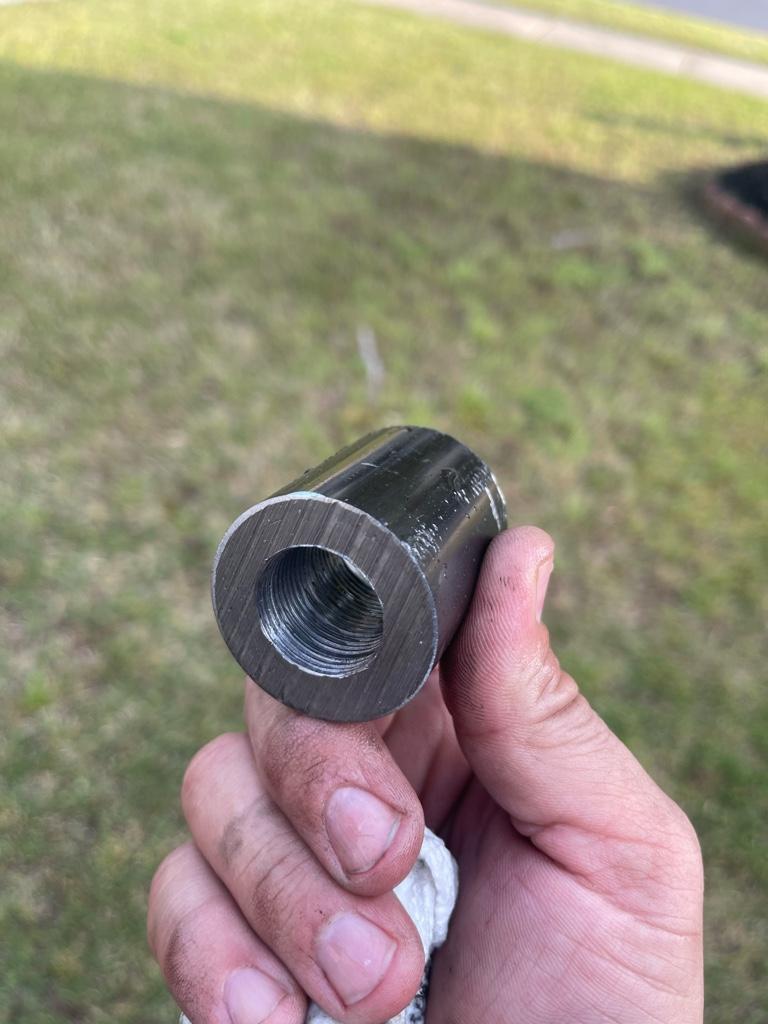
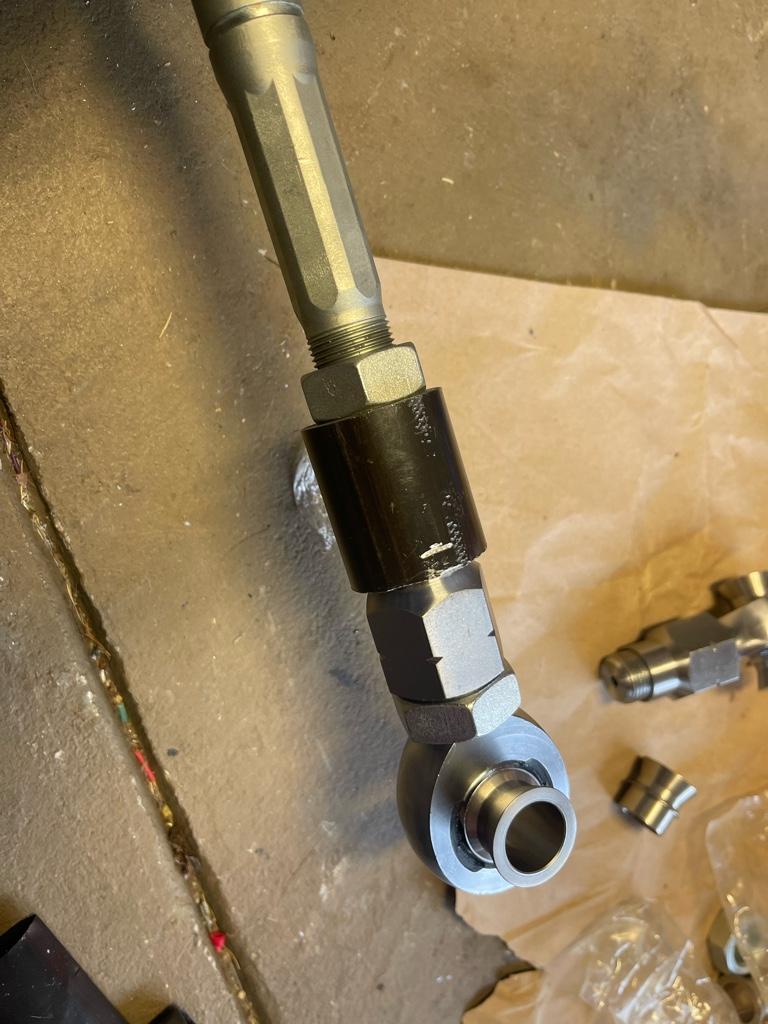
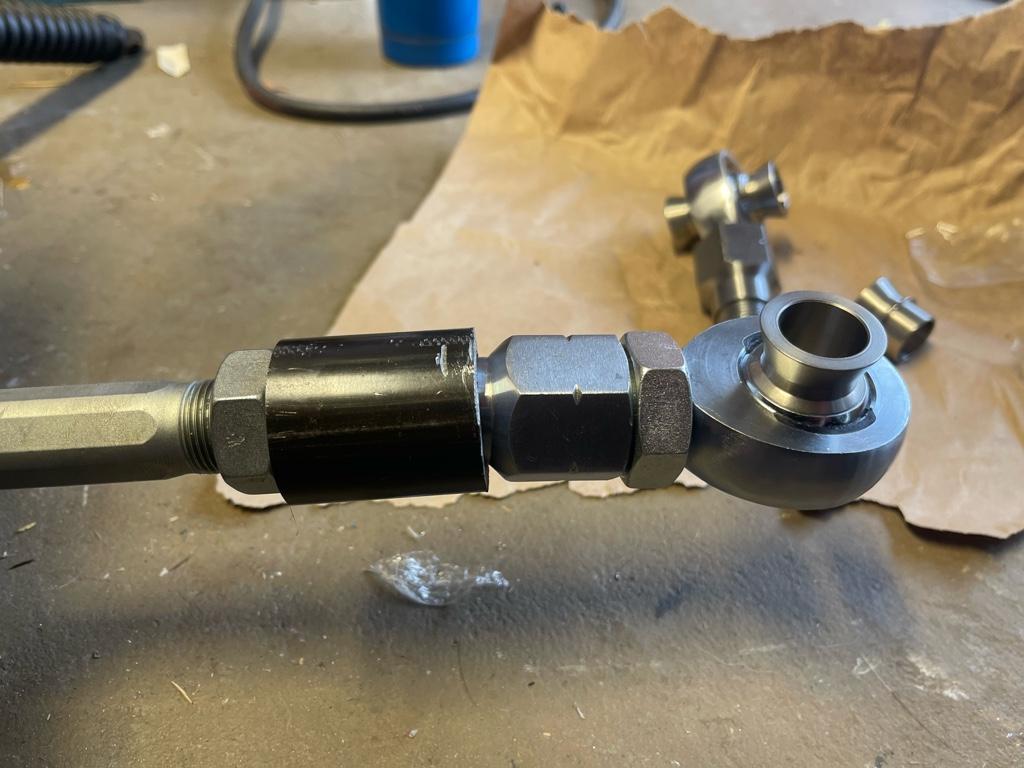
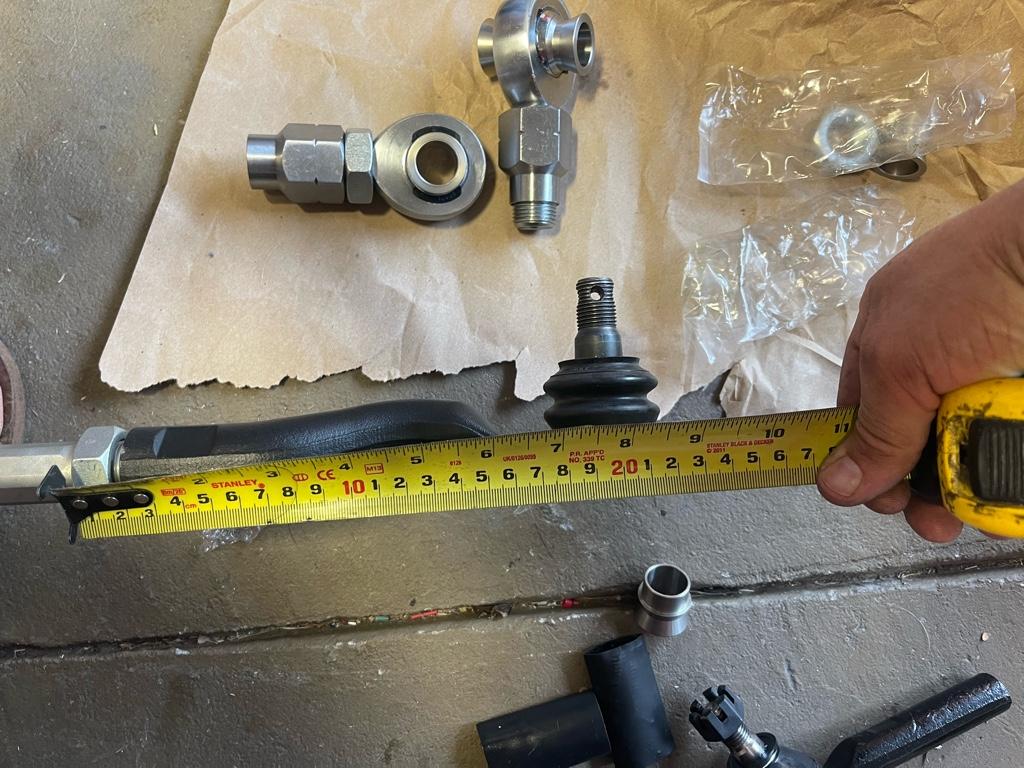
I decided not to wait to fab these up and cut down one adapter. Here is what it looks like so far. I’m measuring a 2.25” difference between the lc200 tie rod with it turned in to the max vs this one, so I THINk that should get me to a good spot with the overall width. Between the adapter and the heim itself I probably have another 2 inches I can come out at least if needed.

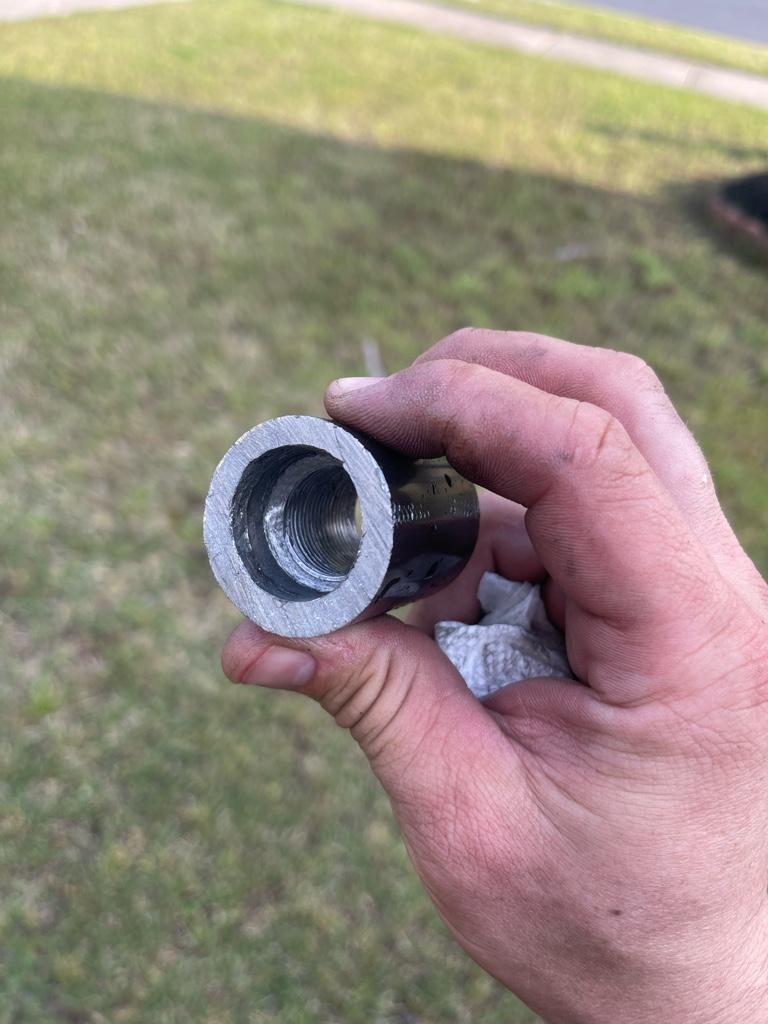
Hand drilling without a press isn’t as exact as I had hoped.. I’ll have to use a smaller bit than the 20.5mm that is called for the m22 threads.. while hand drilling I ended up wobbling a bit and the hole naturally is larger than 20.5mm bit. I don’t really think it’s an issue but the threads cut pretty easy and I don’t know if they are as deep as they should be. I have plenty of dom tubing left so I may recut this side and take a bit more time with the drilling.

The size difference to the stock rods is unbelievable lol

50472f7b6df5d1c2c287fd2784c84761.jpg

bec3cb2adaa20d8ef92b40db1f595fe2.jpg

b978fb2b04dfb9c9c722a63f6b1e2b84.jpg

e07e2eac44b85af2db7d18f96ce6496d.jpg

0eb51fb52fc547aa479d3513f5037755.jpg

7321357074c8b5400709882d1f9e0da1.jpg

b0dd225745585b3a6a8b7fbfae4ac6ea.jpg


Sent from my iPhone using Tapatalk
 
I forgot if you're using the relocated mounting position, using the diff mount that pushes the rack forward in the frame, you should clear the coil over.
 
I forgot if you're using the relocated mounting position, using the diff mount that pushes the rack forward in the frame, you should clear the coil over.


Wait what relocates position ? Are you saying use the diff mount hole to mount the rack so it sits more forward ?


Sent from my iPhone using Tapatalk
 
Mason's brother did an install in his FJ that pushes it forward. He also sells bushings that makes it work a little easier.

LC200 Steering Rack DIY Install Guide | Toyota FJ Cruiser Forum


Completely disregard what I asked.. of course I know about that .. I even have the bushings for it already lol. I don’t know why I blanked on the fact that you’re using the diff bolt on the drivers side and drilling a new hole on the passenger.


Sent from my iPhone using Tapatalk
 
Completely disregard what I asked.. of course I know about that .. I even have the bushings for it already lol. I don’t know why I blanked on the fact that you’re using the diff bolt on the drivers side and drilling a new hole on the passenger.


Sent from my iPhone using Tapatalk
You got a lot going on with this thing, not hard to forget small details.
I'm starting think I need a white board to keep notes and a list of all the different tasks left to be accomplished on my build.
 
You got a lot going on with this thing, not hard to forget small details.
I'm starting think I need a white board to keep notes and a list of all the different tasks left to be accomplished on my build.

You're not wrong about that man.. I'm actually at a point where I feel like I need to stop working on it for a bit and take it off road and for some camping.. the projects are endless and i feel like time is flying and it will be hot and miserable before I know it.. I feel like I already missed the whole month of April with it and at the rate I'm going I can be working on it non stop for the next 2 months and still not be done lol.

I got the shipping label sent in from RCV to get my axle over to them.. just need to pack it and ship it, hopefully today or tomorrow. My plan is to try and tackle the LC200 rack install when I get the axle back.. which also means cutting off the cam tabs and welding in the total chaos ones. Since I have to pull the shock from the passenger side anyway most of my suspension will be apart so I figure its a good time to do it.

I bought some aftermarket LCA's that I have laying around.. not sure if I want to throw those in for the time being or not.. mine are at 150k miles now so the bushings are sure to be worn out.. just not sure how much I trust a non OEM ball joint to last.

I figure I should hopefully be able to get all this done in a 3-4 late evening days worth of work.. I hope at least..
 
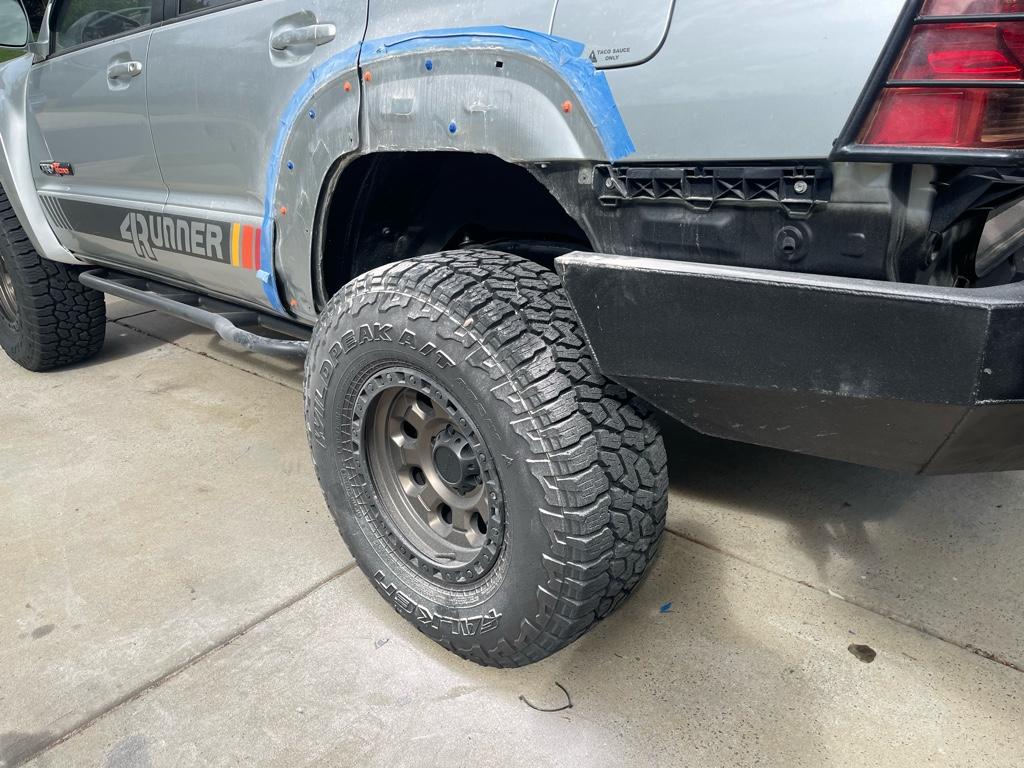
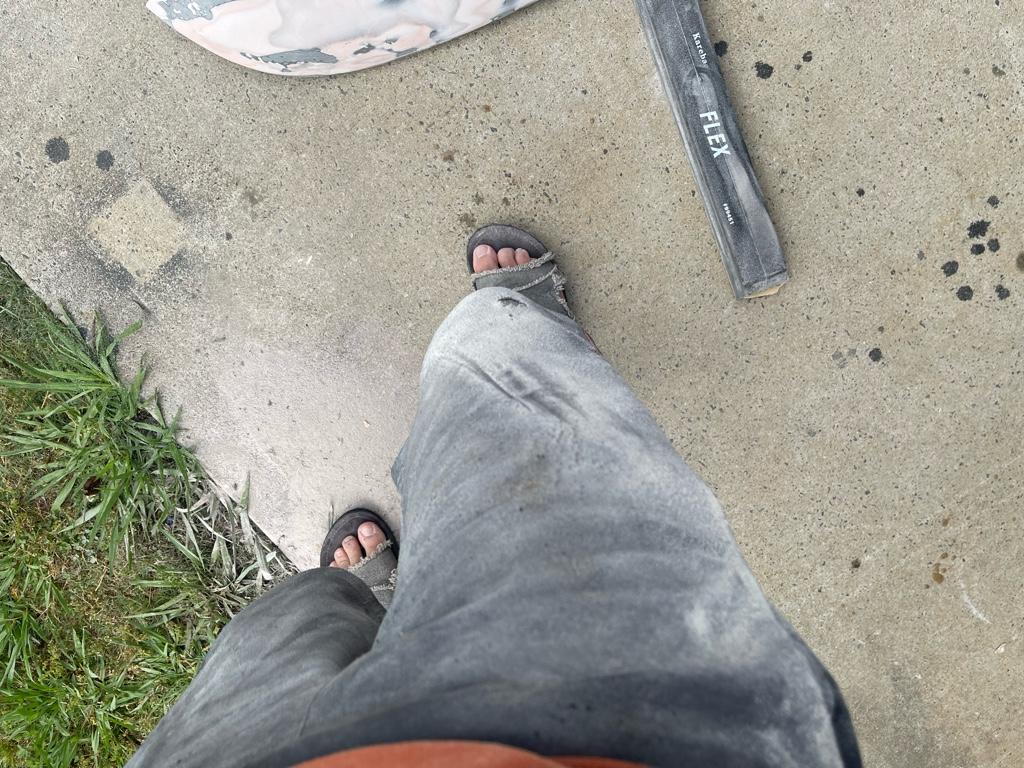
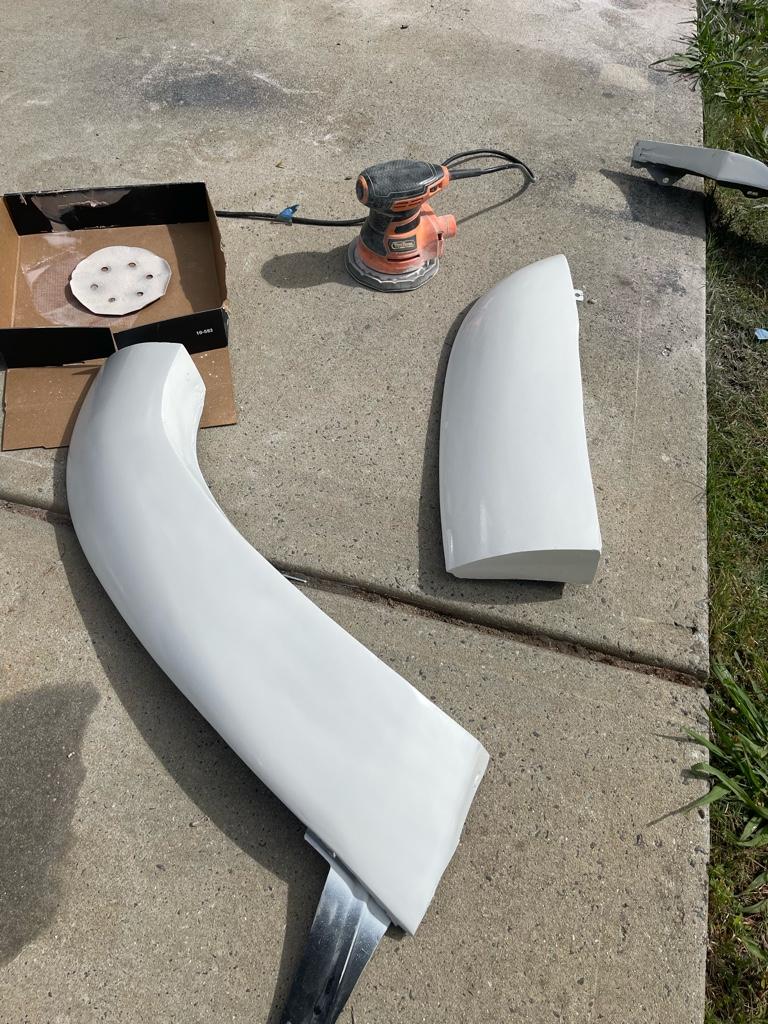
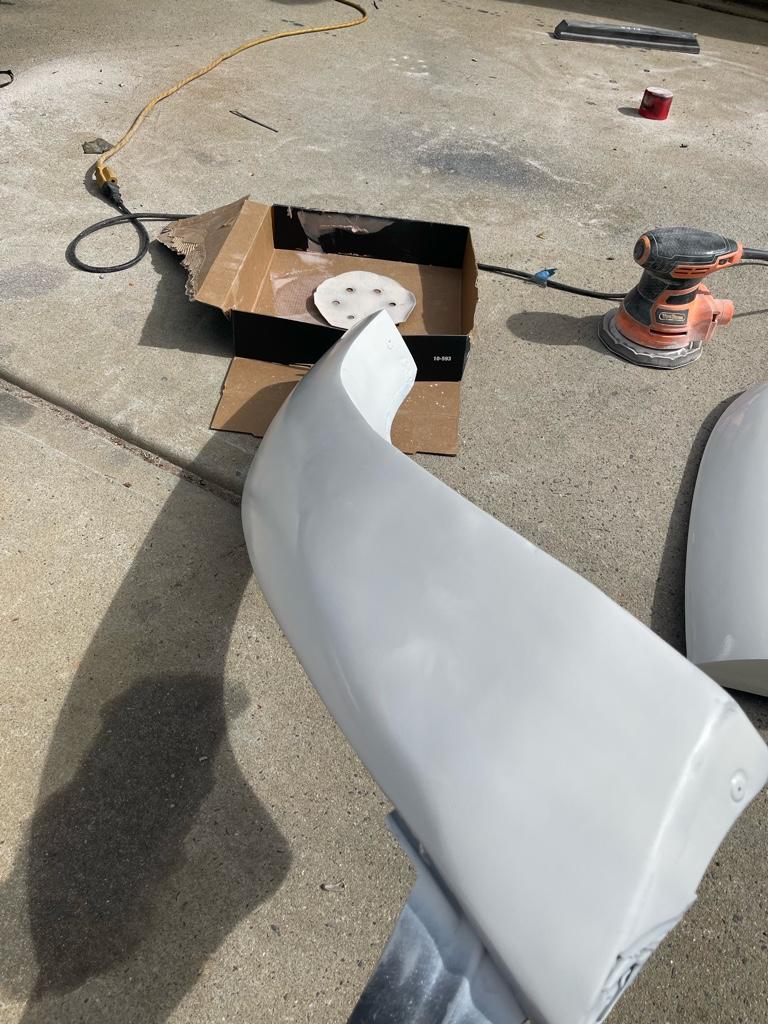
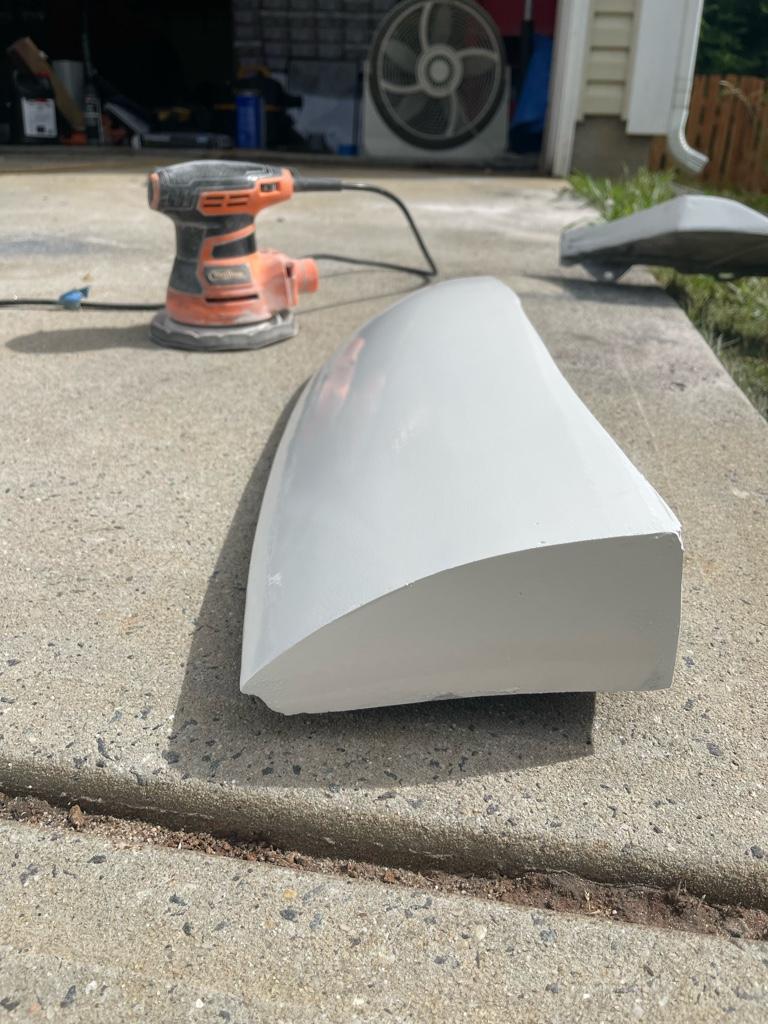
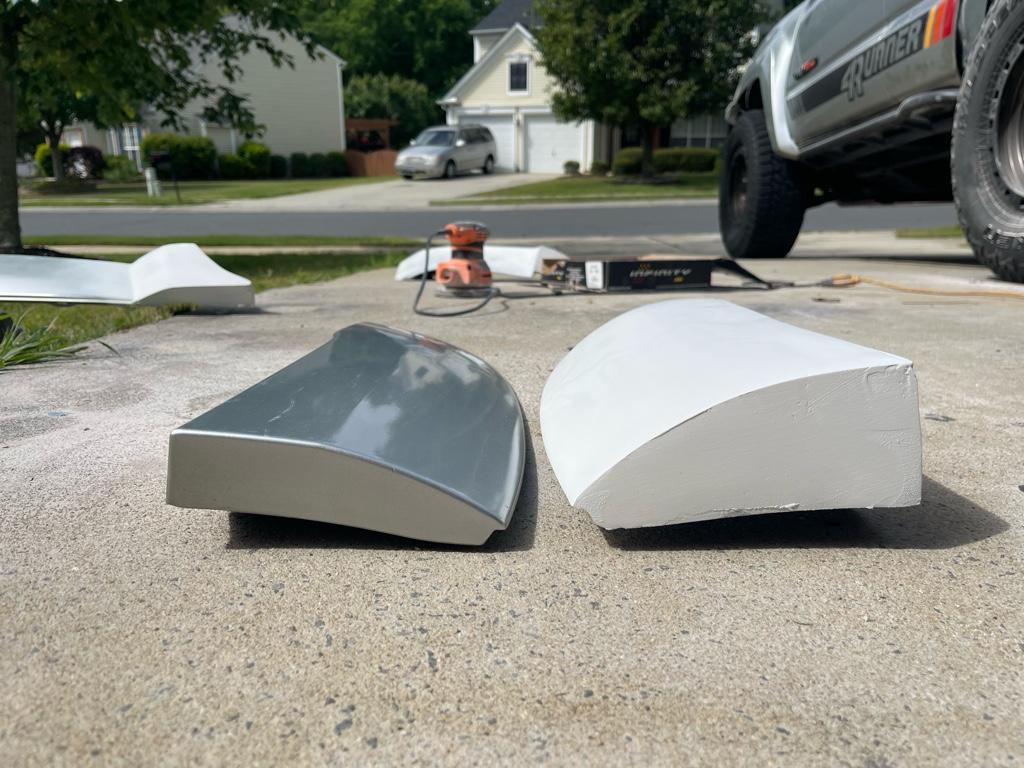
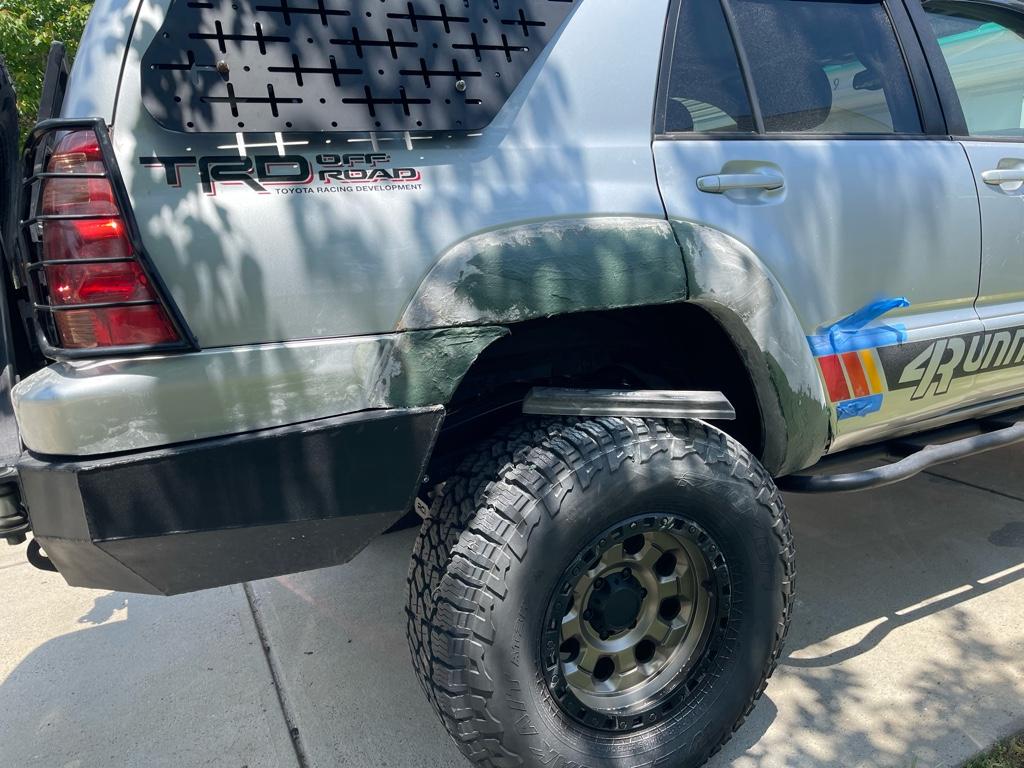
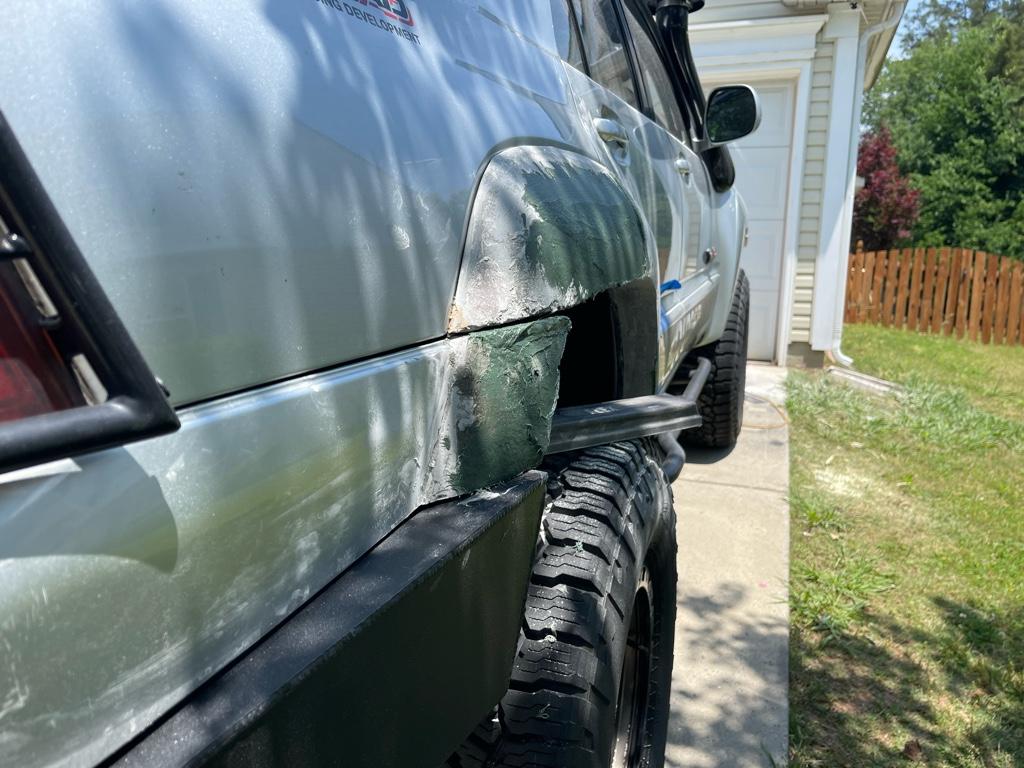
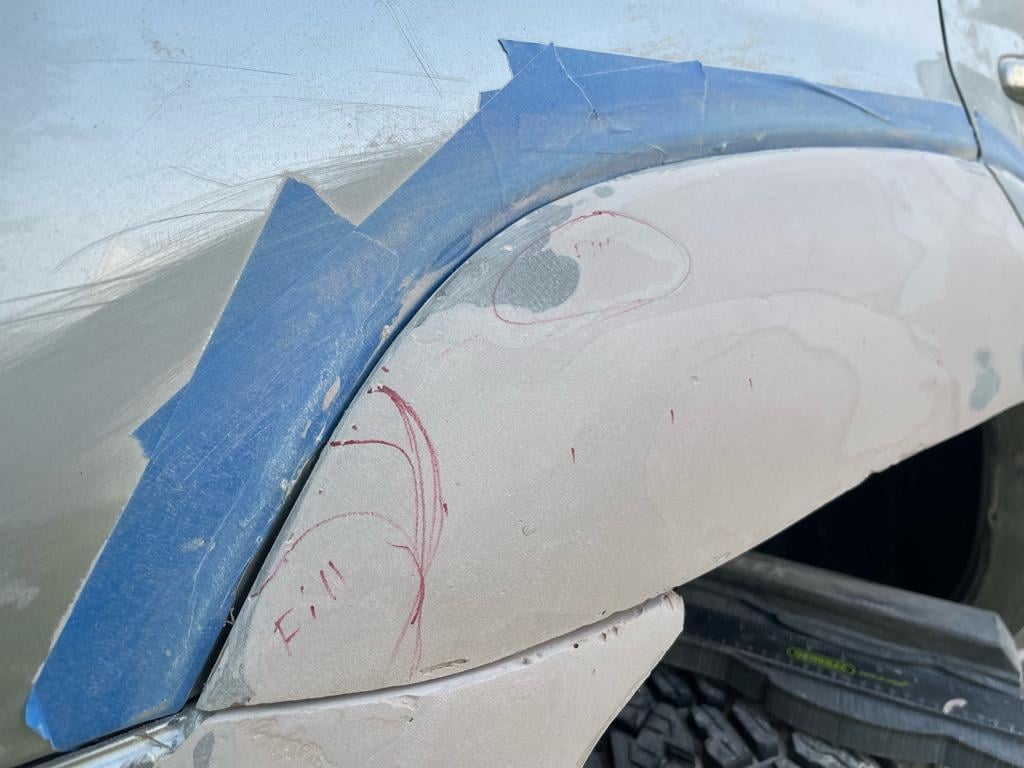
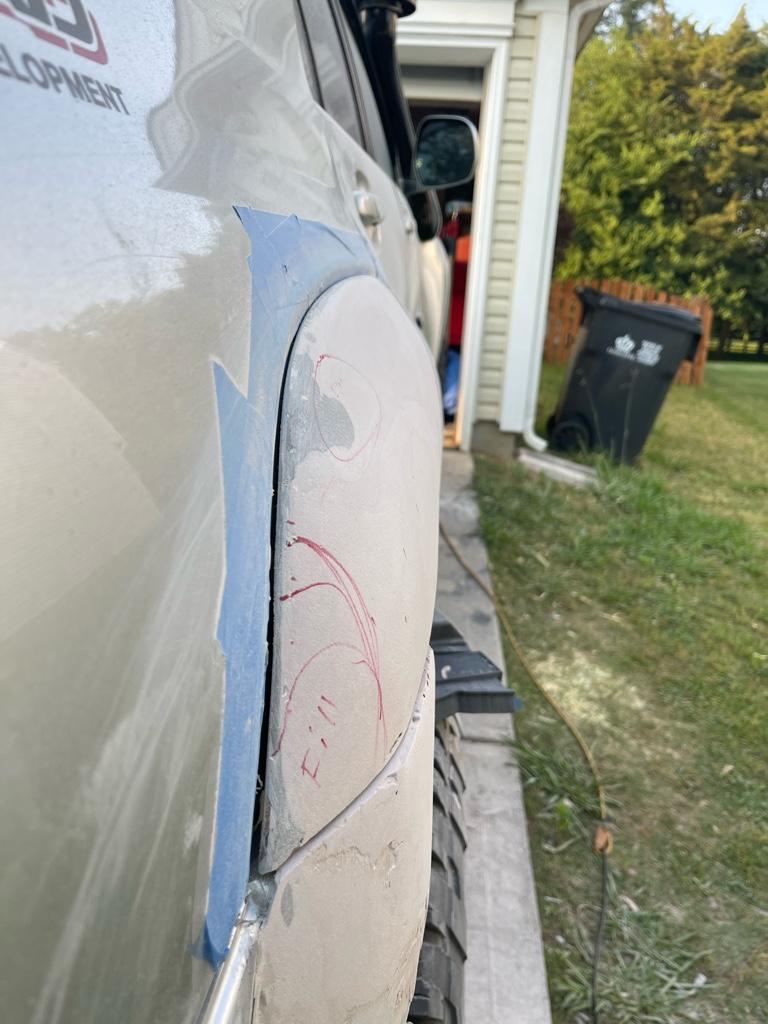
So you want to make custom wide body flares huh? Be prepared to live a messy, messy life for a few weeks [emoji38][emoji38]

Getting super close on the first side though.. and hoping that the next one goes even quicker now that I know what I’m doing more or less
9f31f91080227b5f5efb729c4d905d94.jpg

8d3039b13d12d0e11575971c47a9e79b.jpg

19dfa7a29715c02bcd89679a34b93438.jpg

a483d1d1a04219b31348db6184269a4f.jpg

36eb431413581c072097c2bce6c34e46.jpg

1a621fb4f51c249feb99e8ef1b8fd88b.jpg


Sent from my iPhone using Tapatalk
 
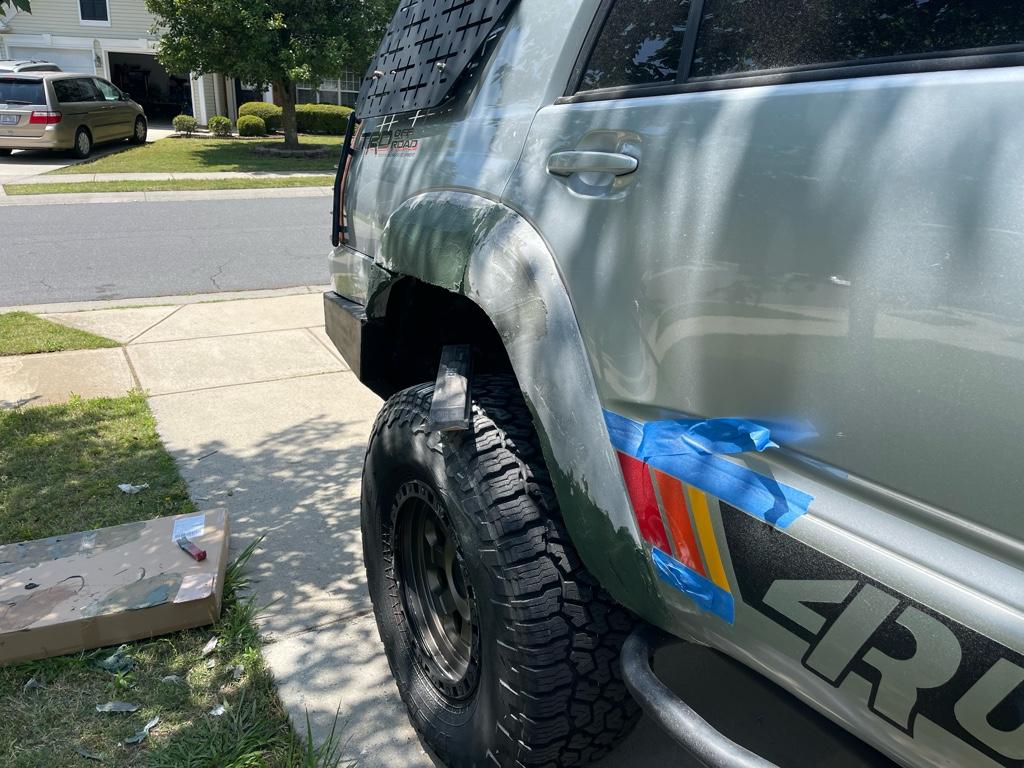
Second side is under way. Gained about 1.25” over stock. What do you guys think? Didn’t want to go overboard.

d99bd3293aa273c8b3de8db6deec89ee.jpg

1488082ef8e4e3dd8c9dacf4e6399f03.jpg

bac877bd90b5e3674104f23dc0e532ff.jpg

aab9d9e0244a1bbc48aabac6ff56cfa0.jpg

fac7e7eff5c4ec744bd553e9dd24b223.jpg

4161a16532a398f81ad5a43c4756cfc9.jpg


Sent from my iPhone using Tapatalk
 
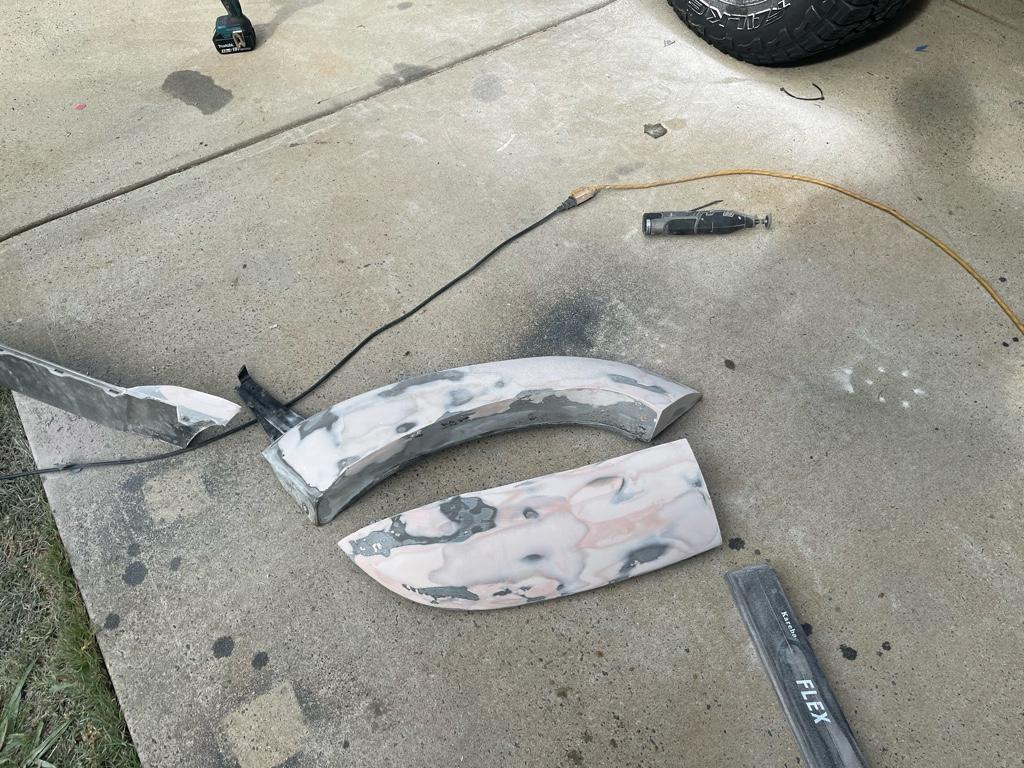
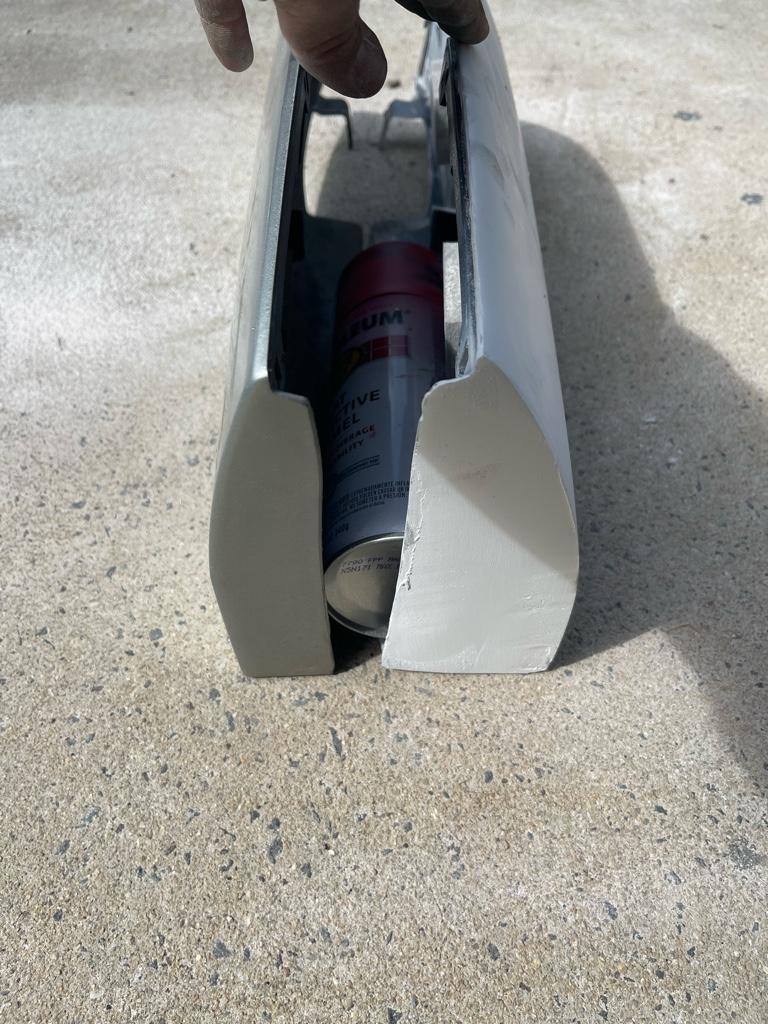
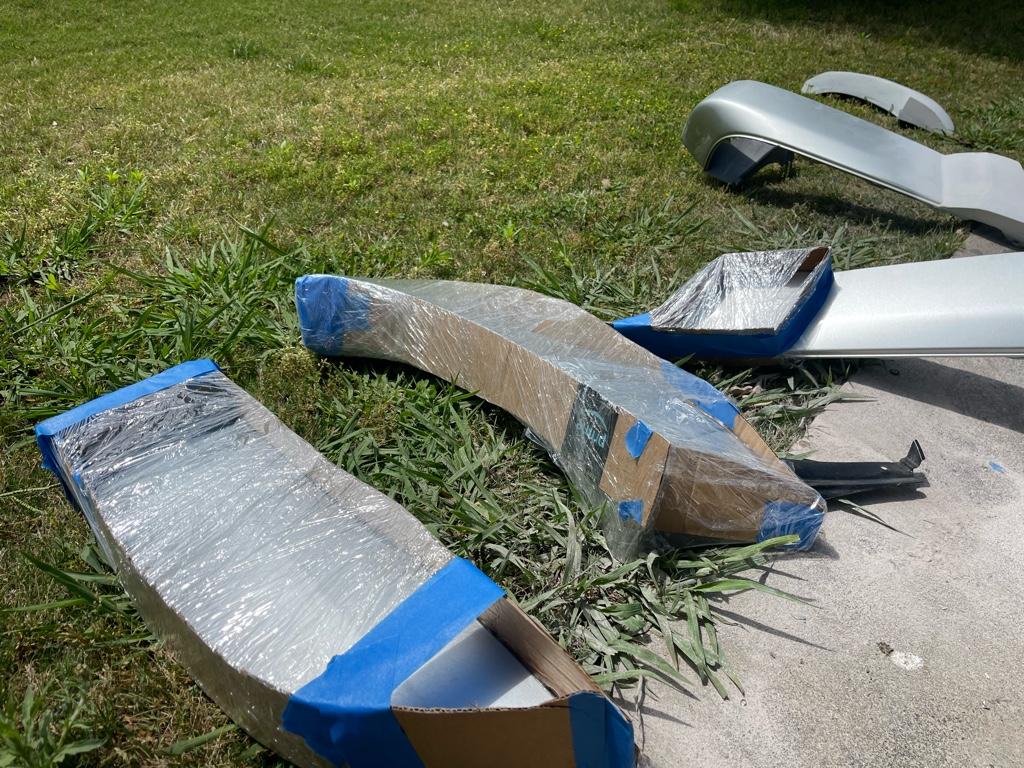
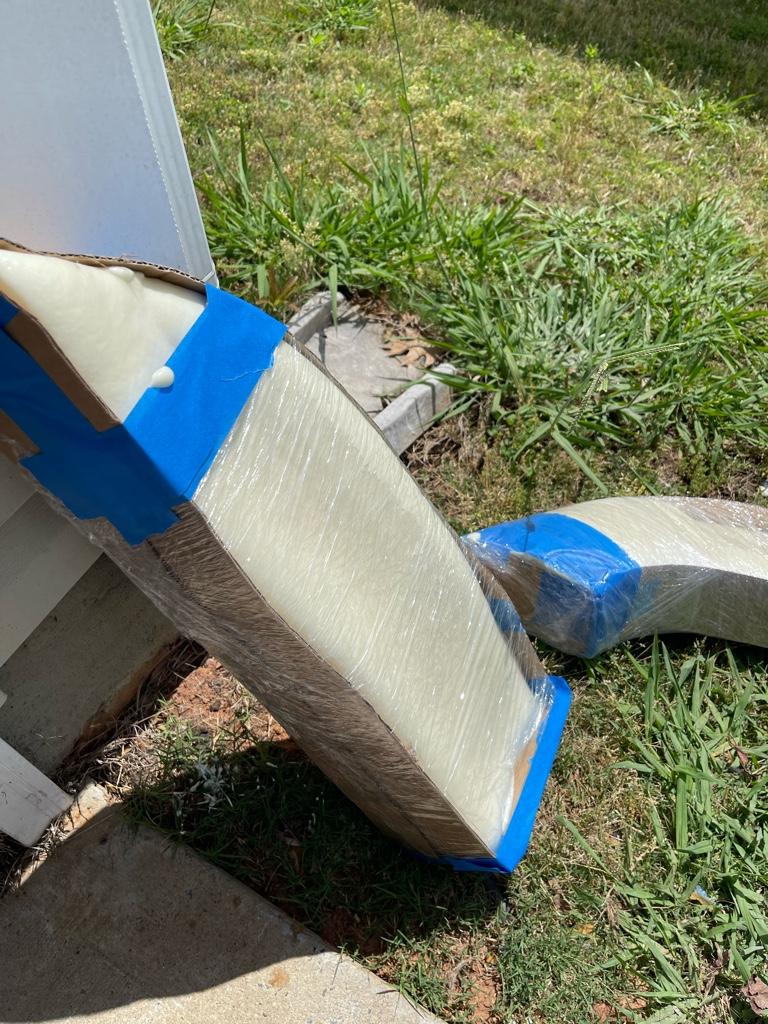
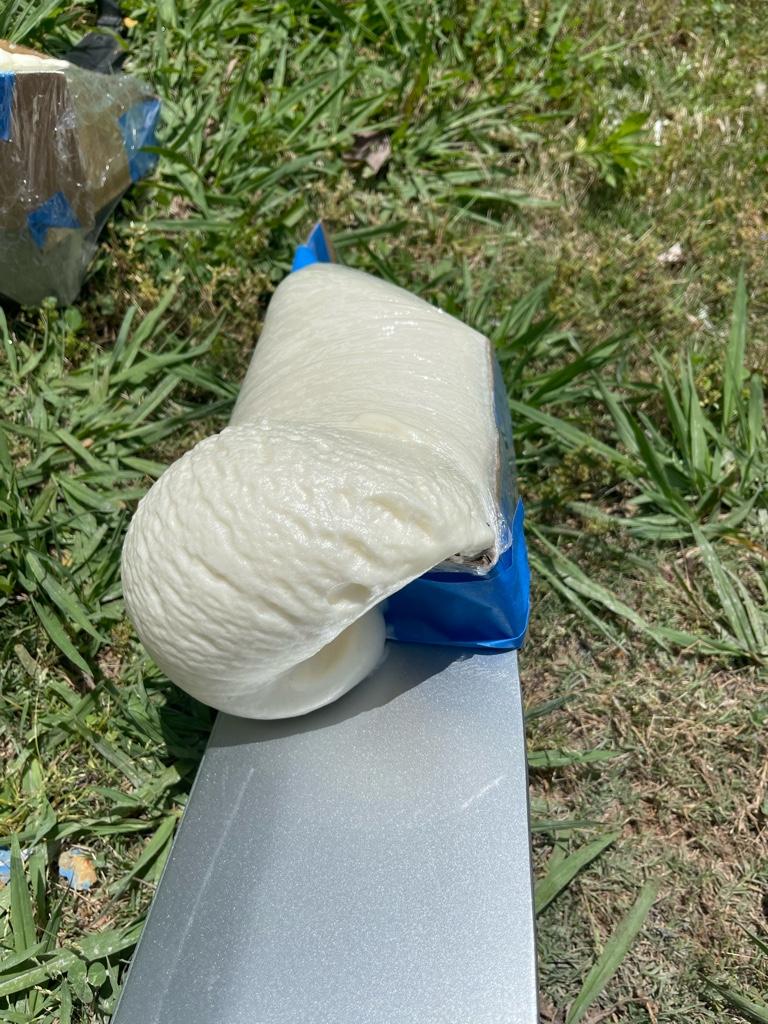
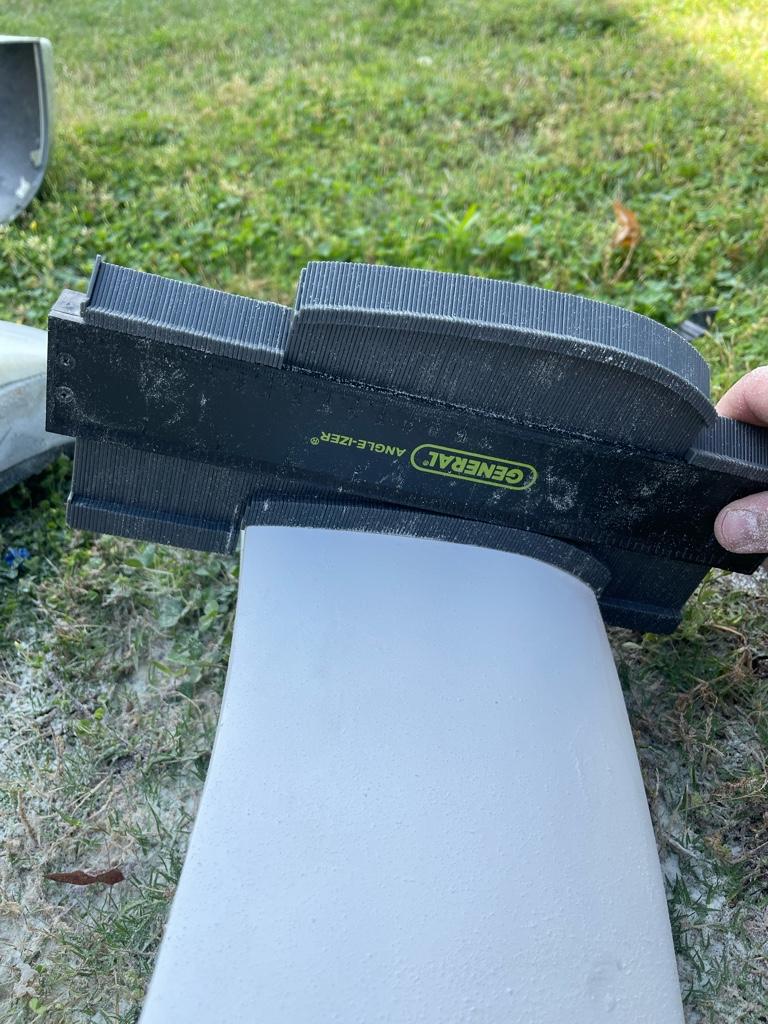
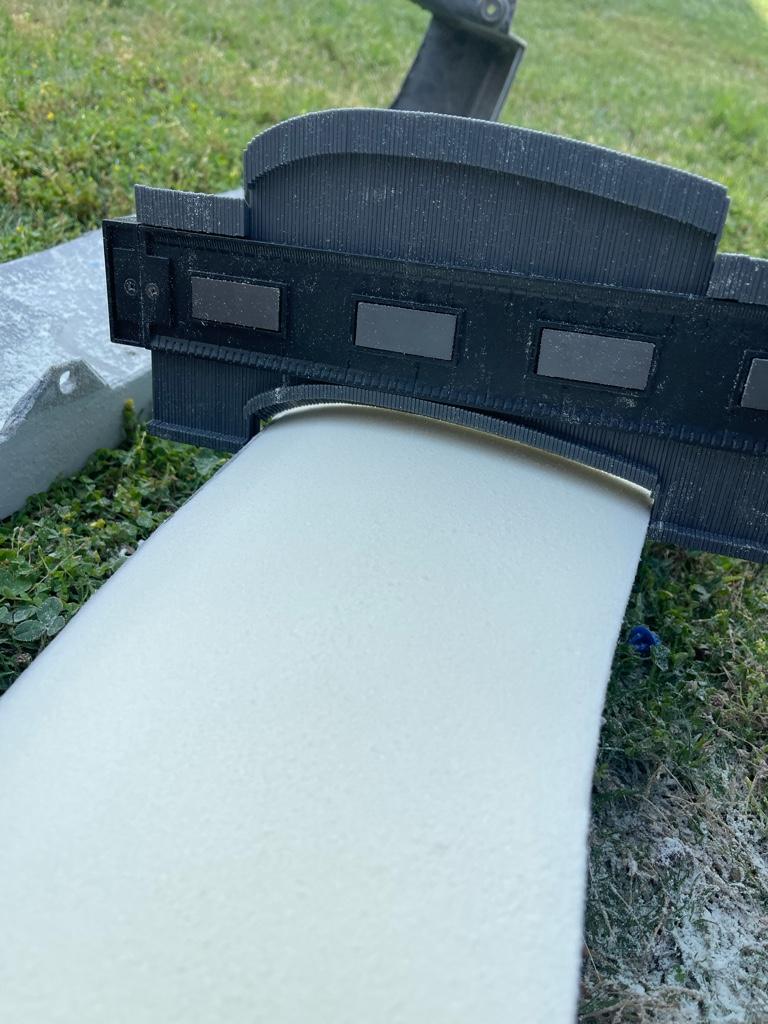
Side number two is coming along so much quicker than the first. The fully enclosed foam method did me wonders in being able to do just a single foam shaping pass. Using a contour tool to verify a few quick spots to get it close was helpful. I already have these covered in bondoglass for reinforcement, hopefully this sanding goes quicker, I’m ready to get these done , painted and on the car to see what it looks like.

8478aa8a0c1c2cc9a5dae0839dccf705.jpg

fdafe9b4a668d1fffb118111c606de45.jpg

87a9640f844a952717d851168555ce3b.jpg

f32517fc0e336cf0f37b9943b22a8f0d.jpg


Sent from my iPhone using Tapatalk
 
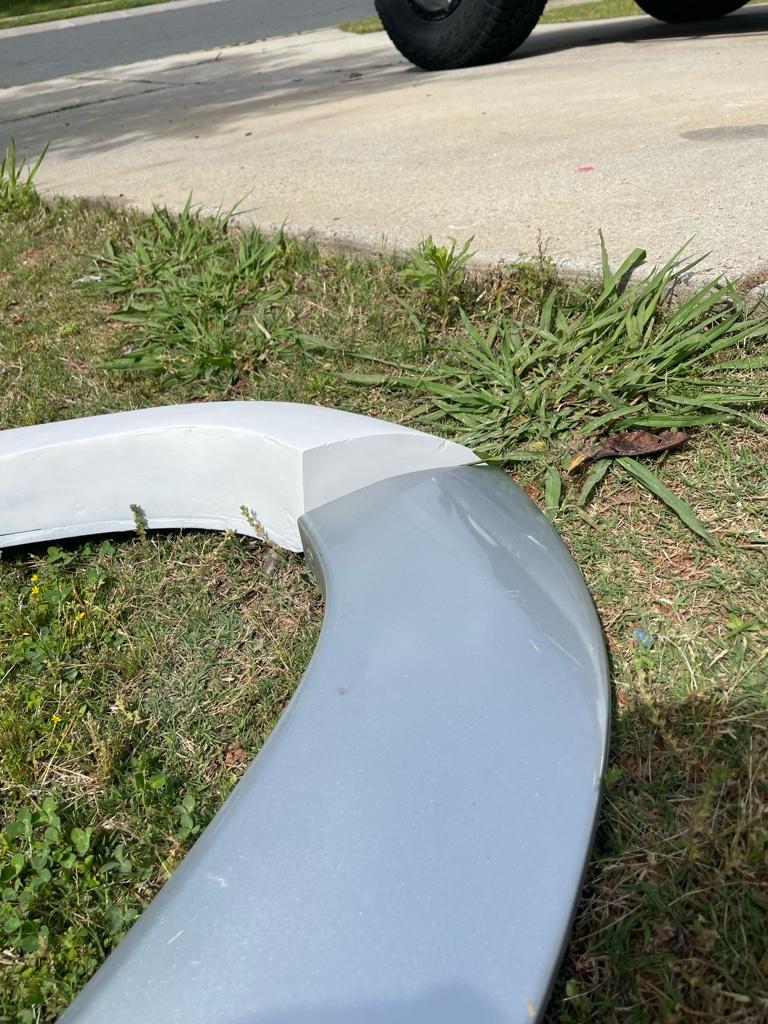
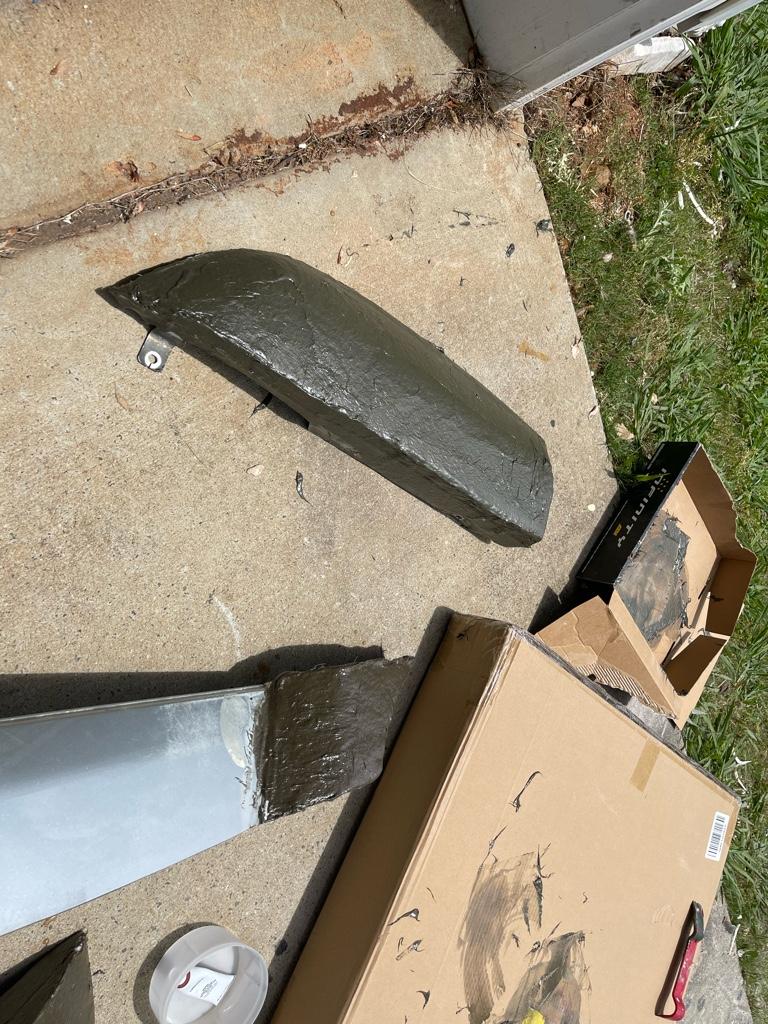
I won’t say it’s going SUPER fast, but the passenger side is going significantly faster for sure. The door piece is just about there. The center flare ended up being a bit low compared to the door flare so I’m having to build it out with some Bondo glass reinforced filler. The rear bumper portion I screwed up in every imaginable way lol. Way too thick at the top, not nearly enough at the bottom, and the curve is all out of wack… I’ll let you guess whether I used the contour tool in this or not [emoji23]

I figured I probably have another one , maybe two layers of Bondo glass and then start going over with regular filler. If all goes well maybe I’ll be done with shaping these by Thursday this week.. fingers crossed !

Next step will be to figure out how to reattach the the door flare the I cut away from the horizontal piece .. haven’t looked to see if there are clips behind there or not. Worst case I’ll just throw some expanding foam behind there to help adhere it to the door.

05d1979b52cd92b4c6e48319ba92c447.jpg

cb7d241cb422f256fa35bab8be949deb.jpg

1e4f436652a30498082458a9afc246a8.jpg


Sent from my iPhone using Tapatalk
 
Well.. just heard back from RCV that they received the axle and is on the table for inspection now and should have an answer for tomorrow... we'll see what they say.. fingers crossed that its a quick (and free, or at least cheap) fix so I can get this thing back together with the LC200 rack!
 
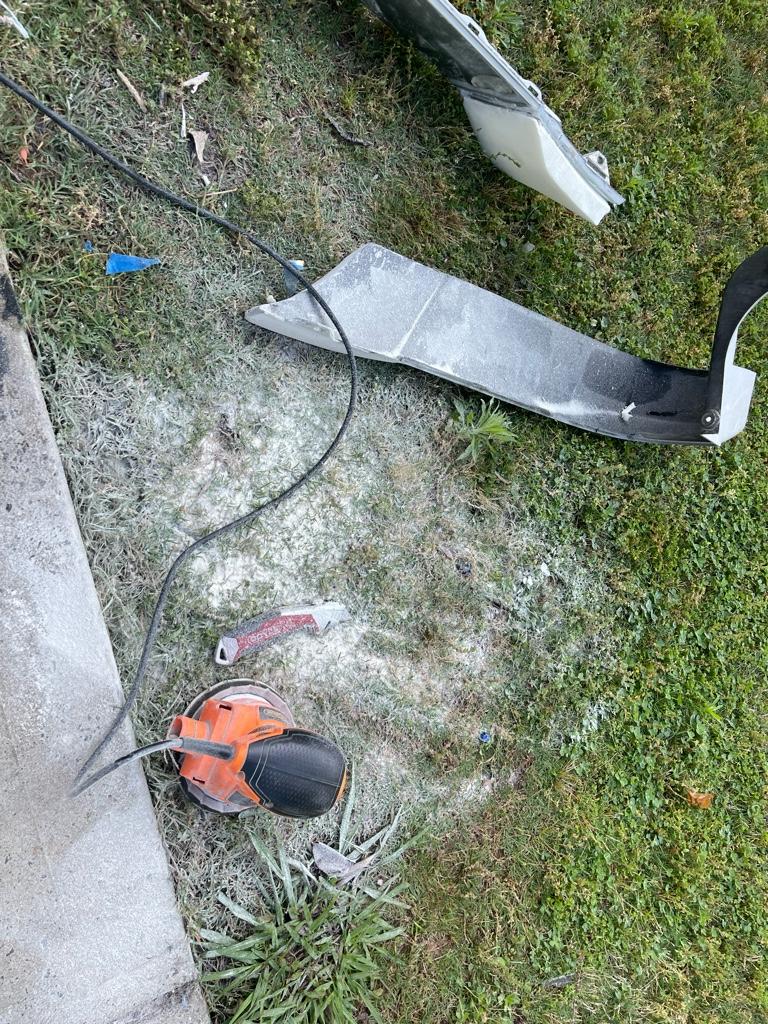
So… much…… sanding …… so so much … ask me again why I’m doing this ???

But I am making great progress. If I didn’t care about making these near identical from one side to the other I probably would be done by now.. but if figured if I’m going do it, I may as well do it right.

I can’t tell you guys how many times I have gone back and forth with the contour tool to verify every inch of the panels left to right. I think the middle flare only has two small low areas left to fill before it’s near identical. The other two should be significantly quicker. Hoping to make good progress tomorrow.
280b8981d41a49ab74c5f3243805c77e.jpg

40bb2e7ed668f4d9a3b3a76c8a44aee3.jpg


Sent from my iPhone using Tapatalk
 
Mad respect for your dedication and attention to detail, it will be worth it. Pretty sure it's way more work than I would want to put in.


I kinda didn’t leave myself a way out since I’m modifying my existing panels .. lol.. it’s certainly more work than I ever planned on putting in .. even know I should know damn well exactly what it will take since it isn’t my first custom body project.. lol. But getting super close.


Sent from my iPhone using Tapatalk
 
got news from RCV on my axle. Their investigation determined that a possible tolerance issue on the machined parts caused them to wear too quickly, causing the clicking noise. Sure? I mean I'll take it.. as long as its fixed :)

They offered to replace the "rebuild kit" which includes the expensive components free of charge, however, I still need to pay labor ($70) and buy 2 new boots ($40 each). so all in all, this repair will run me 150 bucks shipped to and from RCV.

I asked that they send me back my 2 original boots since they weren't torn or ripped and fairly new, but they said that "they were cut off during inspection" which kind of baffled my mind as to why you would cut off a perfectly fine, $40 boot instead of taking it apart, but maybe that is just their process. I am not mad since they said they'll throw in 2 spares for me to have (which I think is a pretty reasonable thing to do, considering they cut my original boots to inspect parts on their axle that failed prematurely).

I already have shipping information via fedex and anticipate having this thing back on hand by early next week.
 
got news from RCV on my axle. Their investigation determined that a possible tolerance issue on the machined parts caused them to wear too quickly, causing the clicking noise. Sure? I mean I'll take it.. as long as its fixed :)

They offered to replace the "rebuild kit" which includes the expensive components free of charge, however, I still need to pay labor ($70) and buy 2 new boots ($40 each). so all in all, this repair will run me 150 bucks shipped to and from RCV.

I asked that they send me back my 2 original boots since they weren't torn or ripped and fairly new, but they said that "they were cut off during inspection" which kind of baffled my mind as to why you would cut off a perfectly fine, $40 boot instead of taking it apart, but maybe that is just their process. I am not mad since they said they'll throw in 2 spares for me to have (which I think is a pretty reasonable thing to do, considering they cut my original boots to inspect parts on their axle that failed prematurely).

I already have shipping information via fedex and anticipate having this thing back on hand by early next week.
Sounds like that could have gone either way. Cutting the boots and sending out 2 to replace them must mean they are getting them pretty cheap.
 

Members online

Forum statistics

Threads
278,312
Messages
3,554,089
Members
248,016
Latest member
Advally Service

Trending content

Back
Top