ARB bumper install on a 99 SR5

octanejunkie

Elite Member
Today is the day!

Ordered my ARB 3423020 from bumperSuperstore.com on Thanksgiving and it arrived in less than a week (shipped from CO and received in 2 days to be accurate)

I will be follwing this thread by [MENTION=49642]jsmithjr732[/MENTION] and will note anything I do or encounter that is different or unique. The google doc he created and linked is awesome :thumb:

The new bumper will be adding about 200 pounds to the front of the truck (shipping weight was 210#) so new shocks and springs are in my future.

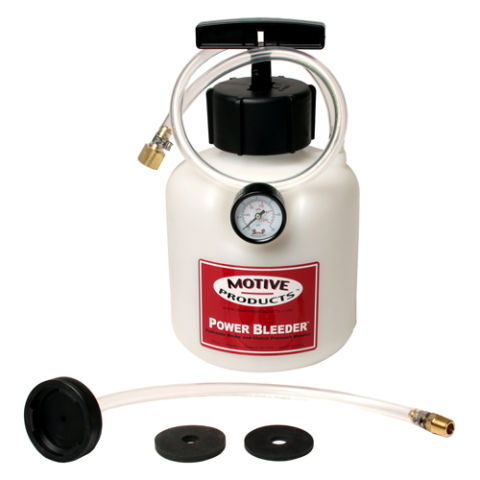
While the stock bumper is off I will be installing an external trans cooler inline with the rad cooler and if time allows I might tackle a basic side-marker turn signal mod using regular bosh relays

Tools anticipated
  • sockets and wrenches
  • 4" grinder with cut-off wheel
  • hacksaw
  • 3/8" to 1/2" drill bits and drill
  • a mallet
  • black primer
  • electrical wiring stuff (soldering iron, heat shrink, split loom, etc)
  • a strong and patient friend

I will be losing my factory fog lights for the time being but will be adding aftermarket LED fogs very soon and will update that as it happens
 
Last edited:
Register to hide this ad
Thanks man - glad that doc is still helping out folks after all these years.

My bumper, and the 4Runner, are still going strong. I think about selling it and grabbing a 100-series LC, but it’s so hard to give up the 4Runner. Perfect size, easy to work on, cheap parts, and indestructible.

Good luck on the install!
 
Today is the day!

Ordered my ARB 3423020 from bumperSuperstore.com on Thanksgiving and it arrived in less than a week (shipped from CO and received in 2 days to be accurate)

I will be follwing this thread by [MENTION=49642]jsmithjr732[/MENTION] and will note anything I do or encounter that is different or unique. The google doc he created and linked is awesome :thumb:

The new bumper will be adding about 200 pounds to the front of the truck (shipping weight was 210#) so new shocks and springs are in my future.

While the stock bumper is off I will be installing an external trans cooler inline with the rad cooler and if time allows I might tackle a basic side-marker turn signal mod using regular bosh relays

Tools anticipated
  • sockets and wrenches
  • 4" grinder with cut-off wheel
  • 1/2" drill bit

I will be losing my factory fog lights for the time being but will be adding aftermarket LED fogs very soon and will update that as it happens

Up early wrenching on a beautiful Fall morning :thumb:

If not much trouble, please weigh the stock bumper. Seems like you'll be adding somewhat less than 200 pounds...

Thanks for the thread start. Enjoy.
 
My install process

Inspected all items and reviewed what’s in the box

Reviewed instructions, both ARB’s and the Google Doc from [MENTION=49642]jsmithjr732[/MENTION]
ARB’s instructions leave a lot to be desired, and the bumper has changed somewhat since jsmithjr732 wrote that doc, but the only real difference is there are 3 cage nuts on each bumper mount that the bumper mounts to.

-buffer kit (bumpers)
-indicator kit (turn signals)
-hardware kit (all the bolts etc)
-bumper mounts
-bottom cover (a big plate)
-a long, curved plate not mentioned in the instructions at all

Marked fenders with painters tape for consistency in measuring
Measured from ground to mark:
driver: 35-3/4”
pass: 36”​

Measured from mark to line on tires:
driver: 8”
pass: 8”​

Remove stock bumper
  • disconnect turn signals and fog lights
  • remove 2 x 12mm bolts from front bottom of bumper valence to crush bar
  • remove 2 x 12mm nuts from bumper from wheel well
  • loosen 2 x 12mm nuts under the two nuts you removed (rubber cushion)
  • remove 2 x 12mm nuts on each side of the front bumper (next to turn signals)
The bumper should pull right off

Remove crush bar
  • remove rear-most 12mm on each side
  • remove bottom 2 x 12mm on each side
  • remove single top 12mm bolt on each side
The crush bar should lift right off

Remove tow hooks
  • remove 2 x 14mm bolts on each side
I needed a long breaker bar to break these

Measured fender/flare height to ground after removing stock bumper
-measurements are basically the same, no notable difference in height of vehicle

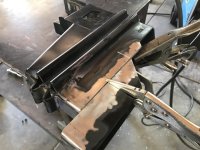
Cut the front pads off the frame
I wanted to keep the pads and not destroy them incase I ever want to sell the truck with the stock bumper
Starting with a 4” grinder I cut down the welds on the top and bottom of the pads
Due to the shape of the pads (curved outer edge) and nuts, plus no good access for the disc, I moved to a hacksaw
-not sure a sawzall will fit
NOTE: be careful not to nick the AC dryer or lines
Working from the inside out, I was able to get a hacksaw blade between the front pad and frame rail and cut the top and bottom welds
The weld on the outside of the pad runs the whole length of the vertical frame rail and was not easy to cut
Using a big channel lock I pried the pad outward and wiggled it to break the weld
It took some of the frame off with it (1/16" silver) but I figured that would be my locator guide if I ever weld these back on, so it's all good Lol

Cutting these pads was the most tedious and time-consuming part
After I test-fit the bumper mounts, I cleaned up the cuts and painted the bare metal

Fit the bumper mounts
Driver side slipped on and aligned with the mounting holes no problem, passenger side not so much
I ended up doing a minor amount of grinding and pounding to get the passenger side to fit but it wasn’t too bad
Be prepared for this, a big mallet and a slide hammed (to remove the mount after you pounded it on) are helpful

The bumper mounts attach using only the 2 x 14mm bolts that secure the tow hooks and one long 1/2 bolt from the ARB kit
ARB gives you new grade 5 hardware to remove the tow hooks but I opted to retain the factory tow hooks and bolts, they are grade 8
Like ARB says, once the two hook mounts are aligned, you drill upwards through their bracket (has a 3/8” hole) for the 1/2 bolt

Drilling the frame and bracket
I installed the tow hook bolts and tightened them to keep the bumper mounts from moving
Starting with a 3/8 bit in the hole in the bottom of the ARB mount, I drilled up in a few steps as is recommended to a final size of 1/2
The 1/2” are bolt goes in from the bottom and lined up with the top hole in the bracket, done

At this point I paused to install my trans cooler, but if you are not doing that the next thing is to install the actual bumper
 
Last edited:
Finishing the install

Per ARB’s instructions install the M10 cage nuts WITH THE SPRING TABS FACING UP AND DOWN
-this ensures you don’t pop them off when sliding the bumper on (it’s heavyish and awkward to manipulate)
Loosen the tow hook bolts and long, vertical 1/2" bolts and fit the bumper on to the mounts
-while I was able to muscle the bumper around, it’s large and awkward, so have a strong friend help (not HeMan but not a child either )

I had to use a mallet to influence the mounts outwards to allow the bumper to slip between the mounts
-use the two welds on the bumper as a visual guide to align it between the mounts on the vehicle

Once you have the bumper on the mounts (it will pretty much stay there on it’s own, but maybe not) you can install the 7/16 bolts through the bumper to cage nut on each side to keep it there - from underneath the vehicle
-your strong and attentive friend can hold the bumper in place while you are under it installing the bolts while it’s unsecured, it will injure you if it falls

Attach the bumper loosely to the mounts attached with 3 x 7/16" bolts on each side you can align the bumper
-I used 7/16 lock washers from my own stock, the ones ARB gives you are 1/2" and are too large
With all bolts (adapter to frame and bumper bolts) still only hand tight ajust the fit and position of the bumper to the body

Aligning the bumper
I used thin wood blocks between the bumper and the body to set my body to set the bumper gap (ARB says 20mm) but even with the bumper at it’s highest adjustment, the gap is way over 20mm too large for my liking
NOTE: you may need to adjust it more or less on either side to get the gap consistent, there are variations in frames from vehicle to vehicle

I will probably be removing the bumper at some point soon mount a winch and may enlarge the slots to get it closer to the body, or to add a body lift and readdress the gap then
NOTE: there is no adjustability for body lift, so if you have any body lift you will have a big gap unless you seriously mod something with this bumper

Once you have the bumper aligned to the body (again a strong friend here helps) tighten down all the bolts

ARB does not give you any torque specs, but I used the following
  • Tow hooks to frame (7/16 grade 8 fine thread) 57 ft pounds (factory was way more)
  • Long 1/2” bolt through mount and frame (grade 5 coarse thread ) 57 ft pounds
  • 6 x 7/16 through bumper to mount (grade 5 coarse thread) 37 foot pounds
Your bumper is now mounted :D

Turn signals
The ARB comes with indicators that everyone seems to hate, I like them so far
They have a gasket, an insulated pigtail and a LONG body-wire harness which I cut down
The indicators mount to the bumper with plastic grommets that you pound into the recessed tabs inside the cutout in the frame and sit below flush - they are not visible from the side at all

Wiring
I cut my factory turn signal bulbs off leaving about 3” of wire to work with
I used a test light to confirm which wire was hot and which ground (the white wire with green ticking was ground on each side)
I trimmed the ARB body side pigtail (connector already on) to about 6” and soldered it on and heat shrunk each connection
I slipped their shielding over my heat shrinks and tested the turn signals; all good
The turn signal pigtail is pre-terminated but not polarized, you have to install the wires into the plastic connector
This is another opportunity for you to confirm/adjust polarity, use it wisely

I soldered an extra wire into the HOT connection on each side routed back to the body that I will use to make side flashers with in the near future

Install the supplied rubber gaskets in the indicator housings, snug the lens and housing together and screw it into the grommets you installed in the bumper
Connect the turn signal pigtail connectors and test your turn signals once again

Once you have confirmed that all bolts are tight and your turn signals work, you are done :party:

Does the ARB bumper change the rake though?
My front end dropped 1/4” due to the weight of the ARB, and I don’t like it Lol
I'm sure installing a winch in there in the future will only drop the front end more

Measured from ground to painters tape mark I put on the flares when I started:
driver: 35-1/2”
pass: 35-3/4”​

Measured from mark to line on tires:
driver: 7-3/4”
pass: 7-3/4”​

Next up, new front suspension :fro:
 
Last edited:
Per ARB’s instructions install the cage nuts WITH THE SPRING TABS FACING UP AND DOWN

measured from ground to painters tape mark I put on the flares when I started:
driver: 35-1/2”
pass: 35-3/4”

measured from mark to line on tires:
driver: 7-3/4”
pass: 7-3/4”

Next up, new front suspension


Where are the pictures?!?!

We need completed glamour shots!

Great explanations here & good attention to detail for anyone installing..

But again people, at its most basic level:

Take off your bumper
Cut off the plates that the bumper attaches too
Fit the provided crush cans over the frame rails
Drill a vertical hole for the provided bolt
Re-use bottom tow hook bolts
Fit bumper onto crush can mounts (octane junkie is lying about needing a friend to help maneuver)
Screw in 3 bolts on each crush cans to secure bumper (this is a pain because if one pops out while you're trying to screw them in, you really have to pull the whole bumper & try again)

If you DO have a body lift, you'll have to cut the mounts & re-weld them higher
 

Attachments

  • IMG_2122.jpg
    IMG_2122.jpg
    128.8 KB · Views: 1,205
Last edited:
I moved to a hacksaw
-not sure a sawzall will fit
NOTE: be careful not to nick the AC dryer or lines

Nice write-up. Sounds like it was a pretty fun job. Now get some pics up. lol


When I installed my Relentless bumper I used a sawzall with a short metal blade to cut the frame caps. It's super tight to the AC line so care is a must. I use a sawzall every day for work so my skills with them are a lot better then most. It would be really easy to bind the blade causing it to kick back and take out the AC lines.
 
Nice write-up. Sounds like it was a pretty fun job. Now get some pics up. lol

When I installed my Relentless bumper I used a sawzall with a short metal blade to cut the frame caps. It's super tight to the AC line so care is a must. I use a sawzall every day for work so my skills with them are a lot better then most. It would be really easy to bind the blade causing it to kick back and take out the AC lines.

The key with a sawzall is to keep forward pressure on the cut, once you let up it will buck and bend/break the blade or do other damage. The hacksaw blade was thinner and I got a good shoulder workout Lol

No kidding with those AC lines. I wrapped the one on the driver side lower corner with an old, slit 3/8 oil hose to keep it from getting nicked as I worked around it. Guard against scope creep, don't let one project turn into 2 or more!
 
Swapped my front shocks and springs

Installed a set of 4WD tall coils on my truck today along with a set of reflex shocks the springs came mounted on. Meh.

Measured
  • Driver's side: 35"
  • Pass side:35-1/2"

This swap-grade dropped my front end by about another half inch and the ride is a bit soupy for my taste. My stock 2WD coils and 1" spacers felt better, TBH.

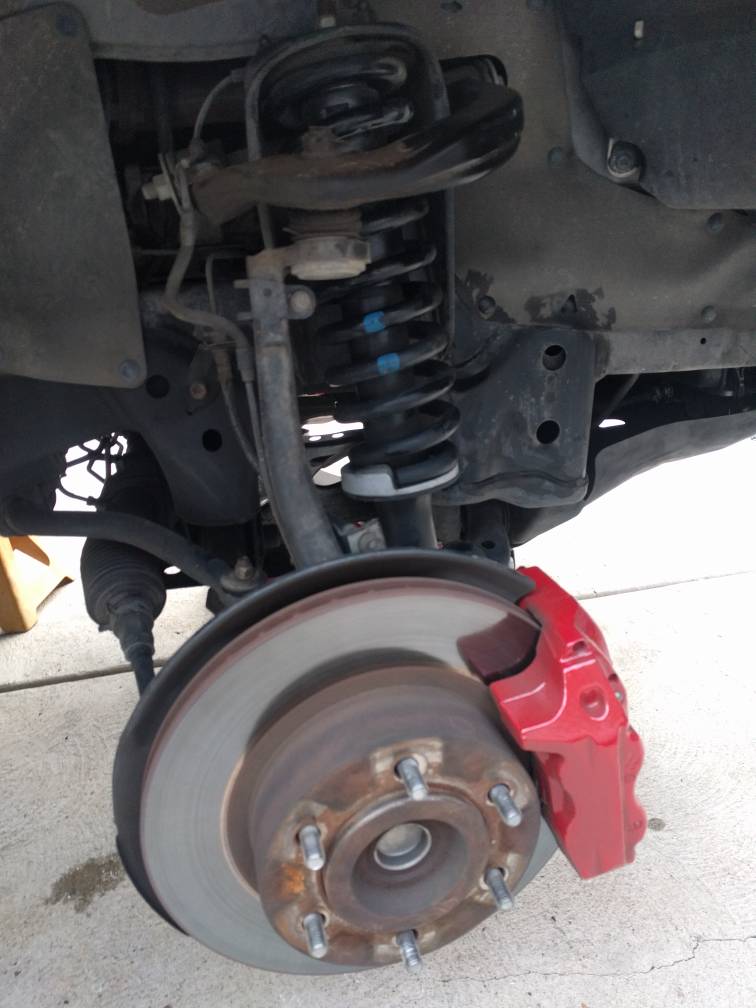
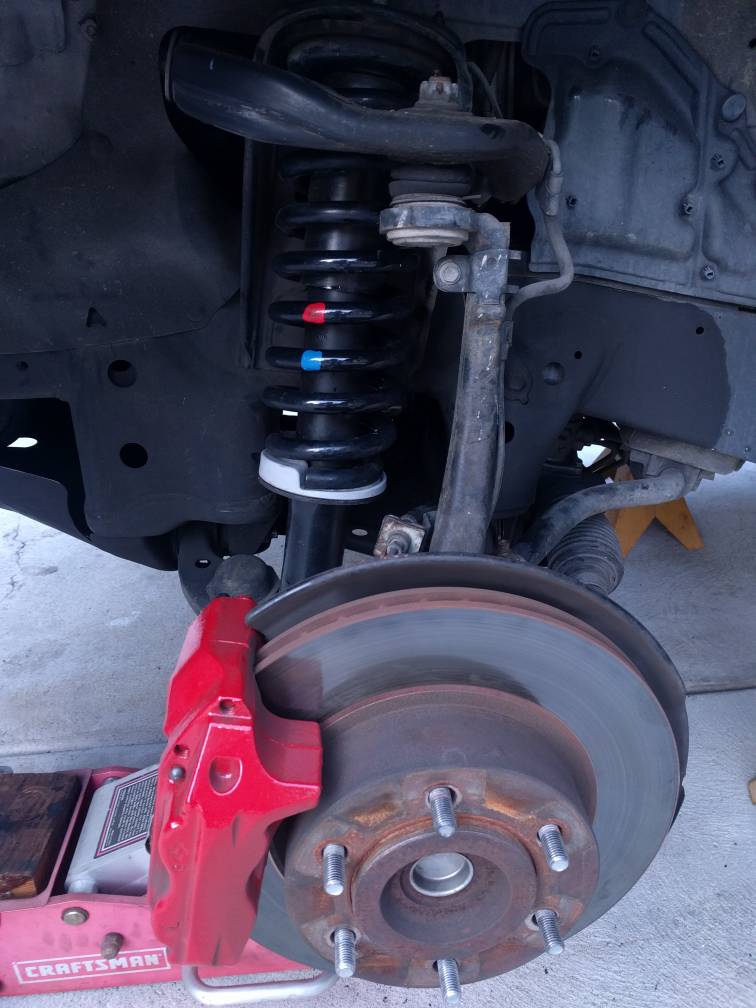
Passenger and driver's sides, respectively

4176e2e4e196bbc31b1e04597a19338e.jpg
ac6c06bd27cd3dd3a199f102b7087934.jpg


Weighted my bumper with 60# temporarily to emulate a bumper mounted winch per [MENTION=143526]theesotericone[/MENTION] which dropped the front end another 1/4"
Wonder if new shocks AND new springs are in my future. Lol
 
Last edited:
Mine is coming tomorrow, great post man. But I think there's no way it's an extra 200 lbs, that's bumper plus shipping crate and shipping material. From what I read the bumper weights about 86 lbs.
 
Mine is coming tomorrow, great post man. But I think there's no way it's an extra 200 lbs, that's bumper plus shipping crate and shipping material. From what I read the bumper weights about 86 lbs.

Mine was strapped to a pallet, no box, and no quantifiable extra packing material to speak of; it was just wrapped in corrugated paper, foam and plastic.

Overall, it did drop the front end by 1/4" plus, and TBH there is a bunch of extra hardware I didn't use. Conservatively I'd say it added about 100# to the front end all tolled (new bumper - weight of stock bumper, etc)

Congrats on your purchase and welcome to Club 3423020 :D Looking forward to your install thread
 
Would an engine hoist be a reasonable substitute for a friend?

Then again, the bumper I have on the way needs some welding (Shrockworks), so I'll probably be at my buddy's house anyway...

-Charlie
 
Would an engine hoist be a reasonable substitute for a friend?

Then again, the bumper I have on the way needs some welding (Shrockworks), so I'll probably be at my buddy's house anyway...

-Charlie
Can an engine hoist hold your beer? If so, then yes.

Sent from my Nexus 5X using Tapatalk
 
New shocks: Tundra Billies

Installed a set of tundra billies (24-261425) on the 3rd notch

Got back to pre-bumper height plus 1/4"
driver: 36" to fender
pass: 36-3/4" to fender​

With 60# up front (to mimic the weight of a winch) the front drops 1/4" on both sides. Which is fine.

It bothered me that the passenger side was higher, so I pulled the shock assemblies off and swapped sides; no difference. That really bothers me.

Next thing to do here is replace the LCA bushings, steering rack bushings and sway bar bushings - and probably the sway bar end links too.

The install
No real trick here. Borrowed a coil spring compressor from AutoZone and oiled/greased the threads as was mentioned and hit it with my electric impact driver. This is loud, but makes quick work of compressing the coils. One trick I might mention, the boot hangs up on the jaws of the compressor so DON'T install the zip tie on the boot until AFTER the shock/spring are assembled and the compressor is removed. Getting the shocks in and out of the truck is really a 2-person job as we had to leverage the LCA downward after disconnecting the sway bar end links to allow free motion of the suspension. I suspect new LCA bushings vs. old frozen rubber ones would allow more flex without having to leverage the LCA. To make life easy, insert the spring assy into the upper perch, install one bolt to hold it in place then get the bottom of shock bolted up and compete the 3 top bolts. Don't forget to reconnect your sway bar end links.

The shock came with only one upper rubber shock bushing, and the instructions supplied for this shock shows only a bushing installed above the top hat with a cupped washer and only a cupped washer below. WELL THIS IS NOT CORRECT and will leave you with about 1/2"+ of free play. I installed a rubber shock bushing I had on hand, giving me the correct top mount (bushings above and below the top hat) and ordered a set of Energy Suspension poly shock bushings that I will swap in when I install my LCA bushings since the shocks need to come back out then anyway.

The Ride
Needless to say, the ride is an amazing improvement over what was on the truck. Not only does it track well and handle bumps better than the stock (or the temporary, blown, Reflex shocks) these shocks dampen really well - I do not feel they are overly stiff (in response) and I can't wait to see how they react with a bit more weight up front (winch). The combo with used, stock 4WD springs seems to be okay for now. I will re-evaluate over time if new coils are desired.

One thing is for sure, I want to either level out the vehicle (driver side to pass side) or get the driver's side a tad higher (to compensate for my fat ass)

277866d1513002105-what-did-you-do-your-3rd-gen-today-img_20171211_061951.jpg


Passenger side shock and spring, before I swapped it over to the driver's side
 
Last edited:
Nice dude [emoji1360]
The fronts are equal side-side, so you may be better off putting a spacer on the rear driver coil. My Superflex side specific rear coils make me sit 100% level.
Interesting you had to take the end links off- I am able to easily pull my suspension without even taking my tires off
 
The fronts are equal side-side, so you may be better off putting a spacer on the rear driver coil. My Superflex side specific rear coils make me sit 100% level.
If I stick with these coils I will consider a 1/4-1/2" driver side spacer, otherwise side-specific coils make sense.

Interesting you had to take the end links off- I am able to easily pull my suspension without even taking my tires off
All the rubber bushing are/were so frozen that until I disconnected the end links and rotated the sway bar to "break" it free it wouldn't barely rotate, now it does.
 

Members online

Forum statistics

Threads
278,310
Messages
3,554,080
Members
248,016
Latest member
Advally Service

Trending content

Back
Top