Saker
Senior Member
Steadymobbin 20% off
Wish you would have shared this with us a little earlier for the 20% discount!
Steadymobbin 20% off
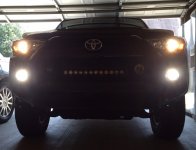
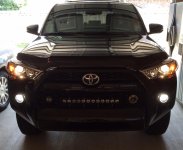
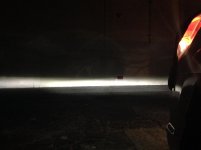
Installed my Morimoto XB LED Fog Lights and adjusted!
What, no detailed installation instructions or pictures Saker.................:lol:
I can't find any "OEM Toyota LED fogs" either!
[MENTION=77957]blizzardwhite[/MENTION], can you shed some light on this?
Lexus has a Few models with LED fog lights, ISF, ES350, LX570.
The part numbers are:
81210-48050 - RH LED Fog
81220-48050 - LH LED Fog
For my 11 SR5 they were plug and play (zero modifications, zero cutting, zero rewiring) aside from the pita of removing old ones and installing new ones.
Lexus has a Few models with LED fog lights, ISF, ES350, LX570.
The part numbers are:
81210-48050 - RH LED Fog
81220-48050 - LH LED Fog
For my 11 SR5 they were plug and play (zero modifications, zero cutting, zero rewiring) aside from the pita of removing old ones and installing new ones.
I seemed to have too much of a gap on one side of each light, towards the center of the grill, when I installed these and I was only able to use a single screw on each side. I ended up taking the mount off the back of the old lights and placed them on the LED lights. Fits a bit better with less of a gap and I was able to use both screws on both sides, at least on my install. Also, no need to use a dremel which I had tried on the old mounts. I haven't had a chance to align the lights yet but am hoping the use of the old mounts works out.
If the Morimoto LED's fit without issue on the old mount, I don't see why you would have any problems.
Also, if the anchor points on the OEM and the Morimoto's were located in the same place, you may not need but a small adjustment!
Wish you would have taken some pictures!!!!!
Let us know how they work out!
I seemed to have too much of a gap on one side of each light, towards the center of the grill, when I installed these and I was only able to use a single screw on each side. I ended up taking the mount off the back of the old lights and placed them on the LED lights. Fits a bit better with less of a gap and I was able to use both screws on both sides, at least on my install. Also, no need to use a dremel which I had tried on the old mounts. I haven't had a chance to align the lights yet but am hoping the use of the old mounts works out.
Do you have pictures of the cutoff from the Lexus units?
Wish you would have shared this with us a little earlier for the 20% discount!
Found out about the code same night that I ordered.
The code was found by searching on this forum. Another member had posted it in the past. But you do take a hit on the shipping fees. =(
Anyways, mine arrived today but the HID headlights and the fog. Only had time to install the headlights. The fogs will be another time.
FYI, for the headlights, the red and black wire were reversed, had to removed the 2 pins from the connectors and switch back to get it to work. It was assembled from the manufacturing incorrectly. I was sweating for a second thinking I received a duds.
How are you guys adjusting these once they are installed? I don't see an opening to get at the adjustment screw.
Has anybody ordered these with the Lamin X yellow yet? Long story, but the painting I tried to do didn't go so smooth so I re-ordered with the Lamix this time. Looks like the sheets they gave are too small and the part number seems to match the taco fogs (T136).
![]()
Edit: FYI, I just heard back from TRS and here is what they said. "Thanks for the email and recent order. I double checked with the person in charge of setting all that up and he confirms that it's actually supposed to be like that. He stated the fog light will install in place of the other one, and the bumper or bezel of the fog light will actually cover the section of the lens that isn't covered. You'd just need to test fit the projector and make a template or just otherwise note which area of the fog light was exposed when it's in the OE location. Doing so should allow you to apply the Laminx so that what's visible of our lens is covered, and what isn't covered will be by the bumper/bezel."