Dirtco's 1999 4Runner Build

That's amazing! Looks fantastic!

Thanks Connor!

Wow. That looks great.

Do you think clearance will change at all with your LT down the road?

Yes, it will change if/when I go LT. I tried to keep that in mind while clearancing everything. I borrowed some 2" wheel spacers from a guy I work with, I can double them up on the front to get an idea how much room I'll have with the extra 3.5". It won't be perfect since the arc the wheel makes while turning would be completely different, but it will give me an idea and help to visualize. I'm sure I'll have a lot more room with LT.

you make my hammer job really look like a hammer job. Nicely done. :clap2:

Thanks Sam!

Looks great! 37's ?

36" Irok's. They are a little taller than 36" when installed on my wheels at 25 psi, and probably pretty close to most of the 37" tires on the market.
 
Super clean work as always, man. Adding the 1/4" rod was genius. Structurally, it will be tougher than stock, and it looks like it made the process of shaping and welding in the panels much easier.

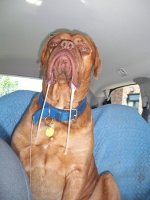
This is gonna be me when I see the finished product....

1.jpg
 

Attachments

  • 1.jpg
    1.jpg
    59.1 KB · Views: 1,630
Holy crap that looks amazing!!!!!!!!!!! I knew that you would make it look good, but even with that expectation it's better than I thought. Can't wait to see this thing on the trail.
 
Awesome work and I can't wait to see the finished product with the 36's on there!

I have a question for you:

I am in the process of making clearance for my 285's on 8" wide 3.25" backspacing wheels.

At first, the rears were rubbing the fenders BAD, so I rolled the inner fender lip up and at the same time pushed the outer fender out a little. That gained me quite a bit of clearance and they should be good now.

For the front, I did the easy stuff ie. folding over the pinch weld and doing a bit of trimming and I don't rub at all at ride height. However, Im now taking off my front swaybar and want them to clear at full compression.

How much can I hammer the firewall back without worrying about what's behind it such as wiring and the kick panels? Is there anything that I need to relocate or risk damaging?
 
Awesome work and I can't wait to see the finished product with the 36's on there!

I have a question for you:

I am in the process of making clearance for my 285's on 8" wide 3.25" backspacing wheels.

At first, the rears were rubbing the fenders BAD, so I rolled the inner fender lip up and at the same time pushed the outer fender out a little. That gained me quite a bit of clearance and they should be good now.

For the front, I did the easy stuff ie. folding over the pinch weld and doing a bit of trimming and I don't rub at all at ride height. However, Im now taking off my front swaybar and want them to clear at full compression.

How much can I hammer the firewall back without worrying about what's behind it such as wiring and the kick panels? Is there anything that I need to relocate or risk damaging?

You and me both!

There is a good amount of room, but I would still pull the kick panels and keep an eye on things. I would recommend disconnecting the battery and removing any control modules that are close to the area, just to play it safe.
 
Your too nice Addison, thanks for all the kind words!!! I guess I might be a little OCD when it comes to my vehicles.

I hope your brother finds the perfect candidate. Is he going to build it to go wheeling with you and your dad, or just a mild daily driver?

Deserved kind words. We can all tell you have a lot of pride in your workmanship, and it's extremely entertaining for us all to watch. Well done on the tub job, you took it to a whole new level once again. Very clever, considering you have to make a cut to the A-Channel when you cut the floor. Those rods are no doubt making it much more structurally rigid down there.

How funny is that photo with the hole in the floor and the tire sitting there. LOL It's a nail biter when you plunge into the firewall. (not that you haven't done worse...lol)

Yah my brother will be building the 3rd Gen to start wheeling with me and the old man. Pretty excited that we are all getting into it. Just gotta convince my youngest brother now too! haha
 
I thought of something this weekend and wanted to ask you. What are your plans for replacing the splash shield on the inner side of the fender?
 
I thought of something this weekend and wanted to ask you. What are your plans for replacing the splash shield on the inner side of the fender?

Good question, at this point I will probably seal up all the holes into the engine bay, reroute the air intake, and just leave it open. And, I would like to build some small deflectors to keep the inside of the corner marker lights from getting hammered with mud and snow.

I might add something down the road, but I'm having a hard time coming up with something that will seal the inside of the fender entirely (or close to stock), while allowing the fender to be removed, and not take a ton of time to make.
 
Next I had to address the body mount, it just barely rubbed the tire at full bump with the steering wheel maxed out to the right. I would have just let it go if it was a smooth surface, but it’s not.


Chopped


And filled in


Clearance after


And I finished welding the ¼” round rod on the front fender

 
More!

Some self-etching primer, under-coat, and bedliner.


Got the front fender smoothed out with some body filler and primed.


Made a block off plate for the air intake and rerouted it through the old windshield washer hole with some 3" exhaust tubing.


Filled all the holes in the passenger side door. I used 1/4" bolts, and I slid the bolt head through the hole and behind the sheet metal.


While the welder was out I placed a small weld on the Lotus LCA skid. I've been extremely happy with them, and they have saved my LCA mounts more times than I can count. But, if you hit them hard enough they will loosen up. This will keep them in place, and if I need to remove them it will only take 2 or 3 minutes with the cut-off wheel.

 
Last edited:
It was time to get the 4Runner turned around in the garage (so I could start working on the other side). So I temporary installed the coilover on the passenger side, mounted up another new tire and pulled it outside.


A few more pictures (the lighting sucked so I had to mess around with the settings to make them somewhat acceptable).


More!


Filled all the holes in the passenger side door. I used 1/4" bolts, and I slid the bolt head through the hole and behind the sheet metal.


Harbor freight sells a copper welding spoon, which if placed behind the holes in the sheet metal can make filling those holes with weld 20x easier. It traps the gas, and the copper does a great job of pulling heat away from the thin sheet metal. Just a recommendation, should make your life easier by not using so many bolts as well as not having to cut any!
 
Harbor freight sells a copper welding spoon, which if placed behind the holes in the sheet metal can make filling those holes with weld 20x easier. It traps the gas, and the copper does a great job of pulling heat away from the thin sheet metal. Just a recommendation, should make your life easier by not using so many bolts as well as not having to cut any!

Thanks for the input, I didn't want to gut all four doors to get to the backside of the holes. By using the bolts I was able to keep the doors intact, and save some time. If I had easier access to the back side (or if I was actually going to paint the panels instead of using bedliner) I would have used the copper welding spoon. Thanks for the tip!
 
If you were to do all the fender clearance again, what would you end up charging? WOULD you ever do it again?

Very clean work (as if you've never heard it before!) and I do love the fact that you're keeping the IFS and enjoying it for what it is.

It's amusing how similar our set ups are - I have a 1000 sqft log cabin and a 880 sqft 3 car garage. One spot for the 3rd gen of course!

Looks great!
 

Forum statistics

Threads
278,312
Messages
3,554,089
Members
248,016
Latest member
Advally Service

Trending content

Back
Top