**DONE!!!!!**1988 SAS build - need advice for beginning

1988 SAS build - need advice for beginning

9f9cba2be80da77add58ef6024271da1.jpg


They are stock. The diameter of the shaft decreases where it enters the birfield. It also has 100ac birfield nin printed on it.

What do you think happened to the inside of the knuckle and is it good to load up and use?
 
That really looks like it's been self-clearanced. Maybe somebody lost a wheel bearing or something and forgot to unlock the hub. I think you can run it like that, it looks like there's plenty of metal left.
 
^^^what KidV said. I too will say that you'll be fine running it like that. Almost every solid axle I've built showed similar contact from the birf. Now stop worrying about it and get it done already! :biggrin1:
 
Haha. I'm working on it! Got all bearing and seals pressed out this morning.

I'll be cutting the frame holes this afternoon and maybe start cutting the front crossmember to inset the spring hanger.

I'm going to assemble as much of the axle as I can without putting the birfs back in (rotor, spacers, ect). I'm thinking by the time I'm ready to install the axle I may have enough money for longs. We'll see.
 
The parts don't look as intimidating now that I organized them all in the bed of the truck. I think I'm missing a spring pad though. There are a few packages I need to open to double check.

Do you guys re-shim your axles for the SAS or just put the shins back how they were?
 
Put the shims back how they were, then measure the steering preload ($5 fish scale from the sporting goods store works great). The RIGHT way is to use the Toyota SST centering tool, but nobody has one of those so we just use the same amount of shim top and bottom and hope the axle isn't bent. :D

I think you should only have one spring pad, because one or the other of the springs are slightly taller than the other? I forget which side is which though.
 
There should be one spring shim to weld to the driver side front perch. The passenger is casted higher and the stock springs are side specific to compensate. I think it's a 3/8" plate
 
Thats correct, the 3/8th pad goes on the non diff side. (drivers side)

If you are reusing trunion bearings, just put the shims back how they were (assuming they still pass the pull scale) If using new bearing, then youll need to re shim.
 
Last edited:
Yeah I haven't found that in the stack of parts yet. I'll double check. And yes kit came with new trunion bearings so I'm replacing them.
 
Yeah I haven't found that in the stack of parts yet. I'll double check. And yes kit came with new trunion bearings so I'm replacing them.

Then you will need to re shim. The kit should have come with a shim packs, you can also re use your old ones if you need to. The '85 FSM has great instructions on how to set up the bearing preload. My only tip for setting them up is use the bottom shims for setting the knuckle height, and the top shims for setting the preload.

If you cant find the plate, any piece of 2x5 3/8th plate will work.
 
Last edited:
So much done. Axle gusset and armor tacked in place. Motor mount covers tacked in place. Frame tubes aligned and tacked in place.
 
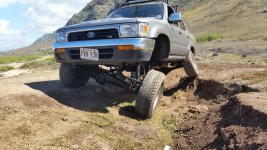
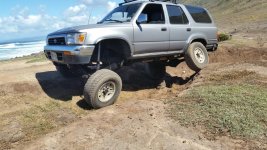
Nice!! Just went through the same process. finished my swap a month ago. 3" tg HD springs up front with 4" on rear. Stoked to see the rest of your build good luck bro. Check out my set up. Running stock tires for now to break in but got my 36 iroks coming
 

Attachments

  • 20141012_140551.jpg
    20141012_140551.jpg
    141.1 KB · Views: 1,208
  • 20141012_140522.jpg
    20141012_140522.jpg
    138.8 KB · Views: 3,253
Last edited:
Thanks guys. I really appreciate all the info you've been giving me. I'm super excited to get this flexy beast on the trail!
 
1988 SAS build - need advice for beginning

Well, caught pink eye from my kid. Boss said to stay home. That means bearings are going in and front crossmember is getting cut and spring hanger is going to be clamped and tacked. I will be hanging the axle tonight hopefully and checking the angles and what not.

The big question is when I will weld the front hanger. I only have a 110 Lincoln, which is rated for 1/4 with multiple passes. I'm eyeing the new 210mp from Lincoln, rated to 5/8 with stick and over 1/4 with mig.

Ask anyone on welding web and they will tell you my Lincoln will barely weld 1/8 properly. However I can blow holes through 1/8 with it, so I'm skeptical about their assessment. But most of them are well trained and wouldn't be leading anyone astray just for kicks.

That being said I think with preheat and flux core wire I can get plenty of penetration, but I don't want to chance it. I'm going to try and bump up my timeline to get the 210mp, so the project may get put on hold until I have a welder definitely capable of making this safe.

Good news is that may only be 2 weeks, which gives me time to do other things. I don't just let it sit when I hit a snag, I move to a different section of the project.

 
Do you have 220v? I have a great big beasty of a buzz box sitting in my garage waiting for me to find something to do with it. I'd be happy to learn how to stick weld on your truck. :D
 
1988 SAS build - need advice for beginning

Haha. I do have 220v ready to go. It's what my plasma runs on. Just depends on your plug. I had my neighbors thunderbolt for a while but i think something was wrong with it. I only got a good arc going once. Don't know enough about stick to troubleshoot. Figured a machine sitting for 15 years may have some unknown problem. However when the puddle got going my mig experience helped me see what to do with it. You can swing by I've got a ton of scrap to practice on!
 

Members online

No members online now.

Forum statistics

Threads
278,316
Messages
3,554,120
Members
248,016
Latest member
Advally Service

Trending content

Back
Top