Fixing the transfer case shift motor leak from within..

Whats the purpose of the breather tubes?

Also, everyone doesn't need to split the case to fix the O'ring. Just separate the actuator black box from the tcase and slap some toyota/lexus gasket sealer in there after you cleaned out the area with brake cleaner. Its basically a liquid version of a gasket. These applications are also similar to those used for gas appliances instead of using traditonal old teflon tape.

It will save you lots of time and money if you just do it this way. A fifteen minute job is better than a 4-8 hour job to seal a leak. Genius idea if you've asked me.


Let me know how that holds up over the long term. For now, I'd rather do a 8 hr job once and do it right than a 15 minute quick fix that's going to cost me more time and headache down the road. Squirting some FIPG or RTV in there is not a permanent fix, but a bandaid like Blue Devil.


Sent from my iPhone using Tapatalk
 
Let me know how that holds up over the long term. For now, I'd rather do a 8 hr job once and do it right than a 15 minute quick fix that's going to cost me more time and headache down the road. Squirting some FIPG or RTV in there is not a permanent fix, but a bandaid like Blue Devil.


Sent from my iPhone using Tapatalk

I drove 3,000 miles already. I have yet to see a leak on it. Will let you know if it does leak.


Can you really get that sealant into the gap around the shift rods without totally removing the actuator housing? That seems to be the holy grail of 4th gen tcases is to repair the actuator (or even removing it from the shift rods) then getting everything back together and shifting properly, leak or no leak.

Thats what the mechanic said. take the screws off the actuator and pull it back as far as the rods let you go and clean it out and slap the sealant onto there. This is the holy grail to fix it. whether it is a temporary or permanent fix. I can say it is working for now. I rather not waste half a day trying to change an Oring and 2 seals. (which i still have but never end up using them. )
 
Last edited:
I drove 3,000 miles already. I have yet to see a leak on it. Will let you know if it does leak.


Thats what the mechanic said. take the screws off the actuator and pull it back as far as the rods let you go and clean it out and slap the sealant onto there. This is the holy grail to fix it. whether it is a temporary or permanent fix. I can say it is working for now. I rather not waste half a day trying to change an Oring and 2 seals. (which i still have but never end up using them. )

Holy grail is overselling it... it's temporary fix with potential to hold up a long while. At best you stop the leak, at worst you pull too much and pull the rods out of alignment in the actuator (had one come in another shop tried to fix that way.)
 
No holy grails here. Busted her open yesterday. The quick fix wouldn't have worked. Well, once you use Blue Devil, you can kinda consider all seals trashed.
22053aab780bdf7d15740ca30b4fcf78.jpg
92bcb1ff0c7f64fe200e708ac54903ee.jpg
68b4310b1cac3166776e03cf03f06bf7.jpg


Sent from my iPhone using Tapatalk
 
Wow, that was an adventure

Well, after my bout of stupidity my truck is finally back together and functional. I learned a lot along the way, most of them very hard lessons.

I picked up an AISIN branded actuator (the OEM manufacturer) off Amazon for $500. It was described as for the V8 only but everything I could find here and on some of the Toyota parts sites indicated they are the same part for both. The only difference in this new unit and the old one is the inspection cover. There's not one on the Amazon unit so you can't check the timing of the diff lock shift rod from the outside.

Here's the list of truly stupid things I did that cost me lots of time but were still educational/interesting.

First of all, instead of cracking the T-case as the manual and many posts here recommend I was determined to do this repair/replacement from the outside. In that regard I was successful with one HUGE caveat....I had to pull the T-case. I figured out the timing on the new unit and dismantled/reassembled it numerous times and got all excited about putting it back together while laying on my back under the truck. I forgot about one key thing....gravity. Trying to keep greasy gears and axles in place within a single tooth while getting everything reassembled proved to be nearly impossible (at least for me).

I also had to mod the actuator box a bit. The difference between the 2-4 rod being all the way in and the diff-lock rod all the way out is about 19mm. That doesn't give quite enough clearance to get the top layer motor plate in/out of the case. I ended up notching some of the thin plastic with the dremel. If I were a little trickier and had thought of this earlier I think it would be feasible to rig up a power supply on the individual motors and monitor the index switch with a meter. That would have taken me even more tinkering and time though.

Lastly, in my haste and a bit of frustration I ended up tearing one of the oil seals....DOH. So, thanks to the forum I ordered some replacements from Colonial seal. I also took the dremel to the shoulder area of the shift rods to take off the sharp edge that had torn the seals. A little dremel work and some polishing with an old 2000 grit belt brought the whole seal area to a nearly mirror finish. We'll see how well that holds oil with time.

Luckily, I only had the t-case out and back in a single time but I cracked the actuator box open nearly a dozen times trying to get the timing right with it on the case. Half of those were "operator error" by not paying attention to the front diff actuator. Going from 2Hi to 4Hi involves moving the shift rod from all the way in, through the diff-lock position, to the fully out or "unlocked 4wheel drive" position. The last thing the 4wd computer does is lock the front diff. Only then does it give you the solid green 4Hi dash light. On a couple of my attempts I could hear the t-case shift, then the front actuator, but the lights kept flashing. I thought I'd messed up the t-case until I finally crawled under and twisted the front driveshaft and "click" the diff fully engaged....Woo Hoo green light!!

The best advice I can give is "do it according to the book." If you get in a position where you've got a gunked up motor and you end up disassembling the actuator I can probably give you a hand with the timing and getting it back together, especially if you're willing to open the T-case.

Also.....pulling the tcase isn't too bad. Just don't let the wife operate the jack and almost drop it on you. The only way I was getting mine back in solo was by building a little cradle with some scrap wood and screwing that to the foot of my floor jack. Luckily the balancer weight on the t-case ends up acting like a "foot" and keeping it almost in the right orientation. There's also one of the bolts on the bottom coming from the transmission side that's wedged up against a mount. That one was a bit of a pain to remove/reinstall.

Overall, I'm setting my phone for a monthly reminder to shift into 4lo somewhere for a few minutes and hoping I never have to deal with this again....and that the t-case doesn't leak.:lol::lol:
 
Well, after my bout of stupidity my truck is finally back together and functional. I learned a lot along the way, most of them very hard lessons.


I picked up an AISIN branded actuator (the OEM manufacturer) off Amazon for $500. It was described as for the V8 only but everything I could find here and on some of the Toyota parts sites indicated they are the same part for both. The only difference in this new unit and the old one is the inspection cover. There's not one on the Amazon unit so you can't check the timing of the diff lock shift rod from the outside.


Here's the list of truly stupid things I did that cost me lots of time but were still educational/interesting.


First of all, instead of cracking the T-case as the manual and many posts here recommend I was determined to do this repair/replacement from the outside. In that regard I was successful with one HUGE caveat....I had to pull the T-case. I figured out the timing on the new unit and dismantled/reassembled it numerous times and got all excited about putting it back together while laying on my back under the truck. I forgot about one key thing....gravity. Trying to keep greasy gears and axles in place within a single tooth while getting everything reassembled proved to be nearly impossible (at least for me).


I also had to mod the actuator box a bit. The difference between the 2-4 rod being all the way in and the diff-lock rod all the way out is about 19mm. That doesn't give quite enough clearance to get the top layer motor plate in/out of the case. I ended up notching some of the thin plastic with the dremel. If I were a little trickier and had thought of this earlier I think it would be feasible to rig up a power supply on the individual motors and monitor the index switch with a meter. That would have taken me even more tinkering and time though.


Lastly, in my haste and a bit of frustration I ended up tearing one of the oil seals....DOH. So, thanks to the forum I ordered some replacements from Colonial seal. I also took the dremel to the shoulder area of the shift rods to take off the sharp edge that had torn the seals. A little dremel work and some polishing with an old 2000 grit belt brought the whole seal area to a nearly mirror finish. We'll see how well that holds oil with time.


Luckily, I only had the t-case out and back in a single time but I cracked the actuator box open nearly a dozen times trying to get the timing right with it on the case. Half of those were "operator error" by not paying attention to the front diff actuator. Going from 2Hi to 4Hi involves moving the shift rod from all the way in, through the diff-lock position, to the fully out or "unlocked 4wheel drive" position. The last thing the 4wd computer does is lock the front diff. Only then does it give you the solid green 4Hi dash light. On a couple of my attempts I could hear the t-case shift, then the front actuator, but the lights kept flashing. I thought I'd messed up the t-case until I finally crawled under and twisted the front driveshaft and "click" the diff fully engaged....Woo Hoo green light!!


The best advice I can give is "do it according to the book." If you get in a position where you've got a gunked up motor and you end up disassembling the actuator I can probably give you a hand with the timing and getting it back together, especially if you're willing to open the T-case.


Also.....pulling the tcase isn't too bad. Just don't let the wife operate the jack and almost drop it on you. The only way I was getting mine back in solo was by building a little cradle with some scrap wood and screwing that to the foot of my floor jack. Luckily the balancer weight on the t-case ends up acting like a "foot" and keeping it almost in the right orientation. There's also one of the bolts on the bottom coming from the transmission side that's wedged up against a mount. That one was a bit of a pain to remove/reinstall.


Overall, I'm setting my phone for a monthly reminder to shift into 4lo somewhere for a few minutes and hoping I never have to deal with this again....and that the t-case doesn't leak.:lol::lol:


I really found getting the transfer case back in to be the bigger pita, even with a transmission jack. I finally said "the hell with it", rolled on my back, said "I'm pushing with my feet, you guide it", and the darn thing went right in. I never want to do it again though.


Sent from my iPhone using Tapatalk
 
I ended up having to boost it up and kind of use my knees to guide it in. Thought for sure I wrecked the shaft seal on the tranny, but got lucky. Someone needs to get the diameter of the oring seal on the actuator and hole in the transfer case. I forgot and wished I had went and tried to find a better oring. It could be much thicker where it fits into the groove on the actuator and maybe an little tighter in the radial direction as well. I usually try to not replace a known jank part with the same one, but if this one lasts another 150K then I am cool.
 
So I'll follow up on this thread as I just swapped in a "new" transfer case and actuator based on this write-up. Firstly, thanks for putting this together! It served as the only manual I used for getting the job done.

A little background: This is my second transfer case that I installed on the truck. I had a leak from the actuator and a busted plug that was sent with the unit during shipping (they refunded the cost of the unit, but I was still out the shipping). Bottom line, I had 3 TC's in my possession with 2 TC's worth of working parts lol.

TC1: My original TC that had a leaking actuator that went unnoticed, only until I hear some real nasty grinding and gear skipping that I figured it out.

TC2: Replacement TC that had the actuator damaged during shipping. Unit currently in the vehicle. Won't engage in 4L or CDL, constant flashing like CDL/VSC Off is trying to engage.

TC3: Free donor from a buddy that had tried to time the actuator and failed. Otherwise completely functional to my knowledge.

The game plan was to take the actuator from TC1 and insert it into TC3 so that I could still have a driveable vehicle while I was working on rebuilding. I swapped in all 3 seals as mentioned above but it was evident that the O-Ring was the culprit for the leak. It was super stiff and flattened. Cleaned everything up, replaced the seals according to the write-up except for the electrical tape. I just took care to slide the shafts back into place gently. When I pulled out the actuator from TC1, the shorter shaft (I believe it's the center diff lock) actually pulled out of the actuator housing. Minor panic moment but I was able to set it back in and have it engaged with the gear inside by giving it a 1/4 turn to settle it in there back to it's original location. Fit everything back together and everything went smoothly. Prep work and reinstalling the skid/frame cross bar took longer than the actual TC work itself.

I'd say 7-9h for me but that included putzing around, going out of my way to get other things cleaned up etc. while I was up there. The one casualty I did have was a sheared bolt from the bell housing to the TC, but it was one of the upper ones which IMO I think I can get away with. Not ideal but I'll continue to monitor it and make sure that nothing's leaking. I was also going to replace the TC input shaft seal, but stupid me bought the wrong seal. It was still in great shape though so I rolled the dice. The next steps for me are going to be to re-time the actuator on TC3 and install it on TC2 to have another rebuilt case on standby should I need it. Everything currently functions exactly as it needs to for the most part. CDL disengage and 4H/L sometimes take a sec, but I'll just keep engaging/disengaging to loosen things up. This morning they started right up since it was a little warmer.

A few items of note:

Take your time - the job isn't hard, you just have to be patient with getting everything done just right. The write-up is great.

The c clips on the shaft were a PITA to get off for me. Took some real muscle to get them off of the first actuator, got easier on the second one. Probably practice. They can easily go flying so just keep an eye out.

Make sure you have a real clean face for putting the case back together. No sense in spending all that time working on it just to have it leak because you didn't want to clean it up all the way. I took a blade to get the bulk off and ran it at a very flat angle around the face to not nick it then followed it up with a copper brush. A small wire wheel on a dremel will work too, this was easier for me to make sure that the little RTV bits didn't go everywhere. Took a little longer but cleanup was easier.

Sorry I didn't take pics, but A) I was up to my elbows in gear oil and B) I lost my phone and am back to the stone age with an old iPhone 3GS. Happy to answer any questions.
 
Still a lot of traffic on this thread so I figured I'd update...

Just shy of 3 years and 35000 miles and the truck is still leak free! Glad this thread is still helping people.
 
Still a lot of traffic on this thread so I figured I'd update...


Just shy of 3 years and 35000 miles and the truck is still leak free! Glad this thread is still helping people.


I know it's only been about 6 months since tackling this on my '03, but I'm still 100% leak free. This thread was an invaluable resource.


Sent from my iPhone using Tapatalk
 
Update on mine: I have done the o-ring replacement twice (once on mine and once on my son's). Both are still leak free, one was done 2.5 years ago and the other 8 months.
 
I'm about to take this on, I think. If it's not too much more work, I'd like to replace other seals while I have the transfer case out. What other seals should I think about replacing? I see one thing in the FSM for transfer case oil seal, but I can't tell which seal it is.

Now I'm really confused with the kit mentioned in the Lexus TSIB. Does it contain the actuator shaft seals normally bought from Colonial?
https://www.lexuspartsnow.com/parts/lexus-gasket-kit-transfer-overhaul~04362-60120.html
781450%2f360797_2_04362_RL_V1.5.png


Does this kit contain everything except for the O-ring for the actuator?

Actually, it looks like the kit part number has changed (and there are multiple depending upon the year, so don't go by this):
0436260780_1.jpg
 
Last edited:
I'm about to take this on, I think. If it's not too much more work, I'd like to replace other seals while I have the transfer case out. What other seals should I think about replacing? I see one thing in the FSM for transfer case oil seal, but I can't tell which seal it is.

Now I'm really confused with the kit mentioned in the Lexus TSIB. Does it contain the actuator shaft seals normally bought from Colonial?
https://www.lexuspartsnow.com/parts/lexus-gasket-kit-transfer-overhaul~04362-60120.html
781450%2f360797_2_04362_RL_V1.5.png


Does this kit contain everything except for the O-ring for the actuator?

Actually, it looks like the kit part number has changed (and there are multiple depending upon the year, so don't go by this):
0436260780_1.jpg

To my eneducated eye, looks like the Tcase input seals (where the tranny output shaft comes in), front output shaft and rear output shaft seals. These are the larger ones. Two crush washers for the fill + drain plugs. Four shaft seals, two of which are for the CDL/Hi Low deal (maybe). Large O ring also for the CDL/HI Low deal.
 
So it turns out the seals in the kit that look they they are the 23x15x7 shaft seals are actually 25x15x5 or 6, so they aren't for the shafts. I had to overnight ship some seals from Colonial seal. Also keep in mind that the actuator O-ring doesn't come in the kit either. What came in my kit was: input shaft seal, 2 front output shaft seals (a big one plus one of the ones with a crush washer stuck inside), 2 rear output shaft seals, 4 crush washers for some reason, breather gaskets, oil pump o-ring (didn't replace), a plastic ring (didn't replace), and two 25x15x5 that didn't go anywhere. Mine didn't seem to have one of the large o-rings in the picture above. Maybe my kit was screwed up.

I have a 2003 V8, and many of the seals were in pretty bad shape and were falling apart as I messed with them. I went ahead and replaced almost all of the seals in the kit plus the output of the transmission. Not going to lie, this took WAY longer than I expected. I also replaced the diff fluids and coolant and degreased the entire tcase, but all in all it took the better of two days. I also wasted some time turning UHMW plastic on the lathe to make seal drivers. The two output shaft seals have lips on both sides, so I really didn't want to hammer on the lips to drive the seals in. This was probably overkill, but I was waiting on my actuator seals to arrive.

Major thanks to those who figured this out and gave their tips. Here's what I'd add:
* You need at least 18" worth of ratchet extensions, and one needs to be a wobble. I had to use multiple wobble extensions to get bolts out at awkward angles.
* The actuator shaft seals are very hard to remove. Make sure you have a strong pick or two. I had to make a trip to Harbor Freight because mine kept bending.
* Immediately replace the actuator seals after you remove them. With mine out, I had a shaft fall out and was worried about having to time the actuator. Fortunately I wiggled it back in and it worked fine.
* If you use the Toyota FIPG sealant, definitely use the metal key that comes with it to wind up the tube to force the stuff out. Replacing all three seals meant that I had to use FIPG in three places. The first time I didn't think the key was that important and I would just squeeze it out. It's WAY easier with the key!
* The seals that you have to pull rather than push are a pain - the input shaft seal and the transmission seal. I bought the cheap HF slide hammer seal remover, and it finally got the job done but not easily.
 
Last edited:
Excellent article! I was wondering if it is possible to leave the transfer case (TC) in place and just split/remove the rear half of the case only? That might save some time and heavy lifting.

I must commend MandAtaco for the best write up on the net for this, not involving an actuator tear down. Stay away from all those pull twist and crack articles, the info dosen't even apply to the two shaft actuator.

You can buy new actuators from the OEM who is AISN, not TMC, Dorman is even selling them now, not sure if they are just repackaged AISN units.

To answer Gdmeaders:

Yes, did it once the hard way, it is unruly and unbalanced and dropped it 3 times. The next two times I split the case on the truck, just beat the case with a dead blow until the RTV released. Pull the unit straight back until disengaged and lower it to you chest. This cuts the weight in half and is way more manageable when doing it without a lift and tranny jack.

Tips: you may tear the front shaft output seal so have a new one handy, can install from outside b4 pulttng the flange back on. Toyota may have an error online as seal supplied has huge flinger flange on it, so I removed the one pressed on the output hub for now.

When unbolting the front shaft, remove the grease fitting so you can compress it easier, will shoot grease so cover w/rag.

Make sure you recover the 2 halves of the split needle bearing and thrust washer, put back in place prior to putting halves back together, a handful of grease lathered on it will help keep in place.

Lube up your seals before putting them back down the shaft.

My conclusions on cause and repair of this known problem:

TMC uses this xcase for several models, so there are 3 actuator shaft holes in the case. (I have the AWD 2004 V8, so 2 shafts) The open hole in the case is allowing splashed oil to migrate towards the o-ring seal, once it gets to the o-ring, it is trapped in the gap between the plastic disk covering the o-ring and shaft seals and has no way to drain back into the xcase. Eventually when the o-ring fails the dripping begins, and every time the truck moves, that cavity is refilled with a small amount of oil. This is why it is such a small leak.

The oring design is also a failure in its own right. The gap is wide enough to put 2 orings in comfortably. So that's what I did on round 3. These orings by the way ended up being common ASA sized o-ring and can be had for pennies, it was size 035?, but I misplaced the package, but the Toyota ones are cheap enough to get 2.

The shaft seals are really not the culprit in this case, I had maybe 3 drops of gear oil visible inside the actuator on a 13 yo truck.

The key i think is to plug that unused hole in the case. It is slightly smaller than the stated seal ID of 15MM. Harwall sells blind 15mm seals similar to the old freeze plugs, and I drove 1 down into the unused hole. Not a drip in the 3 weeks since.

Was not able to get the old shaft seals out, so I bit the bullet and disassembled the actuator. Don't do it unless you mark the exact large gear positions, and the blue and white wheel positions, along with noting the exact enagement of the teeth on the shafts relative to the metal spur gears that engage them. There were lots of pictures and questions about retiming these, but no way to be sure they didn't all ready move something or mention reliably what setting the shift rods were in when dissembled.(4HI, 4LO, Locked/Unlocked)

I am now leak free, but will have to do further work on the diff lock setting, The blue pot is giving be an intermittent reading causing the flashing lock light issue. With that not working, it wont let you actuate the high/low mode.

This 800-1200 problem is fixed with 2 seals, 2 orings and 2 quarts of oil, and your time and skill.

 
toyota_tx, where were you a week earlier? :) The first of your suggestions would have made this easier and the second would have given me more peace of mind.
>When unbolting the front shaft, remove the grease fitting so you can compress it easier, will shoot grease so cover w/rag.

>The key i think is to plug that unused hole in the case. It is slightly smaller than the stated seal ID of 15MM. Harwall sells blind 15mm seals similar to the old freeze plugs, and I drove 1 down into the unused hole. Not a drip in the 3 weeks since.

I can't believe Toyota's solution wasn't to add a plug to the unused hole. There's no reason there should be oil outside of the aluminum housing.
 
I've taken my transfer case out and swapped it with another one that had 70k miles. mine was 204K miles and it was having alot of metal shavings when I drained it.

WHen it starts leaking oil on this new one.. Which I hope not, I may have to open it up to change the seals which I still have. Figure changing the transfer case was alot easier than doing surgery work, but it was still a pain to lift the transfer case and put it in. I had to replace the seal around the transmission and Transfer case since it was leaking there as I pulled it out. Took another two days to wait from the dealership , cost me $18 and the $400 for the used transfer case. Overall happy.
 
I have the same leak described in this thread. Leak between the actuator and transfer case. Dealership is telling me that I could potentially have a cracked transfer case. Has anyone come across this? Its a 2004 v8. Thanks in advance
 
I have the same leak described in this thread. Leak between the actuator and transfer case. Dealership is telling me that I could potentially have a cracked transfer case. Has anyone come across this? Its a 2004 v8. Thanks in advance


Could? I guess, but it’s unlikely so. The dealer can say whatever they want because they aren’t going to replace the o-rings anyway. I’m at about 10 months with no leaks since I split the transfer case and replaced seals.


Sent from my iPhone using Tapatalk
 
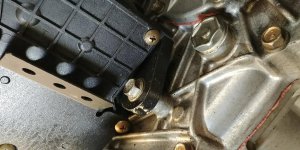
Looks like mine is leaking also.
Plan on doing this repair in a couple of weeks.
Good job on this DIY OP!
 

Attachments

  • 20180308_163326.jpg
    20180308_163326.jpg
    144 KB · Views: 952

Members online

Forum statistics

Threads
278,313
Messages
3,554,090
Members
248,016
Latest member
Advally Service

Trending content

Back
Top