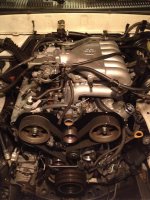
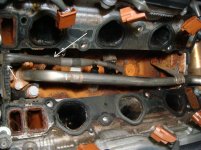
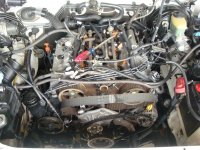
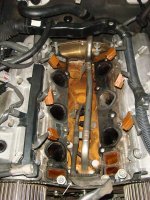
Head Gasket symptoms starting to show...

Thanks for the tip on the freeze plug install.

The previous owner of my vehicle must've made the change from the red to green. Is it safe to go back to red?
 
You can do it, no problem. I just flushed the engine for a couple of minutes before installing the thermostat back again (avoid blocking the flow). I used a water hose to do the flush, meaning tap water, not good for engines, that's why I used compressed air to blow all the water out as step 2. A minimal amount of water could stay inside but I don't think that'll be an issue. If you want to be sure all tap water is out, get some distilled water and use it to get it out.

I got the concentrated Toyota Red Coolant from the Toyota dealer and got it diluted with distilled water. Is cheaper than getting the diluted version. Just follow the instructions on the recipient regarding dilution ratio.

Remember to flush the radiator and coolant reservoir as well. Also wash/flush the radiator cap, a/c unit water heater (you can open the valve manually from the engine bay) and all hoses.

At least you're getting an OEM fluid, what your runner brought from factory. I have a G35, all aluminum engine and it brought green coolant from factory. Will get sure I get exactly the same fluid before replacing it.

I replace my runner's coolant every year but it can be replaced every 30,000 miles (as suggested by manuals).
 
Anyone know what that oil seal or cap is called for the back of the head? I bought a brand new one and it didn't come with it. The other head has one and it's a black cap/seal. Can't seem to find the party number on this. Any clue?


F2D25384-F0A6-4648-94FD-35C0ED693A4B-184-00000017FE053BE2.jpg~original
 
So I've started transferring the exhaust and intake manifold bolts from the cracked head over to the new head. I also put it the new spark plug tubes however found something strange. The height of the new spark plug tubes are about an 1/2 an inch taller than the original ones.


Here is a pic of the original tubes sitting at 2.7 inches.
BFC4A112-A67B-45B8-B0B5-544A7FB68F7D-1186-0000010ABD3AC47E.jpg~original


Here's the new tubes hammered down sitting at roughly 3.2 inches.
1A6CC348-4E03-4257-9FFB-9C14B2334A9E-1186-0000010AC59C6DC6.jpg~original


The head was purchased from a place in San Leandro, CA called Japan Engines and they said they get the brand new heads shipped over from Japan. Could it be that the JDM motors have taller valve covers? Or is it that they simply gave me the wrong tubes?


Also does this cable from the valley hang in front or behind the motor? =)
I forgot and curious before i bolt the manifold down.
671E71C7-862D-4BE9-B533-714DF63D1083-1186-0000010ACBB58217.jpg~original


:dammit:
 
Thank you for this thread.

It has been instrumental in helping me make a decision on fixing the head gaskets or replacing the engine.

Needless to say - I am picking up the engine this weekend.
 
Regarding spark plug tubes, no idea as I did not replace my heads. Not so sure they can be removed/replaced. Maybe you should try bringing them to a Machine Shop so they can be cut precisely at the same height of the original ones, but be sure there are no other differences other than that. I guess contacting the seller is the best idea.

I included some of my pics regarding the knock sensors harness. Hope that helps :thumb3:
 

Attachments

  • knocksensorswire1.jpg
    knocksensorswire1.jpg
    135.6 KB · Views: 997
  • knocksensorswire2.jpg
    knocksensorswire2.jpg
    133.2 KB · Views: 1,160
  • knocksensorswire3.jpg
    knocksensorswire3.jpg
    139.8 KB · Views: 2,656
  • knocksensorswire4.jpg
    knocksensorswire4.jpg
    138.5 KB · Views: 1,171
U welcome. BTW, take some time and remove and clean your IAC valve. When I fired up mine after reassembly, engine was not idling fine, then I had to remove the IAC to clean it out and found it was stuck. I was able to take it apart (remove the plastic housing where the electronic part is, from the actual valve) and lubricated the valve to make it work again. Turned out it was the third time I was giving it some attention, no success this last time, the idle was not fine. It kept shutting down and idling rough some times. Got a new one (identical to the OEM one, with the Toyota label and everything) from rockauto, best price I was able to find. Now it idles like it should be. Happy with the results :D
 
I'll definitely make sure i check the IAC while reassembling

As for the spark plug tubes, i'm still stumped. I'm guessing the shop gave me some that were for another car. I'm going to stop by the toyota parts store in the city to buy some. I'll be able to compare the sizes then. In the meantime, i have to pull the long ones out with some vice grips.
 
Call the shop before sending the heads without the camshafts. In my case, the guy asked to have them assembled in order to check clearances, etc. Be very, but very careful of not mixing up those valves shims. They come calibrated from factory and mixing them up means to machine all of them again and that will add some extra bucks to your repair costs. You can make a mark on them using some permanent ink if you are skeptical about someone not doing the right thing. Do the same thing or the camshafts and collars. Everything should go back in the same place it was from the beginning. The guy on the shop should tell you what he needs. Take pictures of everything as well, that's my advice to you. :thumb3:


Hi, Carlos! I am Cuco from Aguas Buenas, PR. I need your help regarding OME-906 coils to my SR5 4RUNNER 1998 4WD, please let me know how I can contact you. I want to put the OME-906 coils rear and want to know where you purchased yours and how much you paid for the shipping. Thanks
 
Yes, same method. Actually is easier to tight than loose the bolts as when tightening, you have control of the force applied all the time (when loosing bolts, you actually don't know how much force is needed to get them loose plus there is always the risk of injuring yourself as soon as the bolt gets loose). I didn't buy any special tools to do the job other than the typical ratchets, drives, sockets, wrenches, pry bars, etc.
 
Quick update on the progress. Was able to get the passenger side head in today. Since i did this portion alone, i bolted the header on before fitting the head in place. All it took was a bit of balance (to not damage the head) and some wiggling. It was a bit easier in my opinion because there were three points to connect with that exhaust manifold.

I lost some exhaust nuts and even some double ended bolts. Will need to pay a visit to the hardware store to replace those. Also will need to tighten the pulley bolts

Pics for the update:

0EC0560A-1470-450A-8EEA-F161927DFA35-5900-000004C4909E411D.jpg~original


As you notice on the passenger side valve cover, the spark plugs tubes are sticking out slightly. That's what i was referencing earlier. I actually did some test fitting with the coil and spark plug in the tube and if i slice the rubber grommet on the coil pack a bit, it'll fit and touch spark. JDM stuff :wtf:
 
Did you contact the seller about that issue? I remember you mentioned something about removing the pipes... did you try it? Making them shorter seems like a quick fix but if pipes can't be removed by means of a vise grip or something, then I guess you'll have to take the head to a machine shop to cut them properly.

Made a websearch and found this thread. Still looking... They are either placed in my means of applying pressure or maybe they are the threaded type.

help where I can buy this spark plug tube remover tool - Toyota Nation Forum : Toyota Car and Truck Forums
 
Nah, didn't contact the seller but went to a mechanic and he gave me a few options:

1. bring it back to the seller and let them pull the tubes and replace it for you. "if they eff up, the eff up. but at least they'll warranty you"
thing is, i don't have time to make another trip or two out to that shop. i'd have to take days off work and i'm dying to get the runner complete and running this weekend.

2. get a sliding hammer and pull the tubes out. then, either cut em or replace them with the right ones.
again, i want to get this started this weekend and dont have the time to find a sliding hammer. plus, i don't want to damage the head trying to get the tubes off myself.


3. find a way to get the coils to connect to the spark plugs.
this is pretty much what i decided to go with. method here is to get an box cutter and carefully slice the rubber bushing-like piece of the coil. this part is suppose to touch the valve cover when fully inserted but it's capping off at the tip of that tube. If i slice enough so that the entire coil and slide down, with some of the tube fitting INTO the rubber, it'll touch spark. Then, just bolt down that coil. my lazy ways....
 
Going back together with everything? I just prepped the block today and did some side installs.

Also does anyone have a good link to a vacuum line diagram for the 3.4?

I have the service manual online but can't seem to find a good figure to go to when the time comes. Thanks in advance.
 

Members online

Forum statistics

Threads
278,316
Messages
3,554,121
Members
248,016
Latest member
Advally Service

Trending content

Back
Top