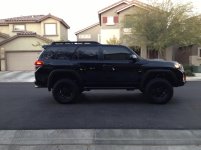
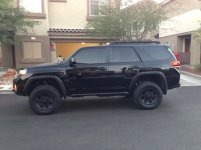
11yrs later and it’s time
So all done with the install... It was hell... Here is my thoughts on it for anyone thinking about doing this install...
Actually first let me say that anyone that has ever done a write up on this forum is awesome and I really appreciate it... Not only does this stuff take a long time to do, it takes way way longer to stop set down a wrench and take pics and notes as you go...
Back to my thoughts on this install....
So for a noob thinking of doing this... Ask yourself why are you doing this? Is it cause mod'ing is fun to you? Or are you doing it to save money? Or cause you are bored? Cause if its to save money I spent way more than I would have spent paying the local off road shop to do it... But I do get to keep the tools and experience for next time.
For me I wanted to do to lift my truck ever since I found this site and saw the build threads... and I wanted to save cash on install and prove I could do it and keep my mind off other stuff...etc...
So to make this thread actually helpful to someone who needs it and instead of a dear diary post let me try to stay on topic.
Search this site and every other site for all the do's and dont's
of installing a lift. Keep in mind there is a lot of info so cut and paste the tips and hints into a word doc. and print it so you have it handy... I wasted more time looking through threads trying to remember tips i had read weeks ago when I was unsure of how to proceed, and I got my computer greasy!
Do not think this is like building a bookcase from target with directions and the little cute wrench and even an extra wood pin.
The directions are garbage that come in the box, 1 page black and white and is very broad... They will be little help unless you understand the components of your suspension and how they work and what they are called etc.
There is an amazing write up from the FJ site... But if you have a 4runner trail w/ KDSS you are on your own... Its got pics that are great and names of the parts and torque specs and which size tool you need.
Everyone talked about issues with the KDSS sway bar... I read a post from SoCalTrail giving step -by-step to another member: attach the passenger side first then put on tires and drop car and jack up under KDSS piston(front driver side)... It took me 5 mins to do the sway bar... That was the only thing that went smooth on this instal, which is funny cause I expected it to be the hardest part... Also have tools, lots of tools are even better.. Go to Home Depot and get a 4x4 or 4x6 whatever i got and have them cut it in a bunch of 1 foot blocks these were so helpful when lifting different parts of the truck to make this go in or to be removed or to apply pressure etc. also have a second car if possible and don't be in a rush cause even if you think you have everything you need you will forget something and if you need your car to go on a hot date that night or to take your kids to school in the AM you might rush to get done and not loctight something or forget to torque something etc.
Stay off the (abs?)brake shield around the disk you don't wanna to bend it, if you do your car will make an annoying noise
Tie up the brake sensor cables cause If you stretch the cable your brake light will be on after the lift and cause it to do something else, still not sure what but I would avoid it.
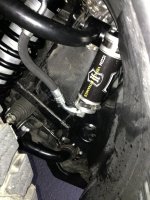
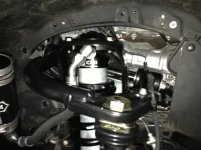
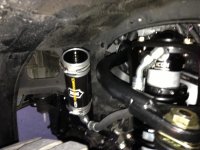
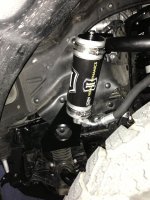
I don't care what people tell you if you're a noob with limited tools and experience avoid the remote res coil-overs... They take tweaking and take fabrication skills. Yes They are pretty to look at but not worth the headache... The brackets are not specific for each model. There are two big holes in the frame where it looks like they go.. Don't get exited cause they don't and one hole is half welded anyways, you'll need a heavy drill and good bit to make the holes in frame... After that you have to twist and fight the canister to get it into position and the canister has such a short line to the top of the coilover that you have no margin for error using that bracket.. Also on the driver side it isn't flat against the wheel well.. So you have to bend it to get it to work and they do not sit flat against the frame.. I will probably end up using Ducmonsta idea of cutting the bracket and putting 3 holes in the side of the frame instead of two in the bottom of frame... I think it would look cleaner and I would trust it more... If I do not do that, I would at least have the brackets bent and get lots of washers under it to fill in the gap and have it sit flat on the bottom frame... Or weld it or get longer bolts... Honestly I don't trust the bracket i could see the possibility of it coming lose when off roading or highs speeds and have it bang around in the wheel well.
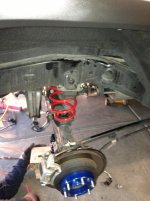
Also don't follow the fj write up for the rear... It suggested after you replace the coils then attached sway bar before putting on the shocks... Don't do it, if you put the sway bar on you will never get the shocks in. Sway bar last.
That's all I can think of I am sooooo tired. Hope that helps anyone else. It's also helps to have a forum members cell number and you can text him pics along the way asking him where the big slinky looking thing goes.
Also the rear shocks had no instructions with them and none on the icon site, I could not figure out which way the rubber washers went: round edge side up or down... Cause when you look at pics the rubber is on so tight you can't tell which side is up or down... After looking for 30 mins for the answer i gave up and finished... If you know the answer please don't post it cause I know I put them on wrong and I want a day or two off to before I start to think about having to fix it.
Wow, this was a fun read and a cringy reread. My favorite part, bittersweetly, is when I did this project with my dad in the garage—handing me tools, smoking, and running to Harbor Freight for mid-project tools. It was one of the last times we spent in the garage together before he passed away shortly after, and I'll never forget it. Back on track...
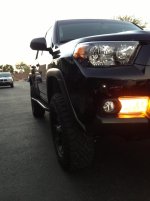
I built my 4Runner just the way I wanted within my budget. As other companies released new bumpers and aftermarket items, I wanted to keep going. Unfortunately or fortunately, life happened—I got married, had kids, got busier, and simply enjoyed driving it, putting a pause on modifications besides routine maintenance.
Recently, I went to the dealer for service, and they informed me that the coil-overs and rear shocks are toast and leaking, needing replacement. As a bonus, my rack and pinion are leaking too. When I saw the repair cost, I had a heart attack. I figured if I did this job once, I could do it again—the suspension job, that is. The rack and pinion won't be a fun one. I found a write-up that involves loosening many components to wiggle the new one in, as the repair manual suggests raising the engine up and out for enough room.
In the 11 years since this project, I've come a long way, leveling up my fabrication skills. I cringe at the memory of not having a file or drill that could go through the frame to mount the coil-over reservoirs. Hopefully, this goes smoother than last time.
If anyone has tackled the rack and pinion or has a helpful write-up, please send it my way.
Thanks!



 Good luck man! :thumb3: