Icon lift do it yourself?

I am lost and way over my head... Well I am being dramatic, didn't expect it too take so long. Not even done with front and its day two... But I ran into issues with defective products that slowed me down...when you don't have a solid shop/garage with good selection of tools when you run into an issue what would take you 2 mins with the right tool turns into hours. God speed on your instal


I may think about trading this truck in before I ever have to replace those evil washers and pull those uca bolts again!

You got it Vegas! Where are you stuck? I can't help you if it's mounting the reserve reservoir. I can help you with everything else though.

You'll be proud of yourself when you're done. And you'll never want to trade it because then you'll have to do this all over again to your next truck!
 
I'm really disappointed that icon gave you defective parts. This is suppose be a higher end company which in turn should have good quality control measures. It's a shame.

Good luck and post pics when you are finished with the install.
 
I, too, am sorry to hear you received defective Icon parts. Like you said, what could take a couple minutes with the proper tools can take hours with the wrong tools. That is the joy of DIY!!!

I can tell you from installing 6 different Icon Coilover sets on different vehicles (2 of my own), I have never had any issues.

I would not worry about the washers. You installed them correctly per your instructions. You just received different washers than I did. I was looking for 4 large washers in your pics and I did not see them. That is the only reason I mentioned it. Out of curiosity, what does your "Revised" date say on your SPC instruction sheet? I am wondering if my washers are newer or if yours are what they are being sent out with now.

Stick in there, it will come together for you and you will be glad you did it in the end. Performing tasks like this by yourself teaches you so much about your vehicle. Even though you run into issues here and there, it is gratifying to say you did it yourself.
 
In regards to defective parts, don't let that deter you from either doing your own installs or buying from a company.

I am very used to the aftermarket world not fitting perfectly. If you think one misalignment spacer that needs a little filing is bad, don't ever buy anything aftermarket for a Jeep. I couldn't name a manufacture that I've had experience with that DIDN'T have a minor issue or two. BTW, have you gotten the pass side reservoir on yet? Icon has some pretty tight tolerances with our washer reservoir.

Anyway, good luck on getting it all completed. You'll be happy you did it yourself, even if you never do it again. I felt that way about my first oil change.
 
Wow! Yea I wil be absolutely sure then to check and double check my parts to not only be certain they are all there, but also manufactured correctly. :redbrick:
Ill do a write up when I am done to help you if I can... But I am not the best to give any advice, I am lucky that so many people are helpful on here.
Hang in there Vegas! I have mad respect for people who try to tackle these sort of things. I don't have the time to try something like this, plus I am a pu*** :) Good luck man! :thumb3:
I'm like you man!
You got it Vegas! Where are you stuck? I can't help you if it's mounting the reserve reservoir. I can help you with everything else though.

You'll be proud of yourself when you're done. And you'll never want to trade it because then you'll have to do this all over again to your next truck!
Just the reservoir at the moment! But it my fault my little drill is no way strong enough to drill holes into the frame... And Ducamonster aka bobby has a post with a pic on how he cuts the bracket to clear the washer canister in the wheel so i might try that and Harper does it be moving the res over on the actually bracket.. Long story long even on the drivers side bracket it doesn't really seem the bracket will lay flush in the wheel well, going to try to bend it out maybe...

Thanks for your help... Why did I go remote res? Not for a noob without the right tools! I would have been done by now.
I'm really disappointed that icon gave you defective parts. This is suppose be a higher end company which in turn should have good quality control measures. It's a shame.

Good luck and post pics when you are finished with the install.
Yeah I was surprised too but any mechanically inclined person with the right tools would have figure it out and modify it in a min.


Back to work I go gents!
 
Last edited:
In regards to defective parts, don't let that deter you from either doing your own installs or buying from a company.

I am very used to the aftermarket world not fitting perfectly. If you think one misalignment spacer that needs a little filing is bad, don't ever buy anything aftermarket for a Jeep. I couldn't name a manufacture that I've had experience with that DIDN'T have a minor issue or two. BTW, have you gotten the pass side reservoir on yet? Icon has some pretty tight tolerances with our washer reservoir.

Anyway, good luck on getting it all completed. You'll be happy you did it yourself, even if you never do it again. I felt that way about my first oil change.

*****I didn't refresh the page... There you are bobby... I thought you were spending your weekend helping me out? Lol

I agree no big deal not like it was a leaking shock or something major.. Just major for a noooooob :)

anyways if you have any pics or other suggestions on the remote res location and placement, please advise... Doesnt give you much slack to place it...I saw you post on jango's thread which helps....

Thanks bobby
 
Those spacers look right to me, you have to make sure they are fully seated in the com 12 bearing otherwise it won't fit inside the shock mount. If you need to use a hammer to open up the shock mount on the lower control arm and everything will slid right in.

For the remote reservoir nothing is wrong with it, I suggest you loosely clamp the reservoir onto the bracket and then bring it up to the mounting holes on the frame. The hose is designed to have a twist in it when fully mounted.
 
Those spacers look right to me, you have to make sure they are fully seated in the com 12 bearing otherwise it won't fit inside the shock mount. If you need to use a hammer to open up the shock mount on the lower control arm and everything will slid right in.

For the remote reservoir nothing is wrong with it, I suggest you loosely clamp the reservoir onto the bracket and then bring it up to the mounting holes on the frame. The hose is designed to have a twist in it when fully mounted.

It was the bottom spacer on the coil-over, the spacer fit into the coilover perfectly... but the bolt would only go through the long side of spacer, the short spacer was the wrong width to fit the bolt... Nothing a round file couldn't fix... I don't know it effects the integrity or more like the longevity of the spacer since to get the bolt to fit I had to file it extremely thin. I will email Brandon this week to ask him if he can give me a replacement spacer or if it is better to contact Icon to replace it.

I am overall happy w/ the quality of the icon parts... minus the spacer... and I am very happy with how knowledgable and helpful metal tech has been.
 
So all done with the install... It was hell... Here is my thoughts on it for anyone thinking about doing this install...

Actually first let me say that anyone that has ever done a write up on this forum is awesome and I really appreciate it... Not only does this stuff take a long time to do, it takes way way longer to stop set down a wrench and take pics and notes as you go...

Back to my thoughts on this install....

So for a noob thinking of doing this... Ask yourself why are you doing this? Is it cause mod'ing is fun to you? Or are you doing it to save money? Or cause you are bored? Cause if its to save money I spent way more than I would have spent paying the local off road shop to do it... But I do get to keep the tools and experience for next time.
For me I wanted to do to lift my truck ever since I found this site and saw the build threads... and I wanted to save cash on install and prove I could do it and keep my mind off other stuff...etc...

So to make this thread actually helpful to someone who needs it and instead of a dear diary post let me try to stay on topic.

Search this site and every other site for all the do's and dont's
of installing a lift. Keep in mind there is a lot of info so cut and paste the tips and hints into a word doc. and print it so you have it handy... I wasted more time looking through threads trying to remember tips i had read weeks ago when I was unsure of how to proceed, and I got my computer greasy!
Do not think this is like building a bookcase from target with directions and the little cute wrench and even an extra wood pin.
The directions are garbage that come in the box, 1 page black and white and is very broad... They will be little help unless you understand the components of your suspension and how they work and what they are called etc.
There is an amazing write up from the FJ site... But if you have a 4runner trail w/ KDSS you are on your own... Its got pics that are great and names of the parts and torque specs and which size tool you need.
Everyone talked about issues with the KDSS sway bar... I read a post from SoCalTrail giving step -by-step to another member: attach the passenger side first then put on tires and drop car and jack up under KDSS piston(front driver side)... It took me 5 mins to do the sway bar... That was the only thing that went smooth on this instal, which is funny cause I expected it to be the hardest part... Also have tools, lots of tools are even better.. Go to Home Depot and get a 4x4 or 4x6 whatever i got and have them cut it in a bunch of 1 foot blocks these were so helpful when lifting different parts of the truck to make this go in or to be removed or to apply pressure etc. also have a second car if possible and don't be in a rush cause even if you think you have everything you need you will forget something and if you need your car to go on a hot date that night or to take your kids to school in the AM you might rush to get done and not loctight something or forget to torque something etc.
Stay off the (abs?)brake shield around the disk you don't wanna to bend it, if you do your car will make an annoying noise
Tie up the brake sensor cables cause If you stretch the cable your brake light will be on after the lift and cause it to do something else, still not sure what but I would avoid it.
I don't care what people tell you if you're a noob with limited tools and experience avoid the remote res coil-overs... They take tweaking and take fabrication skills. Yes They are pretty to look at but not worth the headache... The brackets are not specific for each model. There are two big holes in the frame where it looks like they go.. Don't get exited cause they don't and one hole is half welded anyways, you'll need a heavy drill and good bit to make the holes in frame... After that you have to twist and fight the canister to get it into position and the canister has such a short line to the top of the coilover that you have no margin for error using that bracket.. Also on the driver side it isn't flat against the wheel well.. So you have to bend it to get it to work and they do not sit flat against the frame.. I will probably end up using Ducmonsta idea of cutting the bracket and putting 3 holes in the side of the frame instead of two in the bottom of frame... I think it would look cleaner and I would trust it more... If I do not do that, I would at least have the brackets bent and get lots of washers under it to fill in the gap and have it sit flat on the bottom frame... Or weld it or get longer bolts... Honestly I don't trust the bracket i could see the possibility of it coming lose when off roading or highs speeds and have it bang around in the wheel well.

Also don't follow the fj write up for the rear... It suggested after you replace the coils then attached sway bar before putting on the shocks... Don't do it, if you put the sway bar on you will never get the shocks in. Sway bar last.


That's all I can think of I am sooooo tired. Hope that helps anyone else. It's also helps to have a forum members cell number and you can text him pics along the way asking him where the big slinky looking thing goes.

Also the rear shocks had no instructions with them and none on the icon site, I could not figure out which way the rubber washers went: round edge side up or down... Cause when you look at pics the rubber is on so tight you can't tell which side is up or down... After looking for 30 mins for the answer i gave up and finished... If you know the answer please don't post it cause I know I put them on wrong and I want a day or two off to before I start to think about having to fix it.
 
Last edited:
So all done with the install... It was hell... Here is my thoughts on it for anyone thinking about doing this install...


Do not think this is like building a bookcase from target with directions and the little cute wrench and even and extra wood pin.

^^^^That was my favorite part!

I really enjoyed reading this thread and seeing the suspension experts help you out. You gained a lot of valuable experience that you can share with others now, so in some ways YOU have become an expert. That's how it works. Experience> all.

Congrats, and I admire your tenacity! :hatsoff:
A/M
 
You did good Vegas. You just did one of the harder mods that can be done to a vehicle. The only thing harder is if you designed something from a clean sheet of paper, did all the calculations, manufactured all the components and installed it yourself. Again good job and looking forward to some pics!
 
I would not worry about the washers. You installed them correctly per your instructions. You just received different washers than I did. I was looking for 4 large washers in your pics and I did not see them. That is the only reason I mentioned it. Out of curiosity, what does your "Revised" date say on your SPC instruction sheet? I am wondering if my washers are newer or if yours are what they are being sent out with now.

Rev. on 10/2012... thats almost as often as my itunes software updates...

^^^^That was my favorite part!

I really enjoyed reading this thread and seeing the suspension experts help you out. You gained a lot of valuable experience that you can share with others now, so in some ways YOU have become an expert. That's how it works. Experience> all.

Congrats, and I admire your tenacity! :hatsoff:
A/M
me an expert??? funniest thing I have heard in a while was when I was on the phone with Harper at 2am trying to describe the problem I was having and I couldnt think of the correct terms, I said something like you know the thingy with the bolt and the washer thing...? his response "umm wait... what? what part are you at? have you jacked up the car?"


You did good Vegas. You just did one of the harder mods that can be done to a vehicle. The only thing harder is if you designed something from a clean sheet of paper, did all the calculations, manufactured all the components and installed it yourself. Again good job and looking forward to some pics!

Thanks! I think I'll stick to letting the smart folks do the calculations for me.
 
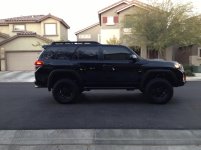
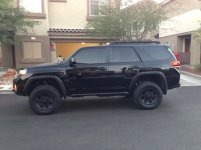
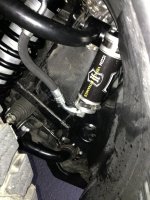
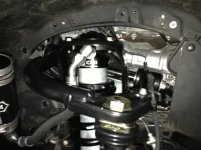
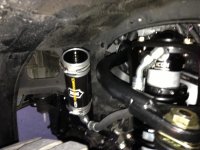
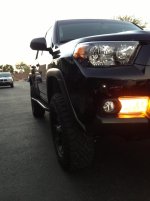
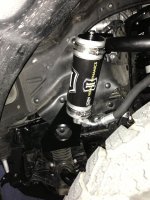
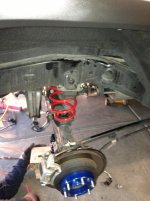
Lift all done... still need to adjust the height on the coil-overs and drive around for a minute to get the suspension to settle...then off to get the alignment... please feel free to look at the pics and tell me If I have the UCA upside down or anything like that...

image (6).jpg

image (11).jpg

image (8).jpg

image (16).jpg

image (13).jpg

image (10).jpg

image (12).jpg

image (5).jpg
 

Attachments

  • image (6).jpg
    image (6).jpg
    127.4 KB · Views: 7,905
  • image (11).jpg
    image (11).jpg
    133.9 KB · Views: 1,876
  • image (8).jpg
    image (8).jpg
    132.4 KB · Views: 1,566
  • image (16).jpg
    image (16).jpg
    119.5 KB · Views: 1,592
  • image (13).jpg
    image (13).jpg
    125.3 KB · Views: 1,538
  • image (10).jpg
    image (10).jpg
    126.3 KB · Views: 1,559
  • image (12).jpg
    image (12).jpg
    131.3 KB · Views: 1,528
  • image (5).jpg
    image (5).jpg
    132.4 KB · Views: 1,537
Looks amazing Vegas! All of my parts have arrived as well, and def looking forward / nervous as hell to dive into this install! Did you modify the remote resi bracket on the passenger side (like Bobby (Ducmonsta) did for Jango)? Feel free to send me a PM or I'm sure I may just be calling you at some point in the next few weeks (not if, but when) I reach an "oh sh*t" moment. But don't worry, I think we speak the same language. I'll be describing things as "big heavy long things" (what, that's what he said?), PITA bolts, and kanipler pins and kanofalator boxes, and of course the johnson rods... :cheers:
 
Looks amazing Vegas! All of my parts have arrived as well, and def looking forward / nervous as hell to dive into this install! Did you modify the remote resi bracket on the passenger side (like Bobby (Ducmonsta) did for Jango)? Feel free to send me a PM or I'm sure I may just be calling you at some point in the next few weeks (not if, but when) I reach an "oh sh*t" moment. But don't worry, I think we speak the same language. I'll be describing things as "big heavy long things" (what, that's what he said?), PITA bolts, and kanipler pins and kanofalator boxes, and of course the johnson rods... :cheers:

Thanks... No have haven't messed with the remote res location... They are staying put so far so I don't want to mess with it. I did just go through and retorque all the bolts and try to adjust the coil-overs and I am getting the alignment done as I write this. Take your time and reread all the post on this forum and the fj site and you will be fine. PM if you have any questions but I really don't know what I am doing... For example I think I attached and reattached the rear sway bar a couple times... Also be careful of replacing the bolts on the factory skid plate.. (I am trying this app to post this so I can't see your signature so I am not sure which model you have) but I stripped one of the skid plate bolts, it happened to be the very last bolt I had to put back on... I think I read a few others did the same thing... Get lots and lots of blocks of wood and a couple jacks and jack stands will make your life better... I completely forgot about the bottle jack that comes with the truck I bought one at Sears.
Good luck !
 
is the icon lift worth the price im new to all this. are there better options?

My 2Cents:

If you have to ask , you will not get any noticeable gain from a high end rebuild able suspension like Icon, King, Fox, Radflo over a much cheaper, just as robust, option such as Bilstien 5100's or a OME setup.

Be prepared to rebuild these every 30k (some get less, some get much more), realize that adding these will not affect your off-road ability in any meaningful way, picking the right line and tires will have a much more drastic effect (and lockers) in what you can and can't do.

I have Radflo's and I love them however I don't think they were the best value for the truck and would suggest someone save the 1-1.5k and buy a portable compressor and set of off-road tires and Bilstien or OME set up.

If money is no object, go for it, I like quality products everything from car parts, tools, lawnmowers and snowblowers that said of everything I have done to my 4runner if I could do it again I would have spent less on suspension and the light bar and likely gotten a rear bumper before a roof rack (still don't have a rear bumper)

Lastly, the Stock 4runner will go places and do things you will not feel comfortable with unless you have past off road experience
 
11yrs later and it’s time

So all done with the install... It was hell... Here is my thoughts on it for anyone thinking about doing this install...

Actually first let me say that anyone that has ever done a write up on this forum is awesome and I really appreciate it... Not only does this stuff take a long time to do, it takes way way longer to stop set down a wrench and take pics and notes as you go...

Back to my thoughts on this install....

So for a noob thinking of doing this... Ask yourself why are you doing this? Is it cause mod'ing is fun to you? Or are you doing it to save money? Or cause you are bored? Cause if its to save money I spent way more than I would have spent paying the local off road shop to do it... But I do get to keep the tools and experience for next time.
For me I wanted to do to lift my truck ever since I found this site and saw the build threads... and I wanted to save cash on install and prove I could do it and keep my mind off other stuff...etc...

So to make this thread actually helpful to someone who needs it and instead of a dear diary post let me try to stay on topic.

Search this site and every other site for all the do's and dont's
of installing a lift. Keep in mind there is a lot of info so cut and paste the tips and hints into a word doc. and print it so you have it handy... I wasted more time looking through threads trying to remember tips i had read weeks ago when I was unsure of how to proceed, and I got my computer greasy!
Do not think this is like building a bookcase from target with directions and the little cute wrench and even an extra wood pin.
The directions are garbage that come in the box, 1 page black and white and is very broad... They will be little help unless you understand the components of your suspension and how they work and what they are called etc.
There is an amazing write up from the FJ site... But if you have a 4runner trail w/ KDSS you are on your own... Its got pics that are great and names of the parts and torque specs and which size tool you need.
Everyone talked about issues with the KDSS sway bar... I read a post from SoCalTrail giving step -by-step to another member: attach the passenger side first then put on tires and drop car and jack up under KDSS piston(front driver side)... It took me 5 mins to do the sway bar... That was the only thing that went smooth on this instal, which is funny cause I expected it to be the hardest part... Also have tools, lots of tools are even better.. Go to Home Depot and get a 4x4 or 4x6 whatever i got and have them cut it in a bunch of 1 foot blocks these were so helpful when lifting different parts of the truck to make this go in or to be removed or to apply pressure etc. also have a second car if possible and don't be in a rush cause even if you think you have everything you need you will forget something and if you need your car to go on a hot date that night or to take your kids to school in the AM you might rush to get done and not loctight something or forget to torque something etc.
Stay off the (abs?)brake shield around the disk you don't wanna to bend it, if you do your car will make an annoying noise
Tie up the brake sensor cables cause If you stretch the cable your brake light will be on after the lift and cause it to do something else, still not sure what but I would avoid it.
I don't care what people tell you if you're a noob with limited tools and experience avoid the remote res coil-overs... They take tweaking and take fabrication skills. Yes They are pretty to look at but not worth the headache... The brackets are not specific for each model. There are two big holes in the frame where it looks like they go.. Don't get exited cause they don't and one hole is half welded anyways, you'll need a heavy drill and good bit to make the holes in frame... After that you have to twist and fight the canister to get it into position and the canister has such a short line to the top of the coilover that you have no margin for error using that bracket.. Also on the driver side it isn't flat against the wheel well.. So you have to bend it to get it to work and they do not sit flat against the frame.. I will probably end up using Ducmonsta idea of cutting the bracket and putting 3 holes in the side of the frame instead of two in the bottom of frame... I think it would look cleaner and I would trust it more... If I do not do that, I would at least have the brackets bent and get lots of washers under it to fill in the gap and have it sit flat on the bottom frame... Or weld it or get longer bolts... Honestly I don't trust the bracket i could see the possibility of it coming lose when off roading or highs speeds and have it bang around in the wheel well.

Also don't follow the fj write up for the rear... It suggested after you replace the coils then attached sway bar before putting on the shocks... Don't do it, if you put the sway bar on you will never get the shocks in. Sway bar last.


That's all I can think of I am sooooo tired. Hope that helps anyone else. It's also helps to have a forum members cell number and you can text him pics along the way asking him where the big slinky looking thing goes.

Also the rear shocks had no instructions with them and none on the icon site, I could not figure out which way the rubber washers went: round edge side up or down... Cause when you look at pics the rubber is on so tight you can't tell which side is up or down... After looking for 30 mins for the answer i gave up and finished... If you know the answer please don't post it cause I know I put them on wrong and I want a day or two off to before I start to think about having to fix it.

Wow, this was a fun read and a cringy reread. My favorite part, bittersweetly, is when I did this project with my dad in the garage—handing me tools, smoking, and running to Harbor Freight for mid-project tools. It was one of the last times we spent in the garage together before he passed away shortly after, and I'll never forget it. Back on track...

I built my 4Runner just the way I wanted within my budget. As other companies released new bumpers and aftermarket items, I wanted to keep going. Unfortunately or fortunately, life happened—I got married, had kids, got busier, and simply enjoyed driving it, putting a pause on modifications besides routine maintenance.

Recently, I went to the dealer for service, and they informed me that the coil-overs and rear shocks are toast and leaking, needing replacement. As a bonus, my rack and pinion are leaking too. When I saw the repair cost, I had a heart attack. I figured if I did this job once, I could do it again—the suspension job, that is. The rack and pinion won't be a fun one. I found a write-up that involves loosening many components to wiggle the new one in, as the repair manual suggests raising the engine up and out for enough room.

In the 11 years since this project, I've come a long way, leveling up my fabrication skills. I cringe at the memory of not having a file or drill that could go through the frame to mount the coil-over reservoirs. Hopefully, this goes smoother than last time.

If anyone has tackled the rack and pinion or has a helpful write-up, please send it my way.

Thanks!

 
If anyone has tackled the rack and pinion or has a helpful write-up, please send it my way.
It's really not that bad. The bolts holding the rack to the cross member come in from the top, so you can't remove them without lifting the engine. What you can do instead is buy new bolts, cut the old bolts out, and install the new bolts from the bottom with the nuts on top. Bonus points for drilling the bolts for a cotter pin. This makes it so the bolts could not fall out if the nuts loosened up.

There is a rubber gasket under the oil cooler that you need to replace when you pull the oil cooler. Don't try to re-use the old one and then have to wait on the part to arrive.
 

Members online

Forum statistics

Threads
278,312
Messages
3,554,087
Members
248,016
Latest member
Advally Service

Trending content

Back
Top