InfamousRNR's 2002 Limited BU!LD THREAD

do you have Homelink on your visor? oem or aftermarket?
103.gif
42.gif


I'm 99.9% it's OEM home link ...
Just recently programmed it to my garage door.. It has 3 buttons . The first one is programmed to my garage door and if I had multiple garage doors I could program the other buttons to those other doors
 
You need to install that diff first...

done & done...

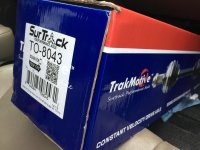
$460 later

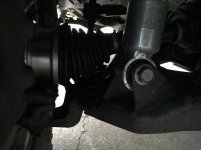
but this included some crappy brand CV axle since mine had a busted boot and splurged all over the place....

IMG_3283.jpg

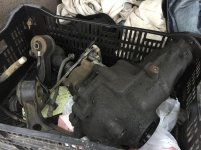
i kept the original front differential just in case i win the lottery and want to put a locker in it and the CV axel for a rebuild to bring on the trail since it's OEM and just the boot ripped...i don't think it ruined it..?

IMG_3284.jpg

IMG_3285.jpg
 

Attachments

  • IMG_3283.jpg
    IMG_3283.jpg
    116.6 KB · Views: 1,097
  • IMG_3284.jpg
    IMG_3284.jpg
    128.4 KB · Views: 1,105
  • IMG_3285.jpg
    IMG_3285.jpg
    134.9 KB · Views: 1,097
Last edited:
. . . . . .

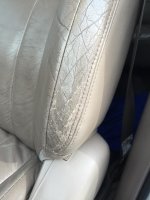
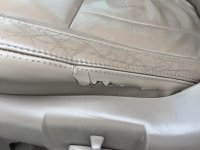
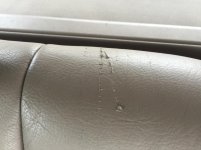
what is everyone doing about their worn/scratched/torn leather?,,,, is my only option to reupholster???
 

Attachments

  • IMG_2582.jpg
    IMG_2582.jpg
    132 KB · Views: 1,335
  • IMG_2583.jpg
    IMG_2583.jpg
    134.6 KB · Views: 1,351
  • IMG_2585.jpg
    IMG_2585.jpg
    123.1 KB · Views: 1,343
Last edited:
anyways....

what is everyone doing about their worn/scratched/torn leather?,,,, is my only option to reupholster???

Have you considered Wet Okole seat covers? I picked up a set for my fronts although I had cloth instead of leather. I was sick of looking at my torn, stained seats.
 
Have you considered Wet Okole seat covers? I picked up a set for my fronts although I had cloth instead of leather. I was sick of looking at my torn, stained seats.


You know there is just something about seat covers that doesn't appeal to me...

It would probably be the best cost efficient solution but it just doesn't appeal to. Just like some people are in the JOAS look and I'm just not into that. Just my style I guess

So I'm hoping I come across some used seats in good condition or eventually I may just reupholster....

Short term I wish I could find a write up on swapping the driver and passenger seat for a temporary solution... Anyone done that yet with power seats and factory seat warmers in the seats????
 
Those don't look too too bad. My seats in my 97 are tore up pretty bad. One of these days I'll just get them re upholstered... "one of these days."
 
My seats look the exact same. The passenger seats are actually worst because my wife's jeans, Some of them have buttons on the back and scratch the shit out of them. I need to burn those jeans. (Hehe. Maybe a picture on my thread soon.).

Anywho I keep them lathered up with conditioner to keep them moist. The dry desert sucks moisture out of everything so fast. I do it probably ever 3 months.
 
My seats look the exact same. The passenger seats are actually worst because my wife's jeans,

Anywho I keep them lathered up with conditioner to keep them moist. The dry desert sucks moisture out of everything so fast. I do it probably ever 3 months.

are you talking about lathering up your wife or the seats??? JK

what type of conditioner do you use?,,,, i prefer the dry texture of a dried out seat but don't like the cracking... its a fine line between those two..

thanks to [MENTION=76112]Roguestatus1688[/MENTION]
i bought some stuff he has in the classifieds and interestingly enough he lives literally within walking distance of my GF's house which I'm at all the time. its definitely a small world after all...

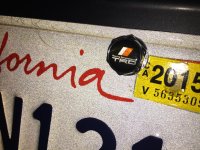
i also added some TRD license plate bolts (+2 hp)

IMG_3314.jpg


hit 140k. still a baby

IMG_3315.jpg
 

Attachments

  • IMG_3314.jpg
    IMG_3314.jpg
    134.8 KB · Views: 1,275
  • IMG_3315.jpg
    IMG_3315.jpg
    119 KB · Views: 1,268
are you talking about lathering up your wife or the seats??? JK

what type of conditioner do you use?,,,, i prefer the dry texture of a dried out seat but don't like the cracking... its a fine line between those two..

thanks to [MENTION=76112]Roguestatus1688[/MENTION]
i bought some stuff he has in the classifieds and interestingly enough he lives literally within walking distance of my GF's house which I'm at all the time. its definitely a small world after all...

i also added some TRD license plate bolts (+2 hp)

It was good to meet you man. You got a sweet rig and it made me miss mine already when I saw yours. Good luck with everything and see you around!
 
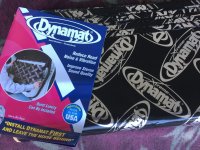
Dynamat

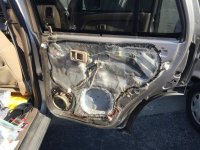
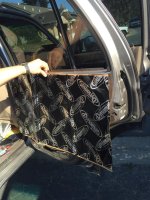
just started but i must say there is a significant area inside the door panel that can accommodate a thick piece of sound dampening.....

so my plan was to layer the inside of the door panel (the opposite side of the door that you see from the outside)... & the inside of the door that the interior panel mounts too as well...

2 layers if you will.... one on the inside of the door panel... where the window guide is... and one layer where the interior panel mounts too....


. . . .
IMG_3368.jpg


door panel removed

IMG_3371.jpg


holding up one sheet on Dynamat (pretty much the size of the door panel)
IMG_3381.jpg


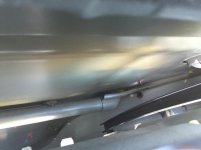
inside the door panel. (you can see how much space is between the glass window guide and the door itself)

IMG_3385.jpg


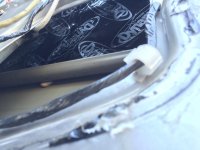
Dynamat inside the door panel


IMG_3391.jpg
 

Attachments

  • IMG_3368.jpg
    IMG_3368.jpg
    145.4 KB · Views: 1,232
  • IMG_3371.jpg
    IMG_3371.jpg
    137.2 KB · Views: 1,273
  • IMG_3381.jpg
    IMG_3381.jpg
    137.1 KB · Views: 1,251
  • IMG_3385.jpg
    IMG_3385.jpg
    141.1 KB · Views: 1,261
  • IMG_3391.jpg
    IMG_3391.jpg
    119.1 KB · Views: 1,246
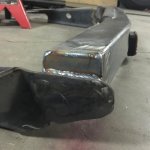
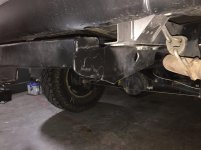
rear trailer hitch raised mod (after BL)

after the 1.5" body lift i was left with an ugly ago between my front bumper and my rear trailer hitch....

thanks to [MENTION=83666]renosauce[/MENTION] my rear trailer hitch looks appropriately proportionate to how it looked stock...

reno has an awesome shop by the way and i'm VERY impressed by his work on his own rigs. thanks again for your help dude! you did a great job and I'm very happy..


. . .

cut, raised approximately 1.5" , welded with a cut plate to fill the hole after cutting, and cut an angle from the bottom to not have the sides poke out on the bottom...

IMG_3478.jpg


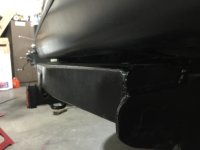
bolted back up


IMG_3482.jpg


showing the gap between the bumper and the trailer hitch

IMG_3484.jpg
 

Attachments

  • IMG_3478.jpg
    IMG_3478.jpg
    124.4 KB · Views: 1,275
  • IMG_3482.jpg
    IMG_3482.jpg
    131.1 KB · Views: 1,269
  • IMG_3484.jpg
    IMG_3484.jpg
    128 KB · Views: 1,273
TBU clean up

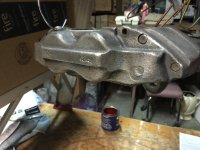
slowly but surely i will eventually have my Tundra (really 2005 sequoia) brakes on!!!! right now my brakes are practically metal on metal... seriously squeaking like an old bed when your GF's over and your parents are in the next room....


. . . .

IMG_3517.jpg


. . . .
IMG_3522.jpg
 

Attachments

  • IMG_3517.jpg
    IMG_3517.jpg
    112.5 KB · Views: 1,183
  • IMG_3522.jpg
    IMG_3522.jpg
    112.7 KB · Views: 1,181
Last edited:
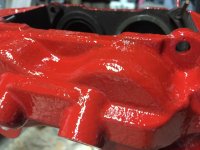
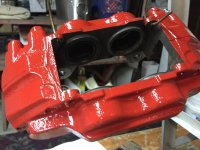
G2 caliper paint for TBU

finally started the most anticipated part of my TBU caliper rebuild. painting with G2 caliper paint... i made the mistake of buying old stock off ebay before i knew that the shelf life is really only 6-9 months for best results...so if you're going to buy G2 caliper paint, make sure you check the date on the back of the packaging.

. . . .
 

Attachments

  • IMG_0087.jpg
    IMG_0087.jpg
    127.4 KB · Views: 1,132
  • IMG_0090.jpg
    IMG_0090.jpg
    125.7 KB · Views: 1,147
  • IMG_0092.jpg
    IMG_0092.jpg
    131.2 KB · Views: 1,151
Psh, you could've just let your unpainted, re-manufactured calipers rust like mine have


They actually aren't re-manufactured calipers. They are used tundra (really 2005 sequoia) calipers I got from [MENTION=14772]shootmymime[/MENTION]...

I took them apart, wire brushed them clean, and then painted them...

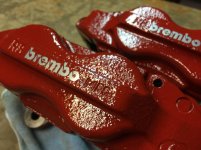
I'm hoping I only have to do this process once and I've seen rusted calipers... Not so pretty.. Was going to do something discreet like black but red gives you +3 HP!!!!! & the brembo decal adds another 2HP for a total of 5HP!!!!


.
IMG_0178.jpg


>>>> a little time-lapse video for your viewing pleasure

. . . .
<iframe width="560" height="315" src="https://www.youtube.com/embed/KTUCZwkG2eM" frameborder="0" allowfullscreen></iframe>
 

Attachments

  • IMG_0178.jpg
    IMG_0178.jpg
    126.9 KB · Views: 1,043
Last edited:
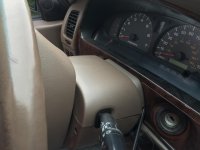
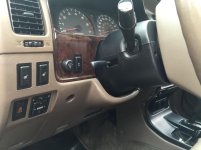
bought a black steering wheel column cover to eventually change everything in that area to black... never really enjoyed the tan steering wheel in the limiteds...

hopefully one day ill find a decent condition black steering wheel to complete the look, but for now, this will be a nice contrast.


before
. . . . .

IMG_0187.jpg


after
. . . . .

IMG_0210.jpg
 

Attachments

  • IMG_0187.jpg
    IMG_0187.jpg
    120.8 KB · Views: 1,033
  • IMG_0210.jpg
    IMG_0210.jpg
    125.9 KB · Views: 1,050

Members online

No members online now.

Forum statistics

Threads
278,311
Messages
3,554,082
Members
248,016
Latest member
Advally Service

Trending content

Back
Top