infamousRNR
Senior Member
Sweet! Did you have to modify the mounting tabs for the charcoal canister?
the charcoal canister on 01-02's is not located in the engine bay, it's underneath the rear of the truck where the spare tire lives.
.
Sweet! Did you have to modify the mounting tabs for the charcoal canister?
Not sure if I am missing any sarcasm but I am actually curious about the bracket lol. I am trying to place my bluesea fuse box on my 2000 and am trying to avoid putting it on the OE fuse box lid. This looks simple. No interference with the hood when its closed?
Moroso catch can mounted it to the fender with the little bracket that's included..
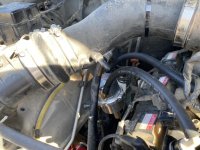
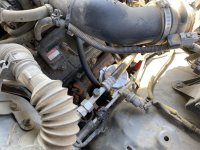
Moroso catch can installed to catch excessive blow. With a supercharger installed, now by tends to happen and a more frequent rate. we will see how much it captures on my next oil change.
mounted it to the fender with the little bracket that's included.
.
Well almost 2 years later, how's that oil catch can working out for you? Any excessive blow by? Been playing with the idea of one but I'm not completely sold on it. Convince me I need one! Lol
well after 10 years and 90k miles, I finally started to have a misfire in cylinder number 3 just shy of 200,000 miles....
and so we begin the journey of tending to the wound.
.
<iframe width="560" height="315" src="https://www.youtube.com/embed/nelMt1UCEnU" title="YouTube video player" frameborder="0" allow="accelerometer; autoplay; clipboard-write; encrypted-media; gyroscope; picture-in-picture; web-share" allowfullscreen></iframe>
.
You forgot to mention every detail of this job will be video documented. As of now, the plan is to have this job broken down into 7 parts:
1) Upper Engine Teardown (Down to the intake manifold and valve covers)
2) Front Engine Teardown (Timing Belt Components, Water Pump and Cam Pulleys off)
3) Get Heads Off (Remove Intake Manifold, Valve Covers, Power Steering Pump, Alternator, Exhaust Manifolds, Cam Shafts and finally the Heads)
4) Get Heads Vacuum Tested, Pressure Tested and Resurfaced at Yota1 Performance (If a head is cracked or needs too much work, it will be replaced)
5) Do the reverse of Part 3 getting the heads and other components that connect to the heads back on.
6) Get the front of the engine back together (Basically performing a complete timing belt job.
7) Get the upper part of the engine back on (Plenums, throttle body, etc)
After all that, put a prayer into the DIY Auto Mechanic Gods and hope it starts and runs perfect.
That is all. Stay tuned....
Timmy the Toolman
Tim and Sean,
Great series planned. Quick question,
The head work at Yota1 will include them putting in new piston rings on the old piston or are you guys doing new rods and pistons head studs etc as well???
I'm just thinking to come this far but not get new engine internals is kinda crazy, no?
Nothing in the bottom end will be touched, just the heads.
Okay so when you say head resurfacing , you mean to the extent that they push a piston down and then work on the cylinder from above the piston head only as it’s fully depressed downward. I.e they won’t be removing the piston or rod or rings.
What about valve train, all that will be left as is but set to spec as far as lash?
Sent from my iPhone using Tapatalk
Watch the videos and you’ll see what they are talking about
Okay so when you say head resurfacing , you mean to the extent that they push a piston down and then work on the cylinder from above the piston head only as it’s fully depressed downward. I.e they won’t be removing the piston or rod or rings.
What about valve train, all that will be left as is but set to spec as far as lash?
Sent from my iPhone using Tapatalk