John's Turbo v6 Build

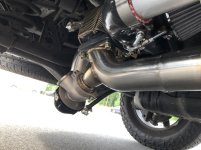
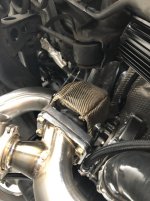
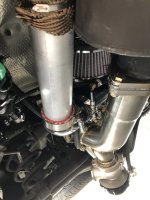
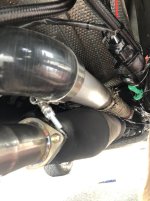
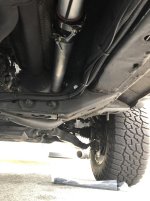
Planning to do a few things this week in my down time. I have a turbo blanket to install on the turbo hot side and I also have an extra exhaust hanger to install. Things were a little too bouncy under there so I temporarily have some metal zip ties to hold it in place. I was able to fix a wideband issue I was having due to a bad ground. This did let me know that my wideband location was incorrect (the numbers were off. Please keep in mind the engine isn’t seeing any boost yet so the idle afr should be 14.7ish but is showing 15.6) the reasoning behind this is that the wideband is too far back in the exhaust. I’ll be having my welder place a new bung right at the y-pipe.

Please stay tuned as I’m trying to get my charge piping run this week haha
 
throw away that turbo timer....nobody uses those 1990's fast and furius crap anymore.

your turbo is oil and water cooled...also, unless you drag race up your drive way and immediately shut it off, it'll never ovearheat the oil....
 
throw away that turbo timer....nobody uses those 1990's fast and furius crap anymore.

your turbo is oil and water cooled...also, unless you drag race up your drive way and immediately shut it off, it'll never ovearheat the oil....

If you noticed in my thread it’s not used to power the vehicle when it’s shuts off. To me that would be pointless. The reason I run it is because since I have a rear mount turbo setup I needed a way for my scavenge pump to remove any left over oil after the car shut off. I have it set to run the pump relay for 30 seconds and that way there’s no smoke on startup.
 
If you noticed in my thread it’s not used to power the vehicle when it’s shuts off. To me that would be pointless. The reason I run it is because since I have a rear mount turbo setup I needed a way for my scavenge pump to remove any left over oil after the car shut off. I have it set to run the pump relay for 30 seconds and that way there’s no smoke on startup.

haha, sorry, i saw TT and immediately rage posted,,,lol

nice tho...in that case, solid win!
 
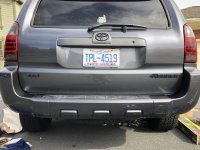
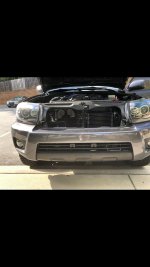
made more progress over the last few days. Installed the turbo blanket, heat shielding, charge piping for the most part, exhaust gaskets and redid some oil lines. I also installed new badges to give some subtle cosmetic changes.

Things I know still need to be done is to install another exhaust hanger as things are several inches too low right now because of the weight. I also need to move the wideband up by the y-pipe as I'm not getting an accurate reading.
 

Attachments

  • IMG_2545 (1).jpg
    IMG_2545 (1).jpg
    130.3 KB · Views: 732
  • IMG_2544 (1).jpg
    IMG_2544 (1).jpg
    129.6 KB · Views: 718
  • IMG_2543 (1).jpg
    IMG_2543 (1).jpg
    127.2 KB · Views: 697
  • IMG_2537 (1).jpg
    IMG_2537 (1).jpg
    127.5 KB · Views: 710
  • IMG_2539 (1).jpg
    IMG_2539 (1).jpg
    129.4 KB · Views: 713
  • IMG_2541 (1).jpg
    IMG_2541 (1).jpg
    132.6 KB · Views: 713
A few updates. I’ve run the majority of the charge piping in the route I wanted up to the engine bay.

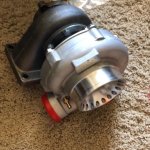
I did find out that the t3/t4 turbo was too small and was spooling too soon. I have since then replaced it with a gt35 which is much better for this application.

I also installed a 2 psi check valve to keep oil in the feed lines from seeping into the turbo. I found that this oil was making into way into the compressor side with I did not want.

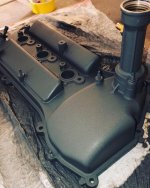
Other than that I’m waiting on a few parts but plan to get the rest of the welding done this coming week. I also painted my valve covers too haha
 

Attachments

  • 11B450FA-EC35-4355-BA04-1E4F46EB3F88.jpg
    11B450FA-EC35-4355-BA04-1E4F46EB3F88.jpg
    119.3 KB · Views: 693
  • 5327A6F0-4321-4255-A3EF-54252EDA669A.jpg
    5327A6F0-4321-4255-A3EF-54252EDA669A.jpg
    130.1 KB · Views: 692
  • B2C0B6C3-45E6-45FB-A184-803A5566EA13.jpg
    B2C0B6C3-45E6-45FB-A184-803A5566EA13.jpg
    133.7 KB · Views: 685
first test pull!

did my first test pull in boost today! went great and realized I am going to need a boost controller as its not making all 4.5 psi at the manifold. Heres a sound clip video

YouTube
 
Update

Made more progress! A lot of this project is waiting for the parts lol.

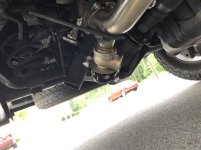
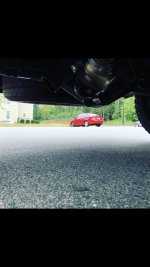
I got my exhaust hangers installed in the rear and the down pipe from the turbo installed. I also had the wideband bung installed about 4 inches post turbo.

I also installed a check valve which solved my oil in the compressor issue. I now do not need the scavenge pump to run after the vehicle shuts off.

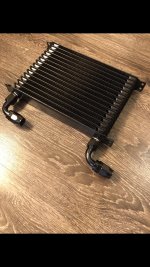
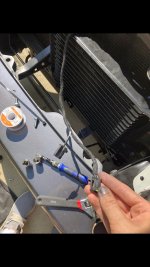
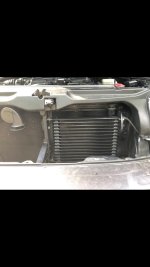
Today I began the oil cooler install. The one I went with was universal so I used aluminum bar from Home Depot and bent it to the proper angles to hang it. All attachment points are drilled and tapped and it is solid. I’m currently waiting on the hose and sandwich adapter. In the process I also moved my horn to the opposite side and extended the wire harness. I also ran the power and ground for the fan for the oil cooler. Still waiting on that as well.

I also have ordered the Hayden trans cooler. Although neither this nor the oil cooler are necessary I still wanted to keep temps down as much as possible for reliability and longevity
 

Attachments

  • 963BFC50-1891-45C4-A8D8-6EF5CB003723.jpg
    963BFC50-1891-45C4-A8D8-6EF5CB003723.jpg
    133.1 KB · Views: 583
  • 7407F71A-2630-4C2D-94E9-2F27B5BFB6CB.jpg
    7407F71A-2630-4C2D-94E9-2F27B5BFB6CB.jpg
    134.8 KB · Views: 593
  • CDFB9AE0-B6B0-420A-94F0-33EDA59DA0CD.jpg
    CDFB9AE0-B6B0-420A-94F0-33EDA59DA0CD.jpg
    143.2 KB · Views: 579
  • AEB69013-564C-4118-AC2D-CF4C66DB1B36.jpg
    AEB69013-564C-4118-AC2D-CF4C66DB1B36.jpg
    135.1 KB · Views: 580
  • 2A3777B4-5343-4C1D-B944-A1A98EA77527.jpg
    2A3777B4-5343-4C1D-B944-A1A98EA77527.jpg
    124.5 KB · Views: 583
  • 7A4C8D25-BC2E-4D8B-82A9-C999BB93FB89.jpg
    7A4C8D25-BC2E-4D8B-82A9-C999BB93FB89.jpg
    126.1 KB · Views: 576
Holy Hell that is clean. Love it! Do NOT bring it up north during the winter. I can't imagine what a PA winter will do to all that piping.

Keep up the good work!

Ed
 
Holy Hell that is clean. Love it! Do NOT bring it up north during the winter. I can't imagine what a PA winter will do to all that piping.

Keep up the good work!

Ed

Thanks! The project is starting to wind down. Just doings fingers crossed some of the finishing touches haha
 
Although neither this nor the oil cooler are necessary I still wanted to keep temps down as much as possible for reliability and longevity

Actually the engine oil cooler is quite necessary. When i added a turbo to my VW GTI back in the day, the summer time cruising oil temps went from 214° to 232°. I added an oil cooler also and it brought it down to around 218°

Also, is this going to be a blow-through or pull-through setup? I see the filter going directly to the turbo so i assume blow-through... Im wondering how the MAF will handle being pressurized and if it has limits as to how much air it can read.
 
Last edited:
kudos to you - this seemed optimistic at first to me, turned out clean and effective it looks like. hopefully (and it seems like youve considered this) it lasts
 
Actually the engine oil cooler is quite necessary. When i added a turbo to my VW GTI back in the day, the summer time cruising oil temps went from 214° to 232°. I added an oil cooler also and it brought it down to around 218°

Also, is this going to be a blow-through or pull-through setup? I see the filter going directly to the turbo so i assume blow-through... Im wondering how the MAF will handle being pressurized and if it has limits as to how much air it can read.

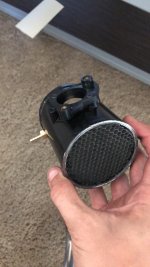
Good to hear it will help! and if I'm following yes it will be blow through. My maf is still near the stock location but I built an intake with mesh inside to even out the airflow. On my test pull last week it didnt give me any issues whatsoever. Today I finally got my wideband working properly and its insane to me how rich these toyotas run. At idle I was seeing 14.3-14.6 pretty normal but under wide open throttle the number steadily dropped to a whopping 10 afr naturally aspirated lol. Talk about pig rich
 
kudos to you - this seemed optimistic at first to me, turned out clean and effective it looks like. hopefully (and it seems like youve considered this) it lasts

Thats the hope! I'm planning to make things as reliable as possible and organized. I'm in the process of making a manual for turbo system diagnosis.
 
if the oil pressure to the remote turbo fails, do you have a pressure switch just before the turbo oil inlet to detect this?, since its a 'remote' system, i am not completely sure if you lose the reliance of the stock pressure switch, there may be a slight pressure drop?.
it is unknown to me since i never gauged what stock is, but worth mentioning.
I had a turbo get eaten very quickly from no oil pressure when i first started a turbo rebuild, the root cause was not purging the oil in the engine after changing a filter, yes the oil light came on when there was an air lock in the filter, but in the 20 seconds it was still on it was not realized the turbo would and did die until it failed soon after (started making chattering noises as the blades were touching the inducer side inlet.) I was wiating for the light to go out but it didnt.. pooof! too late.

sometimes things happen quick and it takes a moment to realize whats happening.

what are the characteristics of your oil pressure light now? does it go out immidiately? is that just sensing the locality to the block?

im not quite understanding where the scavenge pump is located and where it returns to, is it after the turbo oil feed outlet? appreciate to know that also..
 
Last edited:
if the oil pressure to the remote turbo fails, do you have a pressure switch just before the turbo oil inlet to detect this?, since its a 'remote' system, i am not completely sure if you lose the reliance of the stock pressure switch, there may be a slight pressure drop?.
it is unknown to me since i never gauged what stock is, but worth mentioning.
I had a turbo get eaten very quickly from no oil pressure when i first started a turbo rebuild, the root cause was not purging the oil in the engine after changing a filter, yes the oil light came on when there was an air lock in the filter, but in the 20 seconds it was still on it was not realized the turbo would and did die until it failed soon after (started making chattering noises as the blades were touching the inducer side inlet.) I was wiating for the light to go out but it didnt.. pooof! too late.

sometimes things happen quick and it takes a moment to realize whats happening.

what are the characteristics of your oil pressure light now? does it go out immidiately? is that just sensing the locality to the block?

im not quite understanding where the scavenge pump is located and where it returns to, is it after the turbo oil feed outlet? appreciate to know that also..

I have been pondering this. Definitely something I'm considering. As far as ho my setup is, I have a sandwich adapter for my feed all with braided line and an fittings. I would be less worried about a failure on the feed side as apposed to the return since those are just barb connections. My scavenge pump is about a foot and a half after my turbo and it feeds back to the filler neck on the driver side. I have not had any issues with my oil light so far. I found the extra oil line run accounts for a little over a third of a quart so I just added that amount.
 

Members online

No members online now.

Forum statistics

Threads
278,315
Messages
3,554,102
Members
248,016
Latest member
Advally Service

Trending content

Back
Top