
You are using an out of date browser. It may not display this or other websites correctly.
You should upgrade or use an alternative browser.
You should upgrade or use an alternative browser.
John's Turbo v6 Build
- Thread starter Johns06yota
- Start date

a sandwich under the oil filter i understand.
a stock extra pressure sender (depending on psi level its diaphragm /signal operates at) could assist with the potential failure modes of pressure drop, line rupture, blockages, air lock. considering the additional un monitored length of external pipework. personally i would check the spec of the turbo for minimum /maximum oil pressure req , does it have one ? consider what the block / head normally runs at? and find a switch to compliment that.
you have an interesting project!, its more of a learning exercise for all of us i apologize for being suggestive i cant help being interested.
a stock extra pressure sender (depending on psi level its diaphragm /signal operates at) could assist with the potential failure modes of pressure drop, line rupture, blockages, air lock. considering the additional un monitored length of external pipework. personally i would check the spec of the turbo for minimum /maximum oil pressure req , does it have one ? consider what the block / head normally runs at? and find a switch to compliment that.
you have an interesting project!, its more of a learning exercise for all of us i apologize for being suggestive i cant help being interested.

Johns06yota
Member
Great job, super interested in details. could you keep a look at mpg while your taking it easy. it seems like your logging everything already.
Will do! I'm starting to monitor some of the vehicle info, temps, fuel trims and all that within an app I got. It'll also calculate mpg so I'll report back
Johns06yota
Member
a sandwich under the oil filter i understand.
a stock extra pressure sender (depending on psi level its diaphragm /signal operates at) could assist with the potential failure modes of pressure drop, line rupture, blockages, air lock. considering the additional un monitored length of external pipework. personally i would check the spec of the turbo for minimum /maximum oil pressure req , does it have one ? consider what the block / head normally runs at? and find a switch to compliment that.
you have an interesting project!, its more of a learning exercise for all of us i apologize for being suggestive i cant help being interested.
I do not think it does. Its an ebay turbo so I doubt they thought of that lol. As far as how much oil it gets, its plenty. Theres no reducer on the feed other than the check valve but i get a solid stream of oil coming back from the scavenge pump. My plan was probably going to be to find the oil psi ratings for various driving styles and then get a pressure switch that lets say goes off at 20 psi just to have a number figure. I could wire it to set an alarm. Luckily the way I plumbed everything if worse came to worse and I had an oil line failure or pump failure I could unbolt the turbo, shut off the feed and pull the relay for my scavenge pump all within 15 minutes. Along with this my feed and return have check valves so any oil left in the lines would in theory stay there. I built it this way for in case of an oh shit moment.
Johns06yota
Member
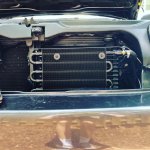
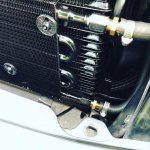
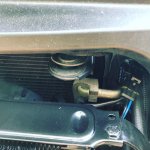
cooling systems upgrade
Part of the build process is not only adding the turbo but also beefing up other systems that are pre-existing to make things as reliable as possible.
To do this I added a Hayden transmission cooler in hopes of for one keeping the trans a little cooler, but also to keep the radiator cooler.
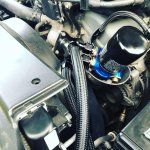
Along with this I installed an engine oil cooler for a few reasons. Although due to the long run of the oil return line it did help cool the oil, I still knew it was adding heat to the system which not only breaks the oil down quicker but also puts added strain on the engine systems. An added bonus of this cooler cooler is that it adds approximately 1.25 quarts of capacity to the system
To install these I created aluminum brackets that are bolted in place. These brackets connect to the oil cooler. Behind the oil cooler is a puller fan to assist in keeping temps down and in front is the trans cooler. The trans cooler lines just run to the factory lines. The engine oil cooler runs to a thermostat sandwich adapter that opens at operating temp. These are connected with 10 an line and 4 10 an 90 fittings. The fan is run off a 15 amp fuse within the fuse box I built earlier in the build.
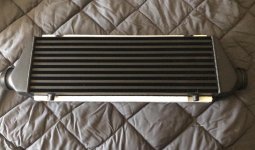
Also my intercooler came in today so within the next week I hope to have it fully installed
Part of the build process is not only adding the turbo but also beefing up other systems that are pre-existing to make things as reliable as possible.
To do this I added a Hayden transmission cooler in hopes of for one keeping the trans a little cooler, but also to keep the radiator cooler.
Along with this I installed an engine oil cooler for a few reasons. Although due to the long run of the oil return line it did help cool the oil, I still knew it was adding heat to the system which not only breaks the oil down quicker but also puts added strain on the engine systems. An added bonus of this cooler cooler is that it adds approximately 1.25 quarts of capacity to the system
To install these I created aluminum brackets that are bolted in place. These brackets connect to the oil cooler. Behind the oil cooler is a puller fan to assist in keeping temps down and in front is the trans cooler. The trans cooler lines just run to the factory lines. The engine oil cooler runs to a thermostat sandwich adapter that opens at operating temp. These are connected with 10 an line and 4 10 an 90 fittings. The fan is run off a 15 amp fuse within the fuse box I built earlier in the build.
Also my intercooler came in today so within the next week I hope to have it fully installed
Attachments
Last edited:
Johns06yota
Member
charge piping!
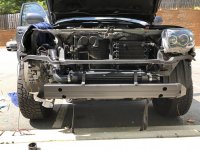
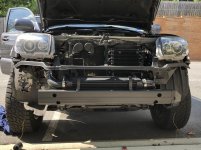
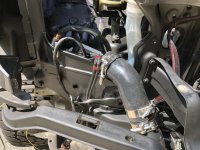
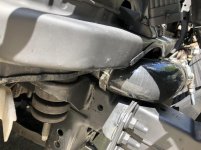
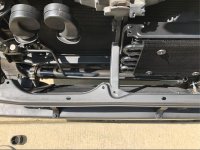
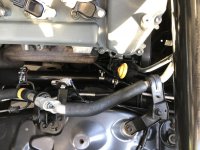
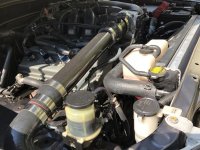
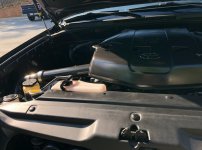
All charge piping is installed! All of it is beaded on the ends and painted carbon mist metallic. Any parts of the metal body I had to trim have been covered with trim guard. The intercooler is solid mounted below the bumper for a stealthy look. Intake temps never go any higher than 15 above ambient but when driving are typically 7-10 above ambient. Big step finished! I also moved my boost reference to right at the maf
All charge piping is installed! All of it is beaded on the ends and painted carbon mist metallic. Any parts of the metal body I had to trim have been covered with trim guard. The intercooler is solid mounted below the bumper for a stealthy look. Intake temps never go any higher than 15 above ambient but when driving are typically 7-10 above ambient. Big step finished! I also moved my boost reference to right at the maf
Attachments
-
 IMG_2945 (1).jpg137.2 KB · Views: 556
 -
 IMG_2950 (1).jpg135.1 KB · Views: 532
 -
 IMG_2947 (1).jpg134.8 KB · Views: 534
 -
 IMG_2948 (1).jpg128.5 KB · Views: 528
 -
 Screen Shot 2019-07-25 at 9.09.12 AM.jpg136.5 KB · Views: 536
 -
 IMG_2963 (1).jpg132.1 KB · Views: 528
 -
 IMG_2951 (1).jpg134.3 KB · Views: 547
 -
 Screen Shot 2019-07-25 at 9.12.19 AM.jpg129.6 KB · Views: 544

Johns06yota
Member
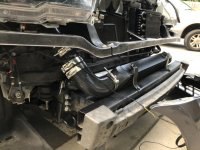
Seems like the IC placement behind the bumper support might not get enough flow? It looks to be mounted on an angle which certainly should help, do you have any more pics of the fitment between the bumper support and intercooler?
This is the only other picture I have at the moment. This is before I added the lower support so it now sits at more of an angle. It seems to be getting enough airflow but if worse comes to worse I could always add a plate to direct more airflow
Attachments
Johns06yota
Member
test rip time!
Finally got some gremlins in my system figured out lol. For one the 4.5 tial wastegate spring was too weak to allow the turbo to get that amount to the intake manifold. To remedy this I installed a 7.5 psi spring which was able to in effect give me roughly 4.5 psi at the manifold. I expected a drop just due to the amount of charge piping.
Now the thing you have all been wondering lol. Does it rip?
Yes, Yes it does lmao. There is a little turbo lag but can be easily resolved with exhaust wrap to keep exhaust temps up. As soon as it gets into boost at about 2200 rpm it throws you back in your seat and scoots! Tried to do a 0-60 run and it broke the tires loose haha. Also all this testing was done on the stock tune which I find to be pretty crazy. The stock fuel system is easily able to keep up with the boost and drops to a solid 11.5-11.8 afr at 4.5 psi of boost at WOT. Also as soon as the vehicle recognizes anything above atmosphere the afr drops incrementally from 13.1 right before boost, 12.5 low boost and 11.5-11.8 at WOT. It also adjusts timing accordingly. I will most likely still be going with a piggyback unit but crazy to see that the stock computer can handle it.
Finally got some gremlins in my system figured out lol. For one the 4.5 tial wastegate spring was too weak to allow the turbo to get that amount to the intake manifold. To remedy this I installed a 7.5 psi spring which was able to in effect give me roughly 4.5 psi at the manifold. I expected a drop just due to the amount of charge piping.
Now the thing you have all been wondering lol. Does it rip?
Yes, Yes it does lmao. There is a little turbo lag but can be easily resolved with exhaust wrap to keep exhaust temps up. As soon as it gets into boost at about 2200 rpm it throws you back in your seat and scoots! Tried to do a 0-60 run and it broke the tires loose haha. Also all this testing was done on the stock tune which I find to be pretty crazy. The stock fuel system is easily able to keep up with the boost and drops to a solid 11.5-11.8 afr at 4.5 psi of boost at WOT. Also as soon as the vehicle recognizes anything above atmosphere the afr drops incrementally from 13.1 right before boost, 12.5 low boost and 11.5-11.8 at WOT. It also adjusts timing accordingly. I will most likely still be going with a piggyback unit but crazy to see that the stock computer can handle it.

Inv4drZm
Senior Member
Finally got some gremlins in my system figured out lol. For one the 4.5 tial wastegate spring was too weak to allow the turbo to get that amount to the intake manifold. To remedy this I installed a 7.5 psi spring which was able to in effect give me roughly 4.5 psi at the manifold. I expected a drop just due to the amount of charge piping.
Now the thing you have all been wondering lol. Does it rip?
Yes, Yes it does lmao. There is a little turbo lag but can be easily resolved with exhaust wrap to keep exhaust temps up. As soon as it gets into boost at about 2200 rpm it throws you back in your seat and scoots! Tried to do a 0-60 run and it broke the tires loose haha. Also all this testing was done on the stock tune which I find to be pretty crazy. The stock fuel system is easily able to keep up with the boost and drops to a solid 11.5-11.8 afr at 4.5 psi of boost at WOT. Also as soon as the vehicle recognizes anything above atmosphere the afr drops incrementally from 13.1 right before boost, 12.5 low boost and 11.5-11.8 at WOT. It also adjusts timing accordingly. I will most likely still be going with a piggyback unit but crazy to see that the stock computer can handle it.
Nice. Great work and documentation, well over my head at this point to be honest, but maybe someday I'll get my truck boosted.
Johns06yota
Member
Nice. Great work and documentation, well over my head at this point to be honest, but maybe someday I'll get my truck boosted.
Thanks! and I'll be adding more info with time. I'm about to be moving so I'm going to have a several week gap between making progress. Believe it or not I had zero knowledge whatsoever on this subject before I started. I honestly just tried to get as much info through videos and a few people in between who had knowledge on the subject.
On a side note if you are wanting to boost yours, I've been in contact with a guy who turbocharged his v8 and he may be a very helpful source for you as he was for me.
Inv4drZm
Senior Member
Thanks! and I'll be adding more info with time. I'm about to be moving so I'm going to have a several week gap between making progress. Believe it or not I had zero knowledge whatsoever on this subject before I started. I honestly just tried to get as much info through videos and a few people in between who had knowledge on the subject.
On a side note if you are wanting to boost yours, I've been in contact with a guy who turbocharged his v8 and he may be a very helpful source for you as he was for me.
I might be interested in hearing from him, it would be a while for any real progress with boost on my truck but its never to early to start planning and learning.
Johns06yota
Member
I might be interested in hearing from him, it would be a while for any real progress with boost on my truck but its never to early to start planning and learning.
Yeah I understand that! I'll let him know. I don't remember if he is on the forum or not but I'll find out for you
Johns06yota
Member
updates
wanted to update everyone. A lot of details have been finalized on the project and at this point there is not much else to do.
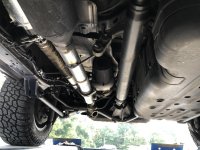
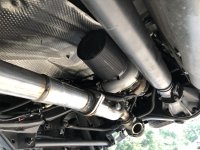
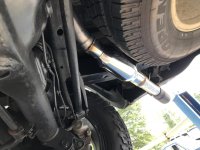
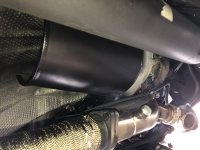
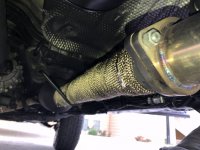
exhaust is done! I had the muffler removed and a vibrant resonator installed next to the tailpipe. I knew this needed to be done to get better exhaust flow to the turbo but was worried about noise level. I didnt want it to be obnoxious and I think I captured the sound I wanted. It still has a nice gurgle at idle but there is absolutely zero drone and the note is nice and deep. This seemed to help a lot with slower spool and turbo lag. I later painted all of the exhaust and did header wrap to keep it warmer.
I also installed a filter sock and shield to keep water out.
Along with this I did a 3/1.5 lift to give the exhaust more clearance of the rear axle in the back. Due to turbo placement there wasn't much space.
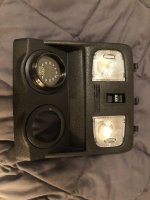
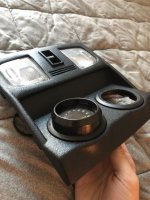
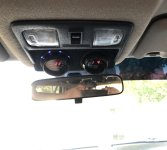
I also recently had to replace my wideband gauge as the old one crapped out. While i had it out I redid my overhead console to where it wouldnt flex and crack anymore.
At this point it runs great on the stock tune and I get similar mpg around town as I use to as well as on the highway. You only really drop your mpg when you get on it in boost which hits around 2100-2200 rpm. I still plan to do a piggyback ecu as well as bigger tires as the stock size looks like it skipped leg day lol.
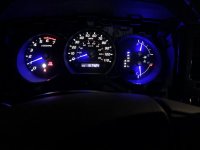
I also made custom needles for my instrument cluster. each needle has a blue led built it.
wanted to update everyone. A lot of details have been finalized on the project and at this point there is not much else to do.
exhaust is done! I had the muffler removed and a vibrant resonator installed next to the tailpipe. I knew this needed to be done to get better exhaust flow to the turbo but was worried about noise level. I didnt want it to be obnoxious and I think I captured the sound I wanted. It still has a nice gurgle at idle but there is absolutely zero drone and the note is nice and deep. This seemed to help a lot with slower spool and turbo lag. I later painted all of the exhaust and did header wrap to keep it warmer.
I also installed a filter sock and shield to keep water out.
Along with this I did a 3/1.5 lift to give the exhaust more clearance of the rear axle in the back. Due to turbo placement there wasn't much space.
I also recently had to replace my wideband gauge as the old one crapped out. While i had it out I redid my overhead console to where it wouldnt flex and crack anymore.
At this point it runs great on the stock tune and I get similar mpg around town as I use to as well as on the highway. You only really drop your mpg when you get on it in boost which hits around 2100-2200 rpm. I still plan to do a piggyback ecu as well as bigger tires as the stock size looks like it skipped leg day lol.
I also made custom needles for my instrument cluster. each needle has a blue led built it.
Attachments
-
 IMG_3493 3 (1).jpg133.5 KB · Views: 633
 -
 IMG_3494 2 (1).jpg134 KB · Views: 645
 -
 IMG_3495 3 (1).jpg129.9 KB · Views: 650
 -
 IMG_3534 2 (1).jpg127.8 KB · Views: 640
 -
 IMG_3536 2 (1).jpg125.2 KB · Views: 636
 -
 IMG_3620 (1).jpg112.6 KB · Views: 641
 -
 IMG_3625 (1).jpg134.7 KB · Views: 634
 -
 IMG_3627 (1).jpg132 KB · Views: 633
Johns06yota
Member
Johns06yota
Member
couple updates
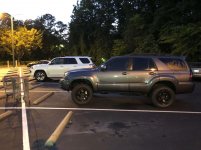
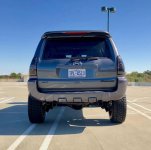
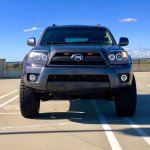
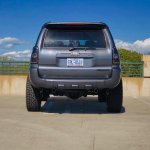
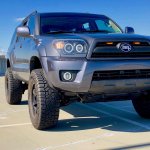
a few updates for you all on this project. As some of you know I just recently finished up my lift so my 4runner currently has 3 inches of lift up front and 1.5 in the rear plus a 1 inch body lift. Along with this I just installed 33's not that long ago.
Now onto the turbo project lol.
Exhaust is now completely done other than possibly another resonator. It is set up as a single 2.5 into the turbo and then a dual 2.5 out of the turbo. This significantly reduced back pressure after the turbo which greatly helped in getting into boost sooner.
I'm hoping to install my fuel pump this weekend which is a DeatschWerks DW200. It has an output of 255 LPH but is suppose to be more quiet than the walbro units. I also plan to do the powder coating on the valve covers.
Im also planning to change my charge pipe routing some to help with spool times
a few updates for you all on this project. As some of you know I just recently finished up my lift so my 4runner currently has 3 inches of lift up front and 1.5 in the rear plus a 1 inch body lift. Along with this I just installed 33's not that long ago.
Now onto the turbo project lol.
Exhaust is now completely done other than possibly another resonator. It is set up as a single 2.5 into the turbo and then a dual 2.5 out of the turbo. This significantly reduced back pressure after the turbo which greatly helped in getting into boost sooner.
I'm hoping to install my fuel pump this weekend which is a DeatschWerks DW200. It has an output of 255 LPH but is suppose to be more quiet than the walbro units. I also plan to do the powder coating on the valve covers.
Im also planning to change my charge pipe routing some to help with spool times
Attachments

Johns06yota
Member
First time reading through your build thread here, and I gotta say, it's neat to see what you've done to your rig. Especially now since it's on appropriate meats... Even though you used *eep fogs in your retros :bolt:
Keep on keepin' on with the custom work :rockon:
Thank you! And it has been a long time coming to get it to this point. I started the turbo project really back in April with planning and then May as far as parts. There’s a lot of satisfaction in knowing that it’s almost done especially when you have done almost all the work yourself
Johns06yota
Member
Fuel pump is done!
Finished up the fuel pump install this weekend. I installed it last week but was having a fuel leak issue in the tank where it wasn't holding pressure when the car shut off. Fixed that by going directly from the pump to the housing outlet.
Plenty of fuel for boost. Way too rich in open loop right now so my piggyback ECU should resolve this pretty easily. (it comes in next week)
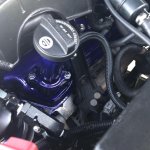
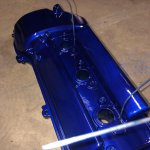
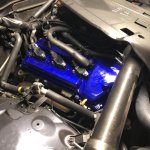
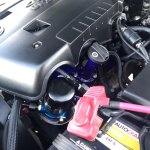
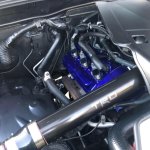
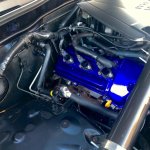
I also was able to powder coat for the first time. probably spent like 4 hours prepping my valve covers. It is not perfect but it looks amazing. Learned a lot and plan to powder coat the new charge piping that I plan to do.
Finished up the fuel pump install this weekend. I installed it last week but was having a fuel leak issue in the tank where it wasn't holding pressure when the car shut off. Fixed that by going directly from the pump to the housing outlet.
Plenty of fuel for boost. Way too rich in open loop right now so my piggyback ECU should resolve this pretty easily. (it comes in next week)
I also was able to powder coat for the first time. probably spent like 4 hours prepping my valve covers. It is not perfect but it looks amazing. Learned a lot and plan to powder coat the new charge piping that I plan to do.
Attachments
-
 F168CCE0-98B2-4937-801B-7B6C21C20D59.jpg118.5 KB · Views: 477
 -
 F44A9C9A-4FB8-44BA-AF30-22B4EC0C61AC.jpg125 KB · Views: 476
 -
 D49C3C2F-D483-492E-959D-780DE657E6AA.jpg130.2 KB · Views: 480
 -
 AC0D0BE0-0DFF-4D90-9DE8-DF0AAD2449DA.jpg127.6 KB · Views: 483
 -
 10238C81-001A-4707-AAEB-769D04A58EC6.jpg122.4 KB · Views: 475
 -
 2D2FD687-25A9-407E-8F08-386DB909B22B.jpg125.4 KB · Views: 468

Similar threads
- Replies
- 12
- Views
- 4K

- Replies
- 12
- Views
- 8K


