
You are using an out of date browser. It may not display this or other websites correctly.
You should upgrade or use an alternative browser.
You should upgrade or use an alternative browser.
My 3 point slow rebuild
- Thread starter bluewavecaptain
- Start date


mikebontoft
New member
I did catch one thing thing that makes me nervous. the tick you mentioned... did it show up after the engine got warm? and it sounded like lifter tick on the left bank? my junkyard 3.0 I have in right now does this after running it pretty hard. hope its not piston slap.
either way, best of luck on your build!
either way, best of luck on your build!

bluewavecaptain
New member
I did catch one thing thing that makes me nervous. the tick you mentioned... did it show up after the engine got warm? and it sounded like lifter tick on the left bank? my junkyard 3.0 I have in right now does this after running it pretty hard. hope its not piston slap.
either way, best of luck on your build!
No, it was there constantly. It was a wierd tick. It sounded like a minor rod knock, but from the top of the engine. One way to diagnose the cylinder is to remove one spark plug wire and start the engine. If the tick is still there, replace the wire and move to the next cylinder. If it still ticks on all cylinders, then its a lifter/valve problem.
bluewavecaptain
New member
ah that sucks. that does happen though.
hey perfect thread for me to watch though! I'm grabbing my spare 3.0 with a cracked #6 piston this Friday. its already .020 so I'm taking it .040.
where did you get a piston/rod set or was that with the old rods on it?
That was actually one thing my old mechanic got right! I had the old pistons pressed off and the new ones pressed on. Too bad I had that done...twice. LOL!

4runnerBrett
New member
What did the machine work cost you? Im curious as I just got burned on a motor I bought that guy said ran perfect. Spent all weekend putting it in and it knocks. So im looking at a possible rebuild.
mikebontoft
New member
What did the machine work cost you? Im curious as I just got burned on a motor I bought that guy said ran perfect. Spent all weekend putting it in and it knocks. So im looking at a possible rebuild.
aww that sucks.
OK that's what I thought about the rods.
Never thought to try that test... makes sense though. remove the combustion and if its piston slap it will go away since the piston won't be forced downward.
bluewavecaptain
New member
What did the machine work cost you? Im curious as I just got burned on a motor I bought that guy said ran perfect. Spent all weekend putting it in and it knocks. So im looking at a possible rebuild.
To get the new pistons, rings, have them pressed on the rods, block acid washed, bored, honed, block and pan primered, and to have the ball bearing plugs pulled out and pipe plugs put in....500 bucks.
I also had the crank polished and balance checked for 30 bucks.
bluewavecaptain
New member
You're getting to discover first-hand why these things blow head gaskets--the exhaust cooks that one corner, which is why it looks so bad. Eventually that would lead to the failure of the gasket. I'm kind of surprised you didn't need to go up one size on the pistons, but if the shop says it's good. If you could swing it, this would be a great time to add some headers, to move all that heat away from the heads--unfortunately, they cost more than your original vehicle purchase price (yikes!). Best of luck on the rebuild!
EDIT: Sure, go ahead and change the story while I'm typing (LOL)--so your pistons DO need resized after all. That's more like it. I would be wary of that first shop--that was a major miss that would've caused you problems on the finished product. Block looks great!
I don't think I'll be able to afford the header setup for the time being. What I am going to do though is the crossover pipe in header tape, cut the CAT out, and I'm going to install a muffler setup much like the freight trucks have. I'll put the muffler and turn-down right under the driver. I also plan on going bigger with the exhaust. I'll install a pipe reducer (backwards) and then run it into a large muffler.
mikebontoft
New member
I was just thinking.... maybe you could try the passenger manifold on the driver's side trick for your headers?
bluewavecaptain
New member
I was just thinking.... maybe you could try the passenger manifold on the driver's side trick for your headers?
You have my attention. Go on...tell me more!
mikebontoft
New member
I don't know enough of it but... I understand the flanges are symmetrical so they will bolt on upside down if you wanted to. I have a spare manifold from my old motor to try this with.
you just need to either Fab plates to block off the emissions passageways or weld them shut and install it upside down on the drivers side. you cut the crossover just after each flange (or make new flared tubing) and bolt them on pointing down. you build your exhaust from there.
I don't know if you need a body lift. it would probably make it easier.
For the rest of the exhaust, I thought about using a 2" dual in, 2.5" single out magnaflow cat (that way the 02 sensor can be mounted pre-cat but with both banks available. very important.) to a turbo muffler and routed out the factory way.
fyi I figured the cat would probably end up before the transmission cross member vs after. you can get about $95 for your cat if its factory and the magnaflow was like $70?
I'll have it up on a lift tomorrow to check it out.
you just need to either Fab plates to block off the emissions passageways or weld them shut and install it upside down on the drivers side. you cut the crossover just after each flange (or make new flared tubing) and bolt them on pointing down. you build your exhaust from there.
I don't know if you need a body lift. it would probably make it easier.
For the rest of the exhaust, I thought about using a 2" dual in, 2.5" single out magnaflow cat (that way the 02 sensor can be mounted pre-cat but with both banks available. very important.) to a turbo muffler and routed out the factory way.
fyi I figured the cat would probably end up before the transmission cross member vs after. you can get about $95 for your cat if its factory and the magnaflow was like $70?
I'll have it up on a lift tomorrow to check it out.
bluewavecaptain
New member
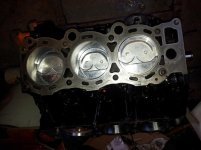
The second bank of pistons installed.
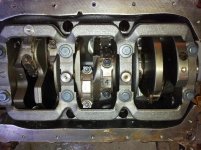
The view from the bottom of the motor. All connecting rods get torqued to 18 ft. lbs. then an additional 90 degree turn.
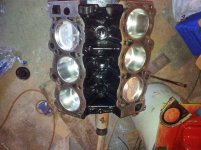
The view from the top of the engine.
Attachments



bluewavecaptain
New member
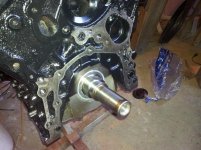
Prepping the surface for installing the oil pump and the water pump. I ended up scraping off the paint that I had painted on the block where the gasket mating surfaces are. An easier way is to keep your old water pump and oil pump (if you replace them) in place until after you paint the block.
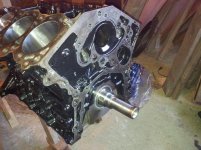
Attachments


bluewavecaptain
New member
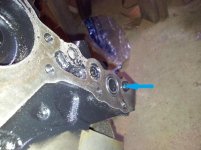
Be sure to have this O-Ring in place before installing the oil pump or it's going to leak.
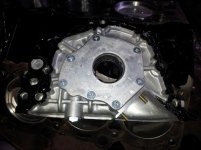
I usually dab the gasket sealer on and then spread it around like cake frosting. This ensures that you cover all the surfaces and also leaves less extra material which can ooze out when you tighten things down and get into your oil, coolant, etc.
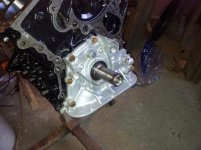
The oil pump installed. BE SURE to apply assembly lube to the crankshaft where the oil seal sits or it will not seat properly.
Attachments



bluewavecaptain
New member
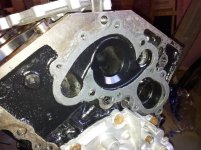
Apply gasket sealer to the block and then position the gasket on the block.
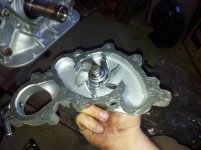
Apply gasket sealer to the water pump and then position the water pump on the block.
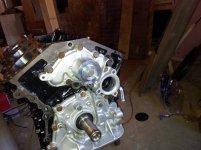
The oil pump and water pump installed.
Attachments



bluewavecaptain
New member
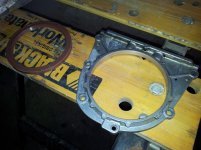
The rear seal and retainer plate.
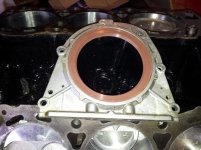
The rear seal installed. Be sure to use care when installing crank and cam seals. If you damage or distort them, they will leak.
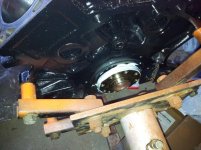
Lube up the crank where the seal sits. The rear seal plate also has a gasket which is installed the same as the water pump gasket.
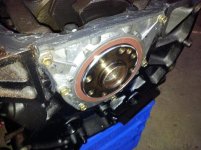
The rear seal installed. The book calls for 69 in. lbs. which is equal to about 7 ft. lbs. I simply hand tightened these because my torque wrench only goes down to ten. Don't overtighten these small bolts or you'll snap them off.
Attachments




bluewavecaptain
New member
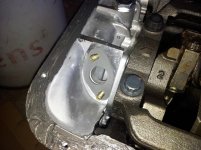
Install the oil pickup tube gasket. DO NOT use gasket sealer here!
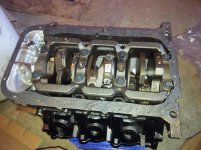
Apply gasket sealer
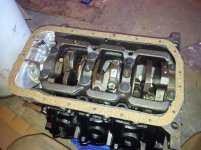
Position ONE of the two cork oil pan gaskets.
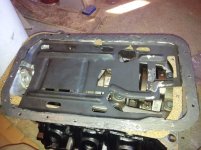
Apply gasket sealer to the "underside" of the windage tray.
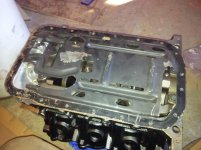
Position the windage tray in place.
Attachments





bluewavecaptain
New member
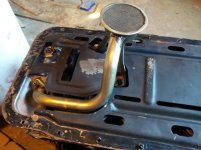
Install the pickup tube AFTER the windage tray. Now you can see how big of a PITA this is to do when the engine is in the truck...
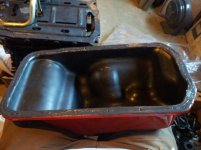
Apply gasket sealer to the oil pan
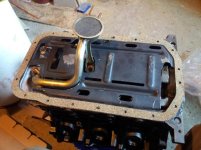
Apply gasket sealer to the windage tray and then position the second cork gasket.
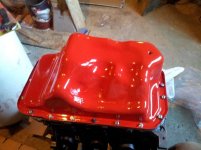
The oil pan installed. If you choose to use the cork gaskets in the set, you WILL have to buy longer oil pan bolts. Also, the two nuts that go on the positioning studs will have to go on after you snug the pan down. You can cheat and buy the Permatex 1 Minute Gasket Maker instead of the cork gaskets, but you have to work fast! As in five minutes fast!
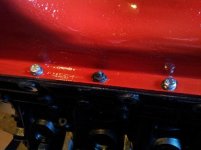
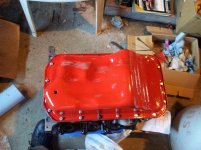
Again, I hand tightened these bolts and you start in the middle and work your way out. Snug all the bolts first, then make a second pass and tighten them all up.
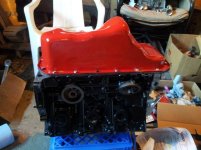
Attachments
-
 20121021_092111.jpg63.9 KB · Views: 1,212
 -
 20121021_092933.jpg53.8 KB · Views: 1,243
 -
 20121021_093119.jpg65.7 KB · Views: 1,917
 -
 20121021_095216.jpg56.5 KB · Views: 1,223
 -
 20121021_095223.jpg43.3 KB · Views: 1,201
 -
 20121021_095237.jpg67.2 KB · Views: 1,217
 -
 20121021_095248.jpg63.1 KB · Views: 1,203
mikebontoft
New member
well there's two things I totally forgot to do... no gasket for the pickup tube and I didnt reseal the rear main plate. no wonder it weeps.
good progress... too bad someone junked my spare block. :|
Checked up on that manifold thing for ya... I'd recommend a body lift, it would make it a lot easier but the passenger manifold fits great. it leaves you with two flanges pointing back with no angle... easy enough to work with.
good progress... too bad someone junked my spare block. :|
Checked up on that manifold thing for ya... I'd recommend a body lift, it would make it a lot easier but the passenger manifold fits great. it leaves you with two flanges pointing back with no angle... easy enough to work with.


