My 4gunner restore, refurb and re-work

Because there is a centering spot (low spot) in the metal on the rack. This helps keep the car pointed straight when the wheel is centered. If you torque and set with the wheel centered, when you try to turn the wheel, it will bind hard. If you turn the wheel and set things as I stated / it will be dead on the first time.

You will read in other posts about people having a hard time getting it right / binding / re-setting over and over. If they follow my guide - it is a 1st time setup.

Thanks & just to clarify, regardless if I am just checking the torque or actually changing out the guide, it would be best to turn my steering wheel a half to full turn to the left yes?

When you installed your guide, you did not do the 18ft/lb then back off 19 degrees method correct?

Did you clean up your original guide and regrease with moly?
 
I did not go off the torque spec - It was always overtight and would cause binding just as other people found. The write-up I did will get you right on the money with tension (did on both of mine). Also, yes I did add some moly and cleaned things up.

Jhelms quick instruction guide for the rack guide if you have an 01-02 or if you purchased the new style guide
- Turn the wheel 1/2-1 turn to the left (VERY IMPORTANT - DO NOT MAKE THE ADJUSTMENT WITH THE RACK CENTERED)
- Loosen the lock nut
- Use whatever tool you have to rotate the large hex cap clockwise until you feel it bind
- Back off of that setting 1/8 to 1/4 turn. This should get you on the money or close. Back off a little more if steering feels to tight
 
1st post! :yo:

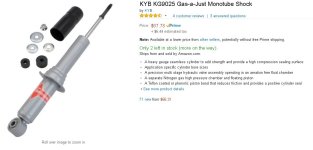
Other than the Bilstein 5100s - any other front shock (budget wise) you can suggest to pair with the front FJ coils?

Currently, I am looking to get these:

90% paved 10% mild off-road for camping/snowboarding trips

Thoughts?
 

Attachments

  • Capture.JPG
    Capture.JPG
    71.2 KB · Views: 904
Last edited:
I have always liked gas adjust. In the 2nd page of this thread, you will see I had them on the silver gunner and also on my previous 98 4runner. Excellent for the cash and I have nothing bad to say about them. But I do think for the extra cash, the 5100's are better and worth it if you can swing it. However... either way you are not stepping wrong.
 
Getting ready to do the TB/WP, curious as to which kit you used or if you ordered everything separate?

This AZ heat is going to kill me while doing this lol, gotta get the swamp cooler going in the shop. Look like you can do the TB/WP fairly quickly, i hope i can get it done in a day without ever doing it before. Any other tips or tricks to offer?
 
Getting ready to do the TB/WP, curious as to which kit you used or if you ordered everything separate?

This AZ heat is going to kill me while doing this lol, gotta get the swamp cooler going in the shop. Look like you can do the TB/WP fairly quickly, i hope i can get it done in a day without ever doing it before. Any other tips or tricks to offer?

It is a lot of work but can be done easily in 3 - 3.5 hours without much stress... I guess more time consuming than anything - not hard. All part numbers are on the first page of this post. I use gates timing belt kits and aisin WP. Nothing really stands out - rather straight forward job. You will have to either remove the timing belt tensioner to compress it in a vise or buy this tool do to it. Do NOT attempt to compress it any other way.

Schley Products 97300 Timing Belt Tensioner Compressor Toyota | eBay


I would offer to do it for you but I am not the cheapest labor in town but not the most expensive either by far. For a non rusted / non mess of an engine bay 4runner I charge $300 labor + parts, fluids and such.
 
Last edited:
What part of town are you in?

Thanks for the info on the compressor I'll have to look into that. I was going to pay someone to do it but on my college budget I figured Id do it myself, especially since my dad has a shop in the backyard, I just didn't want to do it in this heat.
 
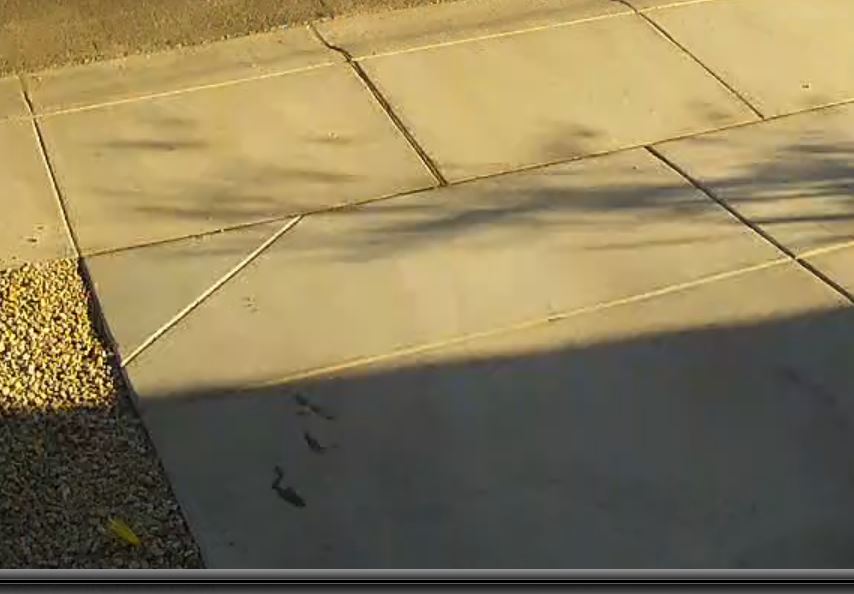
So the other day I was checking air pressure / doing general service on the silver gunner. Pass rear rim was a bit black and oily... ah hell. Looked under and sure enough - blown axle seal. :sad: :sad: :sad: :sad:

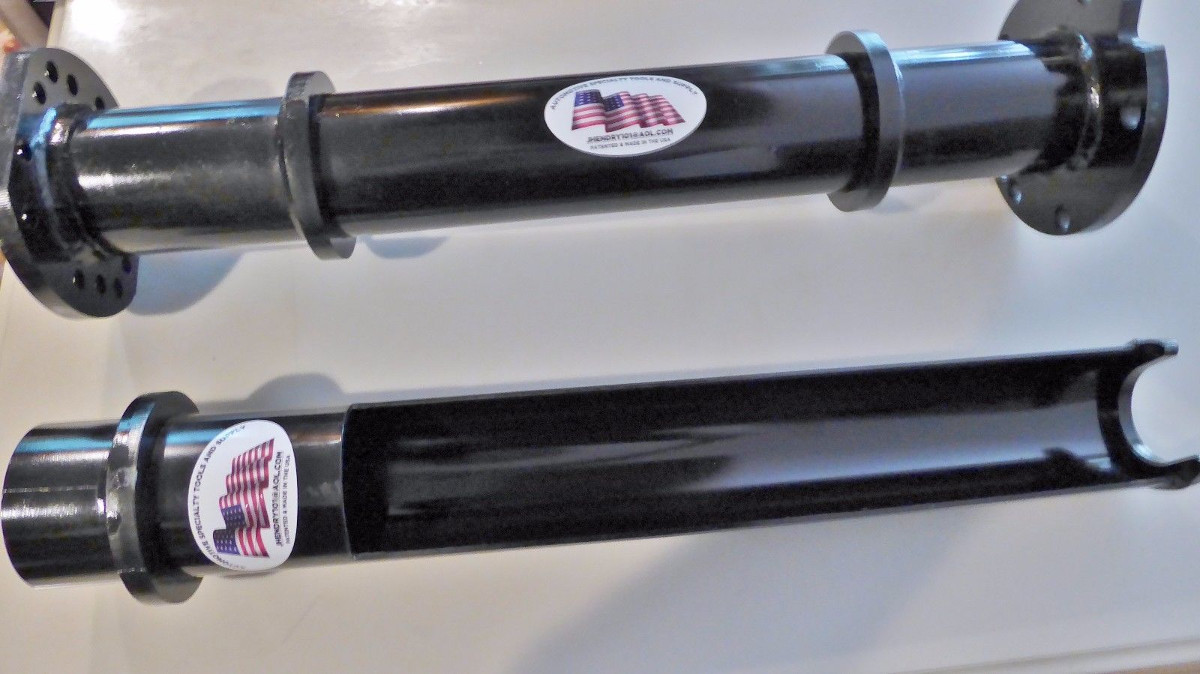
Well, with two 4runners in the stable and possible a 3rd on the way for my oldest boy, went ahead and plopped down the cash for the right tools to do axle seals easy. They were about $420 shipped. These, combined with my press tools will make removal of the retainers / abs ring and all the BS pressed onto the axle - super easy and stress free. They also save the cash of having to buy all those parts (no cutting them off or damaging them). So when all is said and done, all I need to buy for the job are bearings, seals, o-ring, new shoes for the brakes, Brake fluid and 80w90 (have fluids on the shelf always)

Hopefully all comes in by this weekend or at worst, will do it next weekend.

The tools:
s-l1600.jpg


The sign spotted on the driveway on one of my security cameras
OIL%20SPOT.JPG


Part numbers ordered for the job
- Nachi Bearings (same as oem) for the late 00 - 02 gunner x 2 PN 90363 40068
- Oil seals x 2 PN 9031050006
- O-rings x 2 PN 9030188077

Less than $100 in parts but $420 in tools lol. Next time I do one... it will be a cheap venture!
 
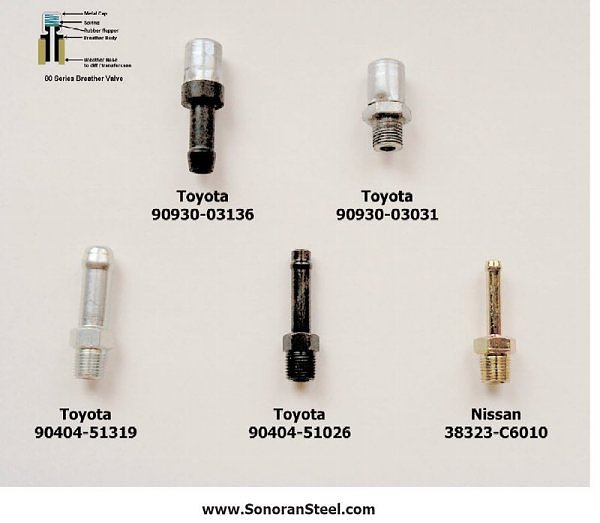
Combined with the axle seal replacement, I will go ahead and replace the rear breather and do a DIY breather mod for both 4runners as it is dirt cheap.

Here is all you need / reference this photo for a visual of the parts:

- 1qty of 90930-03136
- 1qty of 90404-51319
- some hose and clamps

As many have done, just route the line up to your gas filler neck area so the breather is inside the area with the gas cap. About $15 in parts shipped / maybe $20-25 in total with hose and clamps. I figure if I am going to replace the breathers anyways, why not. Now if I ever have to cross deeper water... I will not have to 2nd guess anything. That, and you get the function of the stock breather placed in a location that stays clean.

AYhcKUP.jpg
 
Last edited:
I took your advice on the single ground spark plugs....will be installing in my 02 this week. Curious to know how your "gunners" are running with the single ground. Lots of debates on to use double or single...btw, really enjoy the thread! keep up the great work!
 
I took your advice on the single ground spark plugs....will be installing in my 02 this week. Curious to know how your "gunners" are running with the single ground. Lots of debates on to use double or single...btw, really enjoy the thread! keep up the great work!

As long as you are using a high quality iridium, you are fine as I previously stated. No issues in any of my 4runners.
 
Buy an extra oil seal...I always seem to mess one up driving it in.

Finished replacing the bearings/seals on my both of my 3rd 4runners over the summer. Like you, I bought the SST to make the job easier.
 
Installed the NGK Spark plug wires TE66 and the NGK BKR6EIX-11 iridium plugs today....all went well until I decided to try and pull the PCV valve! Hour and a half later after pulling the valve cover, I finally removed the crumpled and brittle pcv valve which could have been the original one(233k miles) anyway, plugs in, wires in, new pcv and grommet and she is purring like a kitten....and acceleration is much improved! Next challenge is rear shocks.
 
Installed the NGK Spark plug wires TE66 and the NGK BKR6EIX-11 iridium plugs today....all went well until I decided to try and pull the PCV valve! Hour and a half later after pulling the valve cover, I finally removed the crumpled and brittle pcv valve which could have been the original one(233k miles) anyway, plugs in, wires in, new pcv and grommet and she is purring like a kitten....and acceleration is much improved! Next challenge is rear shocks.

The PCV can be a pain. If the grommet is old, best to pull it after the engine warms up and everything is hot. Makes life easier. Glad all went well, enjoy!
 
I am so jealous of your ease with wrenching and lack of hiccoughs and bs problems along the way over numerous projects. It seems that every project you take on, you dominate as if you're a trained toyota tech.

What do they call that? Manly?

I'll be stuck in the minors forever.
 
I am so jealous of your ease with wrenching and lack of hiccoughs and bs problems along the way over numerous projects. It seems that every project you take on, you dominate as if you're a trained toyota tech.

What do they call that? Manly?

I'll be stuck in the minors forever.

Ha! I think I am just lucky not to live in the rust belt or have rust issues here in the dry desert. Makes working on most any older car 10x easier.
 
Maybe I missed it on another thread, and if I did, I apologize for my redundancy.
Why Rotella over Royal Purple? Also, which version (T5 or T6) and weight should be used on a 16-year old 4R with 178k?:help:
 
Maybe I missed it on another thread, and if I did, I apologize for my redundancy.
Why Rotella over Royal Purple? Also, which version (T5 or T6) and weight should be used on a 16-year old 4R with 178k?:help:

I personally like T6. I like how test results come out and its cleaning agents. I also like its low price point. As long as you run a good oil and change yours on a proper schedule, you are fine with most oils. So in short - run what you like :)
 

Members online

No members online now.

Forum statistics

Threads
278,316
Messages
3,554,112
Members
248,016
Latest member
Advally Service

Trending content

Back
Top