New Dashcam Install - Blackvue DR900S-2CH

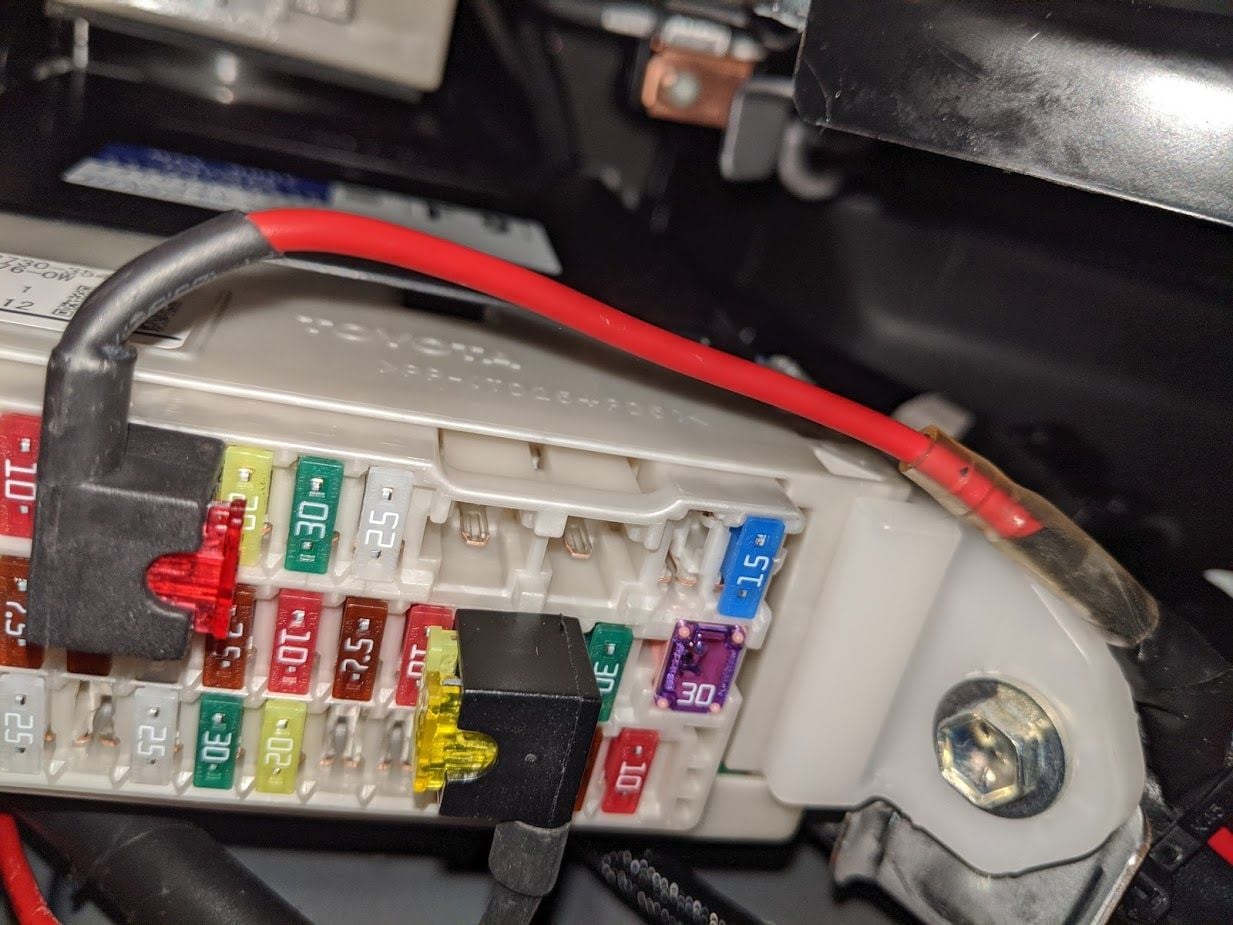
check out post #40 for the correct places to tap (read the details, do not use the picture for the correct fuses).
remember, when you install the PMP in the location under the steering wheel, it is upside down

Perfect. Thanks for this. Will double check it this weekend and make some changes/verify I'm using the same taps spots in the fuse box.
 
I read somewhere that the constant reading and writing on these cards shortens the life span. I've just been buying cheapo SanDisk cards and replacing every 6 or so months
 
A bit late but I thought I'd share my experience with the SD cards.

I was using the Blackvue supplied 16GB card in my DR750S-2CH since December. I haven't had any issues with it but I didn't like how the card got full so quickly.

After reading through some dashcam specific forums someone had reported good results for about 3 years using this card: https://www.amazon.com/gp/product/B01DAYHMDA/ref=ppx_yo_dt_b_asin_title_o00_s00?ie=UTF8&psc=1

It's a relatively cheap SD card at $31 so it wasn't tough to get. I'll report back in a couple months on how its holding up, I check the footage often so I'll be sure to note if theres any differences between old and new footage.
 
Since this thread has been bumped; mine still works great, no issues, a few years old now, live in Miami so constant heat on it.
 
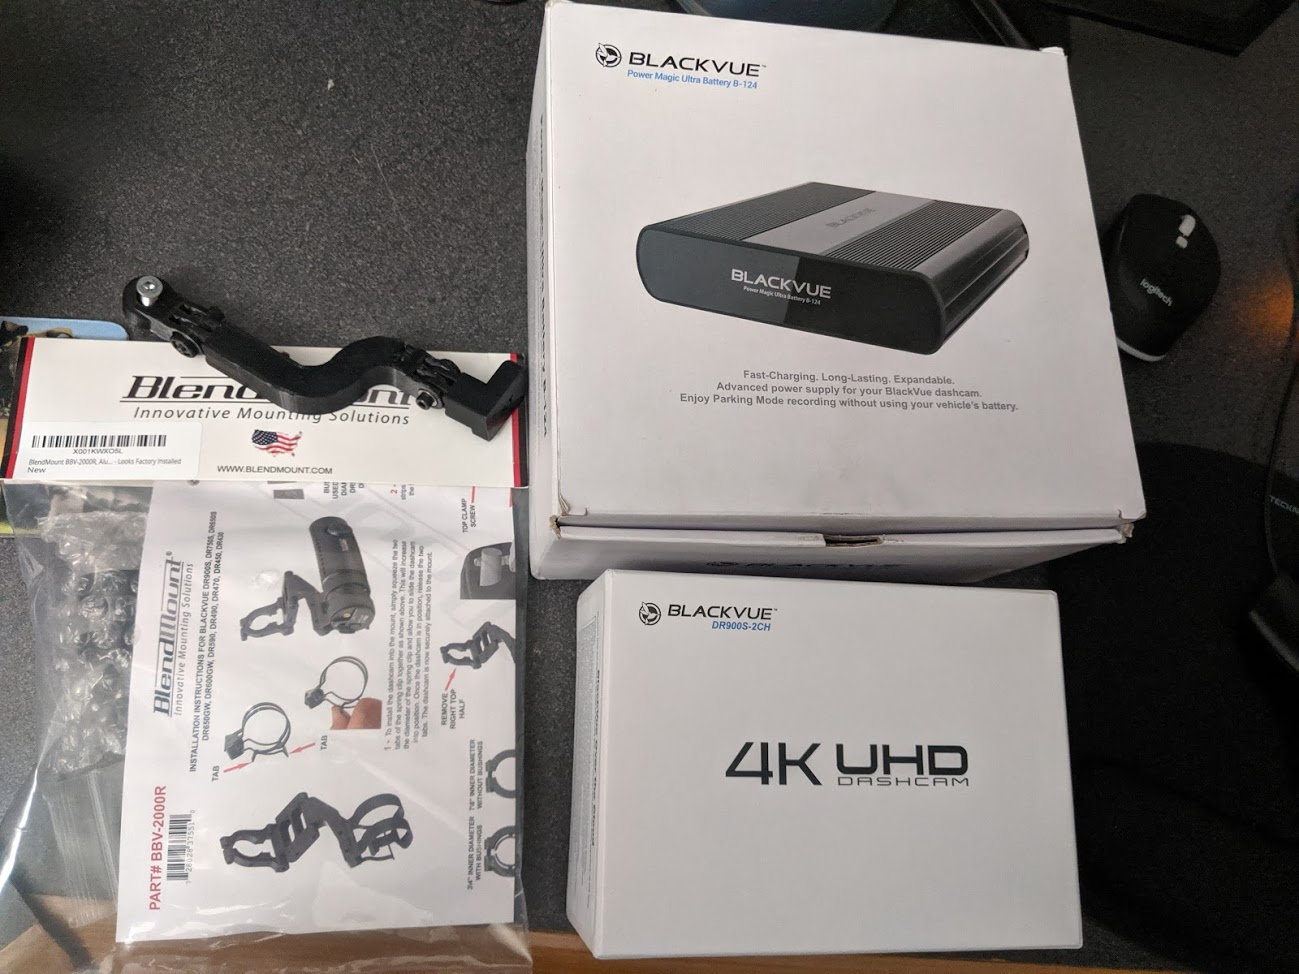
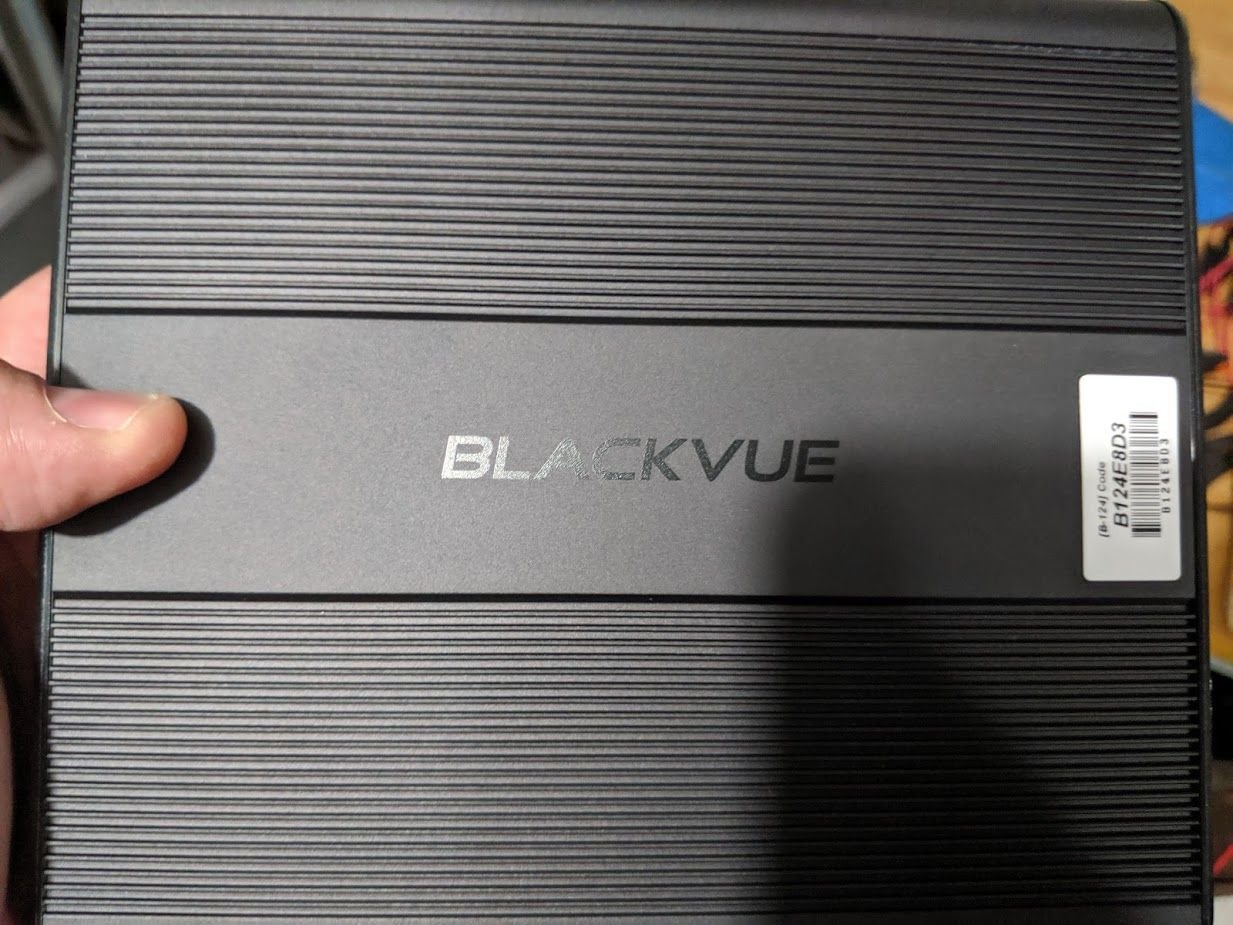
Got my Blackvue 2 channel 4K dash cam installed with the backup battery. Wanted to share some pics from my install

img_20190830_154223_93125f4a0c7bde09f2f945c5fdb4acb7f86b8314.jpg


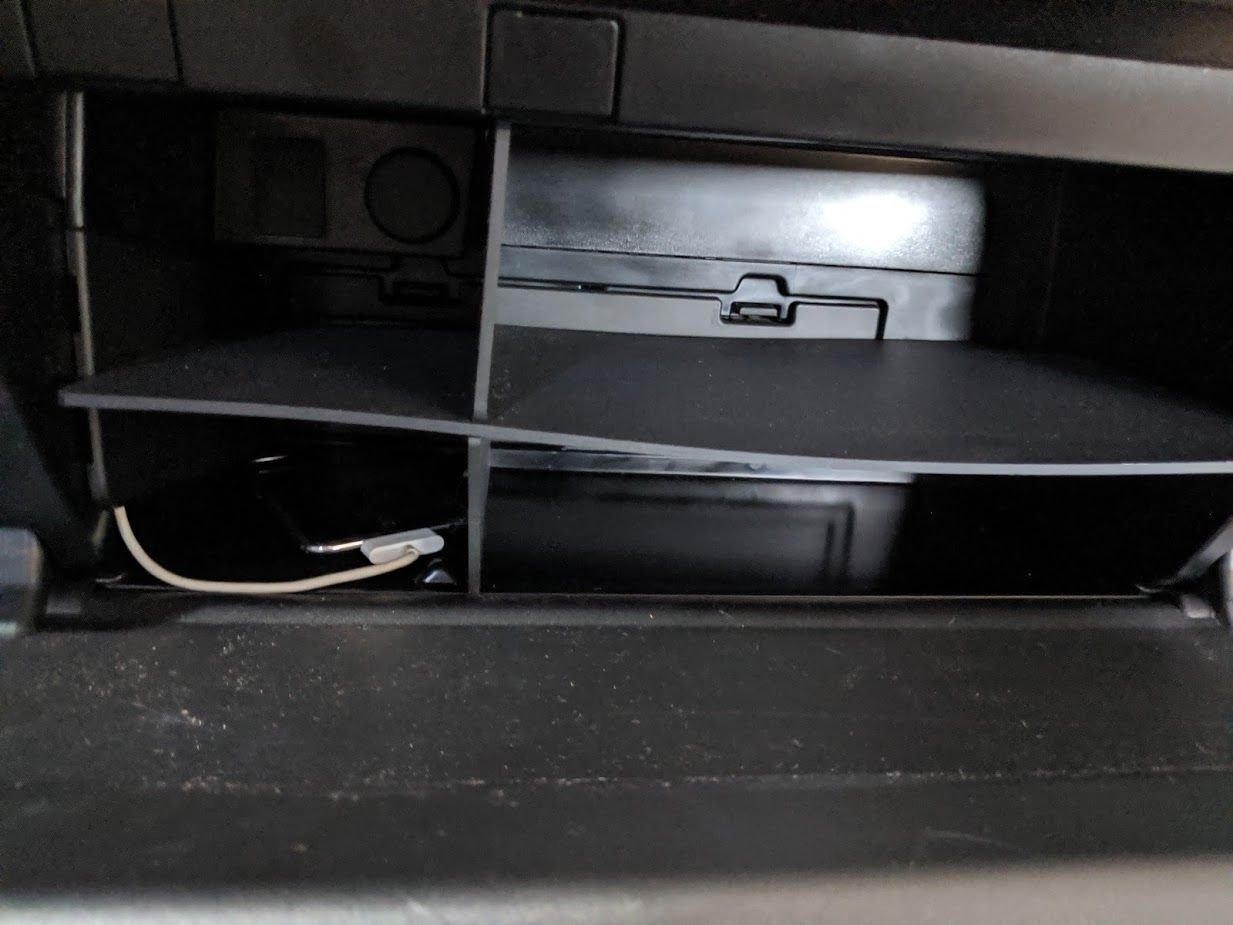
I didn't want to mount the battery under the seat so the glovebox was the most logical. Here's a before.

img_20190830_160324_a0106afd77a7a9eb950b39c0db037642ba12b0ac.jpg


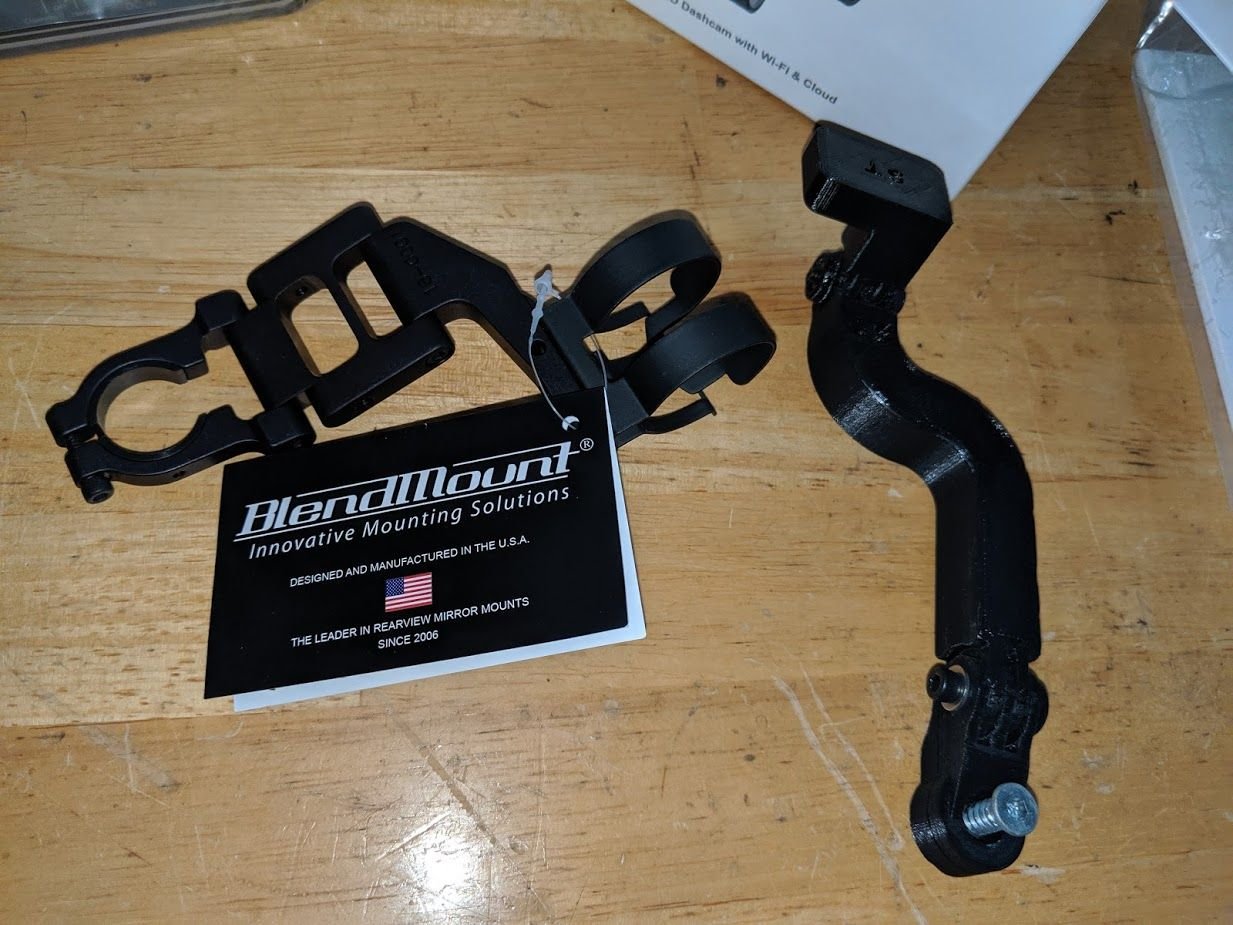
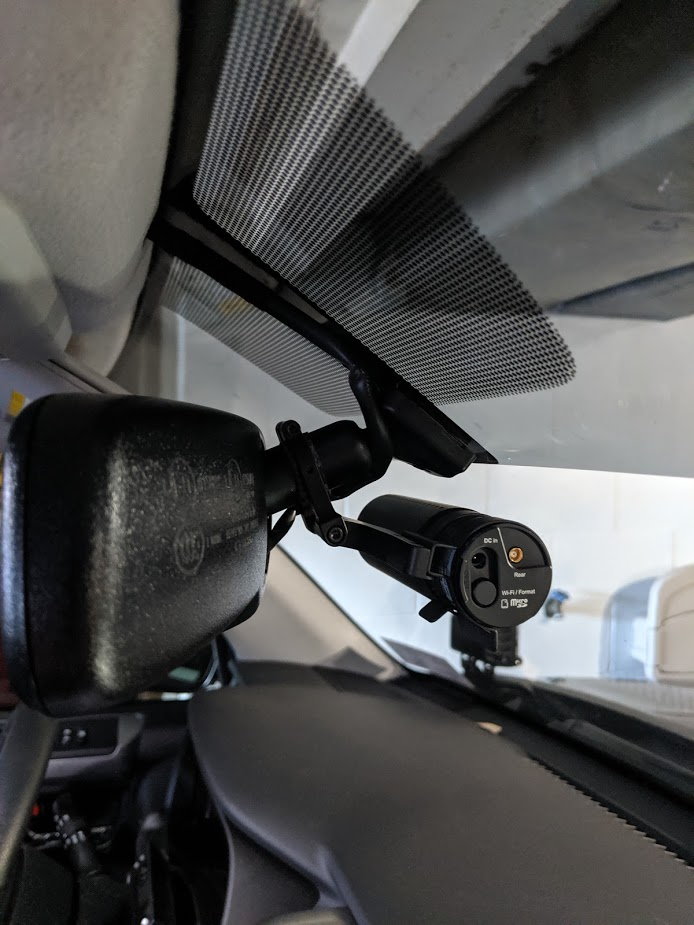
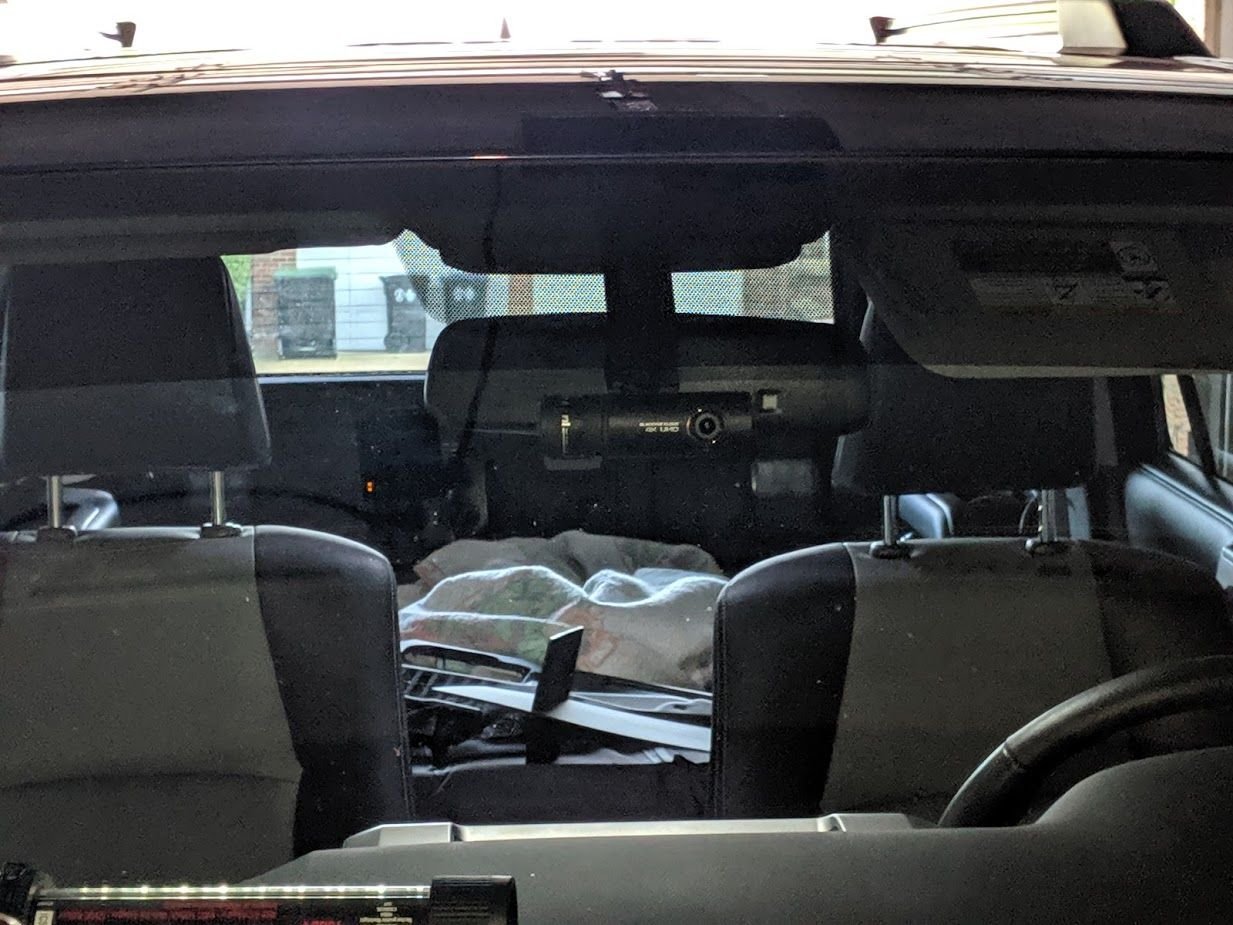
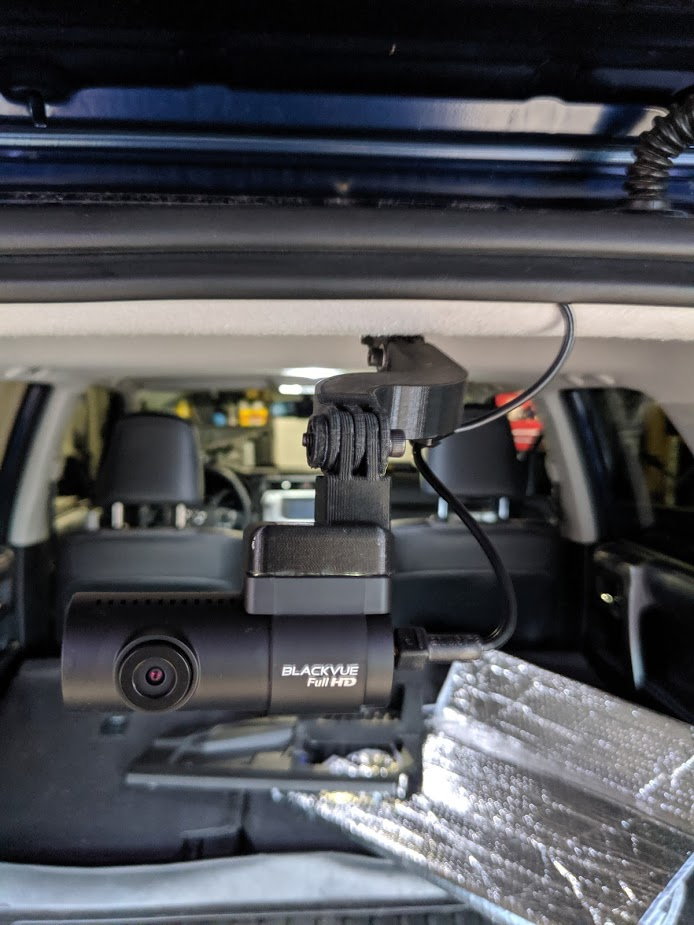
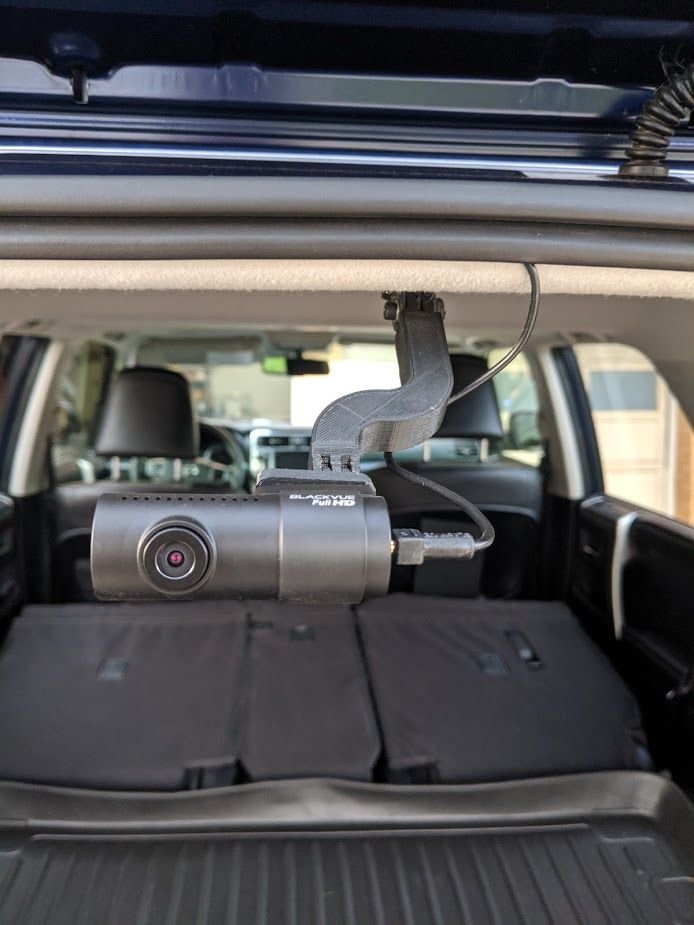
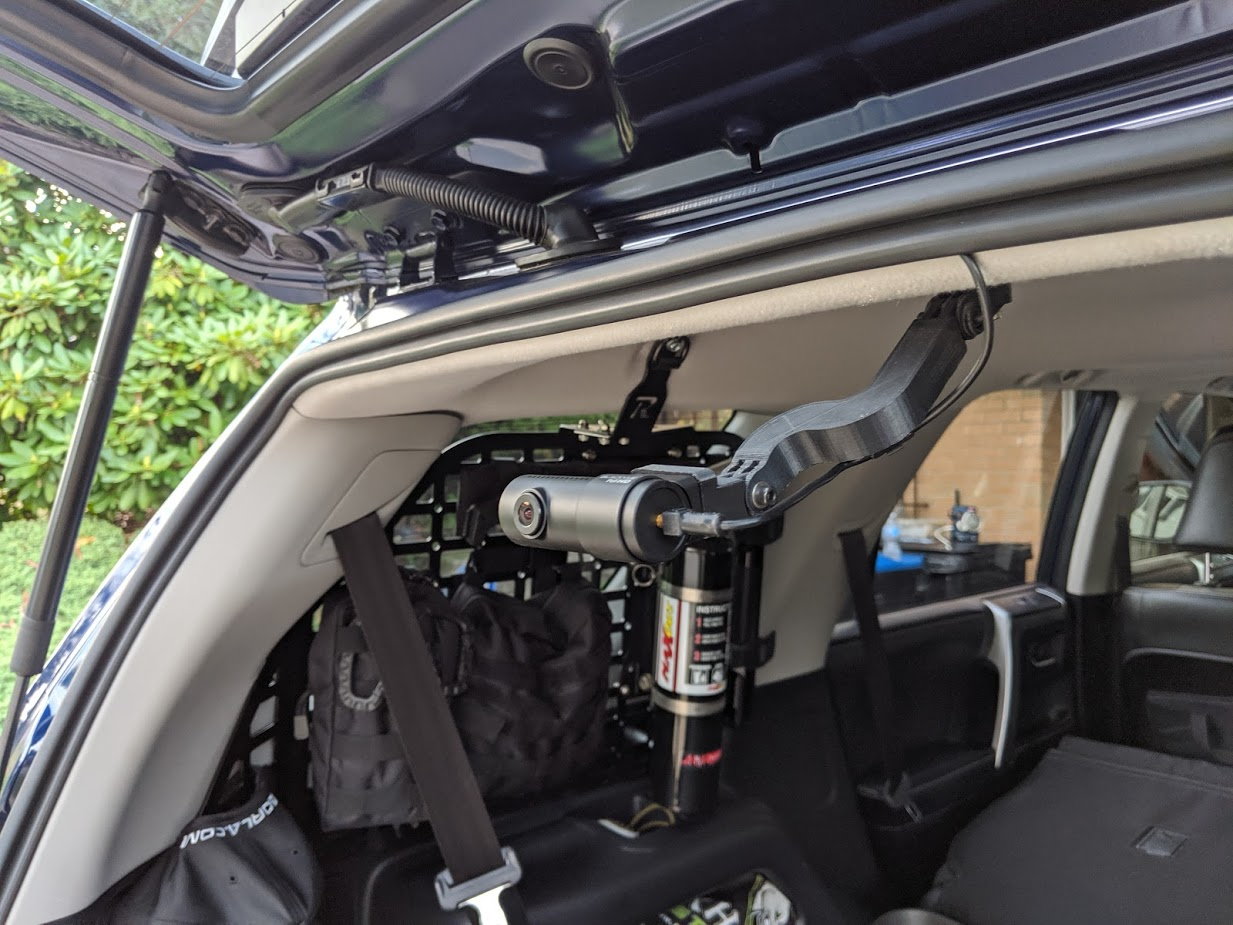
I also spent big money on a blend mount for the rear view mirror. This thing was a HUGE pain in the ass to install, but so worth it to stealthily hide the dash cam. The rear mount was the 3D printed one from this thread

img_20190830_161221_c1a519ecda9e7962c1b0e0bc77b65ba8971095c7.jpg


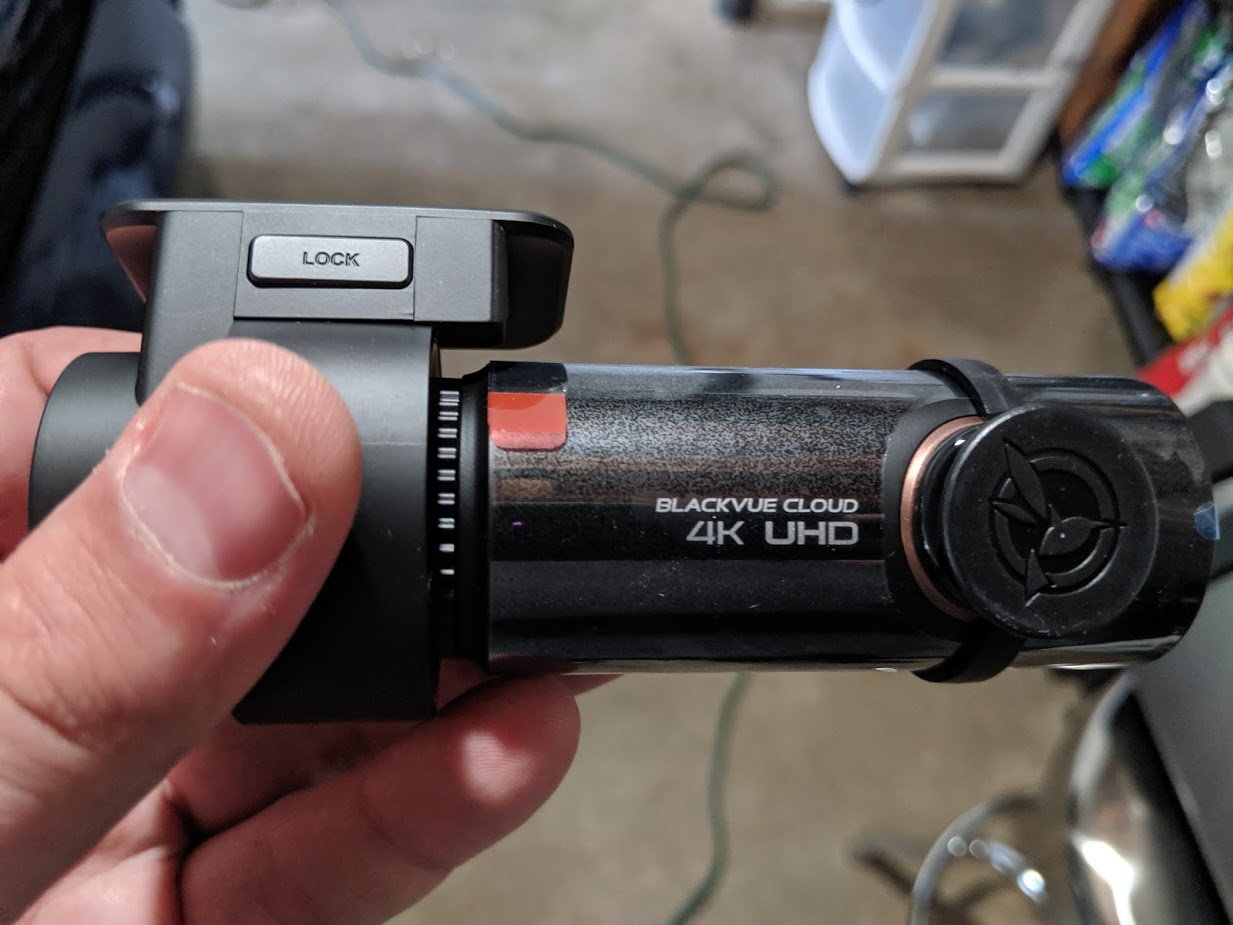
And here's the new fancy camera

img_20190830_162630_5958810ddf5a8774779a2a444605649f9f85a5b1.jpg


Here's the camera mounted up to the rear view mirror. I didn't like how low the camera hung down with the middle piece in the bracket so I removed it to raise the camera up more behind the mirror.

img_20190830_172035_335b8d6aad86131709f25e7faac73c52e0b59516.jpg


And here's the camera all installed. It took me an hour and a half of fighting with the blend mount to get it where I wanted, but I had never worked with one before.

img_20190830_172047_7d271ae31b403d241053fdd67e6c84c90cd75d7b.jpg


I didn't take any pics of fishing the wire back, but it was actually very quick and easy. Here's the rear camera all mounted up.

img_20190830_185413_fb5c803cd7981f9baafe1b5e96f5aae5003d0fde.jpg


After playing with it I got it situated to where it should go

img_20190924_182732_1__090930e1be469e437ffc44ddc610c2862d68bcab.jpg


img_20190924_182741_1__2aa9bf33e949b3e54b12702c8d8eba9f75b8cd09.jpg


I also bought this fancy backup battery so that the camera can record in parking mode without having to draw on the car's battery.

img_20190926_195329_fd91b081716e4a3eb05c9392d178f8365ac3ec8a.jpg


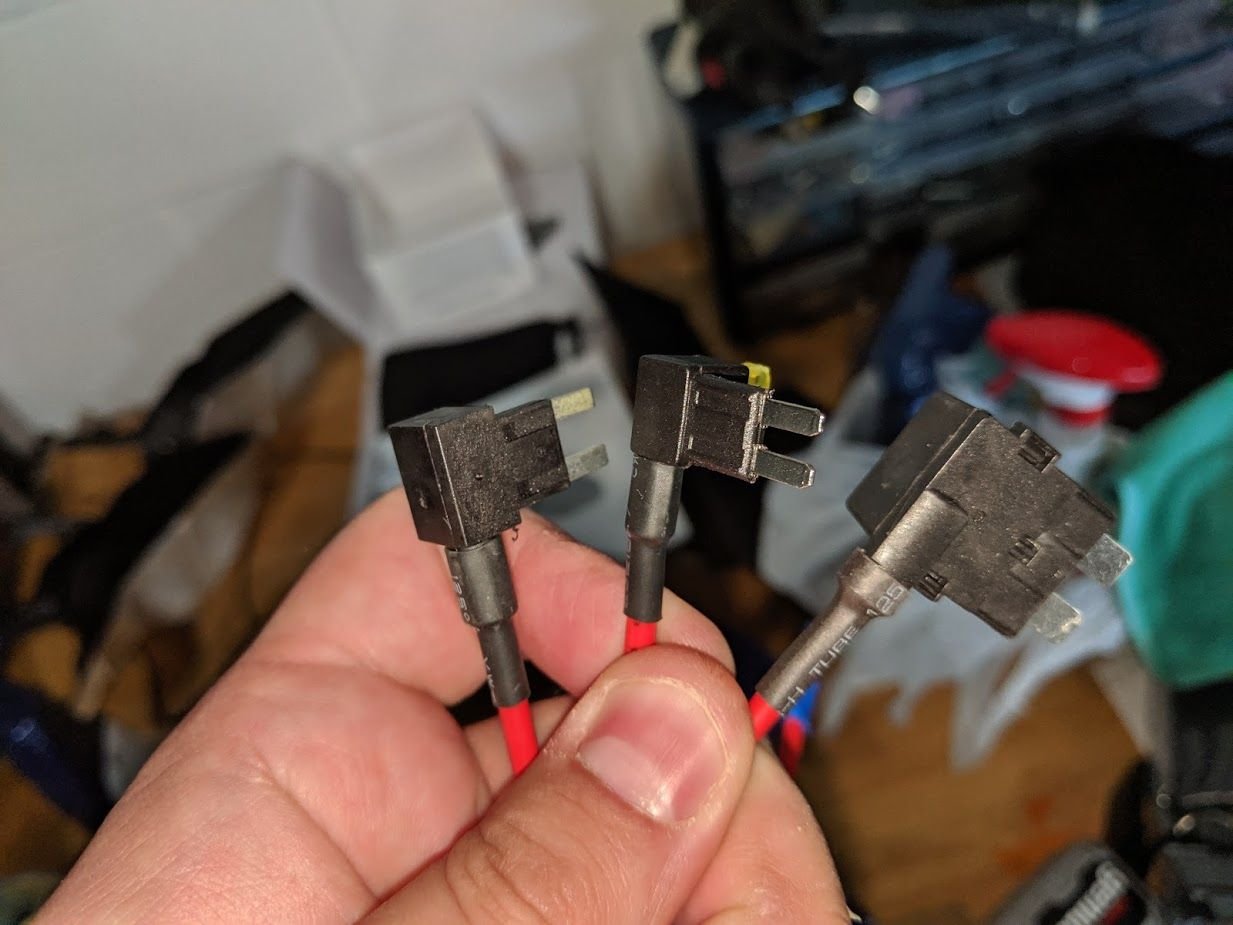
One thing that set back my install was they provided 3 types of fuse taps, but not the kind I need for my truck. My truck uses the low profile blade fuses, I had the same problem when I tried to install my amber grille lights back in the day.

img_20190914_171936_c40ec2ceecd7d9af770d271e01bf982d34c2d1d8.jpg


Here's the fuse tap all installed, it's the one to the right with the yellow fuses. I needed a 20 amp circuit that only came on when the key/ACC was on, so I tapped the heated seats circuit. I was able to fish the wires up behind the dash and get the positive and negative completely out of the way of my foot when I hit the e-brake. This is the hardwire for the battery power to charge and activate when the car is started.

img_20190926_195819_3653cbbdf53e8eb48a36fea8ccf9c2396b90d3e5.jpg


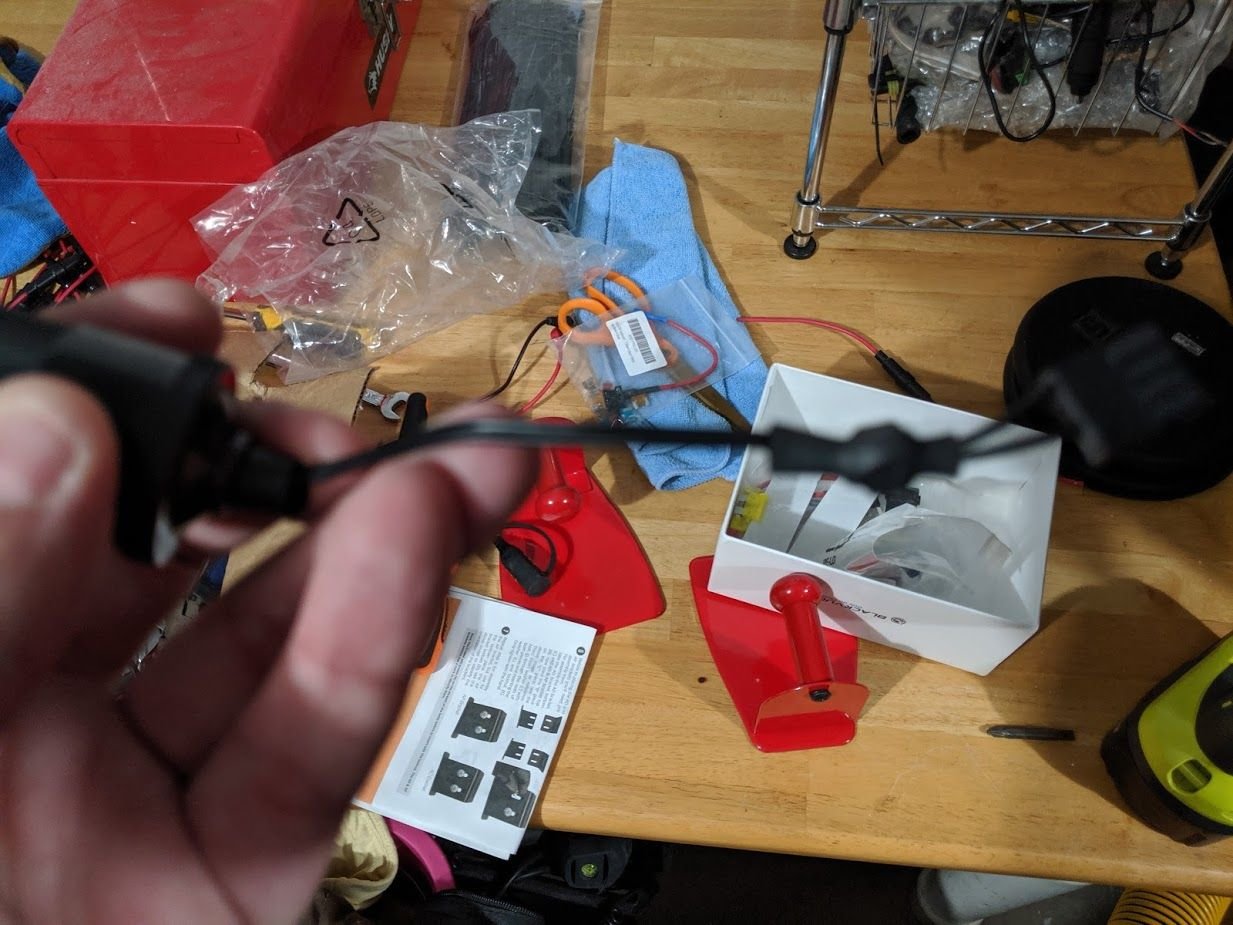
The dash cam power comes from cigarette lighter plugs, male on the camera power and this female connector coming out of the battery unit.

img_20190926_200048_73970b1a08706a3f7e4119801970e637ab11b839.jpg


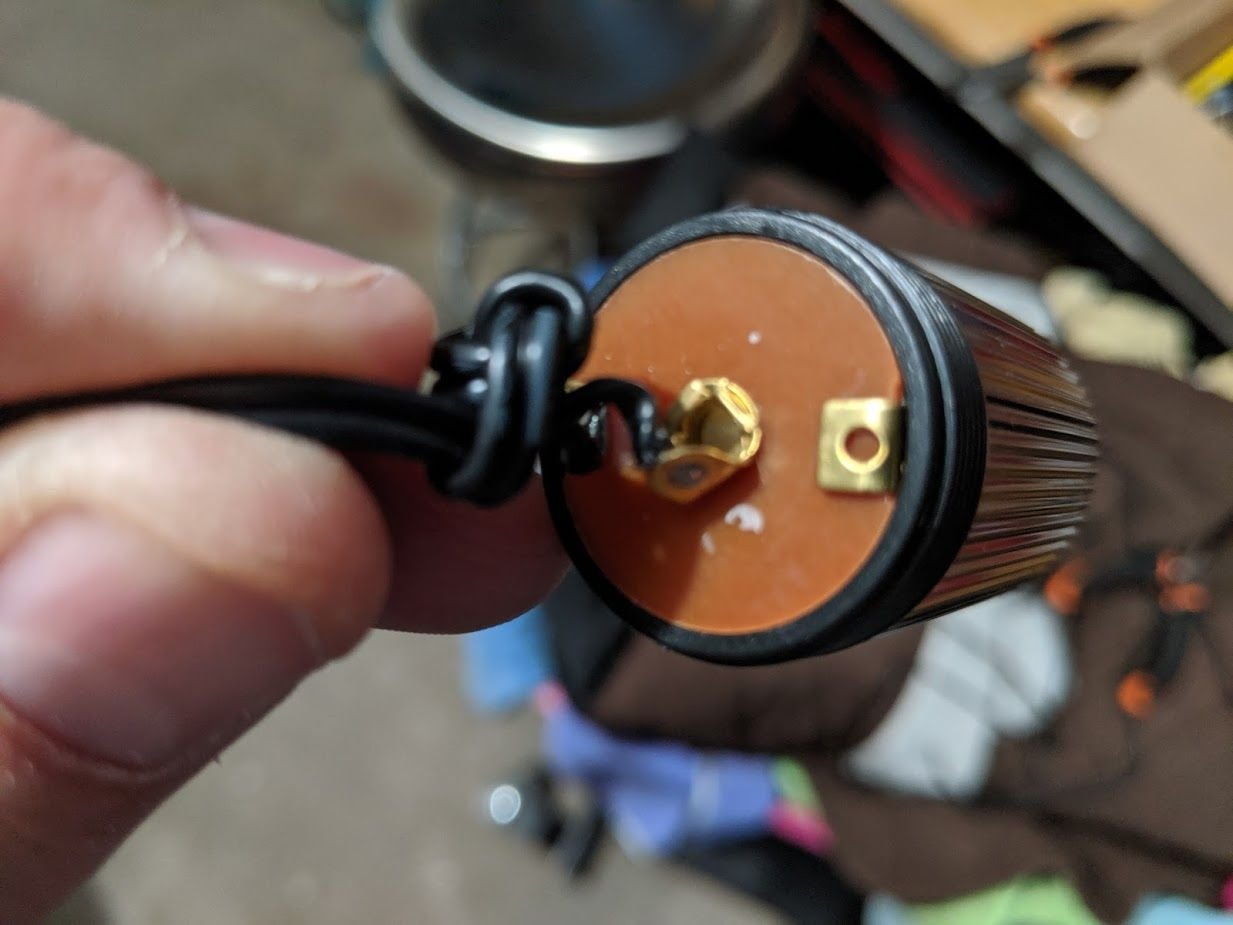
I didn't want to have to hide the bulky cigarette lighter plugs, so I hacked them up.I tested which wire was positive and negative and then I cut the plugs up.

img_20190926_200452_ddd4799c0816784e8fdd69b35a7799aeca2bf82d.jpg


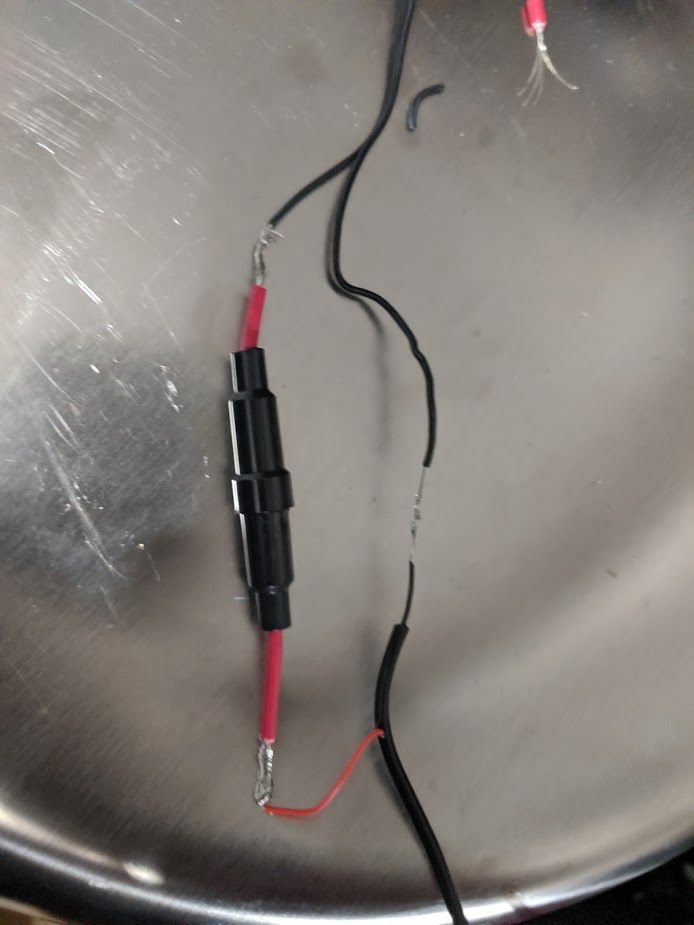
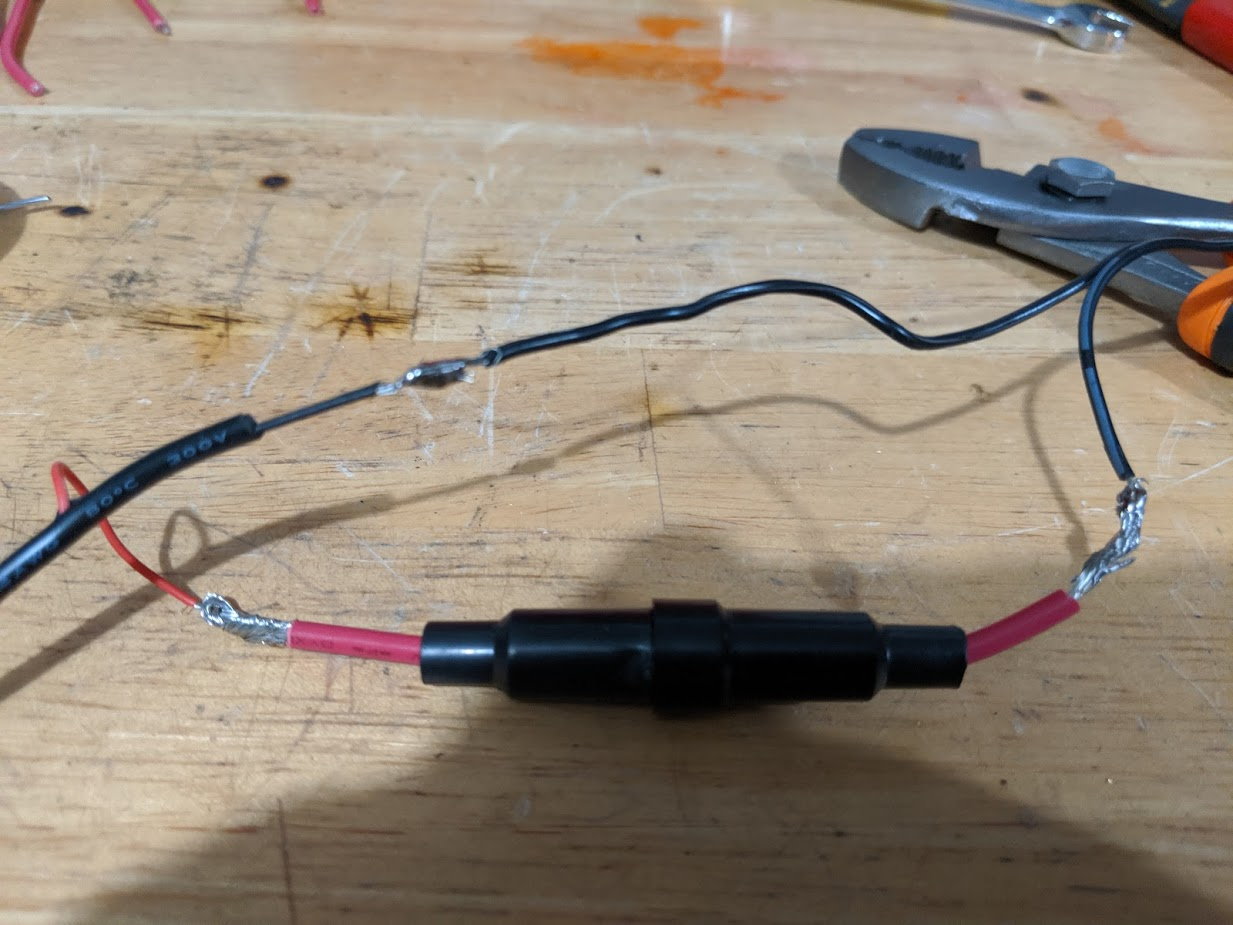
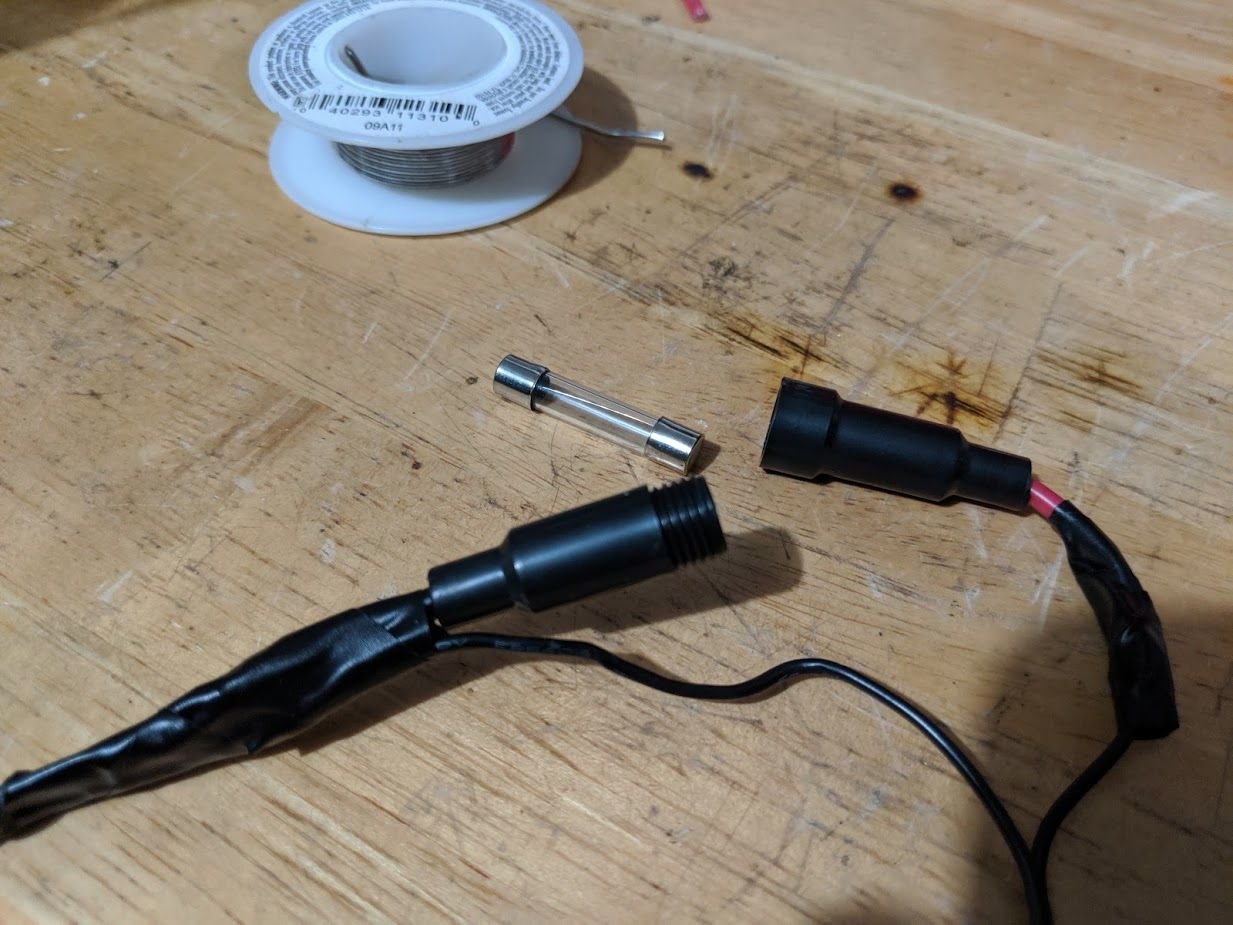
The 12v cigarette lighter plug had a built in glass fuse, so I got a fuse holder to take care of that. Here I spliced that into the positive wire.

img_20190926_201419_0cd04526548bcba7cd9cf4bece5e69022fede404.jpg


Then I soldered it up.

img_20190926_202100_746f6c82f6df05f02c8896ebe722ed718cf628b4.jpg


And here's the fuse all ready to be installed. I hooked everything

img_20190926_202500_cd7c3299cfbbd8028374ce5dfa1b233547ca4a00.jpg


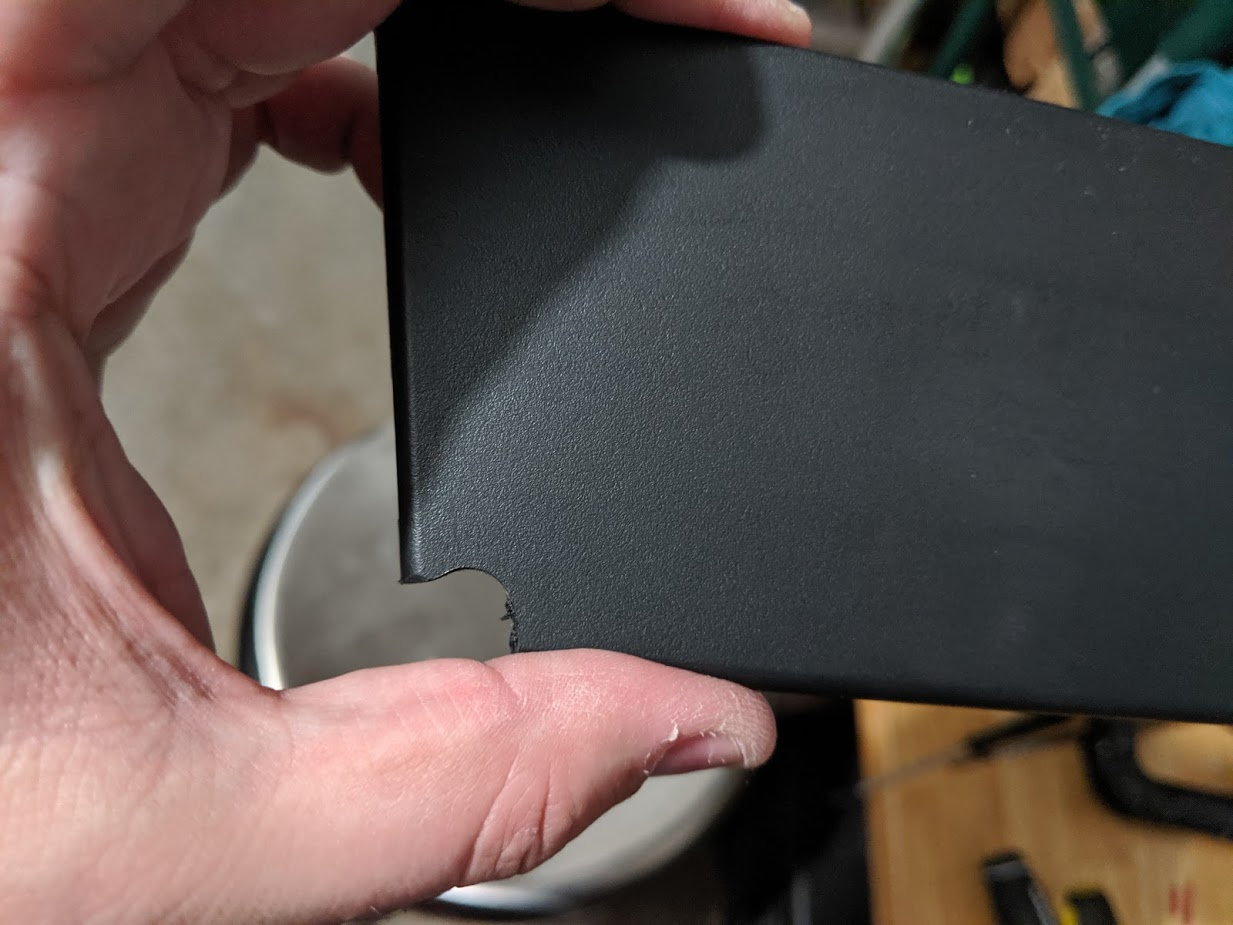
In order to hide the wires I tucked the excess in behind the dash, and trimmed a corner of the glove box panel to better feed the wires. I had my iPod wire running through here and it was being pinched.

img_20190926_204707_06677784a8e9ab3ec010d2a8383f0415b1ed2238.jpg


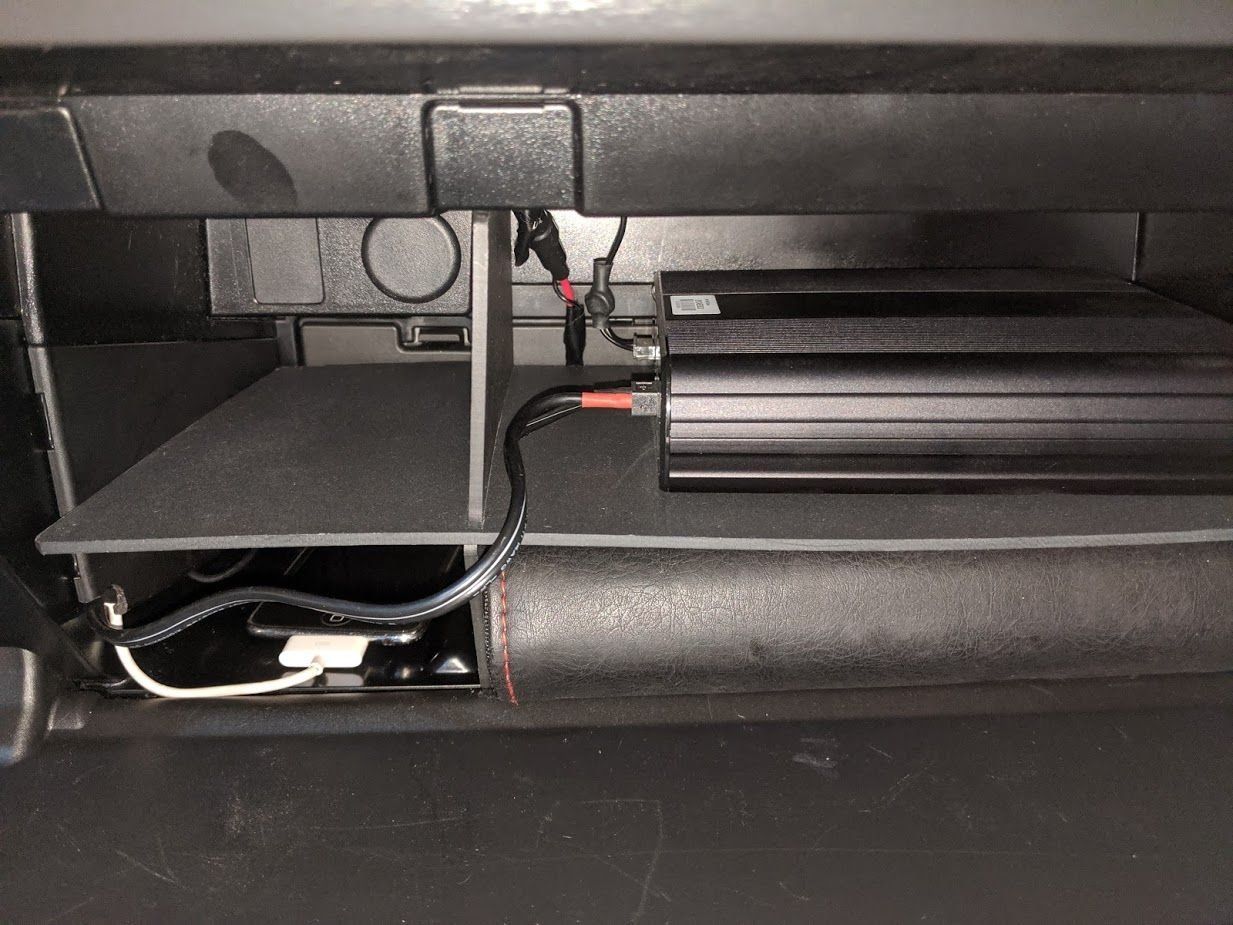
Here's the battery all installed. I plan to reroute the wires through the cigarette plug grommet to the left, but I will have to take the glove box out to do that. I wanted to try everything out before completely burying the wires. Still came out pretty clean

img_20190926_205528_d6eedf9d20697c61e9aaeed5becf885e003a0b35.jpg


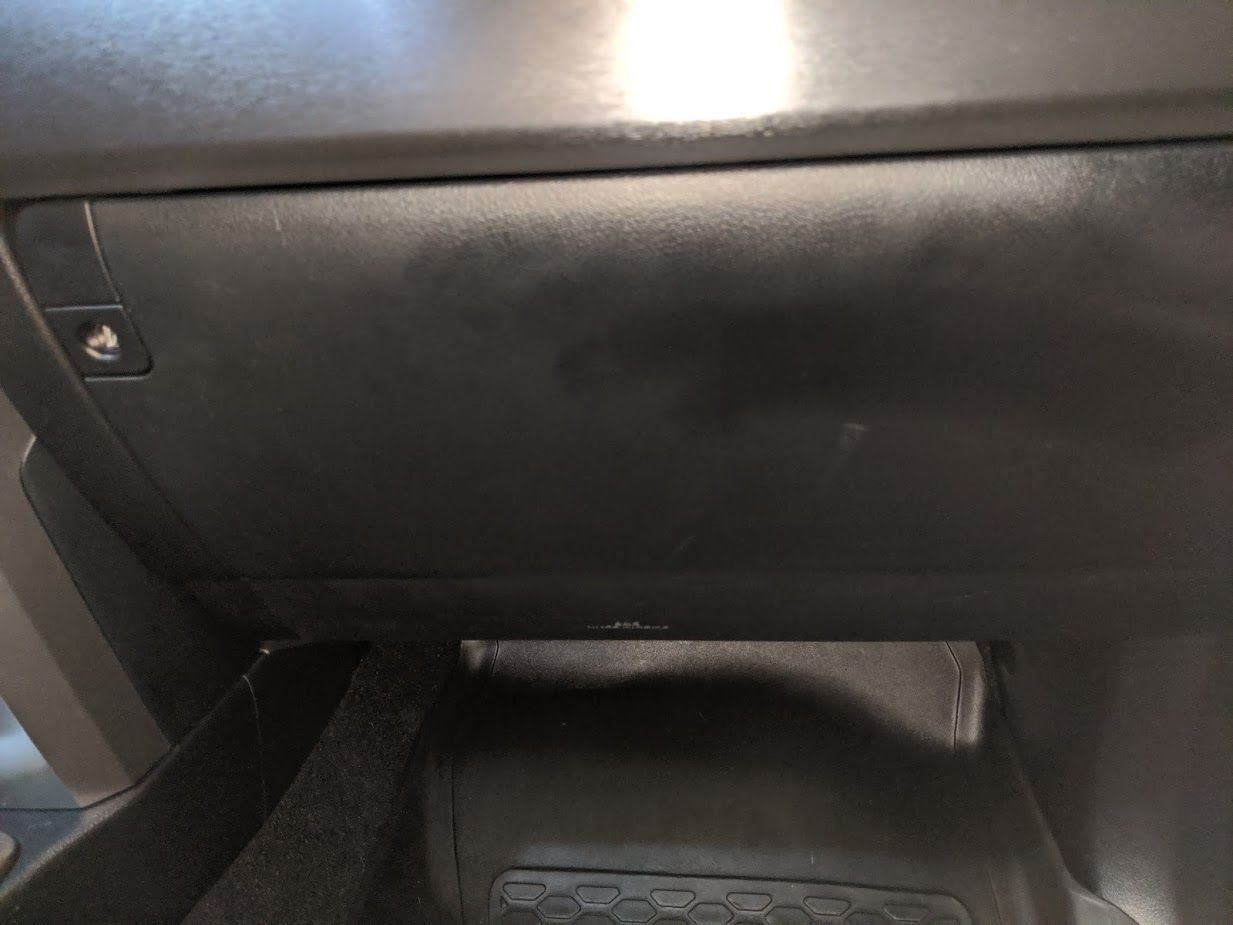
And here's the glovebox closed, you can't see any wires sticking out anywhere.

img_20190926_205616_daaaa4be1bd6b82eb0a22099308168e43f6dc3df.jpg
 
Is anyone making that mount for the rear yet for people who don't have a printer like that? Also the screw info would be great too. I am willing to pay for it. Thanks!
 
This is a fantastic write up, nicely done! Sorry it took me 4 months to see it...

Are you happy with the rear mount, has it lived up to expectation over the past four months?

Got my Blackvue 2 channel 4K dash cam installed with the backup battery. Wanted to share some pics from my install

img_20190830_154223_93125f4a0c7bde09f2f945c5fdb4acb7f86b8314.jpg


I didn't want to mount the battery under the seat so the glovebox was the most logical. Here's a before.

img_20190830_160324_a0106afd77a7a9eb950b39c0db037642ba12b0ac.jpg


I also spent big money on a blend mount for the rear view mirror. This thing was a HUGE pain in the ass to install, but so worth it to stealthily hide the dash cam. The rear mount was the 3D printed one from this thread

img_20190830_161221_c1a519ecda9e7962c1b0e0bc77b65ba8971095c7.jpg


And here's the new fancy camera

img_20190830_162630_5958810ddf5a8774779a2a444605649f9f85a5b1.jpg


Here's the camera mounted up to the rear view mirror. I didn't like how low the camera hung down with the middle piece in the bracket so I removed it to raise the camera up more behind the mirror.

img_20190830_172035_335b8d6aad86131709f25e7faac73c52e0b59516.jpg


And here's the camera all installed. It took me an hour and a half of fighting with the blend mount to get it where I wanted, but I had never worked with one before.

img_20190830_172047_7d271ae31b403d241053fdd67e6c84c90cd75d7b.jpg


I didn't take any pics of fishing the wire back, but it was actually very quick and easy. Here's the rear camera all mounted up.

img_20190830_185413_fb5c803cd7981f9baafe1b5e96f5aae5003d0fde.jpg


After playing with it I got it situated to where it should go

img_20190924_182732_1__090930e1be469e437ffc44ddc610c2862d68bcab.jpg


img_20190924_182741_1__2aa9bf33e949b3e54b12702c8d8eba9f75b8cd09.jpg


I also bought this fancy backup battery so that the camera can record in parking mode without having to draw on the car's battery.

img_20190926_195329_fd91b081716e4a3eb05c9392d178f8365ac3ec8a.jpg


One thing that set back my install was they provided 3 types of fuse taps, but not the kind I need for my truck. My truck uses the low profile blade fuses, I had the same problem when I tried to install my amber grille lights back in the day.

img_20190914_171936_c40ec2ceecd7d9af770d271e01bf982d34c2d1d8.jpg


Here's the fuse tap all installed, it's the one to the right with the yellow fuses. I needed a 20 amp circuit that only came on when the key/ACC was on, so I tapped the heated seats circuit. I was able to fish the wires up behind the dash and get the positive and negative completely out of the way of my foot when I hit the e-brake. This is the hardwire for the battery power to charge and activate when the car is started.

img_20190926_195819_3653cbbdf53e8eb48a36fea8ccf9c2396b90d3e5.jpg


The dash cam power comes from cigarette lighter plugs, male on the camera power and this female connector coming out of the battery unit.

img_20190926_200048_73970b1a08706a3f7e4119801970e637ab11b839.jpg


I didn't want to have to hide the bulky cigarette lighter plugs, so I hacked them up.I tested which wire was positive and negative and then I cut the plugs up.

img_20190926_200452_ddd4799c0816784e8fdd69b35a7799aeca2bf82d.jpg


The 12v cigarette lighter plug had a built in glass fuse, so I got a fuse holder to take care of that. Here I spliced that into the positive wire.

img_20190926_201419_0cd04526548bcba7cd9cf4bece5e69022fede404.jpg


Then I soldered it up.

img_20190926_202100_746f6c82f6df05f02c8896ebe722ed718cf628b4.jpg


And here's the fuse all ready to be installed. I hooked everything

img_20190926_202500_cd7c3299cfbbd8028374ce5dfa1b233547ca4a00.jpg


In order to hide the wires I tucked the excess in behind the dash, and trimmed a corner of the glove box panel to better feed the wires. I had my iPod wire running through here and it was being pinched.

img_20190926_204707_06677784a8e9ab3ec010d2a8383f0415b1ed2238.jpg


Here's the battery all installed. I plan to reroute the wires through the cigarette plug grommet to the left, but I will have to take the glove box out to do that. I wanted to try everything out before completely burying the wires. Still came out pretty clean

img_20190926_205528_d6eedf9d20697c61e9aaeed5becf885e003a0b35.jpg


And here's the glovebox closed, you can't see any wires sticking out anywhere.

img_20190926_205616_daaaa4be1bd6b82eb0a22099308168e43f6dc3df.jpg
 
Last edited:
I can't speak to the 900S being a worthwhile upgrade, because I haven't owned the 750S but my 900S has been working very well for a year or so. I'm a satisfied customer.

Bumping this topic. How's everyones DR900S so far? For those that had the DR750, was it worth the upgrade?
 
I just saw your post, sorry about the delay.

I designed the rear dashcam mount in the thread above and printed the one 97BlackAckCL used in his vehicle.

I'll be happy to print the parts for you but I am afraid I don't have any more of the screws I used and I don't recall the dimensions, but a little trial and error is all it should take to get something that works well.

I'll be happy to print and ship the three printed parts and the hardware that connects them for $40.

Is anyone making that mount for the rear yet for people who don't have a printer like that? Also the screw info would be great too. I am willing to pay for it. Thanks!
 
This is a fantastic write up, nicely done! Sorry it took me 4 months to see it...

Are you happy with the rear mount, has it lived up to expectation over the past four months?

Yes, I'm still loving the mount. I wish it didn't hang down so far, but I love that you designed it to reach to the area that the rear wiper clears. I actually just hit my rear camera with a bag of dog food the other day by accident and the mount held steady. I was able to put everything right back where it belonged with no issues.
 
I just saw your post, sorry about the delay.

I designed the rear dashcam mount in the thread above and printed the one 97BlackAckCL used in his vehicle.

I'll be happy to print the parts for you but I am afraid I don't have any more of the screws I used and I don't recall the dimensions, but a little trial and error is all it should take to get something that works well.

I'll be happy to print and ship the three printed parts and the hardware that connects them for $40.

Just FYI the screw you sent me didn't work anyway, I had to dig around my tool box and find a random screw that did fit. Like you said just some trial and error
 
Yes, I'm still loving the mount. I wish it didn't hang down so far, but I love that you designed it to reach to the area that the rear wiper clears. I actually just hit my rear camera with a bag of dog food the other day by accident and the mount held steady. I was able to put everything right back where it belonged with no issues.

That's fantastic to hear! It does hang down a bit, but I couldn't think of another way to get a decent picture out the back. I bump mine every now and again, but like you, I just bend it back, so far it doesn't seam any worse for the wear.

I'm sorry the screw didn't work, I'm guessing that given it's just a stamped piece of steel in there that was never meant to be threaded they must have very forgiving tolerances.
 
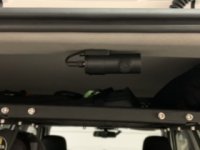
I just used the factory mount and screwed it into the headliner clip. No issues, out of the way, and not obstructed while recording.
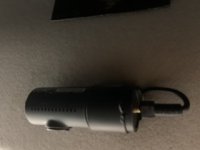
I’ll try to get some pics from the rear view mirror view and recording view tomorrow.
 

Attachments

  • 3D41DE49-B1A4-4524-802C-70BBF3D1B4B3.jpeg
    3D41DE49-B1A4-4524-802C-70BBF3D1B4B3.jpeg
    17.2 KB · Views: 833
  • D22CB2BF-EDE5-404E-9156-E7ECDEB6FC4F.jpeg
    D22CB2BF-EDE5-404E-9156-E7ECDEB6FC4F.jpeg
    10.3 KB · Views: 799
  • AF54B63D-7B1D-434A-BF98-902C87E6190E.jpeg
    AF54B63D-7B1D-434A-BF98-902C87E6190E.jpeg
    14.5 KB · Views: 805

Members online

Forum statistics

Threads
278,316
Messages
3,554,120
Members
248,016
Latest member
Advally Service

Trending content

Back
Top