nglayton's Mod Thread

Lots of awesome info in here, thank you for documenting!

In term of exterior appearance our trucks could be nearly twins. How are you keeping your tire lettering so white??
 
Lots of awesome info in here, thank you for documenting!

In term of exterior appearance our trucks could be nearly twins. How are you keeping your tire lettering so white??

Well I would like to say that I'm doing something special but I am not.

I get it washed every couple weeks at any number of local car washes. Most of which have some sort of tire cleaning brush or one of the higher end places does do some tire dressing work.

When I was younger and had lots of time and no money, I used straight up laundry bleach and a brush to keep my raised white letters nice and bright. Now that I have no time and more money......I have never done that on my 4R.
 
Last edited:
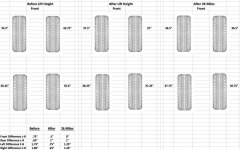
Updated lift info

Here's an updated set of measurements on my lift after a couple of off road trips, 2 months and a little over 2000 miles.

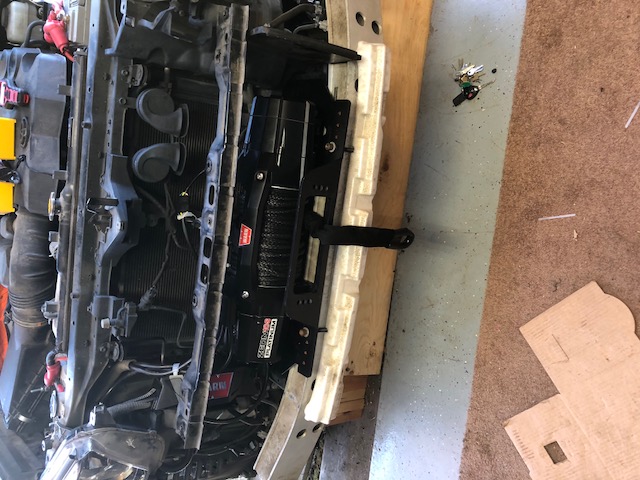
It's also worth noting I did install a Warn ZEON Platinum-S winch during these 2000 miles between measurements. Interestinging it even out the front L-R and took about a 1/2" off the front overall lift. I guess 75 lbs will do that.
 

Attachments

  • lift measurements.jpg
    lift measurements.jpg
    95.5 KB · Views: 1,840
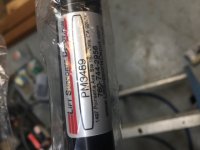
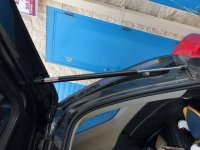
Lift Gate strut replacement

If you have a blown strut you will know, one strut will not hold up your hatch!

In my case they were getting weak and the hatch would not stay all the way up. So I figured this was a cheap enough fix.

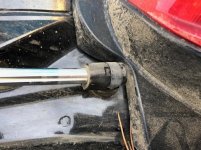
I only took a couple quick pics, but just wanted to post what I used here for anyone doing a search.
I bought these from Amazon 4Runner Lift Gate Struts


I saved the end clips off the old ones and used them on the new ones. This is a 2 person job. The new struts come with the holes lined up straight, you will need to attach one end and rotate the strut 90 degrees so you can attached the other end.


They work like a charm, now my hatch stays up approx another 4" and I don't walk into it any more! :D
 

Attachments

  • IMG_1040.JPG
    IMG_1040.JPG
    78.8 KB · Views: 1,758
Last edited:
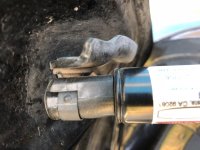
A few more pics

I took a few more pics to show the clips and how the ends are turned 90 degrees from each other. Please forgive the dirt, I just got back from a week of deer hunting.
 

Attachments

  • IMG_0061.jpg
    IMG_0061.jpg
    94.7 KB · Views: 1,714
  • IMG_0062.jpg
    IMG_0062.jpg
    82.1 KB · Views: 1,754
  • IMG_0063.jpg
    IMG_0063.jpg
    118.2 KB · Views: 1,706
Hidden Winch Install

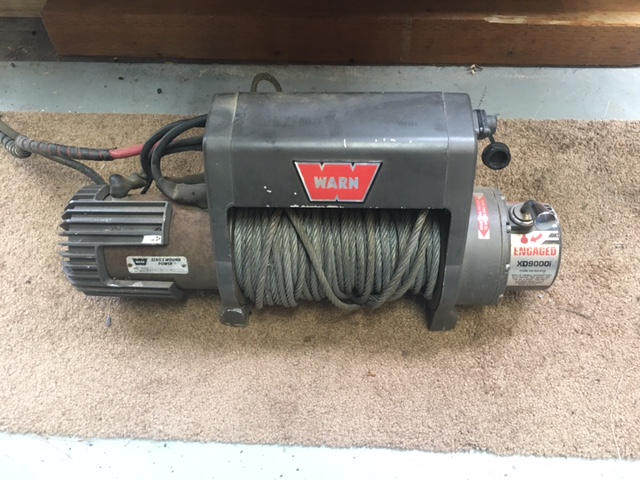
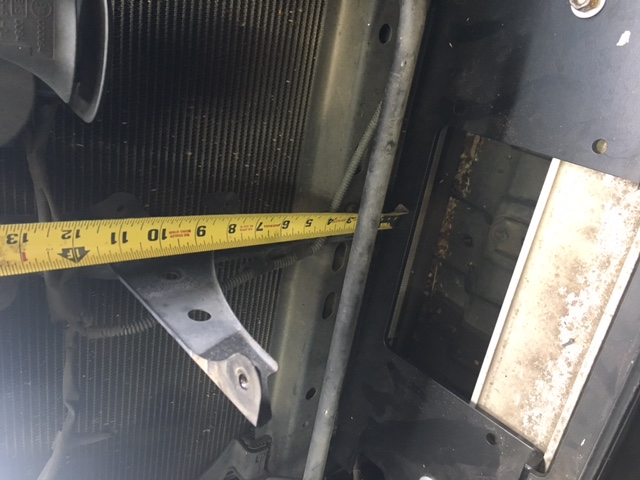
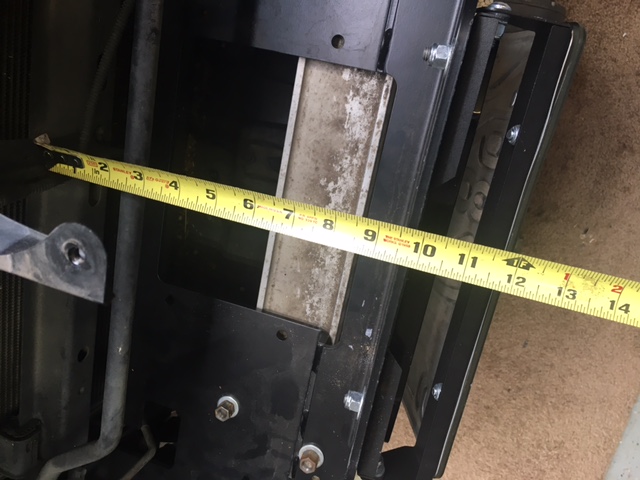
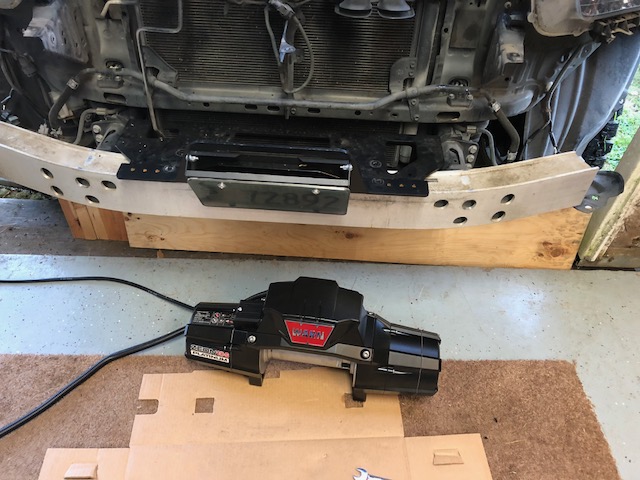
Okay so my goal for this mod was to install this XD9000i from my 3rd Gen on to the hidden winch mount.
IMG_1029.jpg


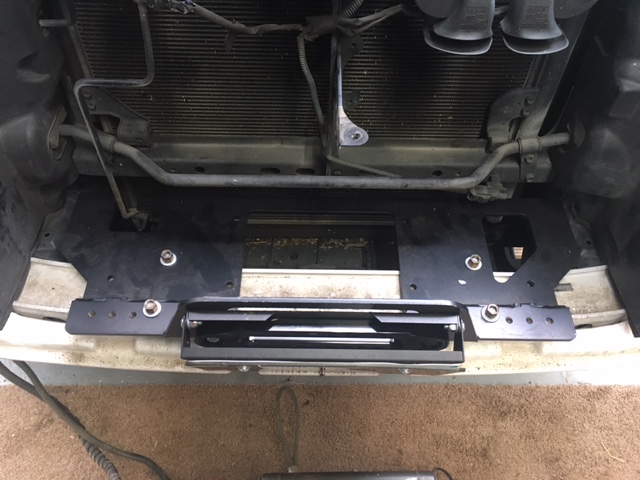
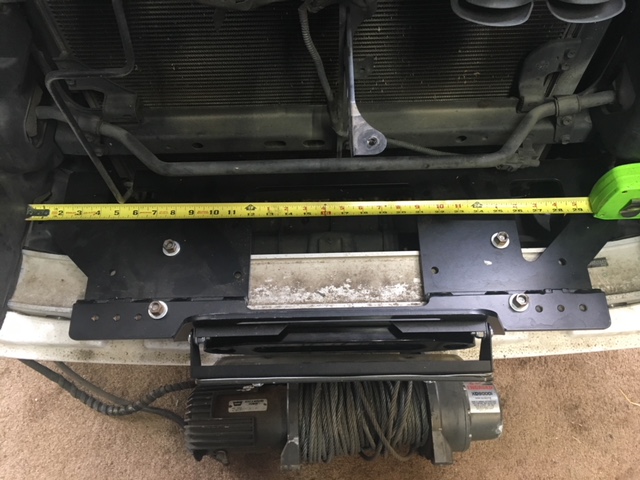
I started by measuring all the space I had.
I quickly figured out it wouldn't even be close to fitting.

IMG_1030.jpg


Looks plenty wide enough.....
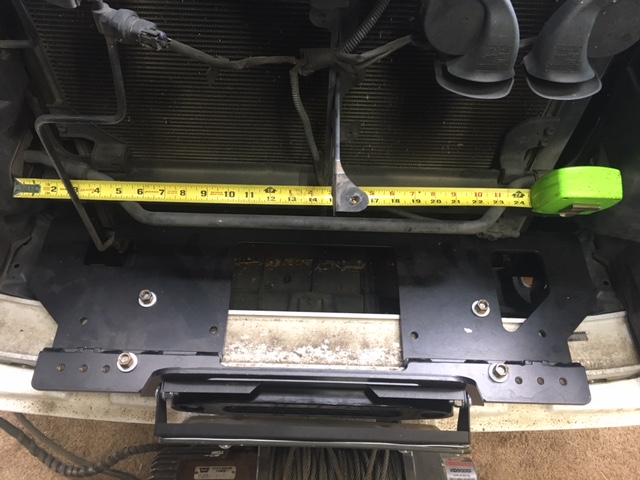
IMG_1031.jpg


I included the tape so if anyone was curious about the amount of space they could see it for themselves.
IMG_1032.jpg

IMG_1033.jpg


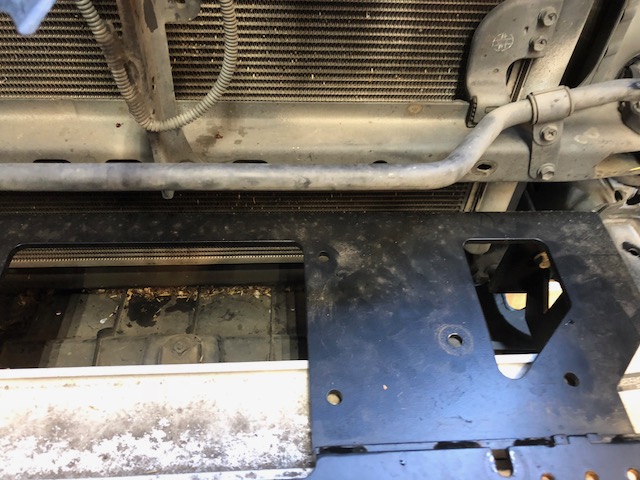
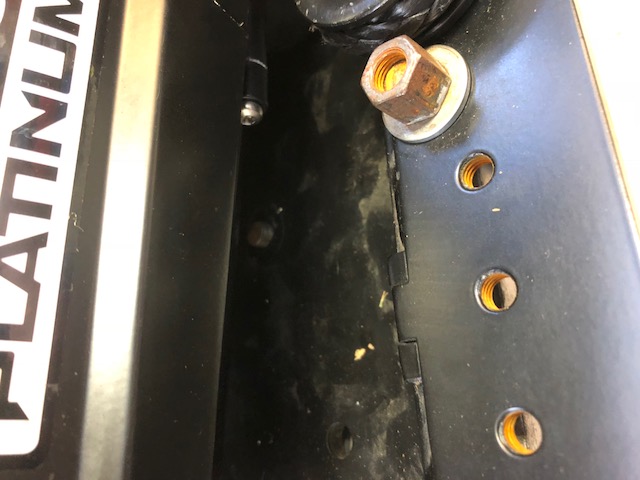
Basically the XD9000i is too tall to fit under the brackets that hold the hood latch and grill.
It is also too wide to clear the vertical air conditioning line running down.
IMG_1034.jpg


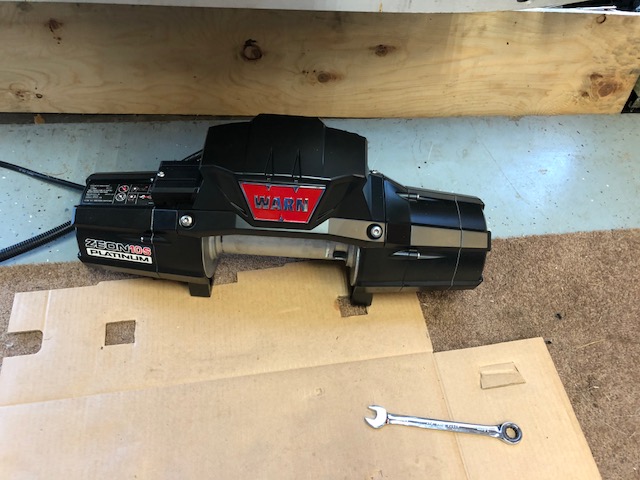
So I went with plan 'B' Not cheap, but damn nice!

IMG_0006.jpg

IMG_0007.jpg
 
Last edited:
Hidden Winch Install part 2

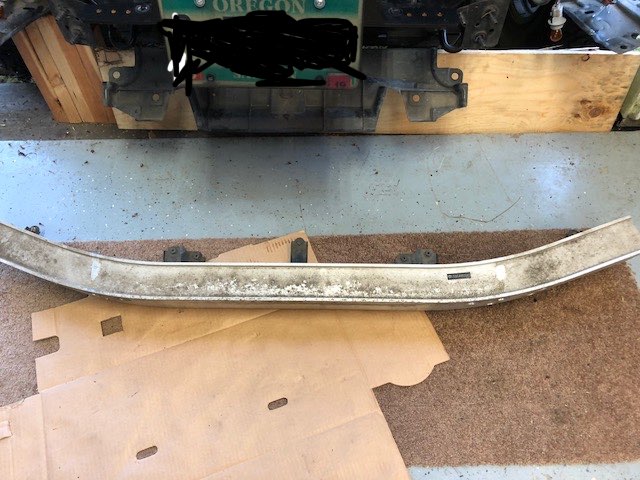
The first issue is in order to bolt the winch down you have to remove the OEM bumper.
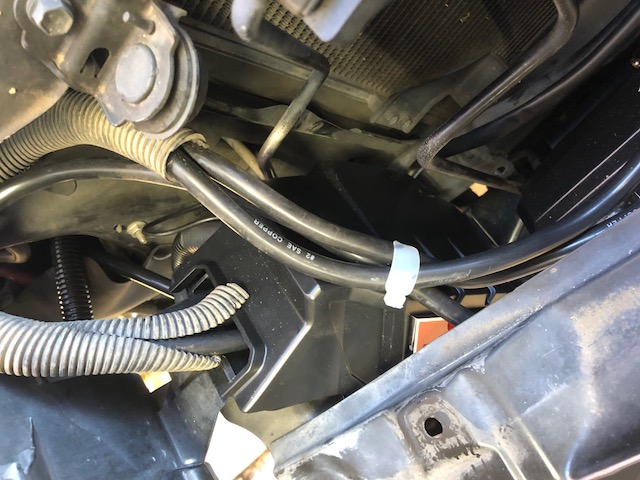
You also have to loosen all the brackets holding the power steering line (vertical line) to gain enough clearance to mount the winch. The line sticks to far forward and it has to be rolled up to get clearance.

I will eventually relocate this line up about 5 inches and remount it to in front of the radiator mounts.

IMG_0008.jpg

IMG_0010.jpg


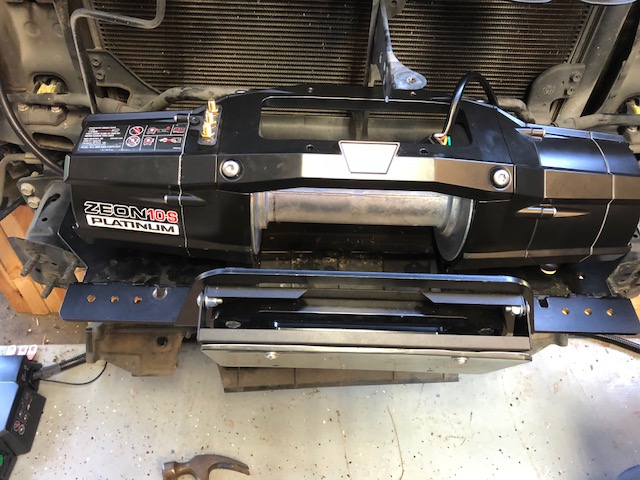
Once it is removed you can get the new winch mounted and get underneath to bolt it in place.
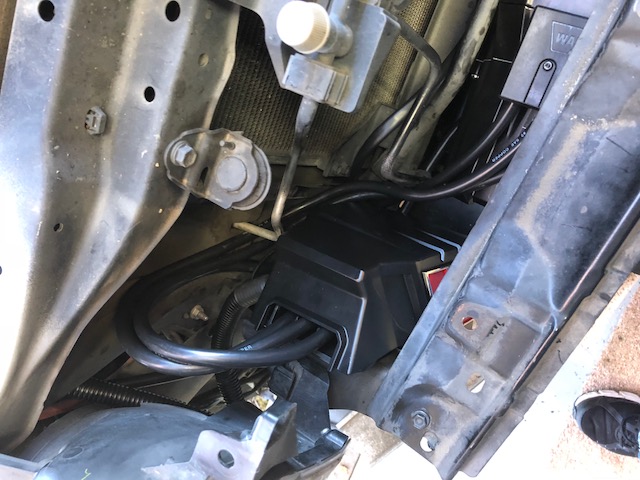
BTW there is no freaking way this new winch will fit without relocating the solenoid pack from the top to else where.
You can see I removed it.
IMG_0016.jpg


I had to loosen all the clamps holding the power steering cooler line so the winch would fit.

Once it's bolted in place, I started working on the wiring.

IMG_0017.jpg
 
Last edited:
Hidden Winch Install part 3

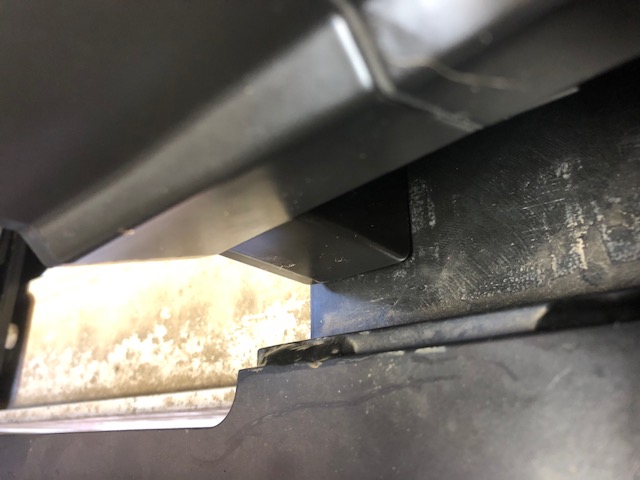
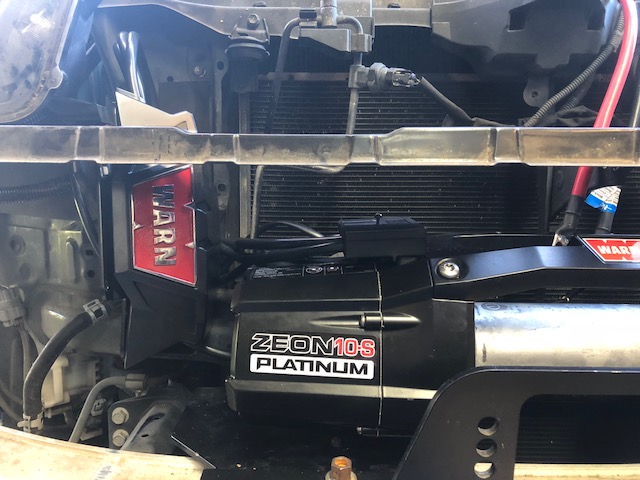
I'm pretty un-happy that the provided holes place the Warn Winch an inch back towards the radiator. This complicates the power steering cooler clearance and the A/C line clearance. I can only assume other winch brands need more space forward. It's possible to drill new holes, but I didn't have time to do this, so I just went with it for now. At some point I will circle back and decide what I really want to do with this. The main issue that needs solved is the power steering cooler line clearance.
IMG_0018.jpg


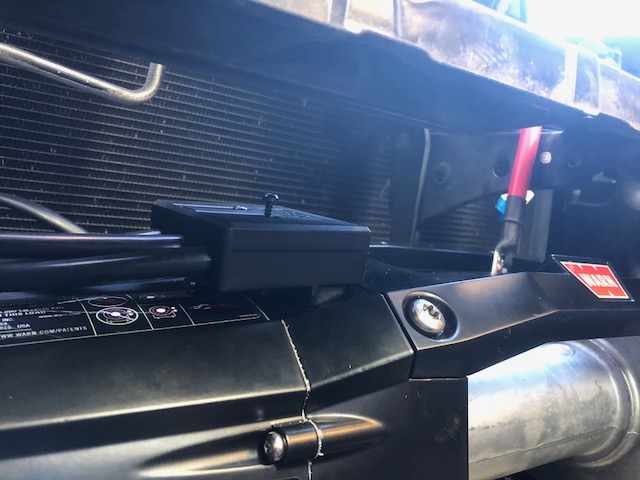
You can see that I mounted the solenoid on the left side. I'm not really happy with this location either. This will be eventually moved up into the engine bay for easier access. It has and on/off switch on the back side for the wireless remote. It also has terminal connections for lights on the back that are also controlled by the wireless remote.
IMG_0019.jpg


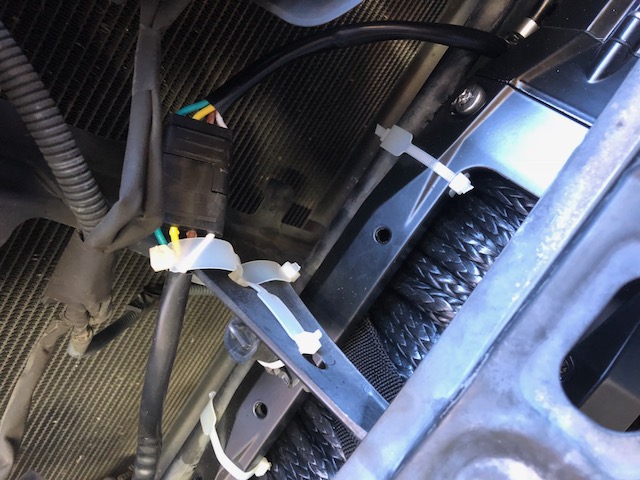
Using the relocation kit to run the control wires elsewhere.
IMG_0020.jpg

IMG_0021.jpg
 
Last edited:
Hidden Winch Install part 4

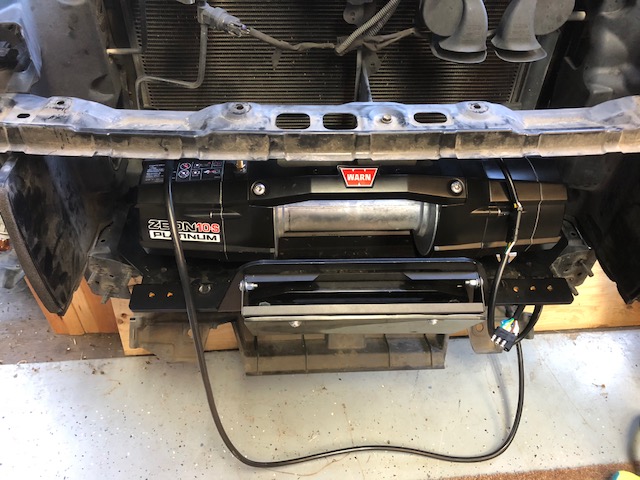
Here is it almost all done and fit in place
IMG_0022.jpg


I zip tied down all the wiring, as well as zip tying the power steering cooler down so it isn't flopping around.
IMG_0023.jpg

IMG_0024.jpg


The u-bolt that was clamping the bumper to winch mount is now useless, I left one side of it bolted but I will remove it later.
I could drill more holes to use it, but I also did not have time and it will have to be done later.
IMG_0025.jpg
 
Last edited:
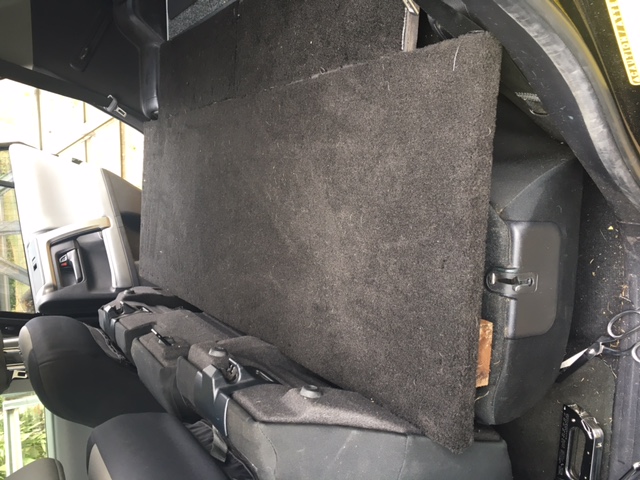
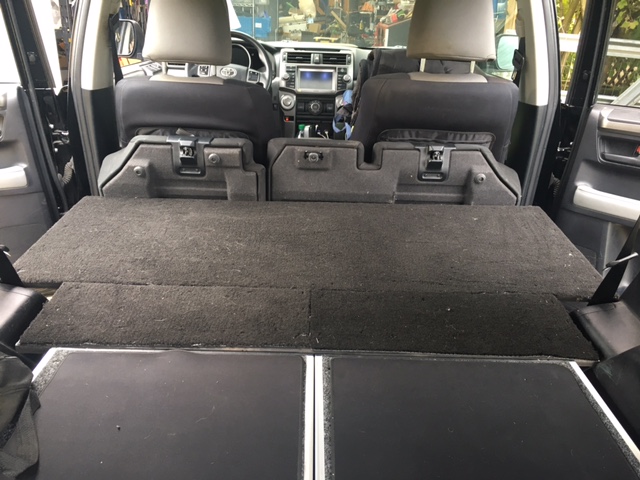
Being a tall guy, when I made the sleeping deck, I for some reason ran the front seats up all the way forward. I guess my thought was I at 6' 2" I needed as much length as possible to lay down with out really checking it. After driving around a couple days with the sleeping deck in I realized that I need the leg room while I'm driving more than I needed it in the back. Plus I can always run the seats forward again after I am out of the cab for the night.

This gave me an opportunity to change a couple things.

After running the seats back to where I was comfortable driving, I needed to trim 3" off the deck. So it is 28.5" deep instead of 31.5." I took 1" off the short side and 2" off the long side. What this really does is make the cutouts for the wheel wells 9" x 5.5" on each side. This gives me a much more finished look with out a few of the larger gaps in the corners between stuff.

My OCD also kicked on a little, so I also took the time to finish the carpet better, wrapping the corners and covering the bolts with carpet, spray paint the board, etc.


img_1027.jpg


img_1028.jpg


It looks a lot better now, plus I can install it and still drive :lookout: without getting a cramp.
Next time I yank it out I think I might make it a bit narrower, so I can just flip it up in to the back when I need the seats. As it is now, I have to pull it out walk it around and place it in back or remove it totally, by making it 1-2" narrower, I could just slip it back.


I went the simpler route bought a 3 inch memory foam queen size mattress and laid it in the back perfect nights sleep every time even with two shepherds back there with me. Heck almost to good to want to sleep in it instead of my bed at home :) i dont have to fight for covers or space
 
I went the simpler route bought a 3 inch memory foam queen size mattress and laid it in the back perfect nights sleep every time even with two shepherds back there with me. Heck almost to good to want to sleep in it instead of my bed at home :) i dont have to fight for covers or space

My problem was the drawers in the back made a 3.5" drop off with the seats down and I needed to make it more level for sleeping. Just packing that area with foam wasn't firm enough for me. I hate soft mattresses, they make my back sore every time.

When I sleep back there it's basically my standard camping setup. I have a couple of foam sleeping pads and then a sleeping bag and a wool blanket.

I need to find a couple of screens of some kind for window vents, and some type of window covers to block the light in the AM so I can sleep longer.

I love the little 3" of hidden space underneath as well, the valuables get packed under there. So even if a thief opens the back door they most likely will only see a shoe or a jacket shoved in on the edges and they will be in too big of a hurry to dig to the center and find anything valuable.

It makes packing up the back more efficient (quicker) as well. One long flat surface lets me slide stuff in much easier from the hatch.
 
Brakes Info

Basically posting this for my own record. Sorry no pics or how-to.

I've been doing brakes since high school. It doesn't hurt that my dad is/was a mechanic before he retired. Brakes are actually quite easy if you are even the least bit mechanically inclined. On disk brakes it's 2 bolts (17mm) to pull the caliper off, a C-clamp to squeeze the pistons back, swap out the pads and reassemble. On the front there are 2 more bolts (12mm &10mm) you can undo to give you a little more break line length to make working on the calipers easier. Then unhook the sensor wire and you are good to go. On the back there isn't a lot of extra line length but you can get the job done easy enough. No extra bolts, no need to unhook the sensor wires.

I just replaced the front and rear brake pads. 92264 miles on the original pads.
Not bad. I still had room left before any scraping so I could have easily gotten another 2-3k out of them, but decided to be better safe than sorry.

It took me less than 1 hour per wheel, really quick and easy. It was more like 40 minutes per side on the front, 1/2 hour per side for the rear. Three hours tops to do all four.

Parts used for my 2011 TE:
04465-60320 Front Brake pad set $42.12
04466-60140 Rear Brake pad set $44.85

There was no need to buy rotors, shim kits, new springs or anything but the pads. You always just re-use all the old gear. Only change to that would be if the rotors were scraped/warped beyond repair or you lost a pin, shim or spring.

I ordered the pads from trdparts.com, but they gave me extremely crappy service, so I wouldn't recommend them even if you save a few bucks. It's not worth that hassle.

They are actually about $3 cheaper from here McGeorge Toyota However not sure on shipping cost.

Here's a good deal saving another $5 or so on pads+new rotor bundles.

There's a great post here with all the part numbers

Just in case that post goes away:

Brake Parts
Front Rotor 43512-60191
Front Brake Pads 04465-60320
Front Shim Kit: 04945-60090
Front Caliper Pins: 47735-60300
Front Caliper Pin hold (Spring): 47743-60280
Front Caliper Springs (fitting kit): 04947-35050
Front Anti-Rattle Spring: 47748-35010 (not needed if using fitting kit?)

Rear Rotor 42431-60311
Rear Brake Pads 04466-60140
Rear Shim Kit: 04946-60141 / 04946-60140
Rear Caliper Fitting kit: 04947-22050

I Did Not Use these kits (Local Dealer quoted me these - they are more $$ with unneeded parts included)
Front Brake kit: 04465-AZ001-TM
Rear Brake kit: 04466-AZ004-TM

Here are some generic brake parts kits, that you should NOT need need either, but just in case.
Carlson 13600 Front Brake Disc Hardware Kit
ACDelco Hardware kits Front: 18K2113X
Rear: 18K822X

 
Last edited:
Stickers

At least I didn't throw them away......I'm sure now that I've started I won't be able to stop.
 

Attachments

  • stickers.jpg
    stickers.jpg
    139.3 KB · Views: 1,665
Ordering My 4Runner

This is my experience "ordering" one several years ago....

I "ordered" mine the day before xmas 12/24/10. A 2011 Black Trail with Nav. Dealer says, "no problem I'll find you one and get it here (Oregon) in 2 weeks!" After two weeks, they came back to me and said, um, there is no black TE w/Nav anyplace in OR, WA, CA, ID, MO, NV, UT, AZ, basically none on the entire west coast. So dealer says we have to order it, I say no problem order it!

Dealer said no problem, take 6-8 weeks. It arrived in my hands on 3/20 - 3 months after my original request on 12/24/10. One week or so after I had it, the earthquake hit. Or maybe the earthquake came just before I had it in hand, I seem to remember talking with the dealer about the problems in Japan. In any case, the timing for me was close to the initial earthquakes and subsequent issues for Japan.

As it turns out, since TE Black w/Nav is a standard production model, they can't just "Order" one, they have to wait until one is produced and put in a request for it. So the dealer checks the shipped vehicles every week on a computer to see what is available and they request delivery of said vehicle.
If they miss it and someone else requests it first they are SOL unless they can trade the other dealer out of it somehow. And if too many requests come in for other vehicles on the ship, the ship goes to the port that is closest to the most requests. Does that make sense? So even if your dealer gets in the request, first one on the west coast and the rest of the shipment is marked for the east coast, you are SOL. (this according to my dealer)

In my case the dealer missed a TE Black w/NAV in January that ended up in Alaska, and missed another one in FEB that went to Chicago. After missing the only 2 produced in 2 months, my dealer started checking the "computer" everyday. (Mostly due to my hounding them!) Technically the dealer also missed the one I got in March!! The one in March that I got, actually went to a Dealer in Washington State, because that's where the shipment docked. But they had no buyer for it, so my dealer made a trade of some sort and got it for me.

It seems the the '11 Black TE w/Nav are only being produced at the rate of 1 per month. I'm not sure about any other color. And with all the troubles in Japan, I'm sure that number of 1 per month is down. They totally stopped production for a period of time.

My dealer also told me a few other things.
1) They (Toyota) base the production runs on what was sold last year. Black was not popular the previous year I guess.
2)They only make "special orders" if you request something that is offered but not standard. ???? I know that sounds crazy, so I said, "huh, what" and they explained it this way, I would have to order a Black TE w/ Purple interior but since they don't offer purple interior on the T4R it could never happen. So to get a special order you would have to want some quirk in the major options, that was odd. Major options are like the paint/interior/engine/drivetrain/2 vs 4wd, etc.

So in other words, I took that to mean, Toyota does not do "Special Orders", they just make every available mix of options on every available color.

3) All the misc options like running boards, floor mats, remote start, blu logic, cargo net, etc are not factory, the dealer adds them to get the biggest bang for the buck. That's not to say some models don't have these options from the factory, because i guess some do, with the make one of everything scatter shot approach.

So in my case the '11 TE w/Nav was bare bones no added floor mats, cargo nets, running boards, nothing. The dealer added the floor mats for me at no cost since I had to wait so long. If I wanted running boards it was like $1000, when I knew I could get them myself for a 1/3 of that price or less, I passed on them.

It's kind of the "If they build it, You will buy it mentality"
 
Last edited:
Too much money......;(

Definitely, by far the least useful, most expensive mod I've done. Good for at least 20 mpg's in my dreams. Actually more like a good waste of 2 tanks of gas money. But it sure does look sweet! I don't know whether to either hate or love the group buy section of this board!

Get yours here. AJT Design
 

Attachments

  • IMG_0536.jpg
    IMG_0536.jpg
    77.9 KB · Views: 1,586
Last edited:
Techstream - My Experience

Download the software from this link on Amazon, if you don't have a cable this one should work so if you prefer you can just order the whole thing. I've actually used this software with 2 different cables purchased on ebay a couple years ago, so odds are good that pretty much any usb to OBD2 cable work.

To find the link to the software download look at the second picture that is a QRCode. Scan it with your phone and it's a link to the down load.

I found install instructions here.

Just in case....
Unzip the files from the download, and install Techstream. Launch it once and choose your language if needed. If you try to connect to vehicle you will have logon or have a valid serial number. So instead do this:

In the folder where you unzipped the download there is an extra mainmenu.exe file

Copy that extra MainMenu.exe application
Go to Techstream folder where you previously installed techstream --> Open File Location:Program files/Toyota diagnostics/Techstream/bin
Replace the copy MainMenu.exe with the extra one from above.

Now when you launch techstream and connect to your vehicle it should just connect.

I have successfully connected to my vehicle using a mac, VirtualBox and free windows 7 image downloaded legally from Microsoft...just remember when you launch virtual box to setup the USB connection first and then each launch you have to tell VB to connect to the USB device otherwise the host computer will retain control of the USB to OBD2 cable.

Once connected I was easily able to program any of the options available on my 4Runner.

Edit: If my instructions don't work for you, Here's another detailed post on how to get Techstream running
 
Last edited:
Key Programming

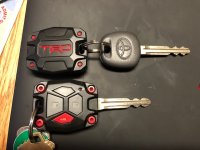
With my techstream setup above all ready to go, I purchased these key blanks from Amazon. I wasn't sure which would work so I bought from different sellers, turn out they are identical, so buy the cheaper ones.

2 for $30 or 1 for $23

Note: The original 2 for $30 link was not f'ing Walmart (it was also amazon) - Damn forum software is scraping links to get a kickback for admins

https://www.amazon.com/gp/product/B00Y1HRV9Q/ref=ppx_yo_dt_b_search_asin_title?ie=UTF8&psc=1

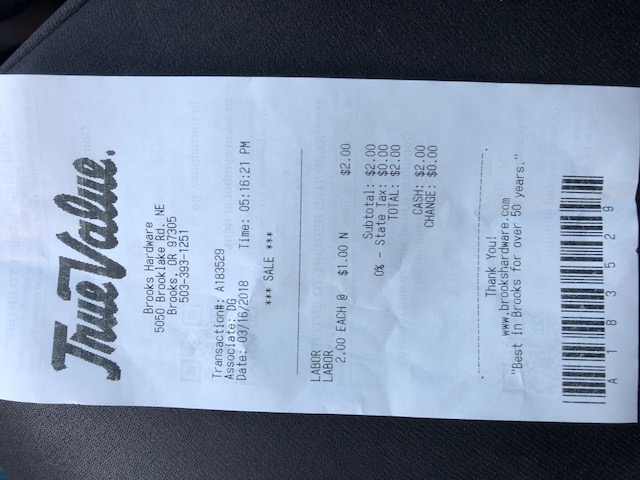
I had the local true value guy cut the keys. Since I brought my own blanks he cut them for $1 each! Ha...basically since I had the cable, all I needed was a key blank and a cut, and I can make good usable keys for about $16 bucks each. Which I promptly did!! I made all 3 and they work perfectly as good as OEM. (I had to go back and get the 3rd one cut)

key cut.jpg


Here is a good thread on the whole process How To: Add a replacement immobilizer key (G-Key) - Toyota 4Runner Forum - Largest 4Runner Forum using techstream, includes videos, that are not 4runner specific but the procedure is the same.
 
Last edited:
Pulling some of my stray posts into my thread so I can refer back to them easier.

I was going to post this in the other thread, but since it was a 3rd Gen, and not a 5th gen I never got around to it.

I still own my 3gen as well as my new 2011 TE.

A few years back my dad got into a wreck driving his full size Chevy Suburban. It was about 75 miles from where we live, piled up in a farmers back field. The tow company wanted about $300+ to tow it home, insurance wouldn't pay, etc, etc.

So he called me up, we hooked up the trailer and off we went to retrieve it.
We had to winch it up on the trailer. It would barely run, front end was messed up. But we strapped it down by the axel's, down tight to the trailer.

It took me about 3+ hours to get home, nice slow pace no hurry. I stopped at the logging scales on the way back. Never really went faster the 45 mph. It liked to push me a little bit, but it was never squirrelly or out of control.

Just under 12,000 lbs!!! Total weight t4r + trailer w/suburban. It was like 11885 or something like that.

As long as you take it slow, think ahead and not get stupid, you call pull quite a bit.

Of course if someone had pulled out in front of me like they did causing my dad's accident to begin with, It would have been a different story. Luckily it all went fine.
------------------------------------------------------------------------------------------------------------------------------------------------------
This post came from --> this thread
 
Last edited:
Dual Battery setup

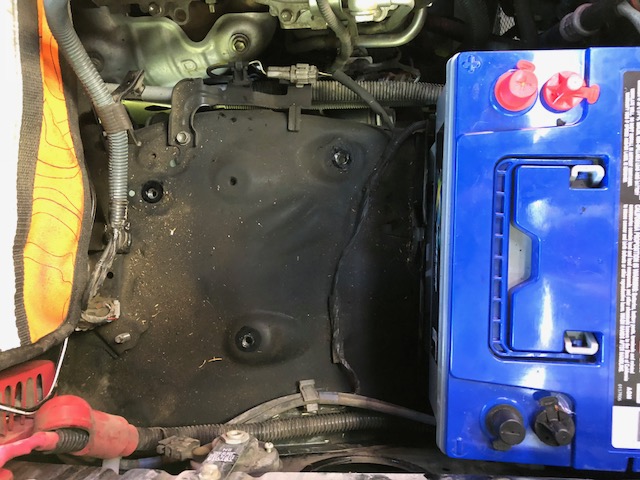
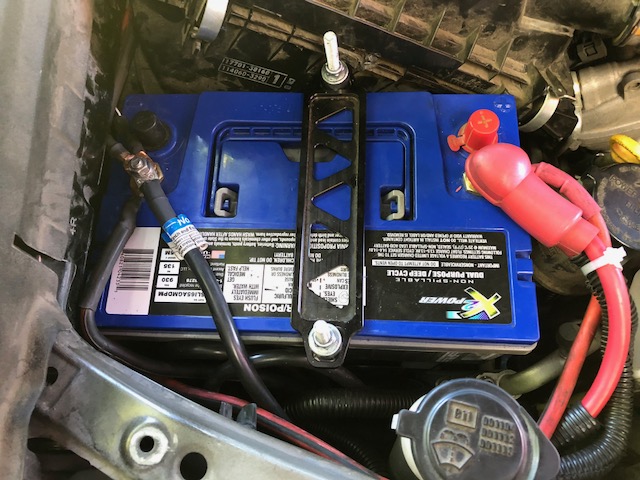
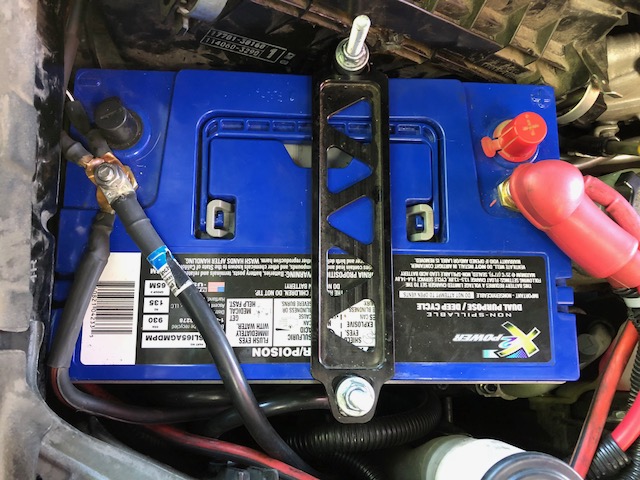
I just got done upgrading my dual battery setup so I thought I would post a few pics and comments.

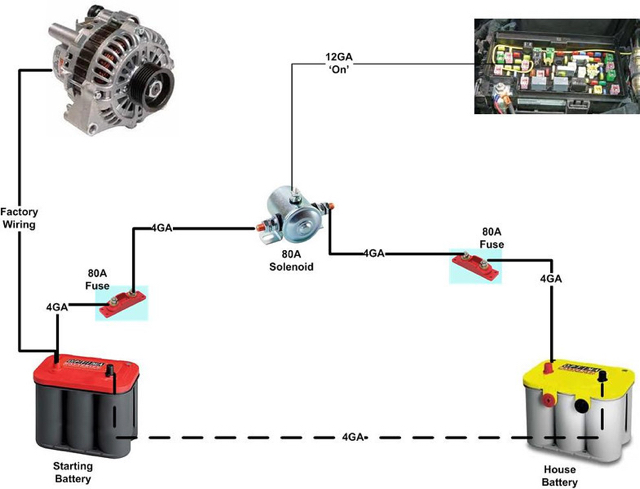
First off for the wiring I used this post to get it all setup. I pretty much wired it exactly like this.-->Dual Batteries on the Cheap.
http://layton.org/t4r_org/simple_dual_battery.jpg
simple_dual_battery.jpg


The pic shows it wired to the fuse box, but it's a generic pic and there is no switched 12v line to tap into under the hood. To find a switched 12v source you need to go into the cab on the t4r. Just pick one, I don't even remember which one I tapped.

I didn't buy the cheap parts if you are wondering, it wasn't really about the money(well ok, maybe a little), it's more about a simple and practical setup. I bought the 500amp relay and heavier cables just for reliability and durability as much as anything.

And the post above this one shows you what I use to monitor my batteries.

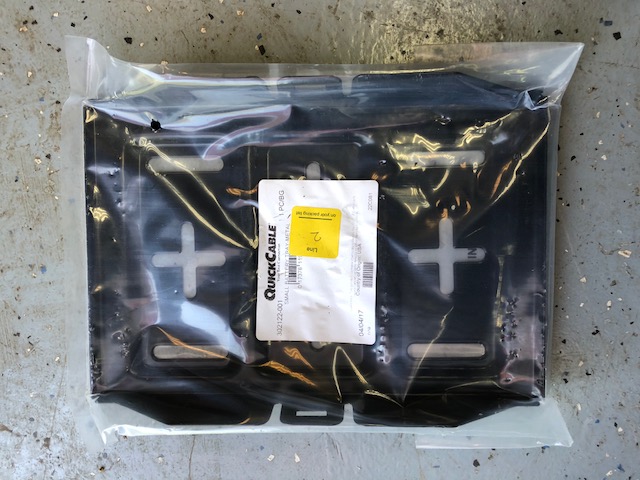
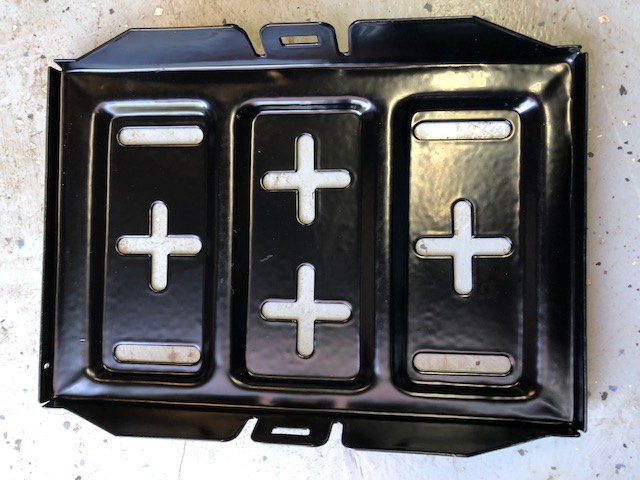
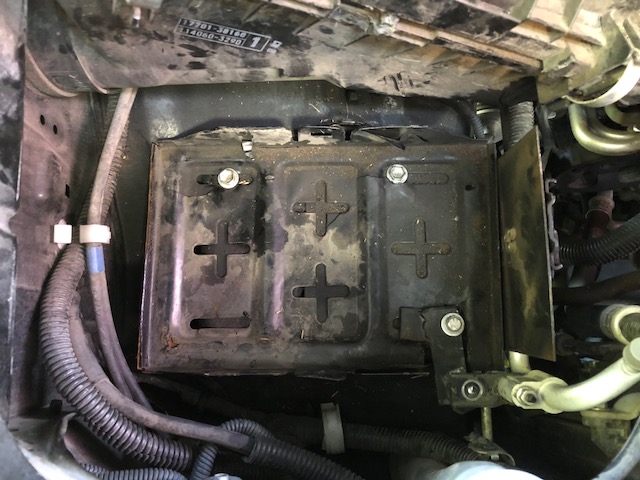
I started out with the OEM Panasonic battery and added a Diehard Platinum Group 34M and ran it that way for 4-5 years. When the OEM Panasonic started to act up I dumped it for a Northstar Group 31M. It fits fine and no I didn't drop $125+ for a battery tray. I mean seriously, what the hell for? The overpriced cages or Australian models are ridiculously over hyped and priced. They all bolt to the EXACT same place as a $10 steel tray here's what I use. I bought the larger one for the Group 31M and the smaller one I used for the Group 34M on the passenger side.
http://layton.org/t4r_org/img_b0713.jpg
img_b0713.jpg

http://layton.org/t4r_org/img_b0714.jpg
img_b0714.jpg


Here's a pic of it installed
http://layton.org/t4r_org/img_b0715.jpg
img_b0715.jpg


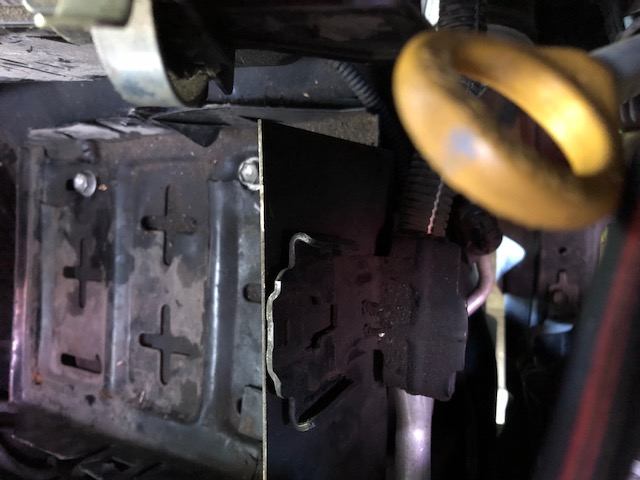
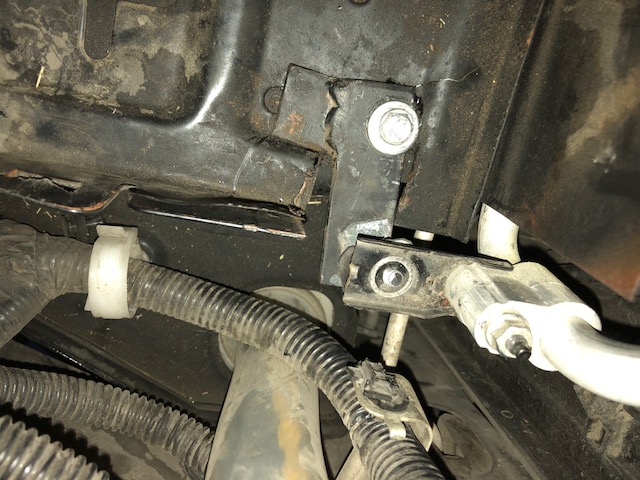
I cut the OEM power steering fluid bracket and screwed it to a simple "L" bracket that I made from a piece of thick sheet metal. I made the bottom long enough I could slide it under the batter tray and drilled it to bolt down with the battery tray. This way I can adjust it if I need to. You can see it on the right in the photo above.

Plus a little better in this one.
http://layton.org/t4r_org/img_b0716.jpg
img_b0716.jpg


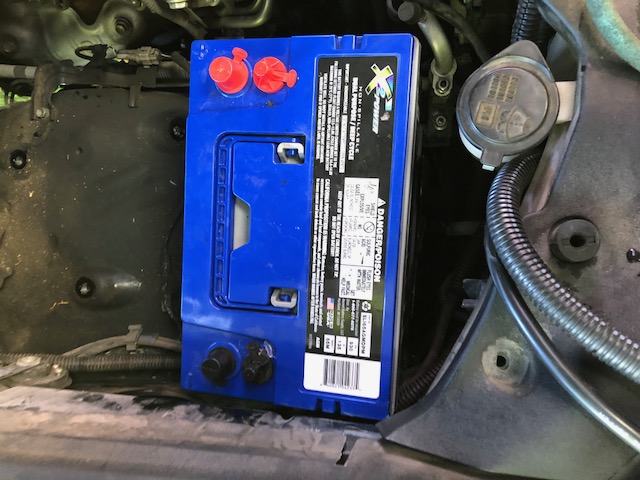
So now, I'm wanted a bit more juice for the second battery. Plus the Diehard is about 5 years old now, so after some research I figured I could stuff a Group 65M battery in the same spot as the Group 34M. The size difference is only about 1/2" - 3/4" in width/length. The height is about the same. That meant reworking the bracket I made to hold the air conditioning line, but nothing major. Just had to move the mount about 1/4" further out to clear and fit the battery in.
http://layton.org/t4r_org/img_b0717.jpg
img_b0717.jpg


Since this battery is a bit bigger, I couldn't just drop it in, I had to remove the air box. (@#$!!) No big deal, but kind of a pain. 3 bolts, hose clamp and a wire harness and it comes right out.
http://layton.org/t4r_org/img_b0718.jpg
img_b0718.jpg

http://layton.org/t4r_org/img_b0710.jpg
img_b0719.jpg


A skinnier air box wouldn't hurt! Anyone know if the fancy TRD model is any skinnier?
http://layton.org/t4r_org/img_b0720.jpg
img_b0720.jpg

http://layton.org/t4r_org/img_b0721.jpg
img_b0721.jpg
 
Last edited:

Members online

Forum statistics

Threads
278,305
Messages
3,554,044
Members
248,016
Latest member
Advally Service

Trending content

Back
Top