Rock Rat's Imperial Jade Mica "Next Adventure" Build

Back Home - Great Trip

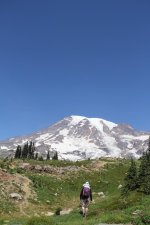
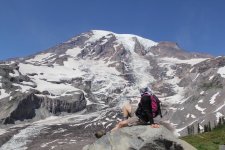
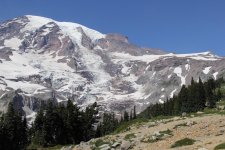
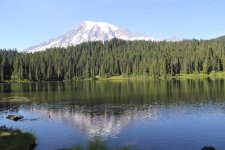
Completing the WABDR was a pretty good accomplishment for a 15 year old 4Runner, but a trip in the PNW Cascades would be incomplete without a nice hike in Mt. Rainier National Park. It was a beautiful day for a great hike and a fitting finish to such a great trip. I look forward to catching up on here and at home over the weekend.
 

Attachments

  • IMG_5446.jpg
    IMG_5446.jpg
    89.5 KB · Views: 621
  • IMG_5514.jpg
    IMG_5514.jpg
    120.4 KB · Views: 698
  • IMG_5532.jpg
    IMG_5532.jpg
    130.8 KB · Views: 641
  • IMG_5560.jpg
    IMG_5560.jpg
    113.8 KB · Views: 634
I'm assuming the other guy is paying for the damages, correct?

Good question and one I've thought about if for some reason my rig was trashed. So far the damages are minimal with just an alignment and some very minor buckling of the drivers side quarter panel. I can fix anything that might be off. Not a problem for me. Front suspension was already on my to-do list.

If there was more damage to my 4Runner, enough to cancel the trip, then I would definitely explore options. I would keep the insurance company out of it.

I've put myself in their shoes as well and if I had a bike on that open road I'm sure I would have opened up the throttle quite a bit. That road is a blast. I was cruising in the straightaways but slowed it down during the turns. The thing is, funny as it may sound, nobody knows what the WABDR is. Both of those guys had no idea what section of the WABDR they were on. I think if they knew this was part of the WABDR, they would have chosen a different route. The other element to this is the fact that we just completed the entire route and NEVER saw another 4wd doing it, and only five riders during the trip; one group of 3 and two solo riders. Chances of them seeing me on the road was slim to none...but...

IMO, Freddy, the rider has already paid for his actions by coming out with one broken rib, serious road rash and needing a new helmet. I'll guarantee you that both individuals have learned so much from this and I will make an effort to contribute to the WABDR website just to caution other riders. Both guys were great and we're all fortunate to be talking about it today.
 
The truck looks great! I truly wish I could join you for a leg or two!

When you're in Seattle we should grab a drink. I'll buy.
Hey Alex thanks! I'll take you up on the offer another time. We wanted to finish up the trip with a hike in none other but the Mt Rainier National Park. Figured an epic trip deserved an epic finish hiking in the shadow of our biggest mountain.

Have fun man, I too wish I could join you.

Wish you could have too. But hey we've got the OBDR in the prelim planning stages. Next year we're on!

The limb risers look real good. Can you open the hood with them on?

Hey Bandit, this was a last minute decision on the afternoon before the trip so I had to come up with something pretty fast. I definitely needed them. There were a lot of sections that were overgrown. For me, the bumper is wide enough but I'll need to fab up some extensions on the rack. I used some CCF under the bug shield to absorb the load so I wouldn't break off the corners. Later, I'll need to find a way to put the cables under the bug shield. I'm thinking a piece of fuel line slipped over the cable. Like you, I want to have access to my hood in case of an emergency. I cleaned my filter and checked fluids at every stop so I had to disconnect them to open the hood. That didn't take too long. Kept a small adjustable wrench in the center console. If you have any thoughts, let me know.
 
I'm guessing you have whitsonmetalworks roof rack. Great quality. But there is one flaw I realized. That even if you powder coated ( mine is ) or paint it. You will never be able to paint under the mesh. Mine is starting to rust from under.

Would of been better if the mesh was bolt on. So you could paint both pieces seperatley. Such a beautiful roof rack sucks to see it rust.

Thanks for the info on the rack. Mine is looking pretty good but I attribute that to the PNW. We're fortunate enough out here to not have to deal with the rust like you guys do in the east coast.

You found water?

Looking at your tan runner in that first pic of the series makes me think twice about a snorkel, but then again, I really don't think much will help when the dirt is that fine and airborn. Hope you check your filter periodically

Have fun, be careful and don't think twice about asking for help if needed.

Tim, you're awesome! Thanks man. Very little water to speak of but with my son behind the wheel he just had to run through it full blast! I told him, "hey you missed a photo op!" When we get to the next one stop first and let me out so I can get a picture of you! Of course, not to be outdone by my son, I had to take over the controls and run through the next "puddle"

I checked my filter and fluids and did a general visual of the rig everyday. I'm running a K&N so you really need running water to clean it. Next time I might just buy paper filters. I closed up the deck plate before I took off for the trip.

Really? It really knocks branches away ?????

What you mean by entire wiring harness

Yes it works really well. I have some great video footage of it in action. Again, it doesn't prevent pin striping but it does save your windshield. When I get some time, I'll save a screen capture of it in work.
 
Enjoy the trip & stay safe!

I dont have a garage but yes! My basement is full of unfinished projects. Custom grill, S/C with 5th injector, gauges etc...starter, re-booting both OE axles, replace rear speakers, install my Black Pearl Emblems, finish rust proofing my frame, put my interior back together. I'm basically driving a 2 seater. LOL
But all of my maintenance is up to date. :clap2:

Hey Mike, thanks and it was a great trip. Now it's time to get to work on my unfinished projects. Looks like you have your hands full for the fall/winter. Take some trips into the Bear Mountain area with your two-seater and post them on here once the leaves start to turn. I miss the gorgeous fall leaves in New York.

EDIT: Huge accomplishment for a 15 year old rig. There should be no doubt as to it's capabilities, regardless of it's mileage if it's taken care of. This trip really made a believer out of my wife. She's gained so much respect for it and everything I've done to it. I've got the "Green" light to do pretty much anything I want. :naughty:
 
Last edited:
Looking good. Makes me miss living in Idaho.

The PNW is a gorgeous place to live. You're in a beautiful place as well. I'm sure you guys have some fantastic trails up in the Blue Ridge mountains.

Hey man, aside from the run in with the guy on the bike, it looks like a fantastic trip you had. Happy that nobody was injured seriously, and your truck doesn't seem to be too banged up either. Glad you didn't have to detour around any fires either, I consider that lucky! It really is an awesome trip with just some beautiful terrain and views along the way.

I'd be interested in an OBDR trip next year, so keep me in the loop on that. It's quite a bit longer, and not quite as clear cut from what I understand. Alex and I did a couple legs(well kinda) last mid May with some IH8Mud guys. Basically Prineville to Sumpter, but we got turned around a couple times due to too much snow still. And the going was SLOW, as it seemed that we were the first to break trail and there were a ton of trees we had to clear. But it was a really good time and I'd like to complete it at some point.

Definitely a fantastic trip. Uneventful all the way except the incident with bike. All of us, family included are lucky to be talking about it today. So many "if's" that could have dramatically changed the outcome. Blessed!

I was pretty shocked that we didn't run into any fires along the way. I heard there's one in the Wenatchee forest that just sprung up a couple of days ago. There's so much beauty up there in the Wenatchee forest with the flowers blanketing the burned forest. The Okanogan forest took on a different perspective. The forest floor basically looked like a barren wasteland in so many parts of the forest. Kinda sad yet amazing to look at. Seeing all of that makes you appreciate the fire fighters and the hard work the NF service puts in to preserve our wilderness. I had one tree I had to clear using the axe. It was on the Bethel Ridge. Going this late in the year, you could see so many trees that were cleared by the forest service. Thank goodness! I can't imagine being the first ones on this route. Chainsaw wouldn't be able to keep up.

I've looked at all of your pictures from your trip to Oregon in May and the OBDR looks just as beautiful. I think the key is to plan this later in the year to ensure the trees are cleared first. Depending on the number of folks going, a chainsaw may be a necessity. If it wasn't for Alex, I would have been turned around as well. My original plan was to leave much earlier in the year. He forewarned me. I think the middle two weeks of August are actually pretty good. Perhaps a week or two earlier.
 
Last edited:
ARB Single Cylinder Compressor Review

For those looking for an air compressor I know there are many options out there to suit the various needs. I just did a review of the ARB Single cylinder compressor (CKMA12) and posted it in the General Discussions section of this forum for owners of all generations. This review, is limited to a size 33" tire being aired back up to 35 psi after being aired down to 18/20psi.

Here's the link to the thread: ARB Single Cylinder Compressor - CKMA12 Review
 
WABDR Trip Report - Ruby Ridge

WABDR - Ruby Ridge, Okanogan-Wenatchee National Forest

The following is just a small but very significant part of Section 5 of the WABDR. It's the road leading to the old silver mining town of Ruby. Very exciting segment. Enjoy.

***************************
Section 5 of the WABDR from Chelan to Conconully takes you along Loup Loup Canyon Road to Peacock Mountain Road in the Okanogan-Wenatchee National Forest on the way to Ruby Ridge (grade). To get to this once bustling mining settlement with eighteen businesses back in the day, you need a 4wd capable of driving in 4L to make it down the steep Ruby Ridge (Grade). My wife and I met a Ranger, quite a few miles back while we were enjoying a much needed lunch break. He knew the area extremely well, but much to my surprise, we were in his stomping grounds and he had never heard of the WABDR. I had the pleasure of showing him the route on our paper maps and on our GPS. I brought up the subject of radios and CB’s and pretty much how worthless they were out here in the National Forest. I’m so glad I went with a handheld Midland.

When he saw that Ruby Ridge was on the way, he took the opportunity to tell me that he had a Tacoma with Yukon gears, locked in the front and the rear. He was chomping at the bit to talk “yota’s”! He highly recommended we not do it. His exact words; “you’ll get yourself in trouble over there you won’t be able to get out of.” “I have a Tacoma with Yukon gears and it’s locked in the front and rear and I won’t do it.” “Wow! Can’t wait to do it.” I thought to myself as I gave him the obligatory head nod. I never saw anything in the blogs or the WABDR site warning against it. He also pointed to another road on our map which was on the route and he warned us not to do that section of the road either. He said that we would run into a barricade with a “Road Closed” sign due to the bridge being washed out. But that was two years ago. Needless to say, I don’t listen very well. They’ve since rebuilt the bridge.

Ruby Ridge, or Grade as seen on the map, was by far one of the “many” best sections of the route that we did. It had all the ingredients of a great 4x4 back country road; loose stones, very exposed, extremely narrow, and nice steep grade. Perfect! My only disappointment was in how short the run actually was. I kept looking for another mile or TEN more, but before I knew it, I was at the bottom of the run in front of the historic sign – Ruby. My biggest regret is that I failed to do my own historical research about the area before I left. I missed out on the “China Wall” and the history surrounding Loup Loup and Ruby. Looks like I’ll have to do that section again some time…

Just look it up on line Ruby and the China Wall. Better yet, here's the link.

Loop Loop

Here's a link to the video of that segment. Enjoy!!

 
Man! I love your truck! The tires look great with the suspension kit!

Hey thanks! I just put those on for the trip. I have the Level 8's and the Toyo AT's back on but I have to admit, I love the Seqouia's and the Nitto's. They performed better than expected. I need to put spacers on the front to clear the UCA's better. Thinking as little as I can get away with.
 
Genius on using the camera you used. It's like you were floating on air, until you catch a glimpse of the runner bouncing up and down out of screen.
 
Genius on using the camera you used. It's like you were floating on air, until you catch a glimpse of the runner bouncing up and down out of screen.

I have to run the video through stabilization in Adobe After Effects. If not you would really see the bouncing a lot more. So glad you found those Sequoia wheels. I love them. Better than the level 8's.

BTW - Browns camp on the weekend of the 17th if you're up to it. Supposed to be a camp out on Friday - Sunday. I think I'm just going to drive out there on Saturday AM and do a few runs.
 
Last edited:
Feedback on the Lumitec Engine Bay Light

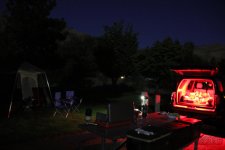
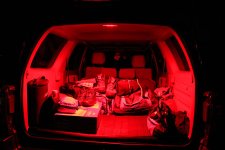
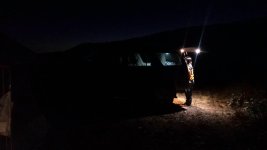
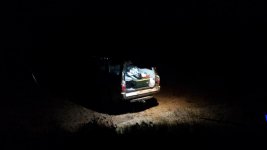
One of the mods I did was to replace my rear cargo light with the Lumitec 6500K engine bay light. I used it quite extensively and I loved it. Here are some photos with it being used in the field. I wouldn't change anything. :thumb3:

The link to the mod is here: Lumitec Engine Bay Light Installation

The red is in a State Park with residual lighting around us. The white is in our camp on top of the mountain with just a Coleman lantern near the tent.

I have the rear Rigid Industries E-Series lights on the cargo door switched. It makes it easy to turn them off and only use the red light in the Lumitec.
WABDR August 2016 078 .jpg

As you can see it puts out a lot of light yet it's not too obnoxious if you're camping or in a campground like we were.
WABDR August 2016 080.jpg

The E-Series lights were switched on along with the cargo light. It put out more than enough light.
WABDR August 2016 _1.jpg

Here''s a picture from a distance. Plenty of light.
WABDR August 2016 _2.jpg
 

Attachments

  • WABDR August 2016 078 .jpg
    WABDR August 2016 078 .jpg
    61.6 KB · Views: 1,123
  • WABDR August 2016 080.jpg
    WABDR August 2016 080.jpg
    90.7 KB · Views: 1,181
  • WABDR August 2016 _1.jpg
    WABDR August 2016 _1.jpg
    33.2 KB · Views: 1,031
  • WABDR August 2016 _2.jpg
    WABDR August 2016 _2.jpg
    29 KB · Views: 1,025
Day Trip to Brown's Camp

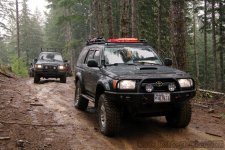
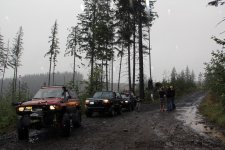
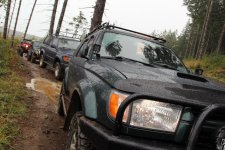
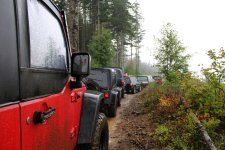
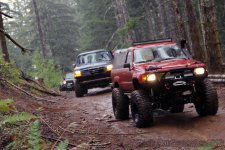
Well our plans for hiking kinda fell through as we saw our first fall rains for the year in the great PNW. We quickly adjusted our plans on Saturday morning and set out to meet up with some guys already at Brown's Camp for the weekend. Met up with Drew and his 85 Runner. Brian had his "new-to-him" LC 80 and then there was a very capable Bronco and two jeeps. Great day on the trails with our group of six playing in the mud considering it was a last minute decision.

The rain definitely added a different element to the trails. I really liked Brian's LC 80 (behind me). Easy going for him on all the trails we did.
Browns Camp_1 Sep 2016.jpg

Browns Camp_2 Sep 2016.jpg

Browns Camp_3 Sep 2016.jpg


Browns Camp_4 Sep 2016.jpg

Drew's 85 Runner. Locked in the front and rear. He the bronco and the red "barbie" jeep went on to do some diamond runs. Diffs were getting banged up a bit. The jeep high-centered and had to winch himself out.
Browns Camp_5 Sep 2016.jpg

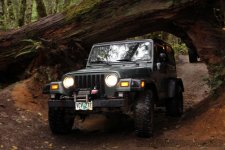
Only Ken's Jeep would fit under the Cedar Tree this time around. I didn't even try.
Browns Camp_6 Sep 2016.jpg

One of the more milder sections of Powerlines
Browns Camp_7 Sep 2016.jpg

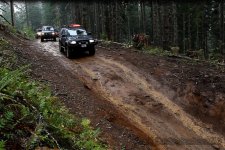
Had some nice mud along the trails. Love the Grapplers
Browns Camp_8 Sep 2016.jpg


Attachments

  • Browns Camp_1 Sep 2016.jpg
    Browns Camp_1 Sep 2016.jpg
    141.1 KB · Views: 1,170
  • Browns Camp_2 Sep 2016.jpg
    Browns Camp_2 Sep 2016.jpg
    134.7 KB · Views: 1,113
  • Browns Camp_3 Sep 2016.jpg
    Browns Camp_3 Sep 2016.jpg
    139 KB · Views: 1,358
  • Browns Camp_4 Sep 2016.jpg
    Browns Camp_4 Sep 2016.jpg
    140.3 KB · Views: 1,345
  • Browns Camp_5 Sep 2016.jpg
    Browns Camp_5 Sep 2016.jpg
    137.8 KB · Views: 1,322
  • Browns Camp_6 Sep 2016.jpg
    Browns Camp_6 Sep 2016.jpg
    121.2 KB · Views: 1,316
  • Browns Camp_7 Sep 2016.jpg
    Browns Camp_7 Sep 2016.jpg
    142.7 KB · Views: 1,093
  • Browns Camp_8 Sep 2016.jpg
    Browns Camp_8 Sep 2016.jpg
    99.9 KB · Views: 1,212
Total Chaos Spindle Gussets Installation

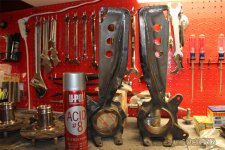
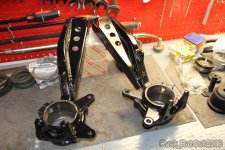
Finally got around to finishing up one of my projects. I installed the Total Chaos Spindle Gussets, prepped, primed and painted. Ready to press in the bearings.

Here's a break down...

Purchased from Total Chaos
  • Part Number: Part # 59697
  • Cost - 37.80 Purchased in May 2016
  • Picked up Used Spindles on a low mileage doner from G&R Collision in Portland: $40 each. I picked these up in Dec 2015
  • Primer Paint: One can of Acid 8 primer grey: $20.52 Make sure you use self etching primer and rough up the surface (wet/dry sand paper) before applying
  • Black Paint: One can of Duplicolor Engine enamel with ceramic: $6.99
  • A good friend with extraordinary welding skills willing to show you some tricks of the trade: PRICELESS

While it's not very common to have a spindle break, the photos that [MENTION=65101]BrianSD_42[/MENTION] posted from his trip last summer prompted me to do the modification. And then after my encounter on the WABDR it just further reinforced my decision.

My goal was to get these done before my trip back in August. Unfortunately, I just ran out of time.

I worked with a friend of mine who is by far one of the best welders I know. He does some really great work.

I wanted to have it powder coated, but the turn around time was more than a month and I was quoted a ridiculous price.

Great to have one project finished. (I also re-booted my original axles using the OEM boot kit and took photos this time. I didn't have time to take pics the last time as I was heading out on the WABDR.)

Once welded, it was time to scuff up the spindles and the gussets in preparation for the etching primer
Gussetts 01.jpg

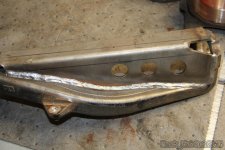
Picture of a beautiful welding job by my buddy. Really clean.
Gussetts 02.jpg

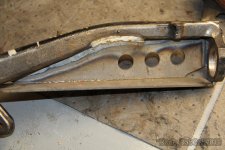
We decided to do a small section on the other side of the gusset.
Gussetts 03.jpg

Here's the gusset and spindle after three coats of U Por #8 self etching primer.
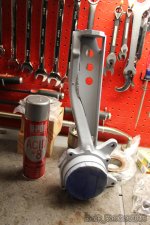
Gussetts 04.jpg

You can see here that I ensured the polished surfaces were protected using regular household interior painters tape.
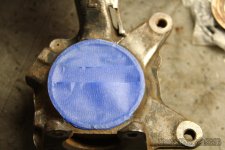
Gussetts 05.jpg

Another photo of the other side of the spindle and gusset after three coats of primer applied.
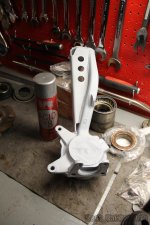
Gussetts 06.jpg

The finished product using Duplicolor Engine enamel with ceramic. Powder coating was my original preference but the turn around time and cost was ridiculous. I'm sure this will last.
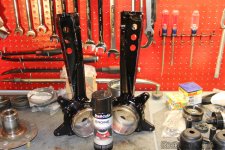
Gussetts 07.jpg

Another photo of the finished project. Yay! Now it's time to press everything back together. Hope it goes back together easier than it came apart!
Gussetts 08.jpg
 

Attachments

  • Gussetts 01.jpg
    Gussetts 01.jpg
    140.7 KB · Views: 1,572
  • Gussetts 02.jpg
    Gussetts 02.jpg
    113.5 KB · Views: 1,627
  • Gussetts 03.jpg
    Gussetts 03.jpg
    120.5 KB · Views: 1,605
  • Gussetts 04.jpg
    Gussetts 04.jpg
    121.5 KB · Views: 1,635
  • Gussetts 05.jpg
    Gussetts 05.jpg
    92.1 KB · Views: 1,500
  • Gussetts 06.jpg
    Gussetts 06.jpg
    116.2 KB · Views: 1,515
  • Gussetts 07.jpg
    Gussetts 07.jpg
    145.2 KB · Views: 1,184
  • Gussetts 08.jpg
    Gussetts 08.jpg
    140 KB · Views: 1,907
Last edited:
Anniversary Month of Ownership

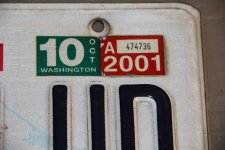
October 24th 2000 marks the 16th year I've owned this rig. It's been good to me and my family and is clearly the best vehicle I've ever owned. I took the 1/4 inch thick stack of registration stickers that I've accumulated over the years (before changing plates) off my old plate to uncover my original 2001 tag.

I hope all of you 4runner owners on here experience the same, if not more, amount of joy that I've had with owning one of the best rigs on the road.

From 12 miles to 347,000 miles. Many more to go... Original Owners
 

Attachments

  • Original tags.jpg
    Original tags.jpg
    117.5 KB · Views: 902
October 24th 2000 marks the 16th year I've owned this rig. It's been good to me and my family and is clearly the best vehicle I've ever owned. I took the 1/4 inch thick stack of registration stickers that I've accumulated over the years (before changing plates) off my old plate to uncover my original 2001 tag.

I hope all of you 4runner owners on here experience the same, if not more, amount of joy that I've had with owning one of the best rigs on the road.

From 12 miles to 347,000 miles. Many more to go... Original Owners

Happy Anniversary!

 

Members online

Forum statistics

Threads
278,317
Messages
3,554,129
Members
248,016
Latest member
Advally Service

Trending content

Back
Top