What did you do to/in your 5th Gen today?!

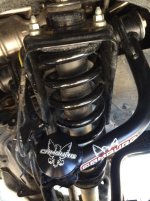
ARB Diff Breather & Camburg UCA Caps

Did a few things over the weekend...

1st I installed these UCA caps on my Camburg BJ arms, should have done this from the start but I was too cheap after spending thousands on lift and wheels :frusty: They look way better than an open ball joint, but boy were they a PIA to install. I spent a good 20mins pounding them in with a mallet.
Photo Mar 18, 6 10 37 PM.jpg

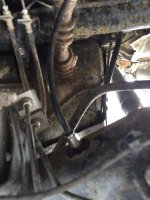
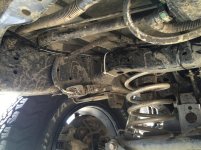
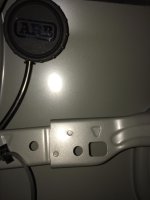
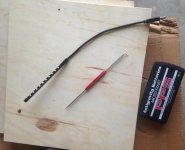
Then my ARB diff breather kit arrived on Sunday so I didn't waste any time getting it installed. Thanks to [MENTION=1913]hoeftm2002[/MENTION] for his thread!:cheers:

Install was very simple, except that I dropped the rubber gasket inside the body panel and spent almost an hour trying to fish it out :bash:, but I finally did!
Photo Mar 20, 2 34 11 PM.jpg
Photo Mar 20, 2 34 19 PM.jpg
Photo Mar 20, 2 52 56 PM.jpg

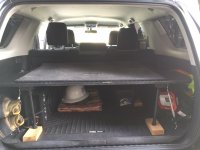
Then I got my cargo area all cleaned out and organized and called it a day.
Photo Mar 20, 3 32 29 PM.jpg
 

Attachments

  • Photo Mar 18, 6 10 37 PM.jpg
    Photo Mar 18, 6 10 37 PM.jpg
    129.2 KB · Views: 1,354
  • Photo Mar 20, 2 34 11 PM.jpg
    Photo Mar 20, 2 34 11 PM.jpg
    123.3 KB · Views: 1,287
  • Photo Mar 20, 2 34 19 PM.jpg
    Photo Mar 20, 2 34 19 PM.jpg
    135.7 KB · Views: 1,331
  • Photo Mar 20, 2 52 56 PM.jpg
    Photo Mar 20, 2 52 56 PM.jpg
    124.4 KB · Views: 1,274
  • Photo Mar 20, 3 32 29 PM.jpg
    Photo Mar 20, 3 32 29 PM.jpg
    124.1 KB · Views: 1,301
Gonna need some details on this.
Those look killer. Where are they for sale? I saw the lights on the oem site, but didn't see the mounts.

They are bolt in mounts and use the factory fog light wiring. Their harness connects to the factory fog light connection so plug and play. They have a few small adjustments to make to the mounting brackets before they release the kit to the general public.


I'm interested in these as well!

Me too! They look great


Thanks for all of the interest! We are currently awaiting Vendor/Sponsor approval. Until then we cannot discuss any details on the product.
Stay tuned for more details .

Thank You,
Bailey
 
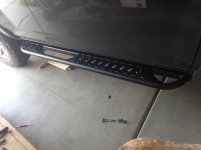
Finally able to install the Shrockwork slider after it been sitting in the room since Dec. I tried to install the passenger side a few weeks ago but gave up after an hour of trying to play around with the stick nut. (don't attempt it after a long day out on the water fishing and expect to have any patience to deal with the stick nut tired, haha)

then [MENTION=53960]itsdchz[/MENTION] gave me some pointers and it has helped out a ton!!

First tip was to extend the stick nut using another stick nut. This helped so you don't accidentally drop it in the frame and then spend another hour trying to fish it out of a tiny hole. haha.

2nd tip was to buy longer bolts. Went to home depot and picked up 3/8 1.5 inch bolt instead of the 1 inch they give you.

Those two tip helped out a great deal but still a bit frustrating with the top and bottom stick nut on the driver rear side!!

Anyways another helpful tool was a tiny skinny flashlight that I stuck in one of the holes so I can see what the heck I was doing. Instead of going into it blind, I had some light in there to line it up.

Anyways finish the driver side last night since I had to waste some gas before doing it. Both are now on and looks awesome. I'm ready to tackle the Lower Link Skids from RCI next. I just need to paint it or powercoat it first since its bare metal.

Thanks again itsdchz!!
 

Attachments

  • IMG_1230.jpg
    IMG_1230.jpg
    71.2 KB · Views: 902
  • IMG_1231.jpg
    IMG_1231.jpg
    64.8 KB · Views: 889
  • IMG_1256.jpg
    IMG_1256.jpg
    77.7 KB · Views: 892
So in the last few weeks my wife and I put our house in Ohio for sale...

...sold all our furniture and gave away a ton of other stuff, thinned our possessions down to like 5% of what we had...

...packed (squeezed) what was left into and on my 4R and her Prius...

...and we are moving to California. We'll start fresh out there; we rented a little place in Ferndale (norCal, Humboldt County) and will be working in Eureka.

We'll be rolling I-80 pretty much the whole way, stopping off in Chicago for a night to visit her mom, and we should be out to Cali by Friday.


Enjoy the ride. I'm from Columbus originally and now living in Los Angeles for the last 16 years. Having gone across on I-80 and I-70 several times, I prefer 80, but the weather can come out of nowhere. I spun my 1990 4Runner in to the middle of divided highway in Nebraska once during a flash storm. That truck stayed upright like a champ.
 
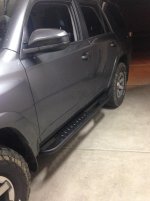
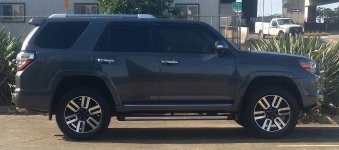
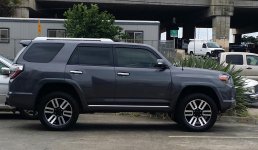
Removed OEM running boards. Before and after:
 

Attachments

  • 20160229_092301-1.jpg
    20160229_092301-1.jpg
    143.5 KB · Views: 865
  • 20160321_104603-1.jpg
    20160321_104603-1.jpg
    139.2 KB · Views: 891
[MENTION=123745]Sig_Fan_55[/MENTION]
Can you send me info on the bussman box... something I can read to understand it...

Windshield gap, huh ... I was thinking of running it from the weather stripping on the driver side door to the fender. I'll have to look at that windshield gap

Sure here is the link, its pretty much 5 relays and 5 fused leads in one box, alternative to an SPod. I prefer it to having relays all over and gives a much cleaner look. I have it powering both front light bars and will soon control sides and back also, the only thing I did not run off of it is the ARB compressor as it takes a pretty high amperage to run. I will upload a pic of the location and mounting when I clean the wires up a bit but its small and fits perfect near the fuse box under the hood.

heads up for anyone buying one, it smells like a burnt electronic when you un-pack it, I thought it was toasted for sure but everything works fine.

Universal Relay Fuse Auxiliary Distribution Box Jeep Cooper Bussmann Off Road | eBay

Windshield channel is the way to go, takes a little effort and a little WD40 on the wire helps too but no visible wires and the shortest run possible.
 
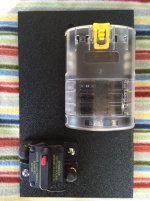
Made up a fuse box and 100A breaker to install over the factory battery stud mounts. Will mount this up and wire to the OEM battery for now and run 8ga back to a 12V outlet in the cargo area for my fridge. Plan to do a dual battery installation and will flip this to the 2nd battery once that is done.
 

Attachments

  • IMG_2123.jpg
    IMG_2123.jpg
    52.6 KB · Views: 1,382
Until I can swing some nice ARBs, I started on cargo drawers 1.0. Can't beat $80 in lumber.


I found some decent and cheap adhesive backed carpet. Next will be the drawers. Then a few final touches.
 
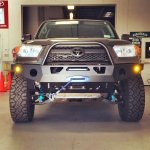
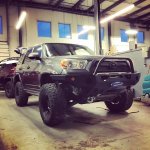
Installed my winch and bumper. Few things to tidy up.
 

Attachments

  • IMG_5914.jpg
    IMG_5914.jpg
    132.8 KB · Views: 1,435
  • IMG_5922.jpg
    IMG_5922.jpg
    132.4 KB · Views: 1,454
Last edited:
Got the rack installed, which was a fairly simple install and then had a 50" curved light bar I got as a gift didn't think I'd be able to use it. But a friend and I made some brackets out of sheet metal that worked great. My brother is going to have a friend at his work C&C some solid ones outta bullet aluminum, so these will work until then.


Wind noise with the rack was barely noticeable (had to have the radio off to hear it and my friend said the problems solved when I throw some real off-road tires on LOL), with the light bar there is a whistle under 20mph and a little more wind noise above 55mph.

When 40" just isn't enough........:bravo:
 
Made up a fuse box and 100A breaker to install over the factory battery stud mounts. Will mount this up and wire to the OEM battery for now and run 8ga back to a 12V outlet in the cargo area for my fridge. Plan to do a dual battery installation and will flip this to the 2nd battery once that is done.

After seeing a few other people do this... I'm curious why Toyota didn't provide a better feed from the factory? Seems like the most logical (powered) accessory would be a fridge back there, right? I might need to consider this as I mount my cooler. We'll see...
 

Members online

Forum statistics

Threads
278,315
Messages
3,554,125
Members
248,016
Latest member
Advally Service

Trending content

Back
Top