What Did You Do To Your 3rd Gen Today?

Status
Not open for further replies.
That was a quick tear down. From what I have gathered here and on YT the gaskets changed in 98, and that the first two years were more prone to such failure. But at least 300,000+ miles on them, how can you argue with that longevity.:banana:

How does the rest of the engine look?

Surprisingly good. Cross hatching evident in all but a few very small spots. No fingernail-discernible ridge from the piston rings.
3 and 5 behind it...
7P9nQ5t.jpg


2,4,6.
2Yltyp4.jpg

Coolant in 2 snuck in there- it wasn't in there originally.

I haven't cleaned off the crud yet. Also haven't checked the heads for warping or anything else yet.
 
Last edited:
Replaced liftgate handle and rear wiper arm. Rust took them out.

Rear wiper arm should have been less then 5 minutes. Remove nut, replace arm, done.
But no - attempt to remove nut. Rusted beyond belief. End up cutting through wiper arm after wrestling with heat, nut extractors etc.
Put new wiper arm on. Attempt to tighten new nut - break off bolt.
Look up part - $256 to replace the whole motor. eeeeffff that!
Drill into broken bolt. Tap threads into center of bolt. CAREFULLY turn metal screw with washer into the new hole to hold down wiper arm.
$%##())!!!!! Took waaaaaaay longer than it should have.

Rear liftgate handle. I guessed at 2 hours to replace after looking at "how to replace license plate bezel" as that would have to come off.
Holy shit it took 20 minutes or so of being careful to remove interior liftgate cover, remove metal liftgate cover, unscrew the window motor, unscrew the rear lock and handle bolts, push tabs out.
Then put new handle in and do everything in the reverse order.
Working with the liftgate up made moving the window motor around easy as I just slid it around wherever to get it out of the way.
Took waaaaaaay less time than I thought it would.

A win and a loss. I'm evened up I guess. Now to replace rear shocks - I'm expecting a loss on this one.
 
Replaced liftgate handle and rear wiper arm. Rust took them out.

Rear wiper arm should have been less then 5 minutes. Remove nut, replace arm, done.
But no - attempt to remove nut. Rusted beyond belief. End up cutting through wiper arm after wrestling with heat, nut extractors etc.
Put new wiper arm on. Attempt to tighten new nut - break off bolt.
Look up part - $256 to replace the whole motor. eeeeffff that!
Drill into broken bolt. Tap threads into center of bolt. CAREFULLY turn metal screw with washer into the new hole to hold down wiper arm.
$%##())!!!!! Took waaaaaaay longer than it should have.

Rear liftgate handle. I guessed at 2 hours to replace after looking at "how to replace license plate bezel" as that would have to come off.
Holy shit it took 20 minutes or so of being careful to remove interior liftgate cover, remove metal liftgate cover, unscrew the window motor, unscrew the rear lock and handle bolts, push tabs out.
Then put new handle in and do everything in the reverse order.
Working with the liftgate up made moving the window motor around easy as I just slid it around wherever to get it out of the way.
Took waaaaaaay less time than I thought it would.

A win and a loss. I'm evened up I guess. Now to replace rear shocks - I'm expecting a loss on this one.

I guess I shouldn’t ***** about the PO not replacing the rear wiper, and me having to order one online, after picking one up at Auto Zone, and realized that one wouldn’t work, as it doesn’t have the two holes that bolt onto the arm.

Quick question: how hard is it to remove the license plate bezel? I need to do that soon, as there is some sun damage on top. I need to remove it, sand it, and prime and paint to restore it to original. It’s been bugging me, and it’s cheap to fix, just time consuming.
 
Picked these up locally on craigslist for $50, no tire upgrade plans right away but it puts some fire under my ass to get that lift started
455414f716567269e2c43fbe0758d77a.jpg


Sent from my SM-G965U using Tapatalk
 
What's the plan for that? Race car?

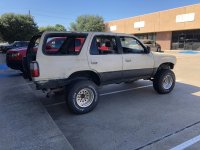
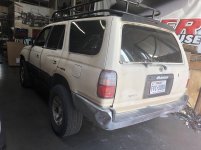
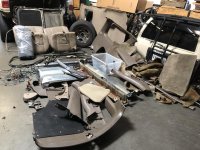
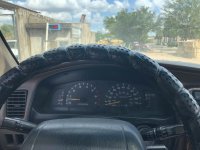
Well.... lol. So I bought this 150k e locker truck from a customer who had it in a pretty sad state. Driveline was excellent but this truck has been t boned and was a massive cluster of wiring gone wrong. Literally everything that someone could have messed up inside and out was nicely haggered up. Sooooo, I thought why not take anything and everything out of the truck I possibly can to make it as light as possible. In doing so it will be quicker and lighter for when I take it mudding etc. the plan is to chop top to convertible, cage it like an H1, make half doors and run 35” boggers when I take it to the trails. The whole fun will be to see how fast I can make it by simple removing unnecessary weight. Both times on the scale was my weight and a full tank of gas.
 

Attachments

  • 20B3AAEA-8E18-46D5-9429-10497F7B6F97.jpg
    20B3AAEA-8E18-46D5-9429-10497F7B6F97.jpg
    126.9 KB · Views: 342
  • D4FCEAF2-B1E3-4DE5-88D5-2932476B06EB.jpg
    D4FCEAF2-B1E3-4DE5-88D5-2932476B06EB.jpg
    138.5 KB · Views: 334
  • 491E7828-FF90-4E1E-9E9A-ACAEB3BDAC52.jpg
    491E7828-FF90-4E1E-9E9A-ACAEB3BDAC52.jpg
    126.7 KB · Views: 334
  • 11513A61-176E-4362-A3B1-3BD8785331BB.jpg
    11513A61-176E-4362-A3B1-3BD8785331BB.jpg
    139.4 KB · Views: 334
What was the procedure in replacing the output shaft seal? Any special tools needed? will it be the same procedure for the rear output shaft oil seal replacement?


Thanks!

You'll need a 3/8s swivel socket, breaker bar, and a 30mm socket. Make sure to mark the drive shaft to the flange so it goes back together the same way. The hardest part for me was removing the bolts from the drive shaft. I believe the procedure is the same for the rear shaft. There is a write up on this forum and Timmy the Toolman has a video as well.
 
What did I do to my 1999 Limited? Finished the Tundra brake upgrade, bled the brakes, cursed the previous owner(s) who made a couple of things a lot harder than they needed to be, and... That was about it. Tomorrow, I'm getting the spare mounted on a Limited alloy rim, and then I should be set for the next tire rotation. And, ohbytheway, any flats on a front tire...

Anyone out there who has doubts about the Tundra brake upgrade path? Lose them; it works, and it makes a huge difference in braking ability. I'm a believer after just the first post-changeover drive and seating the new brakes.
 
What did I do to my 1999 Limited? Finished the Tundra brake upgrade, bled the brakes, cursed the previous owner(s) who made a couple of things a lot harder than they needed to be, and... That was about it. Tomorrow, I'm getting the spare mounted on a Limited alloy rim, and then I should be set for the next tire rotation. And, ohbytheway, any flats on a front tire...

Anyone out there who has doubts about the Tundra brake upgrade path? Lose them; it works, and it makes a huge difference in braking ability. I'm a believer after just the first post-changeover drive and seating the new brakes.

231mm?
 
Weekend Project

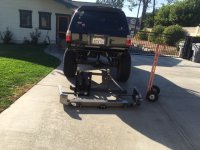
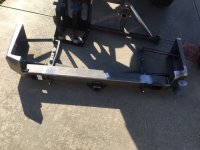
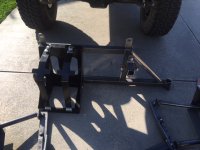
this just showed up, so I have something to keep me busy. First things first, I need to modify it to fit.
 

Attachments

  • IMG_0494.JPG
    IMG_0494.JPG
    130.1 KB · Views: 421
  • IMG_0492.JPG
    IMG_0492.JPG
    121.8 KB · Views: 403
  • IMG_0493.JPG
    IMG_0493.JPG
    114.4 KB · Views: 414
Last edited:
5-star or 3-split spoke? Read thru a couple of your posts, your truck sounds awesome.

I'm hitting up the junkyard tomorrow and I've read that the 16" 3 spokes do not fit.

I haven't posted much, and the truck is brand-new to me, soooo... There's not a lot to boast about in my case.

I've got the standard five-spoke Limited alloy wheels, which is good for that brake conversion. The spare is one I found on eBay, and it'll be mounted tomorrow. Hopefully.

Overall, I'm pretty happy with the 4Runner. I own a '90 truck for work, a '93 Land Cruiser, and I used to own a '93 4Runner. You could probably describe me as a Toyota "true believer", as not a one of these vehicles owes me a dime--The '90 was stolen, once, and the insurance wound up paying me more than I paid for it, bought it back, and it's still working for me. The '93 4Runner got totaled after a collision in a snowstorm up on a mountain pass, and that again wound up paying off for more than I had in it. Can't beat the retained value on these vehicles--Do the necessary and prudent maintenance on them, and they'll last a hell of a lot longer than the other makes. The nice thing is, they're not usually money pits--You fix a Toyota once, and if you do it right with good parts, the repair lasts long enough to get your money out. I can't say that about any of the Fords I've owned, which have all wound up owing me exponentially more money than I ever got out of them for service.
 
Thank you.


You'll need a 3/8s swivel socket, breaker bar, and a 30mm socket. Make sure to mark the drive shaft to the flange so it goes back together the same way. The hardest part for me was removing the bolts from the drive shaft. I believe the procedure is the same for the rear shaft. There is a write up on this forum and Timmy the Toolman has a video as well.
 
Quick question: how hard is it to remove the license plate bezel? I need to do that soon, as there is some sun damage on top. I need to remove it, sand it, and prime and paint to restore it to original. It’s been bugging me, and it’s cheap to fix, just time consuming.

I did not find it that hard. There are a couple of write ups and a lot of *****ing about how hard it is to remove. I was prepared for the worst but it was not bad at all. Took way less time than I thought.

I found it easier to work with the liftgate open. Before you start, drop the window 1" or so. This will help later in realigning. You will need 10mm ratchet w extension, long needle nose pliers and maybe a flat head screwdiver to help w gentle prying.

Remove rear license plate.

Remove interior grab handle. Pop cover off, then 10mm bolt

Remove plastic interior hatch cover. Start from the bottom. The top lip will push up toward the roof

Unclip the 3 connectors - easy enough but some people just let it dangle or tape it up.

Remove just the driver side interior metal panel. Lots of 10mm bolts

Remove the window motor assembly. 4, 10mm bolts. With liftgate open I found it easy to slide the assembly side to side to make room for accessing the next few steps. Someone else mentioned to only move the window assembly around from the sides so as not to get fingers caught in the gears.

Remove 2 bolts, 10mmfor the rear hatch handle, undo the linkage.

Remove 1 bolt, 10mm for the rear lock

Pop the clips - I found needle nose pliers easiest - squeeze and push. Others used small socket heads to push through.

That should be about it. Assemble in reverse. I'm probably forgetting something as this is from memory and I'm not looking at the truck.

It's not bad at all IMO.

 
Status
Not open for further replies.

Members online

No members online now.

Forum statistics

Threads
278,316
Messages
3,554,121
Members
248,016
Latest member
Advally Service

Trending content

Back
Top