
You are using an out of date browser. It may not display this or other websites correctly.
You should upgrade or use an alternative browser.
You should upgrade or use an alternative browser.
What Did You Do To Your 3rd Gen Today?
- Thread starter pin8246
- Start date
- Status
- Not open for further replies.


Got rid of the nearing-uselessness 12V cigarette lighter ports!
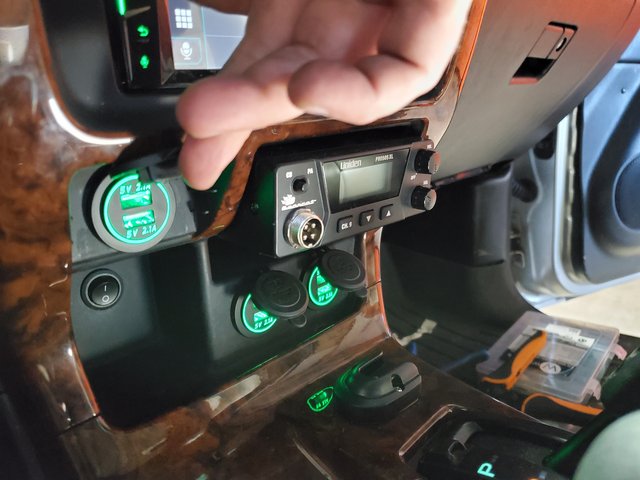
Amazon.com: Cllena Dual USB Charger Socket Power Outlet 2.1A & 2.1A for Car Boat Marine Mobile (4.2A-Green)
Note to potential modders:
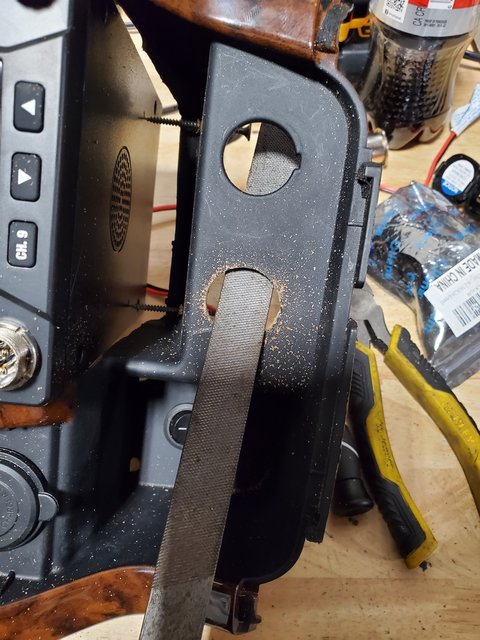
You will need to file/grind out the existing holes. if you go with the most common USB replacements on Amazon. Additionally, you will need to snip the OEM 90-degree connectors off and replace them with standard ones.
Great idea! Now I'm inspired to do the same.

Fiffa
Member
Great idea! Now I'm inspired to do the same.
Awesome! I was hoping to find a less hoaky style, but most everything is blue or red on Amazon. Luckily, the dust covers completely block out the green light!
WhatThePuck
New member
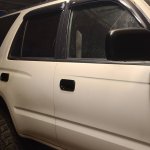
This weekend I:
removed a couple of emblems that I didn't want; and there are 3 remaining that I do want I am going to remove and paint
Removed the roof rack so I could fit it into the garage lol it'll go back on when the weather isn't crappy
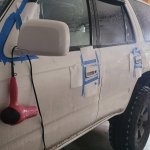
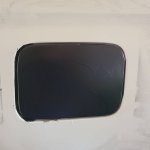
Spray painted the side mirrors, door handles, and gas tank door. On a warmer day I am going to paint the chrome bumpers
I know it's drippy and it doesn't bother me lol
removed a couple of emblems that I didn't want; and there are 3 remaining that I do want I am going to remove and paint
Removed the roof rack so I could fit it into the garage lol it'll go back on when the weather isn't crappy
Spray painted the side mirrors, door handles, and gas tank door. On a warmer day I am going to paint the chrome bumpers
I know it's drippy and it doesn't bother me lol
Attachments
This weekend I:
removed a couple of emblems that I didn't want; and there are 3 remaining that I do want I am going to remove and paint
Removed the roof rack so I could fit it into the garage lol it'll go back on when the weather isn't crappy
Spray painted the side mirrors, door handles, and gas tank door. On a warmer day I am going to paint the chrome bumpers
I know it's drippy and it doesn't bother me lol
The contrast looks good. Are you just gonna paint over the chrome bumper?
My dodge has painted over chrome ( now black) and has held up ok for the past 2 years, but does scratch off easy, could have been my prep work. Im gonna be mounting a ARB bumper this spring in front, so the back being black ( yet stock) might look good.

Limited1996
New member
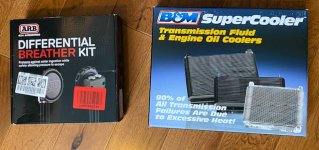
Got stuck in water the other day so went to check my fluids and this is what came out of the fill on the front diff. biggest issue is the drain plug is stripped (It has been been for a few months) Now I need to figure out how to get that out. Did the extended breather mod on the rear a while back and it checked out fine.. does anyone know if you can drive the truck with the front diff fluid like this without damaging anything in 2wd? Avoiding water and mud for a while
Attachments
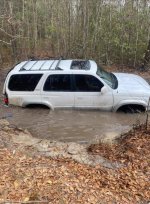
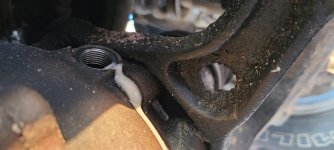
Got stuck in water the other day so went to check my fluids and this is what came out of the fill on the front diff. biggest issue is the drain plug is stripped (It has been been for a few months) Now I need to figure out how to get that out. Did the extended breather mod on the rear a while back and it checked out fine.. does anyone know if you can drive the truck with the front diff fluid like this without damaging anything in 2wd? Avoiding water and mud for a while
Get a sharp chisel and hammer a nice deep groove into the plug. Angle the chisel against the groove and give it a hard hit. That should loosen the plug.
I wouldn't drive around with fluid looking like that. You should drain and flush a few times when you get the plug loosened. You don't want to screw up your bearings. I hate water and mud! I don't understand why people enjoy driving in it. To each his own I guess.

spartacus
Senior Member
Got stuck in water the other day so went to check my fluids and this is what came out of the fill on the front diff. biggest issue is the drain plug is stripped (It has been been for a few months) Now I need to figure out how to get that out. Did the extended breather mod on the rear a while back and it checked out fine.. does anyone know if you can drive the truck with the front diff fluid like this without damaging anything in 2wd? Avoiding water and mud for a while
use a siphon pump and put a hose down the fill plug and suckered out as much of the nasty fluid Take it to welder to get a bolt welded on to the fill plug then drain and fill
WhatThePuck
New member
The contrast looks good. Are you just gonna paint over the chrome bumper?
My dodge has painted over chrome ( now black) and has held up ok for the past 2 years, but does scratch off easy, could have been my prep work. Im gonna be mounting a ARB bumper this spring in front, so the back being black ( yet stock) might look good.
Yeah I was going to tape off the bumpers and paint those too once the weather is a little warmer. I was lucky enough to get away with the blow dryer trick haha! Thinking about doing the grill too and I think that'll require removing it so that will come later. It'll still look good once you have the ARB bumper! I plan on upgrading the bumpers but that won't be for some time. Happy building!

shawnathan9
New member
Added rock lights
Last night, I finished installing, what took two mornings of cable routing, a set of rock lights I picked up off of Amazon.
The first thing I did was to look under the rig and locate areas that would have the least amount of contact and try to keep the locations as uniform as possible to avoid a strange glow pattern on the ground.
I began by recycling some metal bracket plates I had lying around by bending them into an "L" and then cutting them into the right length for the location.
I mounted the rock lights using their existing mounting bolts and then sprayed the bolts to minimize corrosion:
<a href="https://ibb.co/XF69F9f"><img src="https://i.ibb.co/MPKbPby/20210209-094831.jpg" alt="20210209-094831" border="0"></a>
For the rear, I decided to drill into the tow hitch frame and mounted directly to it. Drilling into that thick metal took some time but it was worth it since it allowed me to keep the lights uniform on each side as other points were different due to the way the exhaust tip leads out of the back:
<a href="https://ibb.co/yPfDZ07"><img src="https://i.ibb.co/Sys2MNG/20210208-102100.jpg" alt="20210208-102100" border="0"></a>
Here is where I mounted in the front of the rear tire well:
<a href="https://ibb.co/k3K3wKP"><img src="https://i.ibb.co/mvJv2JP/20210208-102055.jpg" alt="20210208-102055" border="0"></a>
For the rear of the front wheel well, I found a point near one of the body mount bushings where the metal was thinner also kept the rock lights at a low profile:
<a href="https://ibb.co/GWTDKS4"><img src="https://i.ibb.co/fkvWhwz/20210211-082607.jpg" alt="20210211-082607" border="0"></a>
The front was the easiest to determine as I, once again, used a body mount bushing bracket as a base:
<a href="https://ibb.co/Xb53Pnx"><img src="https://i.ibb.co/W6zPXrv/20210211-082546.jpg" alt="20210211-082546" border="0"></a>
I used some wiring loom, in certain areas, to shield from exhaust and engine heat. Not sure how we'll they'll hold up so I'll have to check back on them in a couple of miles down the road. *I can always solder in some new cables in place should they melt.
I found a good place to mount a 3 switch panel I picked up:
<a href="https://ibb.co/8rGgbQx"><img src="https://i.ibb.co/F5c4XdY/20210210-105903.jpg" alt="20210210-105903" border="0"></a>
*The light bar and rear lights are not wired in yet as that would be for a future project.
I had to dremel out some room for clearance for these switches and so I can't go back to a stock look now but I'm pretty happy with the location and that I've got the panel to sit flush within it's location.
I spliced the switch panels illumination into an existing accessory line from my aftermarket stereo. In other words, I took apart the center console just to get this thing powered up and pretty :juggle:
After an hour, or two, of tucking cables in discrete areas of the frame, zip tying, and soldering connections together, I arrived at the the fuse box and began to connect the rock lights, switch panel, and relay onto the fuse box I mounted over the stock location:
<a href="https://ibb.co/JmJCjgB"><img src="https://i.ibb.co/CmGWKD1/20210210-233934.jpg" alt="20210210-233934" border="0"></a>
I ran into a problem at first. I connected everything together but the lights wouldn't switch on. I should have tested the damn thing before I installed it and I began to think of all the wrong things and the worst case scenario that I installed a dud...that would be a nightmare to unistall and return for a replacement but that's what it looked like I was going to do...
Before giving up, I started to play with the relay connections and cut my beautifully soldered connections in half. After that, I held the rock lights power line directly to the batteries positive terminal and it lit up!
So, I figured the lights were working just fine but there's some fault in my wiring within the fuse box, very unlikely, or the relay itself. The relays came pre-installed with wires and so I grabbed another one and took that end off to see what was going on. Behold, the manufacturer of this relay screwed up big time; the 30/85/86/87 leads where NOT arranged as shown on the diagram on top of the relay itself which meant that the power, trigger, accessory, and grounds were all leading out/in incorrectly..
After figuring out the right connections, I resoldered everything nice and clean and crossed my fingers and flipped the switch. Cha-ching!
<a href="https://ibb.co/YLSVBHZ"><img src="https://i.ibb.co/jrYjknR/20210211-010047.jpg" alt="20210211-010047" border="0"></a>
*The kit allows you to connect to the lights via bluetooth so you can change the colors, make a constant or strobe pattern, and also tune it to react with music. The color shown here is actually the white which, is kind of a disappointment, not really as white as I had seen in the picture or preferred.
I wanted to make it a solid bright white, for functionality, and not give it a car show effect. However, it's starting to *Glow on me at this point.
I want to get this to flash along with my alarm system when I lock/unlock my rig. I think that would give a nice effect but I haven't looked into this just yet. If anyone has any leads then let me know!
:rockon:
Last night, I finished installing, what took two mornings of cable routing, a set of rock lights I picked up off of Amazon.
The first thing I did was to look under the rig and locate areas that would have the least amount of contact and try to keep the locations as uniform as possible to avoid a strange glow pattern on the ground.
I began by recycling some metal bracket plates I had lying around by bending them into an "L" and then cutting them into the right length for the location.
I mounted the rock lights using their existing mounting bolts and then sprayed the bolts to minimize corrosion:
<a href="https://ibb.co/XF69F9f"><img src="https://i.ibb.co/MPKbPby/20210209-094831.jpg" alt="20210209-094831" border="0"></a>
For the rear, I decided to drill into the tow hitch frame and mounted directly to it. Drilling into that thick metal took some time but it was worth it since it allowed me to keep the lights uniform on each side as other points were different due to the way the exhaust tip leads out of the back:
<a href="https://ibb.co/yPfDZ07"><img src="https://i.ibb.co/Sys2MNG/20210208-102100.jpg" alt="20210208-102100" border="0"></a>
Here is where I mounted in the front of the rear tire well:
<a href="https://ibb.co/k3K3wKP"><img src="https://i.ibb.co/mvJv2JP/20210208-102055.jpg" alt="20210208-102055" border="0"></a>
For the rear of the front wheel well, I found a point near one of the body mount bushings where the metal was thinner also kept the rock lights at a low profile:
<a href="https://ibb.co/GWTDKS4"><img src="https://i.ibb.co/fkvWhwz/20210211-082607.jpg" alt="20210211-082607" border="0"></a>
The front was the easiest to determine as I, once again, used a body mount bushing bracket as a base:
<a href="https://ibb.co/Xb53Pnx"><img src="https://i.ibb.co/W6zPXrv/20210211-082546.jpg" alt="20210211-082546" border="0"></a>
I used some wiring loom, in certain areas, to shield from exhaust and engine heat. Not sure how we'll they'll hold up so I'll have to check back on them in a couple of miles down the road. *I can always solder in some new cables in place should they melt.
I found a good place to mount a 3 switch panel I picked up:
<a href="https://ibb.co/8rGgbQx"><img src="https://i.ibb.co/F5c4XdY/20210210-105903.jpg" alt="20210210-105903" border="0"></a>
*The light bar and rear lights are not wired in yet as that would be for a future project.
I had to dremel out some room for clearance for these switches and so I can't go back to a stock look now but I'm pretty happy with the location and that I've got the panel to sit flush within it's location.
I spliced the switch panels illumination into an existing accessory line from my aftermarket stereo. In other words, I took apart the center console just to get this thing powered up and pretty :juggle:
After an hour, or two, of tucking cables in discrete areas of the frame, zip tying, and soldering connections together, I arrived at the the fuse box and began to connect the rock lights, switch panel, and relay onto the fuse box I mounted over the stock location:
<a href="https://ibb.co/JmJCjgB"><img src="https://i.ibb.co/CmGWKD1/20210210-233934.jpg" alt="20210210-233934" border="0"></a>
I ran into a problem at first. I connected everything together but the lights wouldn't switch on. I should have tested the damn thing before I installed it and I began to think of all the wrong things and the worst case scenario that I installed a dud...that would be a nightmare to unistall and return for a replacement but that's what it looked like I was going to do...
Before giving up, I started to play with the relay connections and cut my beautifully soldered connections in half. After that, I held the rock lights power line directly to the batteries positive terminal and it lit up!
So, I figured the lights were working just fine but there's some fault in my wiring within the fuse box, very unlikely, or the relay itself. The relays came pre-installed with wires and so I grabbed another one and took that end off to see what was going on. Behold, the manufacturer of this relay screwed up big time; the 30/85/86/87 leads where NOT arranged as shown on the diagram on top of the relay itself which meant that the power, trigger, accessory, and grounds were all leading out/in incorrectly..
After figuring out the right connections, I resoldered everything nice and clean and crossed my fingers and flipped the switch. Cha-ching!
<a href="https://ibb.co/YLSVBHZ"><img src="https://i.ibb.co/jrYjknR/20210211-010047.jpg" alt="20210211-010047" border="0"></a>
*The kit allows you to connect to the lights via bluetooth so you can change the colors, make a constant or strobe pattern, and also tune it to react with music. The color shown here is actually the white which, is kind of a disappointment, not really as white as I had seen in the picture or preferred.
I wanted to make it a solid bright white, for functionality, and not give it a car show effect. However, it's starting to *Glow on me at this point.
I want to get this to flash along with my alarm system when I lock/unlock my rig. I think that would give a nice effect but I haven't looked into this just yet. If anyone has any leads then let me know!
:rockon:
Last edited:
I want to get this to flash along with my alarm system when I lock/unlock my rig. I think that would give a nice effect but I haven't looked into this just yet. If anyone has any leads then let me know!
:rockon:
Hey man, clean install! Those lights are pretty bright. Makes me want to add some to mine.
I was thinking about getting those rock lights to flash with your alarm, and i think it wouldn't be too hard. If you have an aftermarket alarm, there should be a wire that energizes the hazard light relay(if i'm not mistaken), that if you connect to the switch on your rock light relay SHOULD do what you want.
If you have a factory theft deterrent system, it should be the same idea, but you would want to tap into the theft deterrent output on the body ECU. I was looking through my factory diagram, but I have a 2000 and i'm pretty sure they are different.
I searched a little for a wiring diagram for yours, but couldn't find one. Heres a dropbox link for the 2000, maybe that will help?
Dropbox - 2000 4Runner Electrical Wiring Diagram (EWD383U) - Printable - Simplify your life
It'd be great to know if you end up getting it to work!

4TexasRunner
New member
Relay Fuse Block Build
Currently in the process of building relay fuse block for my 97. Took about a million write ups and videos before I got a 5 year old's understanding of how to do it...
Currently in the process of building relay fuse block for my 97. Took about a million write ups and videos before I got a 5 year old's understanding of how to do it...

fourfive
Senior Member
Bolt & screw extractor kits are nice to have for situations like this. Screw extractor for the front diff allen drain bolt. You can get cheap or pricier kits.Got stuck in water the other day so went to check my fluids and this is what came out of the fill on the front diff. biggest issue is the drain plug is stripped (It has been been for a few months) Now I need to figure out how to get that out.
Screw extractor:
IRWIN 53228 15 piece Multi Spline Extractor Set, Model:HAN53228 - Masonry Drill Bits - Amazon.com
Bolt extractor kit:
IRWIN 53228 15 piece Multi Spline Extractor Set, Model:HAN53228 - Masonry Drill Bits - Amazon.com
EDIT:
Correct bolt extractor kit link
IRWIN Bolt Extractor Set, 13 Piece (54113) - Hand Tool Sets - Amazon.com
If that doesn't work have a bolt or nut welded on. Mobile welders are more expensive but convenient for situations (if you don't weld) when your 4runner isn't in an ideal driving condition.
My understanding is that the front diff still rotates in 2WD so driving with watered down gear oil is probably risky.does anyone know if you can drive the truck with the front diff fluid like this without damaging anything in 2wd? Avoiding water and mud for a while
Last edited:
Sorrynotmoose
New member
Found out my stabilizer bar isn't connected on the front end, and put a steering wheel cover on. *shrug*

Smog-guy707
New member


Clutch pedal rebuild thanks to Timmy the toolman!
Sent from my iPhone using Tapatalk

Tinman1985
New member
Finally got my retrofits and color matched grill on. Built with ACME projectors/Apollo 3.0 shrouds and new housings. Easily the best $200 upgrade you can do. I sprayed the grill with a paint from Automotivetouchup.com. Hard to get the gold to match perfect, but still looks better than the fading chrome.


- Status
- Not open for further replies.
Similar threads
- Replies
- 9
- Views
- 26K


- Replies
- 0
- Views
- 2K
- Replies
- 5
- Views
- 1K

- Replies
- 13
- Views
- 3K


- Replies
- 11
- Views
- 21K


