Apohl17's AventuRunner Build Thread - V8 4th Gen

apohl17

New member
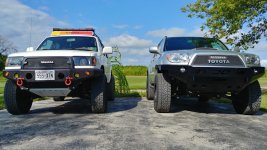
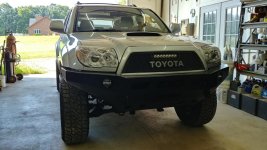
I hereby dedicate this thread to the trials and tribulations of switching over from my awesome 3rd Gen Iceberg Build to this larger, more powerful 4th Gen unofficially dubbed, The AventuRunner.

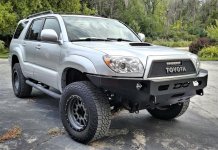
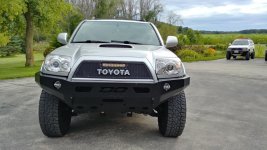
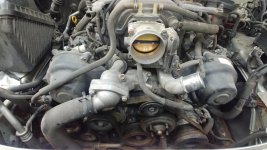
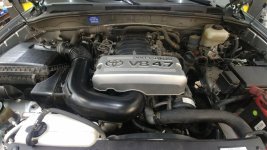
It's a 2007 Titanium Metallic Sport Edition 4runner w/ 211k on the ghastly 4.7l 2uz V8.

I just got "done" building up the Iceberg not long ago, and it has treated me oh so well, but the opportunity arose locally to purchase this second owner, Salt Lake- grown runner for the sake of less rust and miles, more power, and eventual equal capability.

Pics we all came to see...
The AventuRunner on the 26th of May, 2020!
<a data-flickr-embed="true" href="https://www.flickr.com/photos/185141496@N07/49930459626/in/album-72157711478030402/" title="P1100143"><img src="https://live.staticflickr.com/65535/49930459626_236eafb900_b.jpg" width="1024" height="768" alt="P1100143"></a><script async src="//embedr.flickr.com/assets/client-code.js" charset="utf-8"></script>
The AventuRunner on the 1st of January, 2020!
<a data-flickr-embed="true" href="https://www.flickr.com/photos/185141496@N07/49316998182/in/album-72157711510133311/" title="DRL"><img src="https://live.staticflickr.com/65535/49316998182_729164a0ff_b.jpg" width="1024" height="576" alt="DRL"></a><script async src="//embedr.flickr.com/assets/client-code.js" charset="utf-8"></script>
The AventuRunner on the 11th of November, 2019!
<a data-flickr-embed="true" href="https://www.flickr.com/photos/185141496@N07/49048320288/in/dateposted-public/" title="1111"><img src="https://live.staticflickr.com/65535/49048320288_b4c7ede64a_h.jpg" width="1184" height="888" alt="1111"></a><script async src="//embedr.flickr.com/assets/client-code.js" charset="utf-8"></script>
<a data-flickr-embed="true" href="https://www.flickr.com/photos/185141496@N07/49051139001/in/photostream/" title="1112"><img src="https://live.staticflickr.com/65535/49051139001_80ebd926f4_b.jpg" width="1024" height="768" alt="1112"></a><script async src="//embedr.flickr.com/assets/client-code.js" charset="utf-8"></script>
Back on the 22nd of September, 2019...
87b97fd2d43a53cd0dc44d99008a44bf.jpg

And when I got it on September 1st...
c28246b0dd3b7bbb5356b39f694fb8ca.jpg
 

Attachments

  • AVT4R1.jpg
    AVT4R1.jpg
    139.4 KB · Views: 4,641
Last edited:
Register to hide this ad
UPGRADES & MODIFICATIONS (s/o to [MENTION=88599]jso5usmc[/MENTION] for the build start!)

Suspension:
Front: ~2" lift
-Fox IFP 2.0 Coilovers
-Icon Vehicle Dynamics Tubular UCA's
-Revtek RTDD2-KB Diff Drop Kit

Rear: ~3" lift
-Fox IFP 2.0 Rear Shocks
-OME 2895 Coils
-Extended Rear Sway Bar Endlinks (built by [MENTION=98153]MStudt[/MENTION])

Wheels & Tires:
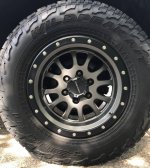
-265/70/17 Falken Wildpeak A/T3W SL
-Pro Comp 44 Series Syndrome 17x9" rims in Matte Graphite
-Gorilla E/T Spline Drive Lugs

Engine & Performance Upgrades:
-AFE Pro Dry S 31-10027 Filter
-Brand Spanking New Timing belt, WP, Idlers, coolant, etc. - 212k
-Gibson Cat-back 618816B SS Dual Exhaust
-AIP Bypass (thanks [MENTION=8828]slyfox75[/MENTION])
-TPMS Disable
-Denso IK20TT Twin Tip Plugs - 215k

Exterior Upgrades:
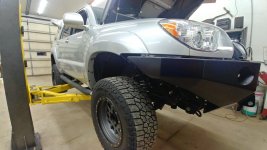
-Domello Offroad ED coated front bumper
-Custom Satoshi Grille w/ 80’s Toyota Emblem & light bar
-Sherpa Princeton Rack - [MENTION=413201]SherpaEquipmentCo[/MENTION]
-LFD Offroad Custom Front Skid

Undercarriage / Drive Train Upgrades:
-New OEM front brake calipers
-New LCA's
-Masterpro MP5235 Pass. CV Axle
-SPC 25435 Performance Cam Bolts
-Dorman / Koyo Wheel Bearing
-Proforged 104-10523 ITRE
-Proforged 104-10389 OTRE

Electrical/Lighting Modifications:
-Custom HID Retrofit using Morimoto D2S 5.0s,XBA Halos, Profile Performance Hi-Lens LED, etc.
-Baja Designs 10" S8 Light Bar (in grille)
-Mindwerx Lazer w/ Cali Raised LED Ditch Lights
-PIAA LP530 Fogs
-LED Map, Dome, and Hatch light panels
-Optima Red Top Battery
-H9 Low Conversion - removed for retro
-JDM ASTAR 921 Reverse LEDs

Interior/Audio Upgrades:
-Kenwood DDX6705S w/ Crux Interface & Backup Cam
-OrangeBoxx Fab Custom Molle PSD's
-Salex / OCD Console Organizer
-Yep, an 8-Ball Shift Knob :rockon:

As much as there was a lot done already on this rig to make it a capable daily as well as a modest adventure runner when I bought it, I can't wait to "finish" the build and make it my own, all the while learn from you 4th gen guys and see if the crowd is as inviting as the 3rd gen section :cheers:

Post Links:
#4- Timing Belt/WP
#13- TPMS Disable
#17- H9 Conversion
#18- AFE Filter Install
#19- Slyfox AIP Bypass
#20- Gorilla 21134ETBCET Spline Lugs
#21- Power Steering ATF Synthetic Drain/Fill
#25- Hood Scoop Paint
#29- Frame Rust Manicure
#34- 8 Ball Shift Knob/ Cabin Air Filter
#51- Passenger Wheel Bearing
#55- Icon DJ Greasing/ Service
#56- MStudt Rear Extended Sway Bar End Links
#57- Gibson Catback Exhaust
#60- Backup Cam Routing
#63- Kenwood Stereo
#93- Sherpa Princeton Rack
#108- Midwerx/Cali Raised Ditch Lights
#137- LFD Skid and Oil Change @ 214,125 mi
#145- Headlight Retrofit Start
#186- Denso Spark Plugs Change @ 215,028 mi
#203- Headlight Retrofit End
#238- Orange Boxx Fab PSD Install
 
Last edited:
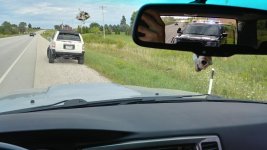
So after purchasing the vehicle, I began the hour drive home with my pops. I'm a good driver, mmkay? Well, Mr. Sheriff man decided to make sure I knew that I didn't have any license plates on. First time getting pulled over happened in a vehicle I owned for less than 30 minutes! Good times.
Nonetheless, he let me go with a warning ( it's legal to drive a just-purchased un-registered car in WI), and I made 'er home...
 

Attachments

  • AVT4R2.jpg
    AVT4R2.jpg
    137.2 KB · Views: 3,455
  • AVT4R3.jpg
    AVT4R3.jpg
    139.8 KB · Views: 3,877
  • AVT4R6.jpg
    AVT4R6.jpg
    141 KB · Views: 3,548
  • AVT4R5.jpg
    AVT4R5.jpg
    140 KB · Views: 3,391
  • AVT4R4.jpg
    AVT4R4.jpg
    134.8 KB · Views: 3,487
Last edited:
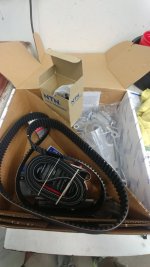
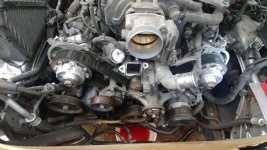
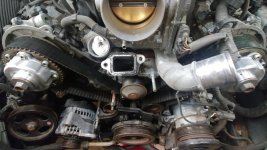
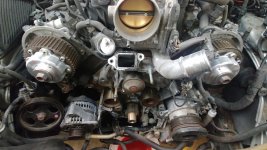
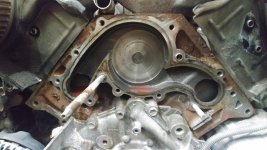
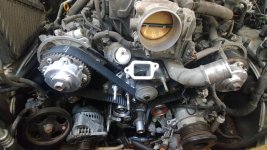
And then proceeded to get it onto the lift, where it would remain all evening and the entire next day for a timing belt job. Previous timing belt was done at 91k, so it was 30k overdue at 211k! Definitely first order of business.

I'll eventually reorder my pictures to where they are captioned inline, but for now, this will have to do.

For any and all of you guys that have done this job, you know how much of a daunting and lengthy task it is!
I started by watching some good videos:
YouTube part 1
YouTube part 2

And then dug into it, slowly but surely. Hardest parts are definitely the fan bracket and the crankshaft bolt.
I ordered the Aisin TKT-021 Kit from ebay, then bought an OEM thermostat (which I later found out had never been replaced, so I'm glad I did), t-stat gasket, serp belt, and FIPG separately, along with 2gal of fresh Z-red coolant. I didn't feel the need to do the crank seal, and wasn't going to mess with the cam seals due to the VVT-I. Overall, about $250 in parts for a job that would be close to a grand in labor if I were to take it to a shop. Can't complain!
 

Attachments

  • 0901191223.jpg
    0901191223.jpg
    124.8 KB · Views: 3,594
  • 0831192145.jpg
    0831192145.jpg
    139.4 KB · Views: 3,544
  • 0831192253a.jpg
    0831192253a.jpg
    142 KB · Views: 3,517
  • 0901191153.jpg
    0901191153.jpg
    139.8 KB · Views: 3,469
  • 0901191224.jpg
    0901191224.jpg
    142 KB · Views: 3,459
  • 0901191249a.jpg
    0901191249a.jpg
    136.5 KB · Views: 3,638
  • 0901191546.jpg
    0901191546.jpg
    141.6 KB · Views: 3,610
  • 0901191905a.jpg
    0901191905a.jpg
    136.8 KB · Views: 3,521
Last edited:
Really happy with how smooth it went- I could definitely tell the old t-belt has stretched and worn a bit when comparing the 130k difference. Cleaned up the engine bay a bit and got a game plan put together for a power steering refresh, new AFE filter, HCF filter delete, and an AIP bypass in the next week or so to keep things smooth in the bay. My first drive to work in this thing was awesome with the extra oomph, and everything is running like a charm!
 
Last edited:
2 very nice T4Rs!!

It seems you're doing a very good job on the 2007!

I also was pulled over by a very small town police officer when I was bringing my 2004 home when I bought it for not having tags, we have 4 weeks to register a vehicle here in South Carolina, the young "country boy" police officer was ignorant of this fact..but after showing him my bill of sale and the title signed over to me and explaining to him what the law is he was at first a little dumb founded and told me I just had to have some kind of "identifer"..LOL, I again explained the law to him and he called his superior who must of explained the law to him as well and he told me to have a good day and I was on my way!!
 
2 very nice T4Rs!!

It seems you're doing a very good job on the 2007!

I also was pulled over by a very small town police officer when I was bringing my 2004 home when I bought it for not having tags, we have 4 weeks to register a vehicle here in South Carolina, the young "country boy" police officer was ignorant of this fact..but after showing him my bill of sale and the title signed over to me and explaining to him what the law is he was at first a little dumb founded and told me I just had to have some kind of "identifer"..LOL, I again explained the law to him and he called his superior who must of explained the law to him as well and he told me to have a good day and I was on my way!!
Thanks! It sure was an interesting feeling of getting pulled over in a vehicle before I even got it home... :lol:
 
Looking good! I agree that the fan bracket was difficult...it almost made me give up early if not for a persistent friend with a blowtorch. HCF is EZ! I got the AIP bypass from slyfox. Very easy to install and seems to work just fine.
 
Looking forward to another V8 build! I've probably got maintenance items I should be doing the same. The lift definitely makes it easier to get work done on these big rigs!
 
Looking good! I agree that the fan bracket was difficult...it almost made me give up early if not for a persistent friend with a blowtorch. HCF is EZ! I got the AIP bypass from slyfox. Very easy to install and seems to work just fine.

Right on! Didn't have to use a torch at all- just lots of persistence and the right tools. I'm very happy to not have to worry about the t-belt for another 100k, one less thing off the plate. Yup, I'm just waiting to get my AFE filter, then will remove the HCF at the same time. Same though, Jeff was very professional and I can't wait to see how easy it is to install with the kit.

Looking forward to another V8 build! I've probably got maintenance items I should be doing the same. The lift definitely makes it easier to get work done on these big rigs!

Awesome! It really is quite a nice engine in these beasts. It definitely does! Very glad I have access to one at my fingertips.
 
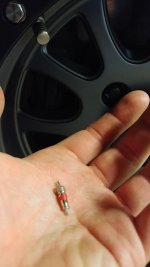
Well, second day of driving it and... the front passenger tire is flat as can be after work, 15 miles from home. Luckily I had a portable compressor at work to throw enough in it to get me home.

I proceeded to spend the next half hour searching for the mysterious object that was in my tire... And didn't find anything. Soapy water, nothing... So I got to a point where it was getting late, so I filled up the tire with more air, and...found the issue. the valve core was leaking, BAD. Threw a new core in and it's good to go.

Good times! :noidea: :rockon:

(first picture is this morning, happy to see it still at 35 psi)
 

Attachments

  • 00O0O_9VHZmm3krSY_1200x900.jpg
    00O0O_9VHZmm3krSY_1200x900.jpg
    94.9 KB · Views: 3,305
  • 0903192043.jpg
    0903192043.jpg
    60.1 KB · Views: 3,315
Last edited:
Day two on the work grind and this flashy flashy TPMS light is driving me bananas. I told myself I'd wait 'til the weekend to get the disable done, but after getting home from work and taking care of some business back home, it was dark, but I decided to get it done. I guess it goes to show how easy it was...

Lots of good writeups on this here on the forums.
Write-up: How to Disable (Bypass) the TPMS

I, however, wanted to do it so it was un-disable-able. :juggle:

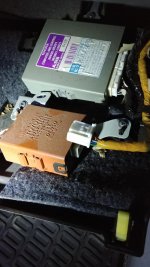
1. Remove the black lower trim under the glove box with a single Philips head screw.
2. Pull the connector off the orange box.
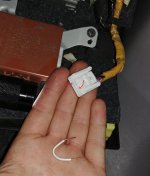
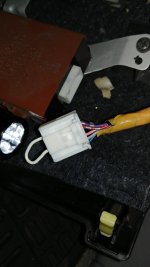
3. Look for the pink/black and white/black wires leading into the male connector.
4. Take a 2" piece of Bell wire in 20 AWG and jump the two pins on the opposite side of the connector.
5. Wrap in electrical tape for posterity's sake. (not shown in pics)

Voila! Light is gone and I can remove when I get the pesky battery replaced in my dead sensor, when I get new tires next year.
 

Attachments

  • 0904192056.jpg
    0904192056.jpg
    137.6 KB · Views: 3,666
  • 0904192059.jpg
    0904192059.jpg
    128.7 KB · Views: 3,649
  • 0904192103.jpg
    0904192103.jpg
    124.3 KB · Views: 3,718
Last edited:
Day two on the work grind and this flashy flashy TPMS light is driving me bananas. I told myself I'd wait 'til the weekend to get the disable done, but after getting home from work and taking care of some business back home, it was dark, but I decided to get it done. I guess it goes to show how easy it was...

Lots of good writeups on this here on the forums.
Write-up: How to Disable (Bypass) the TPMS

I, however, wanted to do it so it was un-disable-able. :juggle:

1. Remove the black lower trim under the glove box with a single Philips head screw.
2. Pull the connector off the orange box.
3. Look for the pink/black and white/black wires leading into the male connector.
4. Take a 2" piece of Bell wire in 20 AWG and jump the two pins on the opposite side of the connector.
5. Wrap in electrical tape for posterity's sake.

Voila! Light is gone and I can remove when I get the pesky battery replaced in my dead sensor, when I get new tires next year.

Nice! I went with the wire tap route. Partially because when I opened that area up a previous owner had already stripped and taped together the two wires to bypass but the tape hadn't held and the wires were no longer touching. I was so glad it fixed my TPMS light because I too was going nuts with it flashing! Your method is definitely easier and more simply reversible!
 
Ordered a Gibson cat-back exhaust yesterday from [MENTION=9]Jason B[/MENTION] at Burtman Industries! Went with the SS, dual side exit, black tip system. Can't wait to receive it and install.
 
First up, the H9 conversion. For those that don't know, the basic Philips German H9 bulbs put out about 2100 lumens @ 65W, about twice that of the stock H11 @ 55W. 5 minutes of my time, a razorblade, and a side cutters and these bad boys went in.
e1fa7cbc747e05e48a28b41cf03261cf.jpg

One the metal tab is trimmed on the socket, the plastic peninsula gets cut out. Trimmed H9 on the left, H9 out of the package on the right.
91e4a3b02d40a6fac306478c7d33fbfe.jpg

Again, H11 on the left, and H9 on the right!
505f49833ef773ef81773e36db844c5c.jpg
def7611b1d00e88b441891314e830411.jpg

Pictures don't do this $12 upgrade justice. Brighter, and whiter.

Sent from my VS988 using Tapatalk
 
Next up, the AFE Magnum Pro Dry S filter and HCF delete. Picked up this guy on lameazon for about $50. Very impressed with the weight and build of this filter, it's heaaaaavy!
eab7f777bb7340121aca77bab22c233f.jpg

Old filter: eesh.
6d0c55417861afc914b6da84dab40b68.jpg

Get this guy outta there...
01cda3d5a3f6c9b6071272fb6ddcc110.jpg

And a comparison!
b7f9bcf585b50e250d2938adcfb0cbdd.jpg

Test drive after this definitely produces a noticeable throttle pickup, less acceleration lag! Happy camper here.

Sent from my VS988 using Tapatalk
 
Next up, AIP Bypass from the one and only [MENTION=8828]slyfox75[/MENTION] . Easy to install, and peace at mind knowing that I'm in the green from now on.
Fuse box:
06af4d5840caea446af36c56b25f0585.jpg

MAF splice:
59a7988fc89d16032ef811a52c8e43f4.jpg

All buttoned up:
8a090b6c7e4ca008cf7128ca45eebb43.jpg


And a side note, I got my Salex OCD organized for the console to cover the black hole under the armrest. Very pleased!
223bf23512efb93c3c14672b8ebdc0d9.jpg


Sent from my VS988 using Tapatalk
 
Next, switch out and retorque all the lugs. After removing the front passenger wheel to replace the center cap last weekend, I found out I had about 4 turns on the acorns. Not good!
Bought some extended Gorillas and replaced 'em all. Now i' m at 9 turns to snug. Muuuuch nicer!
5c21d20d15bb600e9cac6cc97970c82b.jpg


Sent from my VS988 using Tapatalk
 

Members online

No members online now.

Forum statistics

Threads
278,306
Messages
3,554,045
Members
248,016
Latest member
Advally Service

Trending content

Back
Top