
You are using an out of date browser. It may not display this or other websites correctly.
You should upgrade or use an alternative browser.
You should upgrade or use an alternative browser.
2UZ-FE R&R T-Belt & Water Pump
- Thread starter BlackWorksInc
- Start date

UPDATE
Timing belt off by 1 tooth (Left Cam). $450 to reset the belt. It will be done this afternoon.
I'll bet I just moved that cam another 1/2 tooth after I had done the +1 / +1/2 tooth clock per the FSM.
I'm glad I tackled this job initially. I learned a lot. I'll likely do the next one. I'm pissed I pinned myself into this timing corner. . I just wasn't confident I could have it all apart; reset and reassembled in a single day.
This was my first timing belt and I worked slowly and methodically solo. Sometimes it doesn't always work out perfectly.
Timing belt off by 1 tooth (Left Cam). $450 to reset the belt. It will be done this afternoon.
I'll bet I just moved that cam another 1/2 tooth after I had done the +1 / +1/2 tooth clock per the FSM.
I'm glad I tackled this job initially. I learned a lot. I'll likely do the next one. I'm pissed I pinned myself into this timing corner. . I just wasn't confident I could have it all apart; reset and reassembled in a single day.
This was my first timing belt and I worked slowly and methodically solo. Sometimes it doesn't always work out perfectly.

blind squirrel
New member
UPDATE
I'll bet I just moved that cam another 1/2 tooth after I had done the +1 / +1/2 tooth clock per the FSM.
Interesting. Talk more about the +1/+1/2 you mention. I left mine lined up with the timing marks and had no problems when I replaced the belt. I have had cams jump forward a tooth with the belt off, on my acura tl, you just have to pay close attention when you put the new belt on that your marks line back up.
Last edited:
Great Write up
I was curious as I have done one on my previous 2000 LC
-
I will add to Nevada's post regarding the power steering pulley. If you remove the pully and not loosen the pump as indicated in the OP's instructions, you should replace the nut - indicated with a black diamond in the FSM. I speak from experience of being stranded many miles later and having to rebuild the power steering pump with a new shaft.
-
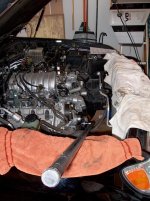
Attaching a photo with my "Breaker Bar" Yakima 48"'er it took to loosen the crank.
I was curious as I have done one on my previous 2000 LC
-
I will add to Nevada's post regarding the power steering pulley. If you remove the pully and not loosen the pump as indicated in the OP's instructions, you should replace the nut - indicated with a black diamond in the FSM. I speak from experience of being stranded many miles later and having to rebuild the power steering pump with a new shaft.
-
Attaching a photo with my "Breaker Bar" Yakima 48"'er it took to loosen the crank.
Attachments
Interesting. Talk more about the +1/+1/2 you mention. I left mine lined up with the timing marks and had no problems when I replaced the belt. I have had cams jump forward a tooth with the belt off, on my acura tl, you just have to pay close attention when you put the new belt on that your marks line back up.
FSM page EM-20 Step 1. D. 1. Hint 2 and 3.
http://www.ezdries.net/Vidpics/4Run...Z-FE Engine Mechanical/Timing Belt/008001.pdf
UPDATE 2
Shop buttoned everything back up and a few blocks out of the shop the Check Eng light came back with the same P0016 anb P0018 codes in addition to a new one: P0011.
I asked for an A tech to do the work but it sounds like they had a B tech on it. So no truck for me tonight. Will get it back tomorrow assuming nothing catastrophic is found.
It seems like there is a little bit of art to doing these Toyota timing belts in addition to the manual instructions.
Shop buttoned everything back up and a few blocks out of the shop the Check Eng light came back with the same P0016 anb P0018 codes in addition to a new one: P0011.
I asked for an A tech to do the work but it sounds like they had a B tech on it. So no truck for me tonight. Will get it back tomorrow assuming nothing catastrophic is found.
It seems like there is a little bit of art to doing these Toyota timing belts in addition to the manual instructions.
Last edited:

BlackWorksInc
New member
UPDATE
Timing belt off by 1 tooth (Left Cam). $450 to reset the belt. It will be done this afternoon.
I'll bet I just moved that cam another 1/2 tooth after I had done the +1 / +1/2 tooth clock per the FSM.
I'm glad I tackled this job initially. I learned a lot. I'll likely do the next one. I'm pissed I pinned myself into this timing corner. . I just wasn't confident I could have it all apart; reset and reassembled in a single day.
This was my first timing belt and I worked slowly and methodically solo. Sometimes it doesn't always work out perfectly.
Interesting. Talk more about the +1/+1/2 you mention. I left mine lined up with the timing marks and had no problems when I replaced the belt. I have had cams jump forward a tooth with the belt off, on my acura tl, you just have to pay close attention when you put the new belt on that your marks line back up.
This is mainly because when you have it set to what the FSM calls for the Cams have a tendency to "Snap" over in either the counter clockwise or clockwise position as was mentioned earlier in the thread (this is because some of the lobes are resting on their peaks at this position so a bump can cause it to roll off those peaks). It's not a lot, but enough that you can be a tooth or two off.
This is mainly because when you have it set to what the FSM calls for the Cams have a tendency to "Snap" over in either the counter clockwise or clockwise position as was mentioned earlier in the thread (this is because some of the lobes are resting on their peaks at this position so a bump can cause it to roll off those peaks). It's not a lot, but enough that you can be a tooth or two off.
Bingo. And it makes perfect sense. But somewhere along the way I (and apparently my shop's tech now as well) bumped the whole timing off a tooth or two. What's interesting is how well the engine sounded (nothing abnormal) and felt (seemingly same power) with the computer throwing the timing code. We'll see what tomorrow brings!

swapmeet
New member
[MENTION=66389]BlackWorksInc[/MENTION]
First of all, thanks for posting this. You've been a great resource for so many on this forum and the internet. Someone should send you a cake.
I haven't completely investigated it, but I believe I have a leaky water pump on my 07 4.7 4R.
Symptoms:
Overheated while idling the other day
Small puddle/ wet spot under the truck, and found red coolant on skids
Saw a wet 'trail' of water on the front of the block
But here's the kicker... my truck has 135k and the timing belt was done at 90k.
What would you recommend? Pull it all apart and replace the water pump and leave the belt for when I hit 150-170k?
Or just do it all?
First of all, thanks for posting this. You've been a great resource for so many on this forum and the internet. Someone should send you a cake.
I haven't completely investigated it, but I believe I have a leaky water pump on my 07 4.7 4R.
Symptoms:
Overheated while idling the other day
Small puddle/ wet spot under the truck, and found red coolant on skids
Saw a wet 'trail' of water on the front of the block
But here's the kicker... my truck has 135k and the timing belt was done at 90k.
What would you recommend? Pull it all apart and replace the water pump and leave the belt for when I hit 150-170k?
Or just do it all?
BlackWorksInc
New member
[MENTION=66389]BlackWorksInc[/MENTION]
First of all, thanks for posting this. You've been a great resource for so many on this forum and the internet. Someone should send you a cake.
I haven't completely investigated it, but I believe I have a leaky water pump on my 07 4.7 4R.
Symptoms:
Overheated while idling the other day
Small puddle/ wet spot under the truck, and found red coolant on skids
Saw a wet 'trail' of water on the front of the block
But here's the kicker... my truck has 135k and the timing belt was done at 90k.
What would you recommend? Pull it all apart and replace the water pump and leave the belt for when I hit 150-170k?
Or just do it all?
The timing belt may have become contaminated if that much coolant is leaking under the cover. Usually we recommend replacement if it's been contaminated with coolant, since you pretty much end up taking the belt off anyways to replace the water pump; it may not hurt to just get another belt for $40. But it's up to you.


thegipper
New member
Wow I wish I would have seen this prior to this past weekend, it would have saved my entire Sunday. This is how the original belt came off my truck too but unfortunately my buddy and I did the timing belt 2 days in a row because, per the guide, the first time we installed the belt we put the cam notches at the straight lines while the crank mark was at the white dot. I got a P0016 and P0018 codes and the truck ran for crap. We got it right yesterday though.
Blackworksinc, to prevent people from getting this mixed up in the future, would you please edit your guide to show that when the crank is at TDC, that is when the cam notches are supposed to be on the straight marks. Additionally, another tip for your writeup is we found that only the front 2 bolts on the AC compressor have to be removed as those are threaded into the fan bracket. The rear bolt can stay and that saves a lot of problems when reinstalling the 2 bolts that needed to be removed.
I'm about to do this job and I'm confused. The FSM has you remove the belt in this exact position shown in the picture. When you go to install the new belt, on what mark do you put the arrows? Also do the arrows go forward toward the bumper?
In that three part video on youtube the guy just rotated the crank until it was at "zero", and both cams marks were lined up with the straight line. This is how he had it when he removed and installed the belt. This seems to make sense to me. Why does the manual have you rotate the crank 50deg to remove the belt? Is it supposedly easier to get it off or something?
Thanks
blind squirrel
New member
[QUOTE/]I'm about to do this job and I'm confused. The FSM has you remove the belt in this exact position shown in the picture. When you go to install the new belt, on what mark do you put the arrows? Also do the arrows go forward toward the bumper?
In that three part video on youtube the guy just rotated the crank until it was at "zero", and both cams marks were lined up with the straight line. This is how he had it when he removed and installed the belt. This seems to make sense to me. Why does the manual have you rotate the crank 50deg to remove the belt? Is it supposedly easier to get it off or something?
Thanks[/QUOTE]
I did mine like you are thinking, lined all three marks up and left it there. The manual has you rotate the crack 50deg to take the pressure off the cams and help ensure one doesn't jump time on accident with the belt off. That happened on my TL, but not on my runner. You just need to pay attention when putting the new belt on that your timing is still correct in all three spots. The belt arrows go out toward the bumper.
In that three part video on youtube the guy just rotated the crank until it was at "zero", and both cams marks were lined up with the straight line. This is how he had it when he removed and installed the belt. This seems to make sense to me. Why does the manual have you rotate the crank 50deg to remove the belt? Is it supposedly easier to get it off or something?
Thanks[/QUOTE]
I did mine like you are thinking, lined all three marks up and left it there. The manual has you rotate the crack 50deg to take the pressure off the cams and help ensure one doesn't jump time on accident with the belt off. That happened on my TL, but not on my runner. You just need to pay attention when putting the new belt on that your timing is still correct in all three spots. The belt arrows go out toward the bumper.
thegipper
New member
Yeah I think I'm just going to do it the way it is shown in the three part video. The FSM is really confusing especially because it has you removing the pulley's and using all sorts of special tools ect.
I'll have my step dad there to lend a hand to hold the LH cam in place while I slip on the belt onto the RH cam using the same method found in video. If the belt comes off/on in the exact same spot as the old one, in theory, it should be correct.
I also heard that using large binder clips to hold the belt to the cam/crank helps to make sure that nothing jumps.
We shall see...
I'll have my step dad there to lend a hand to hold the LH cam in place while I slip on the belt onto the RH cam using the same method found in video. If the belt comes off/on in the exact same spot as the old one, in theory, it should be correct.
I also heard that using large binder clips to hold the belt to the cam/crank helps to make sure that nothing jumps.
We shall see...
Last edited:
I changed my 06 4 runner V8 (83K miles) two weeks ago, & my wife's 04 GX470(63K miles) this past week.
I was worried about age of belts. Both belts looked in very good shape. I did belts, water pump, pulleys, tensioner, all hoses, thermostat, plugs & coolant. Original coolant in both vehicles, no corrosion visible anywhere.
I was intimidated by getting the timing belt on correctly. This turned out to be straight forward...especially because the Mitsuboshi timing belt was marked for Crank, Left & Right cams. I removed & replaced the plugs. This made turing over the engine easy. (I checked the timing 3X on each vehicle)
The difficult items for me were #1 Lower Radiator Bolts #2 Fan Bracket Bolt on underside of AC Compressor #3 Sequence of Parts to Remove & Replace...KEEP TRACK OF ALL THE PARTS & BOLTS & NUTS....I got tired & made reassembly errors on both vehicles. I also had a problem reassembling the small trapezoidal plastic piece on the timing belt cover.
A tip for the Cam Sensor Wire Connector....I had to cut off the mount to disassemble...I used zip ties to reassemble.
A tip for Installing the Timing Belt......Install the tensioner only w/ a few turns on each of the two bolts...then install the belt....tighten the tensioner bolts to spec.....check timing marks....pull the wire holding the tensioner plunger & you will be good to go.
A tip for Coolant Drainage....I used my large diameter oil change pan for this as it is a messy job & removing the water pump lets a lot more coolant out of the engine.
A tip for Spring Clamp Removal...make sure you have a pliers w/ extra thick jaws. This was a major time waster for me until I used an old electrician's pliers w/ thicker jaws.
I was worried about age of belts. Both belts looked in very good shape. I did belts, water pump, pulleys, tensioner, all hoses, thermostat, plugs & coolant. Original coolant in both vehicles, no corrosion visible anywhere.
I was intimidated by getting the timing belt on correctly. This turned out to be straight forward...especially because the Mitsuboshi timing belt was marked for Crank, Left & Right cams. I removed & replaced the plugs. This made turing over the engine easy. (I checked the timing 3X on each vehicle)
The difficult items for me were #1 Lower Radiator Bolts #2 Fan Bracket Bolt on underside of AC Compressor #3 Sequence of Parts to Remove & Replace...KEEP TRACK OF ALL THE PARTS & BOLTS & NUTS....I got tired & made reassembly errors on both vehicles. I also had a problem reassembling the small trapezoidal plastic piece on the timing belt cover.
A tip for the Cam Sensor Wire Connector....I had to cut off the mount to disassemble...I used zip ties to reassemble.
A tip for Installing the Timing Belt......Install the tensioner only w/ a few turns on each of the two bolts...then install the belt....tighten the tensioner bolts to spec.....check timing marks....pull the wire holding the tensioner plunger & you will be good to go.
A tip for Coolant Drainage....I used my large diameter oil change pan for this as it is a messy job & removing the water pump lets a lot more coolant out of the engine.
A tip for Spring Clamp Removal...make sure you have a pliers w/ extra thick jaws. This was a major time waster for me until I used an old electrician's pliers w/ thicker jaws.

black4vcobra
New member
Yeah I think I'm just going to do it the way it is shown in the three part video. The FSM is really confusing especially because it has you removing the pulley's and using all sorts of special tools ect.
I'll have my step dad there to lend a hand to hold the LH cam in place while I slip on the belt onto the RH cam using the same method found in video. If the belt comes off/on in the exact same spot as the old one, in theory, it should be correct.
I also heard that using large binder clips to hold the belt to the cam/crank helps to make sure that nothing jumps.
We shall see...
Late to the party here, but blind squirrel is right, arrows go towards the front and line them up with the notches on the cam pulley.
Did you end up getting the belt installed correctly?
Just replaced the timing belt on my 2003 Toyota 4Runner V8.
Engine cranks beautiful but no start.
I ran a scanner on it and it said the Crank sensor circuit A with code PO335 and with the cheap 125 buck scanner I was able to do an RPM check with it and it showed 0 when cranking.
The thing that baffles me is the the truck ran great before the timing belt.
I know it is in time correct.
The question is can the Crank sensor die just like that?
Plus I did accidentally dumped about 2 cups of coolant on the sensor while removing water pump.I tried to clean it up when it happened.
I removed it and cleaned it entirely after I got the code.
Thinking maybe I did not clean it good enough and
still no start.Also the battery was unplugged the whole time while doing the job.
Any thoughts?
Engine cranks beautiful but no start.
I ran a scanner on it and it said the Crank sensor circuit A with code PO335 and with the cheap 125 buck scanner I was able to do an RPM check with it and it showed 0 when cranking.
The thing that baffles me is the the truck ran great before the timing belt.
I know it is in time correct.
The question is can the Crank sensor die just like that?
Plus I did accidentally dumped about 2 cups of coolant on the sensor while removing water pump.I tried to clean it up when it happened.
I removed it and cleaned it entirely after I got the code.
Thinking maybe I did not clean it good enough and
still no start.Also the battery was unplugged the whole time while doing the job.
Any thoughts?

stir_fry_boy
New member
Just replaced the timing belt on my 2003 Toyota 4Runner V8.
Engine cranks beautiful but no start.
I ran a scanner on it and it said the Crank sensor circuit A with code PO335 and with the cheap 125 buck scanner I was able to do an RPM check with it and it showed 0 when cranking.
The thing that baffles me is the the truck ran great before the timing belt.
I know it is in time correct.
The question is can the Crank sensor die just like that?
Plus I did accidentally dumped about 2 cups of coolant on the sensor while removing water pump.I tried to clean it up when it happened.
I removed it and cleaned it entirely after I got the code.
Thinking maybe I did not clean it good enough and
still no start.Also the battery was unplugged the whole time while doing the job.
Any thoughts?
You probably disrupted the sensor or connection somehow since it is a crank sensor circuit failure. Doubt it would fail at the same time as a timing belt replacement. The battery disconnected wouldn't cause it. Coolant shouldn't ruin a crank sensor either.
I know the connection was good when I removed and cleaned it and the Connector.I reinstalled it and the connector snapped in with that audible click.So I know it has a good connection. There is no visible damage.I am 100% sure I did not damage it. So I guess I should order a new one and see.
I can get one from toyota for 55 bucks.
Suggestions?
I can get one from toyota for 55 bucks.
Suggestions?
BlackWorksInc
New member
[MENTION=145769]TOY4R3[/MENTION]
How did you route the CrankShaft Position Wire when you reinstalled the covers? Typically some people and shops forget to route them correctly and the belt cuts them.
I can't find a picture of it, but it should be somewhat obvious if you look along the right side of the engine from crankshaft to camshaft (when facing it)
How did you route the CrankShaft Position Wire when you reinstalled the covers? Typically some people and shops forget to route them correctly and the belt cuts them.
I can't find a picture of it, but it should be somewhat obvious if you look along the right side of the engine from crankshaft to camshaft (when facing it)
Similar threads


- Replies
- 50
- Views
- 105K


