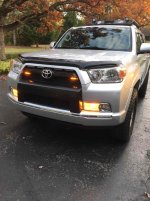
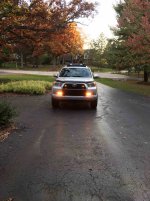
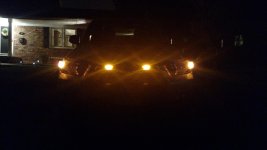
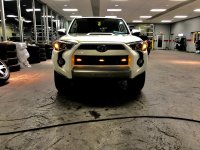
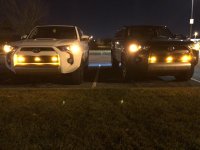
5th Gen Marker Lights in Grill

Im electrically challenged so if the directions say two I use two. If they don't address the issue then I use what came in the packet(1). The failure made me rethink my plan and I might just money up and buy a LED light bar to fit in the same spot. Really like the look but it will be more expensive since Ill have to pay someone to install it.

Man, trust me, I am the furthest thing from electrically inclined. Truth.
You can do this, re work your wiring, shove two 10amp mini fuses in the add a circuit and there will be light. Give it another shot, in the end you will be happy you didn't give up.
 
... I only have 1 10amp fuse...
So what you are saying is if I install the second 10amp fuse then the lights should work?

Something must be wrong with the wiring or where you guys are getting power if it takes 10 amps or more to power tiny LED lights.

Even headlights don't need that much current.

Someone mentioned following the RCO method. The RCO write-up says to use the"existing unused circuit shown below." If it's UNUSED, where does it get its power from. Wireless fuse? ;)

Why don't you find the schematic to be sure, find the wire the powers the marker/corner/tail lights and tap it from there? Simple as that.
EDIT: Sorry...
Wiring two 10-amp fuses to power LED marker lights was NOT a hack job, but was a procedure that could have been more clearly explained - considering we have many members who are not electrically-savvy.
 
Last edited:
Something must be wrong with the wiring or where you guys are getting if it takes 10 amps or more to power tiny LED lights.


Even headlights don't need that much current.


Yes I agree. I’ve tapped into the side marker lights and have no issues. I changed my side marker bulbs to LED as well so I’m confident the load is really low.


Sent from my iPhone using Tapatalk
 
Yes I agree. I’ve tapped into the side marker lights and have no issues....
Yes, that's how it should be done.
Mind sharing a picture of color and location of that wire?
That should help out those who are lost, and save their trucks from unpredictable effects of hacked-wiring. :)
 
Yes, that's how it should be done.
Mind sharing a picture of color and location of that wire?
That should help out those who are lost, and save their trucks from unpredictable effects of hacked-wiring. :)


I’ll take some pics later this evening and post them.


Sent from my iPhone using Tapatalk
 
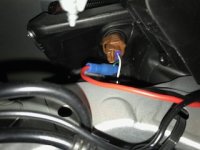
So here are couple of pics of where I've tapped into the side marker lights. Again, I've changed my marker lights to LED's. So the combined load of the marker lights and the 3 grill marker lights are relatively low and rest assured you won't be popping/blowing the fuse.

For reference, the green wire is the power. I just tapped into the green wire. The white is ground. For my ground wire from the grill lights, I just grounded it separately. In the pic, black wire to ground. Hope this helps.
 

Attachments

  • IMG_4706.jpg
    IMG_4706.jpg
    55.8 KB · Views: 1,920
  • IMG_4707.jpg
    IMG_4707.jpg
    31.6 KB · Views: 1,905
Something must be wrong with the wiring or where you guys are getting if it takes 10 amps or more to power tiny LED lights.

Even headlights don't need that much current.

Someone mentioned following the RCO method. The RCO write-up says to use the"existing unused circuit shown below." If it's UNUSED, where does it get its power from. Wireless fuse? ;)

Why don't you find the schematic to be sure, find the wire the powers the marker/corner/tail lights and tap it from there? Simple as that.

Wiring 10-amp fuses to power LED marker lights is a hack job. Why would one hack wiring on a latest model 4Runner?

Hack job? That certainly wasn't the aim. Here was my thinking and again I know nothing about electrical.
I liked the RCO solution because of the fact it did NOT tap into any factory wires and the add a circuit was placed into an unused spot on the fuse block. So if my professional wire job failed it would only affect the marker lights and nothing else. Seemed pretty safe to me. Was the offense here the addition of the 2 10amp fuses into the add a circuit? Are you saying that this set up should have worked in the absence of any fuses being added to the add a circuit?
 
... Seemed pretty safe to me. Was the offense here the addition of the 2 10amp fuses into the add a circuit? Are you saying that this set up should have worked in the absence of any fuses being added to the add a circuit?

Offense 1 is using the wrong fuse rating.
Offense 2 is not making certain of the components or circuit people are working with. Why does it take TWO fuses to run one circuit?
Are they in series? Why?

Ten amps for a 0.5-watt or so LED light?
Ten amps at 12Volts equals 120 Watts, enough to power 2 halogen headlights; And why 2 fuses?
If that after market wiring shorts against something, the wires could get hot and possibly cause a fire, before the blowing the 10-amp fuses.

I'm surprised no 5th-gen owner who knows electrical and knows what that "unused circuit" is for has chimed in.
 
Offense 1 is using the wrong fuse rating.
Offense 2 is not making certain of the components or circuit people are working with. Why does it take TWO fuses to run one circuit?
Are they in series? Why?

Ten amps for a 0.5-watt or so LED light?
Ten amps at 12Volts equals 120 Watts, enough to power 2 halogen headlights; And why 2 fuses?
If that after market wiring shorts against something, the wires could get hot and possibly cause a fire, before the blowing the 10-amp fuses.

I'm surprised no 5th-gen owner who knows electrical and knows what that "unused circuit" is for has chimed in.

What amp fuse(s?) would you suggest for the marker lights in question? Is your contention to have just one fuse added to the add a circuit?
 
Offense 1 is using the wrong fuse rating.
Offense 2 is not making certain of the components or circuit people are working with. Why does it take TWO fuses to run one circuit?
Are they in series? Why?

Ten amps for a 0.5-watt or so LED light?
Ten amps at 12Volts equals 120 Watts, enough to power 2 halogen headlights; And why 2 fuses?
If that after market wiring shorts against something, the wires could get hot and possibly cause a fire, before the blowing the 10-amp fuses.

I'm surprised no 5th-gen owner who knows electrical and knows what that "unused circuit" is for has chimed in.
~Not Me

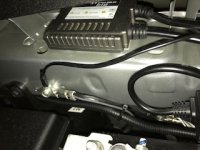
I would like to note that when using an add a circuit, you use 2 fuses. 1 to replace the fuse you remove to install the add a circuit into your fuse holder, and 1 for the new circuit. That's just how they are.

My Oznium LED Bolts are just tapped into the front markers.
 
What amp fuse(s?) would you suggest for the marker lights in question?
IF tapping off a circuit OTHER THAN stock tail light/marker or DRL (as in the "unused circuit" that RCO used), use same value as the stock tail lights fuse.
IF tapping off a DRL or tails/marker circuit, no fuse needed because of very low draw of LED markers.

Is your contention to have just one fuse added to the add a circuit?
Trusty's comment below explains...

~Not Me
I would like to note that when using an add a circuit, you use 2 fuses. 1 to replace the fuse you remove to install the add a circuit into your fuse holder, and 1 for the new circuit. That's just how they are.

THERE YOU GO! Thanks, Trustyaxe; This explains how the add-a-circuit works to everybody who is puzzled. RCO did not mention this on it's post. People blindly-following without understanding how things work get puzzled, re-do their wiring, and/or resort to hit-or-miss.

My Oznium LED Bolts are just tapped into the front markers.
Cleanest way to do it, Like Samster747 did above.
 
Last edited:
Use same value as the stock tail lights fuse.


Trusty's comment below explains...


THERE YOU GO! Thanks, Trustyaxe; This explains how the add-a-circuit works to everybody who is puzzled. RCO did not mention this on it's post. People blindly-following without understanding how things work get puzzled, re-do their wiring, and/or resort to hit-or-miss.


Cleanest way to do it, Like Samster747 did above.


Yes thanks Trustyaxe for explaining the add a circuit. Was nice to get a post regarding this that wasn't full of question marks and more questions.
 
I just tapped directly into the DRL wires and headlight wires. Two markers for DRL and another two for headlights. current draw is so low, don't really need a fuse.
 
Work in progress. Using the clear lens red led. Intending to use it for off road only.
e3f51188bdf458f477fe506ca3b89797.jpg


Sent from my SM-G935T using Tapatalk
 
Thanks for the ideas here!

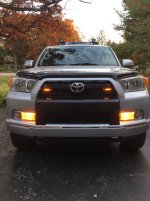
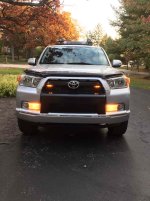
I wasn't happy with the stock look on my 2010 and I just haven't seen this mod on hardly any of the same style with the boxy front fascia. It looks great on the updated front end. After kicking around a million different options including just adding dedicated LED super white units, I thought I'd give this a try.

I bought Blazer brand running lights from the good Ol Farm and Fleet thinking they were the solid LED strip when lit. They're not and I'm pretty happy because it combines the look of the individual box light similar to bolts with the strip which fits the boxy look to me.

Prime real estate was already taken up by my LED warning lights so this was the next logical place to me. Enough talk.


Sent from my iPhone using Tapatalk
 

Attachments

  • IMG_0167.JPG
    IMG_0167.JPG
    105.4 KB · Views: 1,786
  • IMG_0163.JPG
    IMG_0163.JPG
    110.8 KB · Views: 1,807
  • IMG_0164.JPG
    IMG_0164.JPG
    116.3 KB · Views: 1,754
  • IMG_0166.JPG
    IMG_0166.JPG
    125 KB · Views: 1,723
grill amber running lights

Hey all. Relatively new here, as I transition from a Tacoma (and tacomaworld). Finally got around to doing this mod and very happy with the results and ease of it. Went with the standard Amazon amber leds and wired into the running lights.
 

Attachments

  • IMG_20170722_222853654.jpg
    IMG_20170722_222853654.jpg
    139.1 KB · Views: 2,112
Just finished this up. Liking it a lot.


d01589ba2b3e84474e15a585e95d2fa7.jpg


Sent from my iPhone using Tapatalk
 
Last edited:
I'm still wanting to do this with the hood scoop. I know it's been discussed here but haven't really seen anyone implement it yet.
 
Followed RCO method on mine and my friends rig

Very happy the way both Rigs turned out
 

Attachments

  • 58B0FA8A-29D1-4201-BF0D-167ED7050A7D.jpg
    58B0FA8A-29D1-4201-BF0D-167ED7050A7D.jpg
    136.3 KB · Views: 3,091
  • 914A481F-F883-4F7C-B896-3BBD1B2CD4F6.jpg
    914A481F-F883-4F7C-B896-3BBD1B2CD4F6.jpg
    132.5 KB · Views: 1,941
Last edited:

Members online

Forum statistics

Threads
278,316
Messages
3,554,109
Members
248,016
Latest member
Advally Service

Trending content

Back
Top