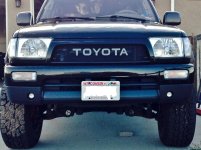
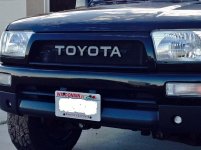
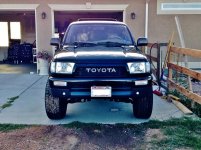
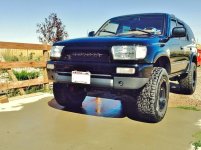
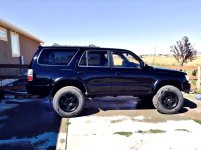
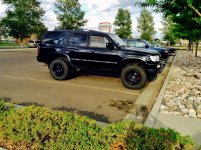
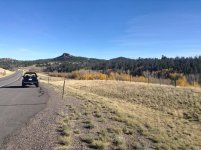
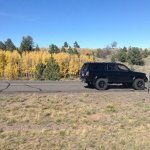
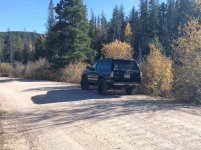
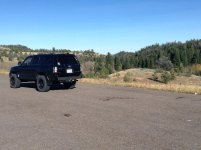
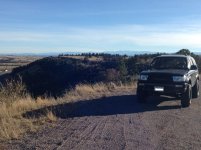
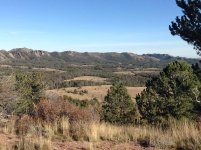
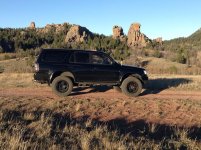
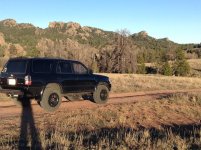
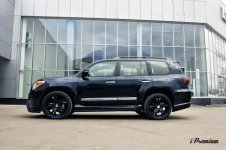
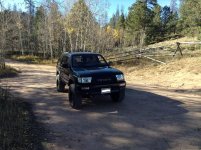
A few pictures of my Runner

Huh, thats crazy. So someone pulled a picture of my truck from the forum or google and tried running a scam with it, Im guessing? I wonder why they would use that picture though. Its not even a good picture of a 3rd gen :shrug:

If they had posted a picture of your build as it stands at $4k with supposedly 130k miles I would have immediately dismissed it as a scam. I guess they wanted it to be somewhat believable? Not sure, really weird though
 
Hasn't been too much going on with Jitters lately as I recently became very sick, lost my job after three months on short term disability, and am now staying with family in Wyoming still seeking a diagnosis for my illness. The best guess right now is that I have chronic Lyme disease, though tests have been indeterminate.

Anyways, the few things I have done lately . . .

- Repainted my satoshi grill and panels beneath the headlights oem black. Got them nice and glossy after 3000 grit sanding and then buffing though you cant see it in the pictures
- Changed the TOYOTA emblem from flat black to platinum metallic for some contrast
- Repainted the rear spoiler oem black
- Painted the silver lip on my wheels color matched flat black
- Replaced my worn out cat with an eastern direct fit converter
- Replaced the downstream O2 sensor
- Installed new EBC performance brake rotors and pads


I don't know why, but I can never take a good picture with my ipod. The truck is so much more shiny in person! Anyways


Re painted grill and emblem
FullSizeRender (3).jpg

FullSizeRender (4)b.jpg

FullSizeRender (5).jpg


Poser shots
FullSizeRender (5)c.jpg

FullSizeRender (5)b.jpg


Best looking vehicle in the parking lot
FullSizeRender (2).jpg
 

Attachments

  • FullSizeRender (3).jpg
    FullSizeRender (3).jpg
    117.2 KB · Views: 1,106
  • FullSizeRender (4)b.jpg
    FullSizeRender (4)b.jpg
    102.5 KB · Views: 1,089
  • FullSizeRender (5).jpg
    FullSizeRender (5).jpg
    137.6 KB · Views: 1,091
  • FullSizeRender (5)c.jpg
    FullSizeRender (5)c.jpg
    133.4 KB · Views: 1,069
  • FullSizeRender (5)b.jpg
    FullSizeRender (5)b.jpg
    108.3 KB · Views: 1,103
  • FullSizeRender (2).jpg
    FullSizeRender (2).jpg
    139.9 KB · Views: 1,108
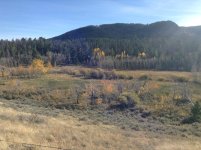
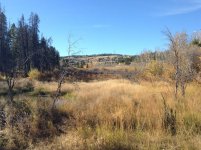
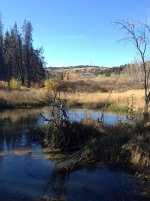
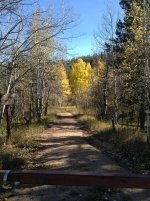
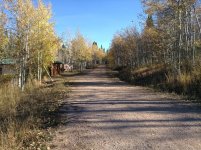
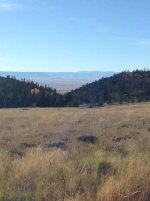
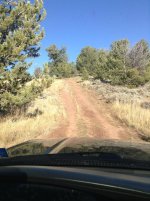
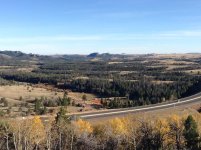
I was feeling well enough to take a drive up to the mountains about 30 minutes from my house in Cheyenne, WY. The area is called Vedawoo State Forest, between Cheyenne and Laramie. There are some outstanding mountain biking trails in this area. Cant tell from my pictures, but some of the peaks are above 8500 ft. Definitely smaller mountains for the Rockies.


IMG_0485.jpg

IMG_0488.jpg

IMG_0491.jpg

IMG_0496.jpg

IMG_0497.jpg

IMG_0498.jpg

IMG_0499.jpg

IMG_0503.jpg
 

Attachments

  • IMG_0485.jpg
    IMG_0485.jpg
    118.9 KB · Views: 1,012
  • IMG_0488.jpg
    IMG_0488.jpg
    105.6 KB · Views: 1,010
  • IMG_0491.jpg
    IMG_0491.jpg
    98.8 KB · Views: 1,042
  • IMG_0496.jpg
    IMG_0496.jpg
    124.9 KB · Views: 998
  • IMG_0497.jpg
    IMG_0497.jpg
    135.7 KB · Views: 1,019
  • IMG_0498.jpg
    IMG_0498.jpg
    136.5 KB · Views: 1,020
  • IMG_0499.jpg
    IMG_0499.jpg
    110.9 KB · Views: 1,022
  • IMG_0503.jpg
    IMG_0503.jpg
    136.7 KB · Views: 997
IMG_0505.jpg

IMG_0511.jpg

IMG_0512.jpg

IMG_0519.jpg

IMG_0523.jpg

IMG_0528.jpg

IMG_0530.jpg

IMG_0531.jpg
 

Attachments

  • IMG_0505.jpg
    IMG_0505.jpg
    136.8 KB · Views: 1,019
  • IMG_0511.jpg
    IMG_0511.jpg
    94.8 KB · Views: 998
  • IMG_0512.jpg
    IMG_0512.jpg
    134.3 KB · Views: 997
  • IMG_0519.jpg
    IMG_0519.jpg
    70 KB · Views: 1,005
  • IMG_0523.jpg
    IMG_0523.jpg
    122.8 KB · Views: 990
  • IMG_0528.jpg
    IMG_0528.jpg
    119.6 KB · Views: 992
  • IMG_0530.jpg
    IMG_0530.jpg
    104 KB · Views: 1,002
  • IMG_0531.jpg
    IMG_0531.jpg
    136.2 KB · Views: 978
I think its time for me to sell my 3rd gen and get one of these little guys. Oh, wait, they cost almost $100k. Oh well, they're fun to look at.


Toyota-Land-Cruiser-A-Class-Apart.jpg

Toyota_LC200_Invader_bodykit_5.jpg

wald-international-toyota-land-cruiser-004_100197539_l.jpg

wald-international-toyota-land-cruiser-001_100197542_l.jpg

wald-international-toyota-land-cruiser-003_100197540_l.jpg
 

Attachments

  • Toyota-Land-Cruiser-A-Class-Apart.jpg
    Toyota-Land-Cruiser-A-Class-Apart.jpg
    53 KB · Views: 955
  • Toyota_LC200_Invader_bodykit_5.jpg
    Toyota_LC200_Invader_bodykit_5.jpg
    129.8 KB · Views: 1,035
  • wald-international-toyota-land-cruiser-004_100197539_l.jpg
    wald-international-toyota-land-cruiser-004_100197539_l.jpg
    84.9 KB · Views: 957
  • wald-international-toyota-land-cruiser-001_100197542_l.jpg
    wald-international-toyota-land-cruiser-001_100197542_l.jpg
    89.7 KB · Views: 948
  • wald-international-toyota-land-cruiser-003_100197540_l.jpg
    wald-international-toyota-land-cruiser-003_100197540_l.jpg
    67.4 KB · Views: 916
That Landcruiser needs more bumper lights!
 

Attachments

  • wald-international-toyota-land-cruiser-004_100197539_l.jpg
    wald-international-toyota-land-cruiser-004_100197539_l.jpg
    49 KB · Views: 869
and yet it's still not as hideous as the LX570

2016-Lexus-LX570-101-876x535.jpg


I actually like that Wald Black Bison Landcruiser. The LX570...terrible
 
Last edited:
and yet it's still not as hideous as the LX570

2016-Lexus-LX570-101-876x535.jpg


I actually like that Wald Black Bison Landcruiser. The LX570...terrible


Yeah, I don't know what Lexus is trying to do with that grille. If they were just going for unique, they definitely achieved it. Uniquely odd and ugly. But, I love the front end of that LC200 in the pictures I posted. That would be an amazing daily driver
 
Hasn't been too much going on with Jitters lately as I recently became very sick, lost my job after three months on short term disability, and am now staying with family in Wyoming still seeking a diagnosis for my illness. The best guess right now is that I have chronic Lyme disease, though tests have been indeterminate.

Anyways, the few things I have done lately . . .

- Repainted my satoshi grill and panels beneath the headlights oem black. Got them nice and glossy after 3000 grit sanding and then buffing though you cant see it in the pictures
- Changed the TOYOTA emblem from flat black to platinum metallic for some contrast
- Repainted the rear spoiler oem black
- Painted the silver lip on my wheels color matched flat black
- Replaced my worn out cat with an eastern direct fit converter
- Replaced the downstream O2 sensor
- Installed new EBC performance brake rotors and pads


I don't know why, but I can never take a good picture with my ipod. The truck is so much more shiny in person! Anyways


Best looking vehicle in the parking lot
View attachment 172571

Didn't know you were sick, get better man! :usa2:
 
Didn't know you were sick, get better man! :usa2:


Thanks man. I got sick 8 months ago. At the time I was making good money and had HUGE plans for my truck. SC, new flares, custom bumper, watts link rear suspension, roof rack, and several other things. And then I woke up one day feeling really off, and then continued to get worse over the next week. Went on short term disability, lost my job, and have now spent all my saving on medical expenses and am unfortunately having to live with my parents.

But, I'm making slow progress and am determined to make a full recovery and get back to my active lifestyle.
 
My Experience With Changing Lower Control Arm Bushings

This is to help anyone changing their lca bushings, especially for those who, like me, have to deal with RUST.

To summarize, I will probably never do it again. Next time I'll just get new pre-assembled bushings. Or more likely replace the control arms and bushings together. RUST was the biggest issue I had, and made almost every stage of the process difficult. For that reason, and not having ideal tools for some of the steps, I would call this project pretty close to 10/10 for difficulty. Hopefully this write up will help a few people in the future. I'll try to show the process I went through with as much detail as possible.

Won't go in to too much detail about removing everything, as that part is fairly straight forward. But for anyone who hasn't torn into their front end before - basically, get the frame on jacks and in this general order:

(Spray everything with a good penetrating oil a day before hand)

1) remove tire
2) remove sway bar/link (this step was easy for me, since I took mine off months ago :p)
3) remove castle nut and pound tie rod end from lbj
4) mark the positions of caster adjustments. You only need to mark on the outsides
5) loosen the control arm bolts (don't remove). This will allow control arm to swivel down easily for future step
6) put a jack under control arm to take load off the coil/strut assembly and remove 4 lbj bolts. Drop the jack to let the assembly extend
7) remove the coil/strut assembly
8) remove the 4 bolts that mount the steering rack. For this step, I've read some have to it, and other don't. I found it necessary. It will allow you to pull the rack out of the way to access the rear bolt and caster sleeve on the driver side control arm. Even with the rack loose, I still had to jack it up a good inch on the driver side to have enough clearance to pull the bolt/caster parts
9) now with a few taps with a hammer the control arm will drop out (with lbj attached)


And now for the fun part. And by fun I mean fun like chewing on Styrofoam. Fun like having a piece of metal shaving stuck in your eye. Fun like smashing your finger with a hammer. Fun like stubbing your toes on the corner of a wall. Fun like . . . well, you get it.


1) Pressing the bushings out of the a arms.

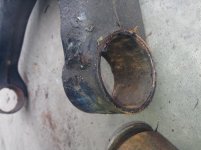
With a press, I'm sure this would have been simple. But I don't have one, so I used the bottle jack method. Position it as shown in picture to press bushing outward. I applied so much pressure on the bushings using the jack that the control arm was literally bending outward, and I still couldn't get them to budge. Until heating with the torch. Because of RUST, the heat was an ABSOLUTE MUST. Once heated I was able to get the bushing to break, and then slowly press out with increased pressure. CAUTION: The pressure from the jack can turn the bushings into projectiles! I had one fly across the garage floor. It was awesome.
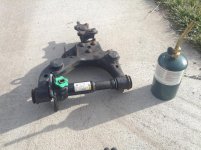
IMG_0629.jpg


Look at that rust. There was a fair amount of pitting on the outer sleeves as you can see. They were definitely seized in the housings. Again, penetrating oil and heat are an absolute must to tackle the rust.
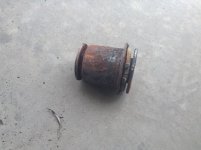
IMG_0630.jpg
IMG_0632.jpg


2) Removing the press-fit washers

Only the smaller washer needs to be removed. I was able to use a vice for this, although even with the vice it was difficult. I used a socket that was just the right size to line up with the inner sleeve, and a section of a pipe wide enough to allow the other end to move. The socket (or whatever you use) needs to be the exact diameter of the lip of the inner sleeve, and lined up perfectly when pressing. Once lined up in the vice, I had to use a cheater bar to turn the vice handle, as getting them to break required a lot of pressure. The washers actually bent inward from the pressure, so I formed them back to shape after removing. With a TON of pressure they eventually popped off. It was a tedious process.
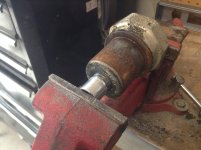
IMG_0633.jpg


3) Pressing out the inner sleeve/rubber

(I forgot to take a picture of this part, sorry.)
Basically, the bushing sits in the vice just like it is in the last picture, with a socket on the front, and the pipe in the back. For this step, once again, HEAT WAS A MUST. I had so much pressure on the bushing that the vice looked like it was going to break. But once I heated the perimeter of outer sleeve, the rubber broke and the bushing began to move. After getting it about 2/3 out, while the rubber was still hot, I was able to pull the bushing out with a large pair of pliers. It will look like this, with most of the rubber attached to the inner sleeve, and some still stuck in the outer sleeve.
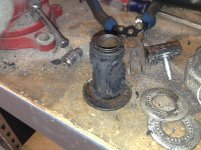
IMG_0625.jpg


4) Removing the old rubber

This was by far my least favorite part. It messy, and took a while. I would recommend doing this outside using a half face paint mask, as the fumes are really bad. But heating the rubber is absolutely necessary to remove it. My process went - 1) heat the rubber till it start on fire, 2) cut sections off with a knife, 3) heat another section of the rubber and repeat. Once the bulk of the rubber was off, I used a razor blade to scrape the sleeves clean.

Because a flat razor wont fit in the concave outer sleeve to clean out the rubber, I used this guy on a high speed drill.
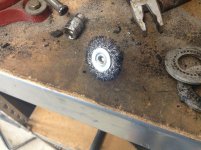
IMG_0628.jpg


Rubber cleaned out of the outer bushing using the wire brush
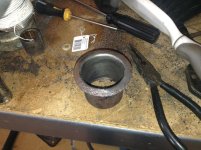
IMG_0624.jpg


5) Re-assembling with the new bushings
This step is easy. I used my wire wheel pictured above to clean the inner and outer sleeves really well. Then just applied grease on both the metal surfaces and bushing and pressed it all together. I pressed the bushing into the outer sleeve first, and then pressed the inner sleeve into the bushing.


6) Pressing the press-fit washers back on the inner sleeve
This step is a little tricky. Because of how much pressure I had to apply to the lip of the inner sleeve to press the washers off initially, they were a bit marred up and even a little bent in a few spote. So I knew lining up the washers to press back on would be an issue, as the tolerance is very tight and lining them up is difficult. If the washer is not perfectly lined up, when pressure is applied the the lip will be bent or damaged (which I did when pressing them out), and then the washer wont seat properly. So i used a file on the lip to get rid of any burrs, and sharpen the lip slightly to make it easier to line up and accept the washer.

I lined it up in the vice, and then used a combination of pressing and hammering lightly until the washer popped on.


7) Pressing the bushings back into the control arm
This step should have been easy, but once again RUST complicated the process, at least on the first bushing. To start make sure to press the bushings in correctly (the small washer that you just pressed on goes inward for both ends). It took me 45 minutes of torquing the vice, heating, pounding, and repeating over and over again to get the first bushing back in. So after that, I took my file to the surface of the outer sleeves to knock down any high spots, and then cleaned them up with the wire brush. This made the other three bushings much much easier to press in.


Conclusion

So that was my experience. Put everything back together in order. Make sure to line up the marks for the caster. Get an alignment.

The whole project took me and my brother probably around 10-12 hours. Although, because of my illness right now, we spread it out over 3 days. Without rust it would have been much easier. Live and learn. If I did it again I could probably cut the labor time in half.

 

Attachments

  • IMG_0629.jpg
    IMG_0629.jpg
    136.6 KB · Views: 783
  • IMG_0630.jpg
    IMG_0630.jpg
    136.2 KB · Views: 775
  • IMG_0632.jpg
    IMG_0632.jpg
    132.8 KB · Views: 786
  • IMG_0633.jpg
    IMG_0633.jpg
    131 KB · Views: 774
  • IMG_0625.jpg
    IMG_0625.jpg
    137.6 KB · Views: 787
  • IMG_0628.jpg
    IMG_0628.jpg
    137.2 KB · Views: 809
  • IMG_0624.jpg
    IMG_0624.jpg
    137.4 KB · Views: 804
Last edited:
Odds are that it isn't even a person behind those accounts.
I wondered about that. I don't really know how spam and trolls work. It's really annoying, but I can at least see the purpose of the stupid links for live streams. But really, what's the point of the cut and paste posts? Been seeing a lot of those on the forum lately
 
My Review of newly installed Energy Suspension lca poly bushings

I changed my lca bushings (write up on previous page) after finding some play in them, and via recommendation from [MENTION=79826]absalom[/MENTION] and [MENTION=57546]4-Ripcord[/MENTION]. I figured they were worn out being original with almost 240k miles on them. Over the past few years I have replaced every linkage part in my front end, save the lca bushings, it attempt to get rid of my front end "Jitters". Lca bushings were the last part of the equation.

So my impressions:

HUGE difference in the feel of the front end. I would say this step, along with replacing the steering rack are the two factors that made the most significant improvements in ride dynamics.

Before replacing lca bushings:

- The front end would slightly wander with changes in the road, though the rack was tight and the steering wheel would not move. There was a disconnect between the steering wheel and tires.
- Bumpy roads were frankly a nightmare. Front end felt like it was shaking all over the place. Felt like a wooden roller coaster. Felt unplanted and unstable.
- I cringed at hitting potholes, as it felt like an explosion going off under the tire.
- Driving on washboard roads left me with epilepsy. Felt like the wheels were going to shake off of the front end.
- Because I had replaced everything in the front end (again save the lca bushings), I assumed these handling issues/vibrations were incurable symptoms of overly stiff stock suspension, the flawed design of a rear-mounted steering rack, short control arms with a small arc, and a relatively narrow front and rear trac.


Test drive with the new poly bushings:

- Wandering is virtually eliminated
- Bumpy rough roads are no longer such a nightmare. The front end feels less reactive to road conditions, and feels more stable and planted. The steering wheel gives me a direct connection to the road.
- The wooden roller coaster feeling is greatly reduced. Shaking/vibrations are nearly eliminated, while I feel much more of the suspension.
- I intentionally hit as many potholes as possible to gauge the difference. The vibrations are mostly gone and a more solid "thud" is produced when tire contacts the pothole.
- The overall feel of the front end is so much better. The 3rd gen still has limitations in its geometry that contribute to its small truck-like handling. But then again, it is a small truck. Seeing how the 3rd gen handles now as it was intended to, I'm very happy with it.


Final Impressions:
Changing the bushings was an absolute pain, mainly due to rust as I discussed in my write up on the previous page. If I did this again in the future I would just replace the entire lca with pre-installed bushings. My lca's are getting ugly anyways. BUT the results were definitely worth it. With everything else replaced, the bushings did end up being the major cause of my front end handling issues. I have struggled with the front end issues since I bought the truck over 5 years ago. Now I can honestly say it feels like a different vehicle than it was when I got it. So I GUESS Absalom and 4-Ripcord were right.:p Much more enjoyable to drive now. Well worth the time and effort.
 
Glad to hear it all worked out!

Replaced mine with Poly recently as well and while my "before" condition was not too bad, the "after" is very controlled and stable.
 

Members online

Forum statistics

Threads
278,317
Messages
3,554,129
Members
248,016
Latest member
Advally Service

Trending content

Back
Top