aemravan's build thread - project TacoRunner

Just an FYI, I messed up thinking the caps were sealed well enough, and I had leaking fluid on my bench and a little on the cross member.

Mine won't be going in for several days as I'm still muddling my way through some cutting/grinding and TRYING to do some welding. Really need a LOT more practice, cause basically I suck at it.

Hope your install goes well.
 
Just an FYI, I messed up thinking the caps were sealed well enough, and I had leaking fluid on my bench and a little on the cross member.

Mine won't be going in for several days as I'm still muddling my way through some cutting/grinding and TRYING to do some welding. Really need a LOT more practice, cause basically I suck at it.

Hope your install goes well.

Thanks for the heads-up on the caps, i'll need to make sure I sit them upright while it waits. I doubt i'll be tackling the steering rack for a while.. really strapped for time before our next trip in a couple of weeks and the top priority is the sway bar and the bump stops. The rack is currently last on the list, but mainly because I have yet to confirm 100% that the width will work without being long travel in the front.. if I know I won't have to cut anything down I may tackle this a lot sooner than later.

With regards to welding, I need to get back to doing some more, which I will on the next couple of projects. I basically suck at it too lol. My brother is really good since has to for work so he gave me a lot of pointers, and I had him weld some hard-to-get to spots on the sliders to make sure they won't fall off. Practice makes perfect. The thicker material is super easy to weld, its just making sure you get the settings right and practicing walking the bead down to make it look good. I definitely started going for almost-burning-through mentality just to ensure I have good penetration first, and worry about making pretty welds later. I don't want my stuff falling apart.. lol.
 
That makes sense. Looking forward to your installs of the LC200 rack and the tk1 racing rear sway bar. I still haven't had a chance to install my sway bar kit yet, but with in the next month or 2!

I have the axle pushed back with my adjustable links pretty far back I guess to clear the 35s against the rear doors at full bump and last time I cycled my suspension the factory stop completely missed my axle


Sent from my iPhone using Tapatalk
 
That makes sense. Looking forward to your installs of the LC200 rack and the tk1 racing rear sway bar. I still haven't had a chance to install my sway bar kit yet, but with in the next month or 2!

I'm really hoping to knock mine out this week, and hopefully get some documentation on it since I've literally found like 2 examples online.. lol.

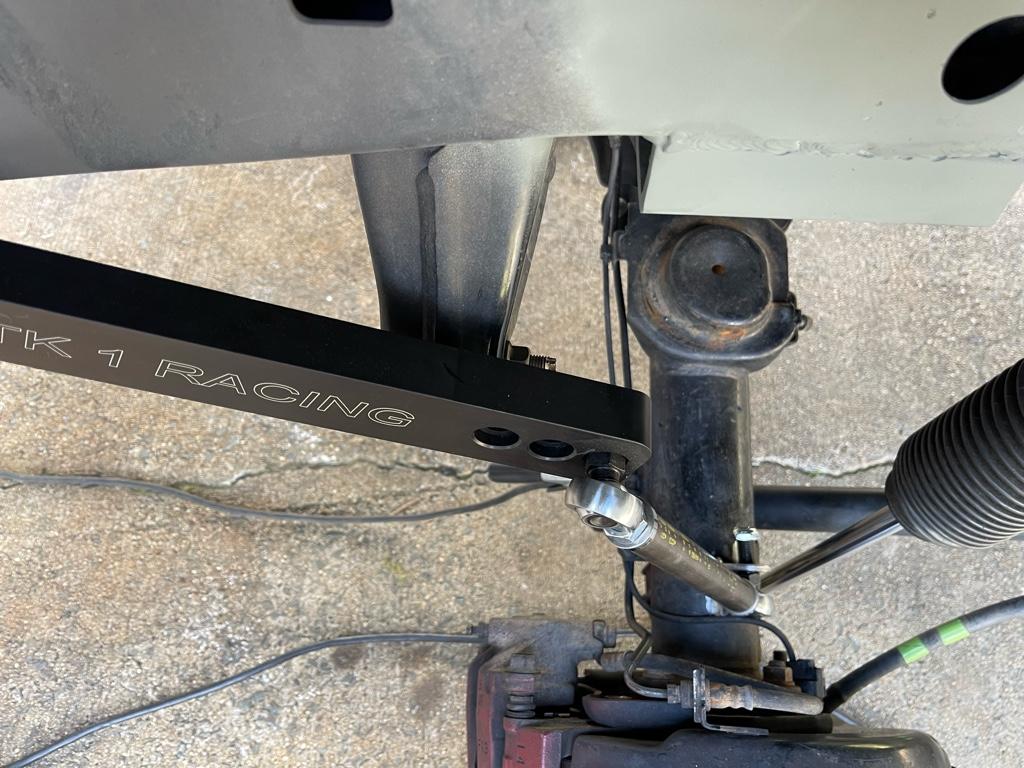
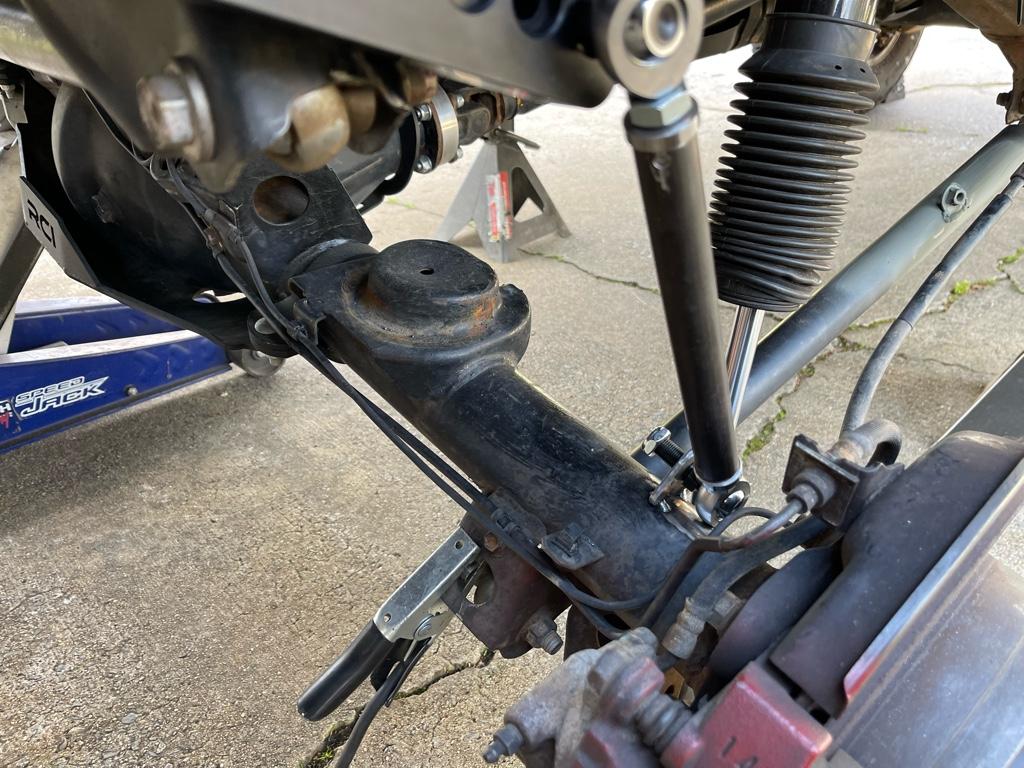
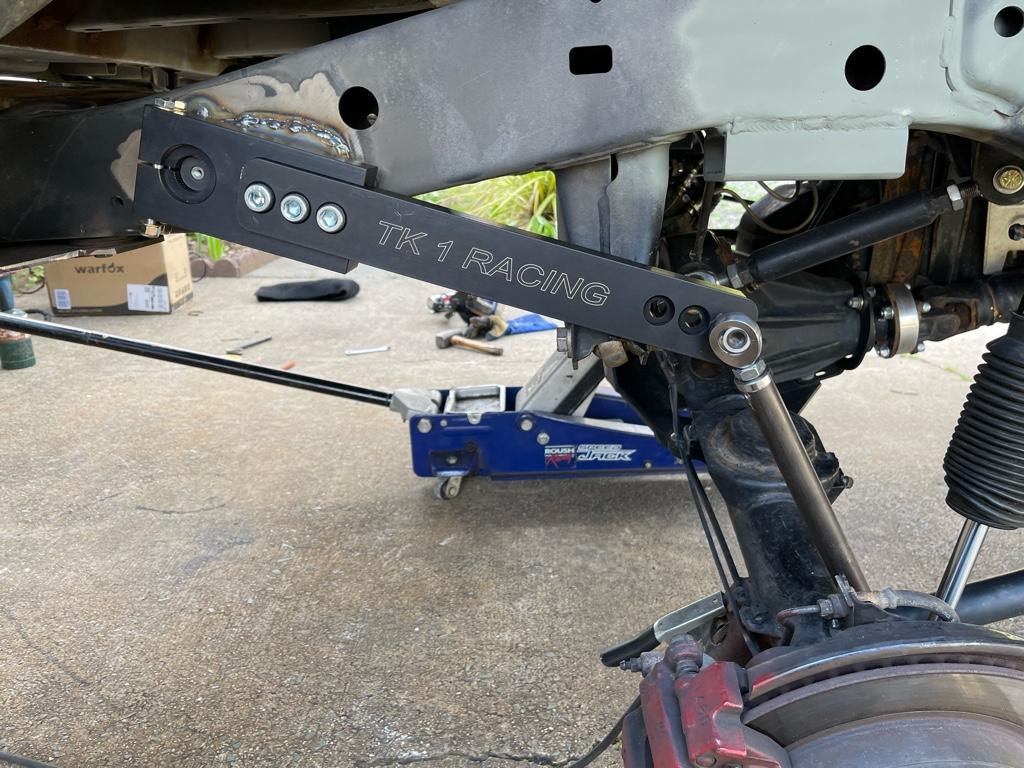
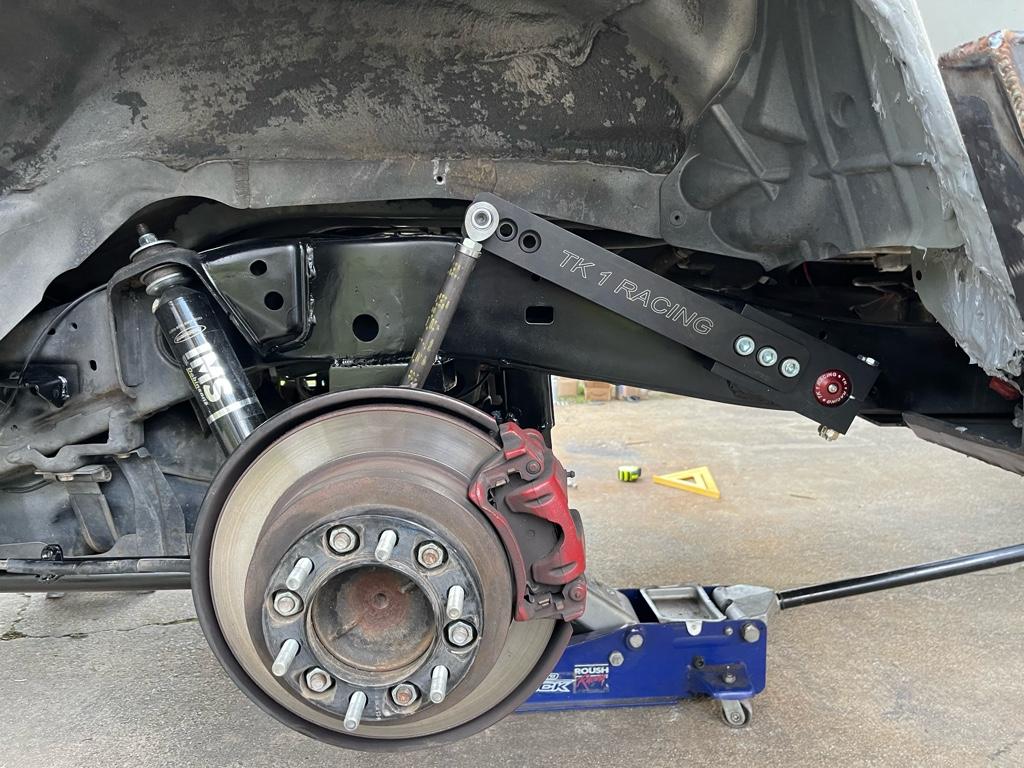
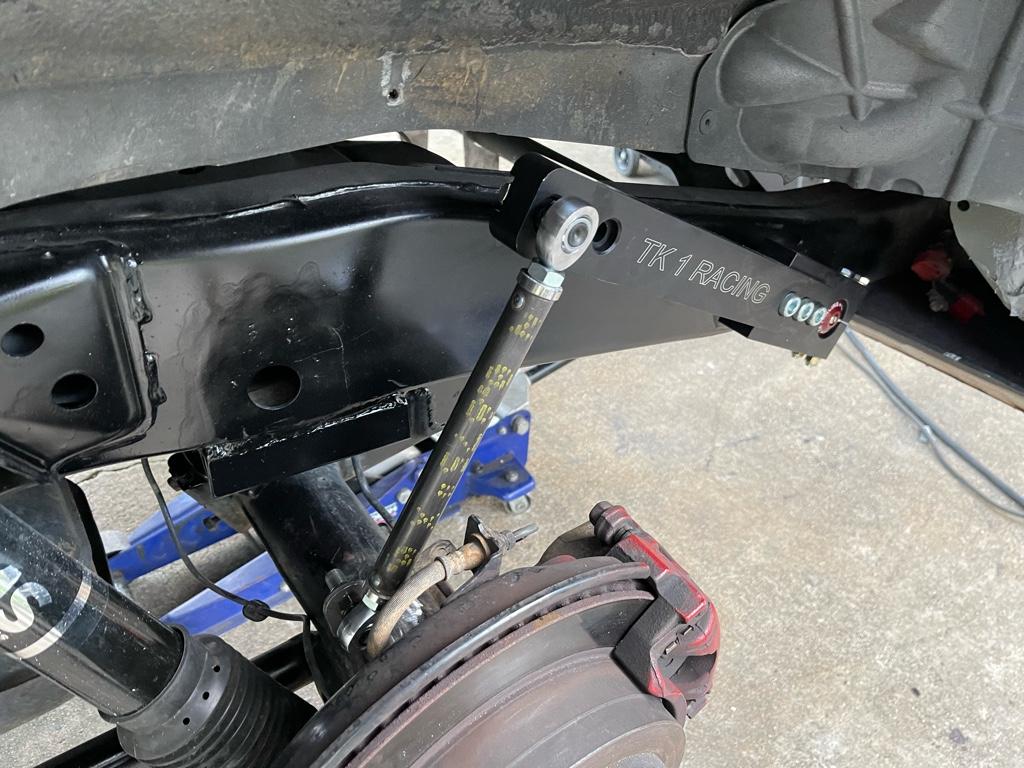
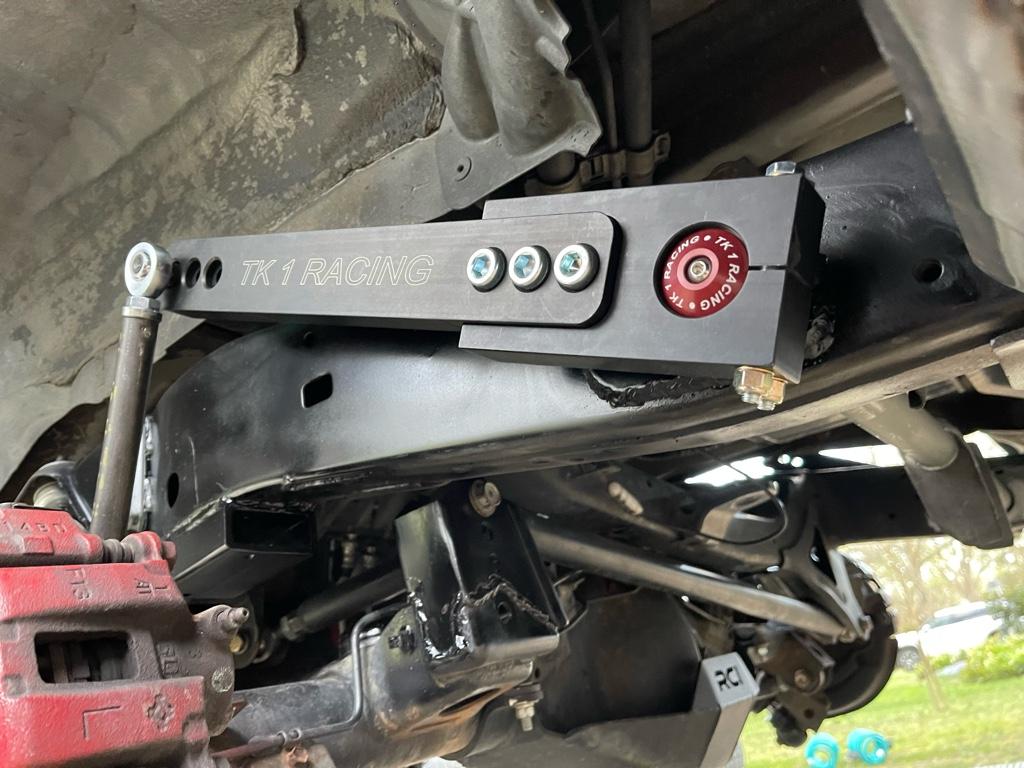
I did some rough laying out of where it "should" be according to the TK1 racing guide: basically the arm should be at least as long as the shock travel, easy in my case since the arm is anywhere from 14-16" depending which hole you use on the end, and the end link length should be at least as long as the shock travel as well, which doesn't look like will be an issue.

I really want to weld the bar running through the middle of the frame rails in the rear to keep it from being mounted underneath, and looks like I shouldn't have any issues, but I may be cutting out the spare tire cross member since it doesnt look like there for structural frame reinforcement. I'll keep you guys posted on the progress, pretty excited to have a rear sway bar lol.
 
Well.. here goes nothing

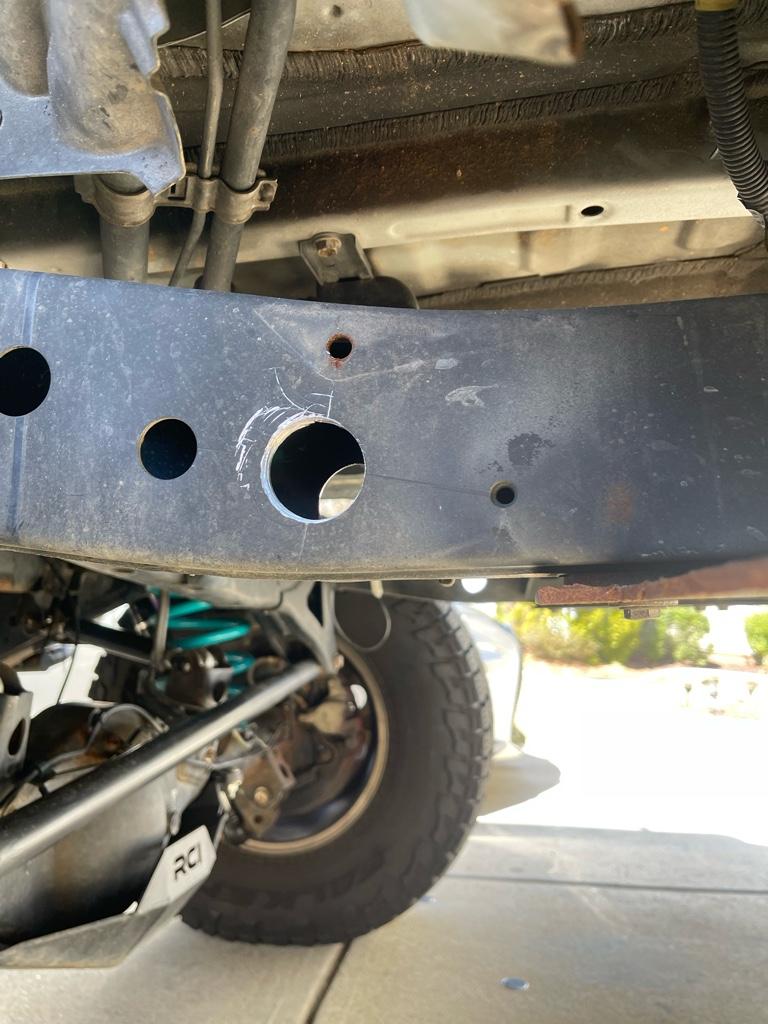
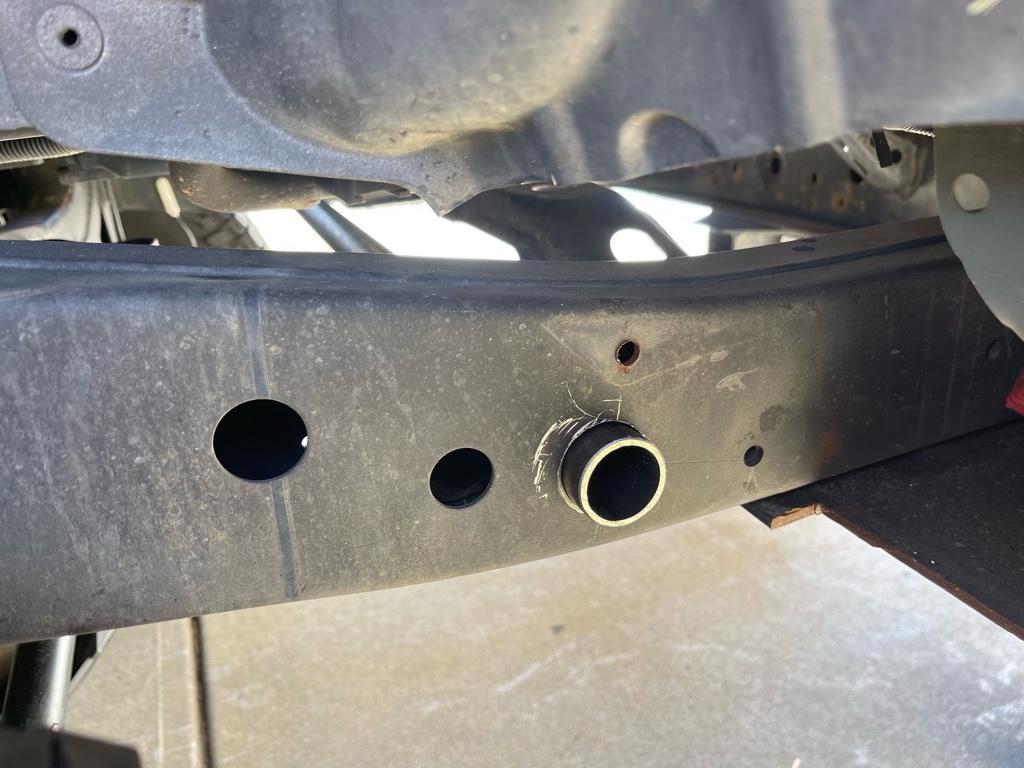
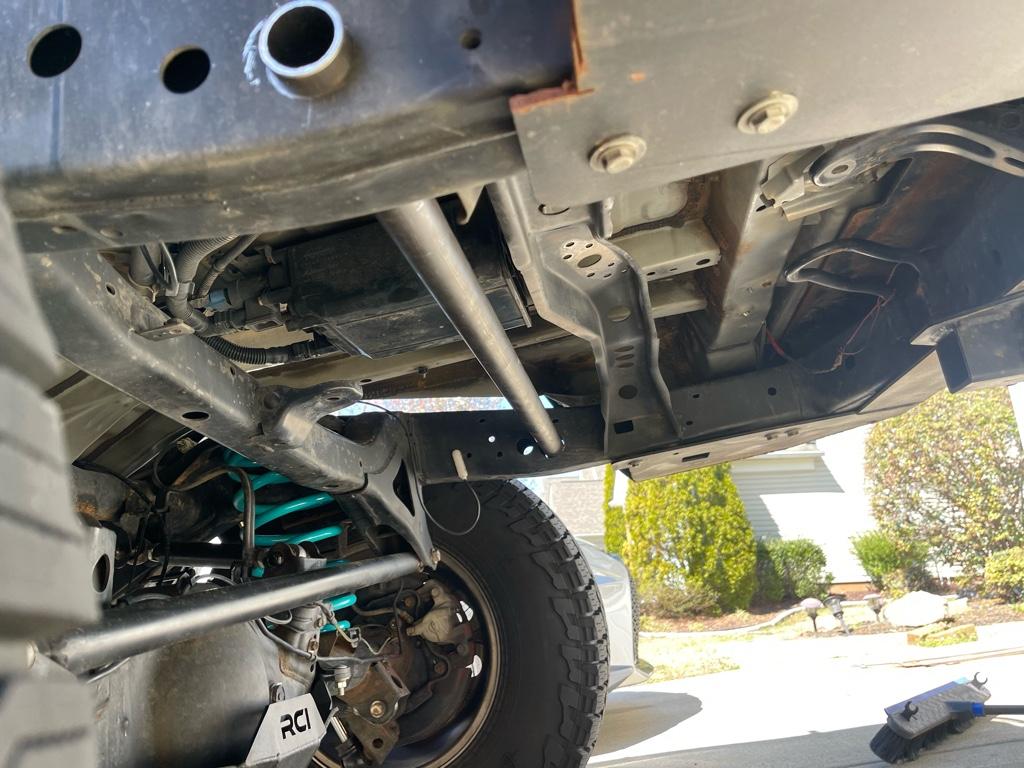
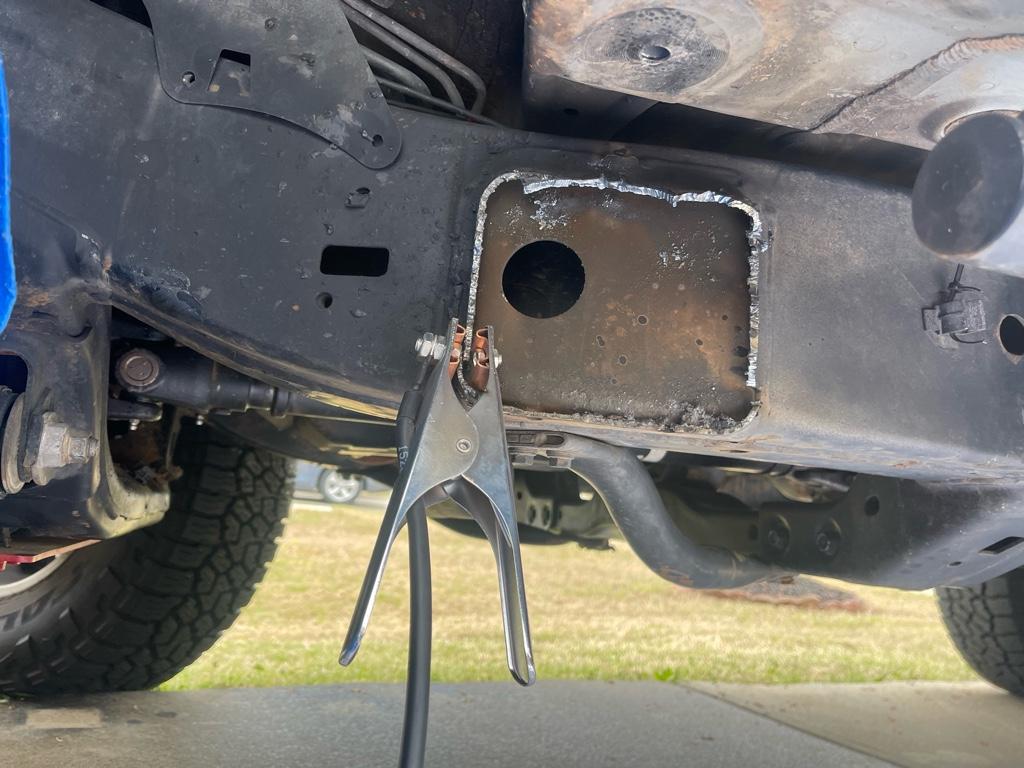
All this sway-bar talk got me excited to get it going.. so I took my lunch break to just dive right in after pulling a couple of measurements.. hopefully my thinking is inline what how it needs to land, because the holes are now in place lol. I know I can't go forward with it a lot, and moving back into the bumper wasn't looking promising since I would have to pull the bumper to drill the holes, and i REALLY didn't want to do that. the UP/Down location was determined by some components running above the tube, and also some rough mock-up of the arm swing as the shock approaches full bump. I figured this should be fairly close.. and the end links only need to be 12" total to match the shock travel.

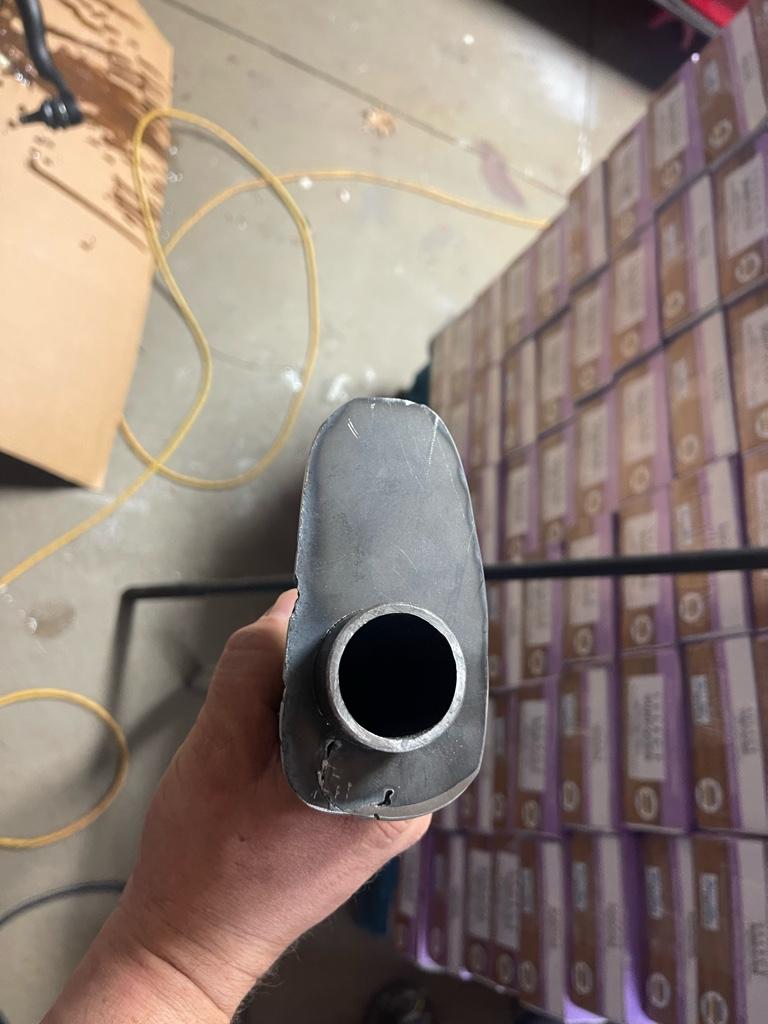
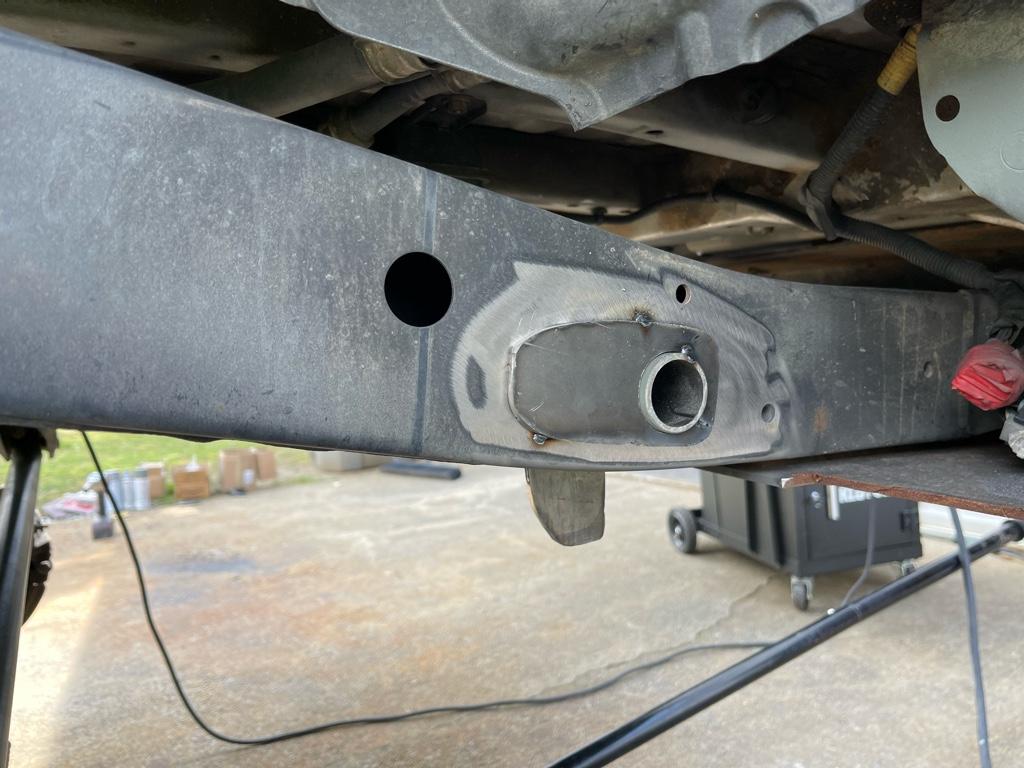
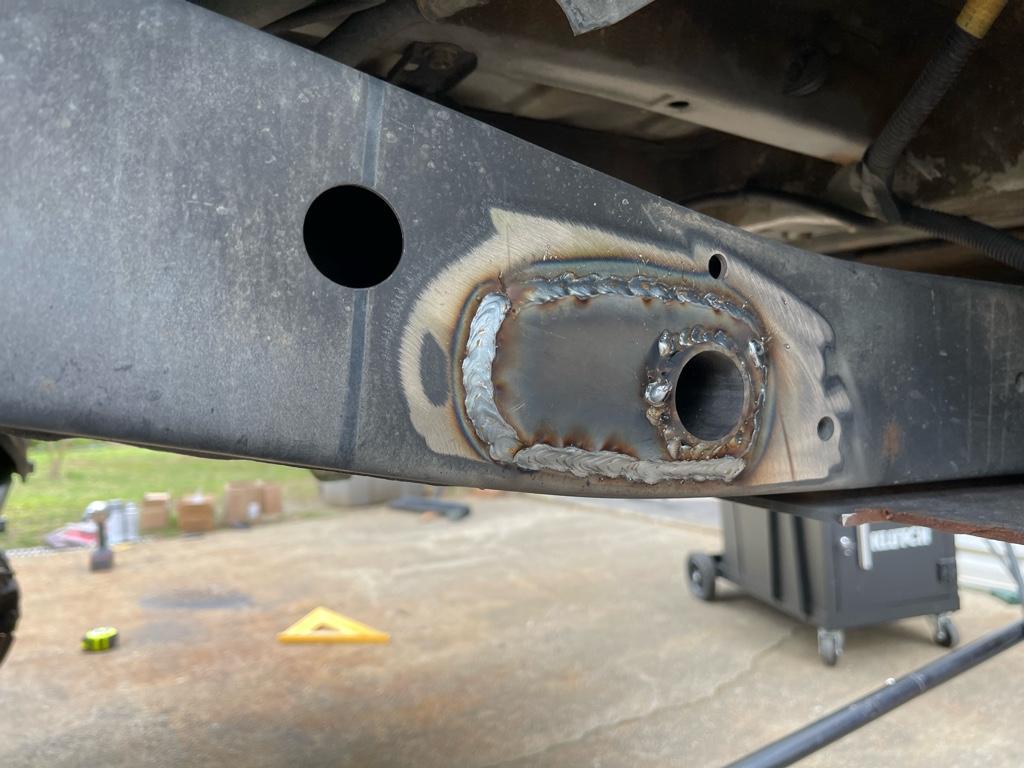
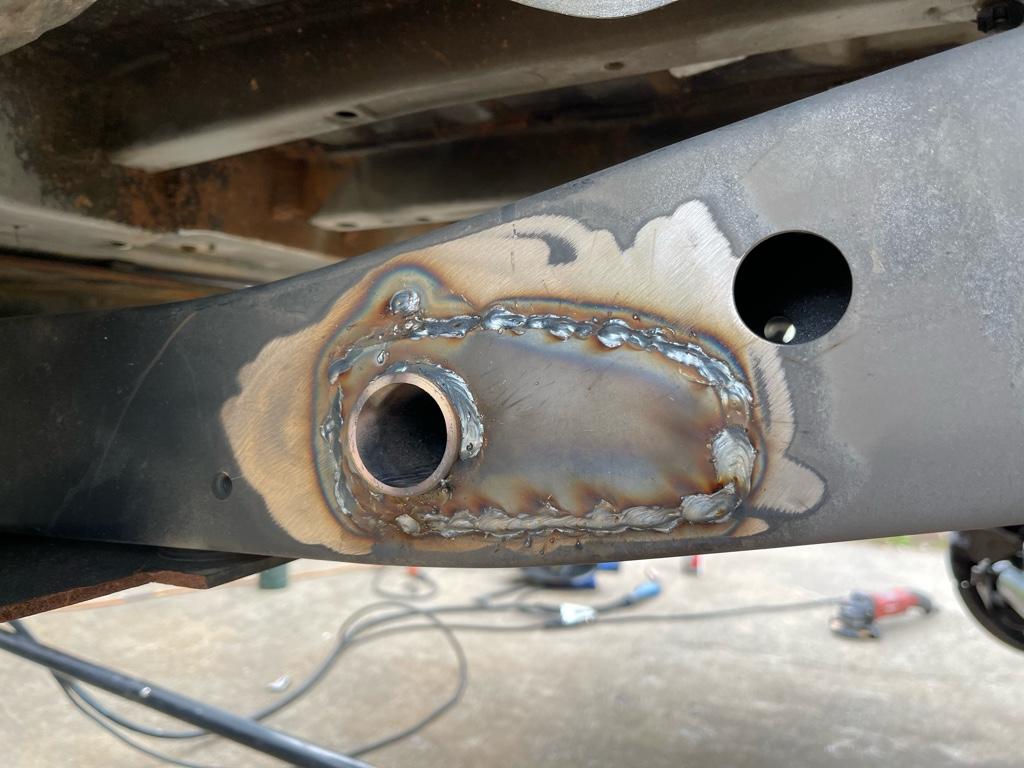
The driver's side I drilled right for the 1 1/2" OD tube, on the passenger side I went larger in order to allow myself adjustment to square up the tube. I plan on cutting some square plates with 1 1/2" OD holes in the middle that I will use to slide over this tube and weld to the frame. Also looking to plate off a couple of the frame holes that are in the same vicinity to reinforce the frame since it will be seeing a tiny bit of added stress in that area.

d2f951ffa9df0bc5ec463e546ac58683.jpg

738d4c1a2dfc16926daa1c257bdd914f.jpg

d546b629b9b1d7418ef7f07ae9bbd77a.jpg


Sent from my iPhone using Tapatalk
 
Last edited:
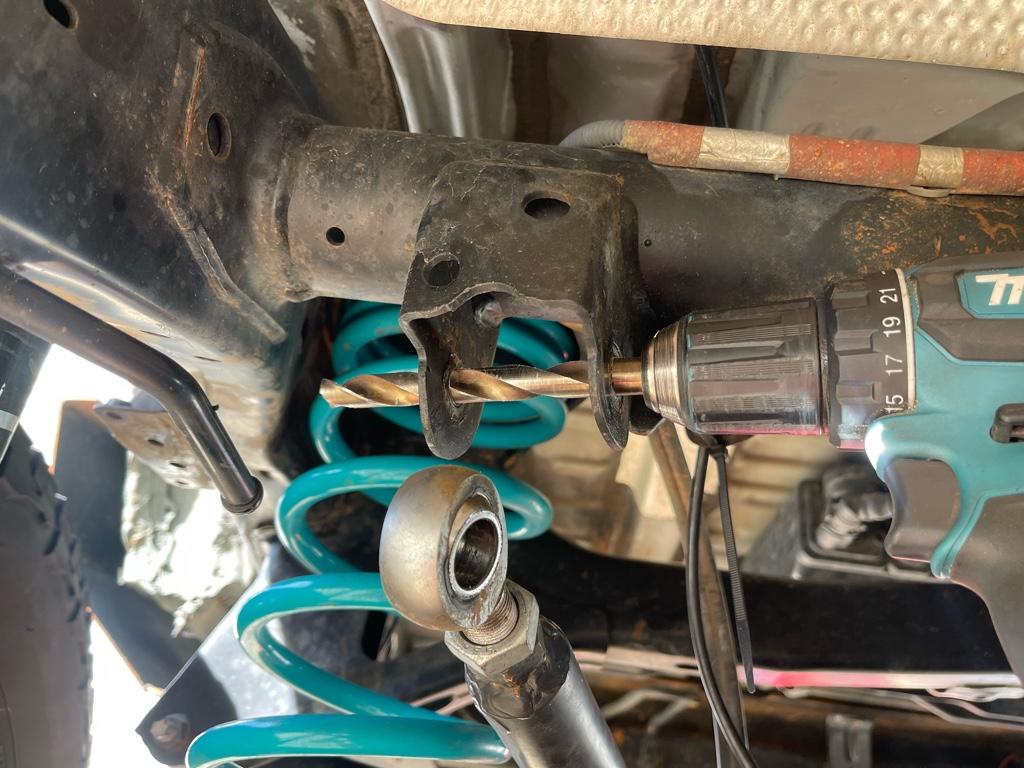
While I was at it I decided it was time to fix the clunking uppers do to the bolts being smaller than the spacer.. the drivers side took nothing at all to do, plenty of clearance to hit the holes with a 1/2” bit.

Had to throw in a washer on the inside to make up some of the slack but nothing crazy.

Nice and snug now. Onto the passenger side which has less clearance because of the tank..
2844315aa3ff37e134a102d0333d90c8.jpg

0b0bdbc69f94c45aa6a09156580016d4.jpg

9c23dd17d9a9402b897bdcf44661f343.jpg


Sent from my iPhone using Tapatalk
 
For anyone looking to drill out the upper links, super doable, the drivers side front one is a bit of a pain and requires the shock to be moved out of place , but after that it was easy peasy
95406ffa32e2a1803aca710e70e6e894.jpg

bff0ab936e91e2b479eba5f8efdc65ab.jpg


Sent from my iPhone using Tapatalk
 
So the hole-saw bits I have went through quite a few projects by this point.. and while drilling the frame for the swaybar tube I managed to snap all of my drill bit inserts, as well as chip off some remaining teeth lol so I have a single 1 1/2" bit coming from amazon today so that I can make some support plates to secure the tube to the frame.

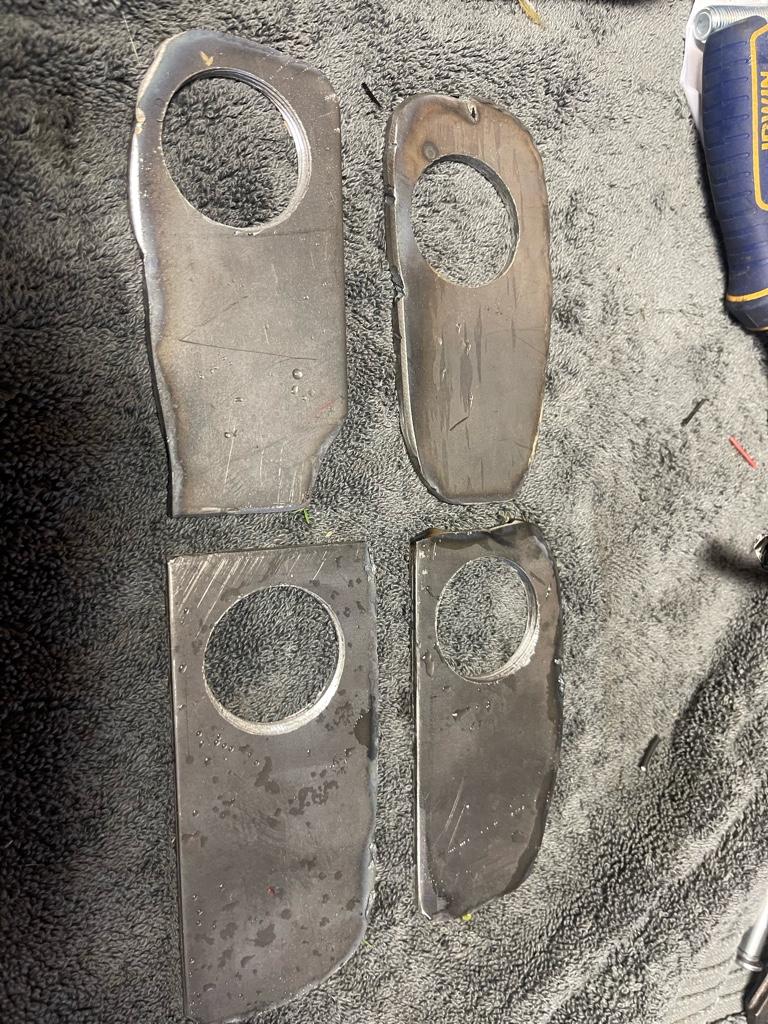
I drilled the passenger side one size larger on purpose knowing very well that I would not spend the time needed to accurately measure and lay out the holes (and frankly, even if I did, drilling laying down under the car would probably get these offset anyhow). The idea is to use the 1 1/2" hole saw bit to cut 4 plates that fit snuggly around the weld-in tube. I will then tack the drivers side in place and use the slop in the passenger side hole to square up the tube best I can. I don't believe this is HYPERCRITICAL to get 100% square, but because the clearance from the arms to the frame will be fairly tight, I don't want either side making contact as it goes through the arc of its motion because its not close to straight.

I also don't think the 2 holes adjacent to my new frame holes NEED to be plated since the new hole will have a tube going through it and welded on both sides, so it's not like the frame will be any weaker there, rather stronger if anything, but I still plan on cutting my support plates oversized so that they would also cover up at least one of the holes on each side.

Time to put the plasma cutter to some actual use!

We have a beach trip coming up for my brothers Birthday and the rig will be out on the sand for 2-3 days , and it is a 3 hours away, so I am in full prep mode to make sure everything is welded and also painted before I expose it to salty air. Got a can of Steel It paint that I'll throw on after all the welding is done, and also see if I can get my hands on some of the inner frame treatment spay my brother uses at work to treat the frame from the inside after it had some welding done from the exterior in hopes of reducing rusting and corrosion.


The plan for today and tomorrow is to cut the 4 support plates for the sway bar, cut the 2 gusset strips to reinforce the drivers side front diff mount I have laying around and cut off and clean up the body mounts.

I'm considering cutting off the original bump-stop mounts since I don't ever see a need to go back to them.. but they also dont appear to be in the way of the sway bar arms so I may just end up leaving them. My initial bump-stop test fit looks promising, but I need to pull the springs to fully cycle my suspension to full-bump and verify i start making contact at least 1" before the shock bottoms out. Before I do that, I may also slide the rear axle back just a tad bit more to fully center it in my new wider opening with the rear bumper cut down... but I feel like i really screwed up when making my adjustable rear links.. I made them to factory length at half-adjustment on the heims.. and really should have made them slightly longer. I don't know how far I can safely run the threads out on them without risking pulling/stripping threads under load, and definitely feel like I'm starting to get close.


That's all for this morning's update.. sorry.. not pictures, just some boring documentation stuff for myself down the road :)
 
Nothing like some early morning fabrication work to get the day started :)

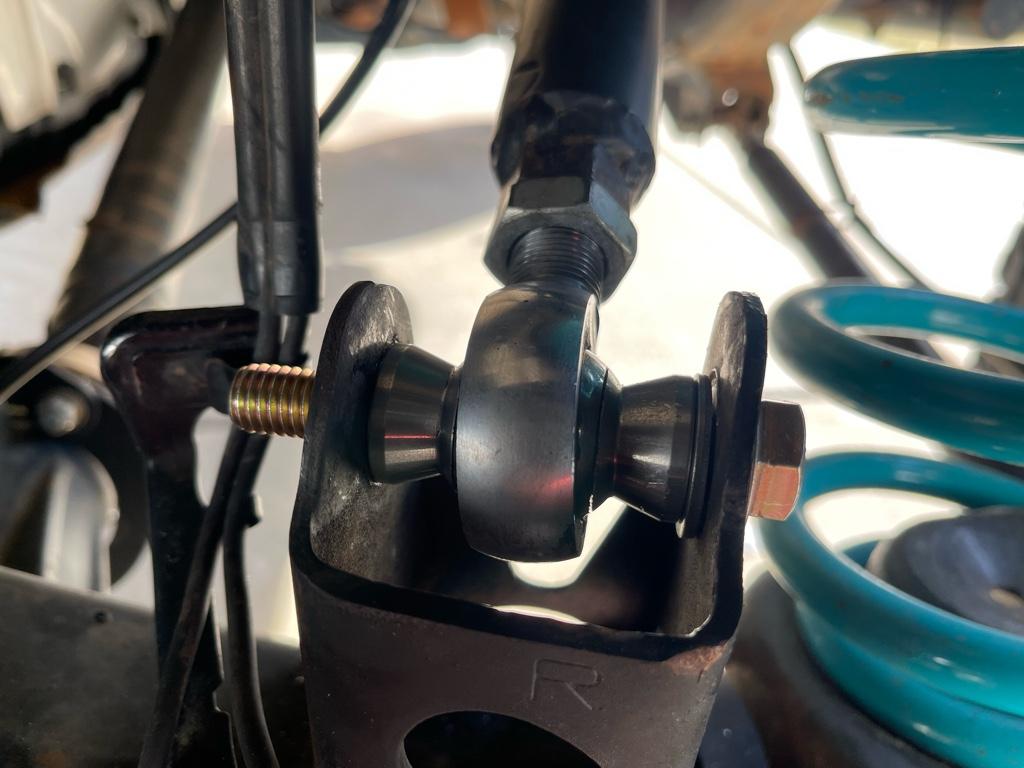
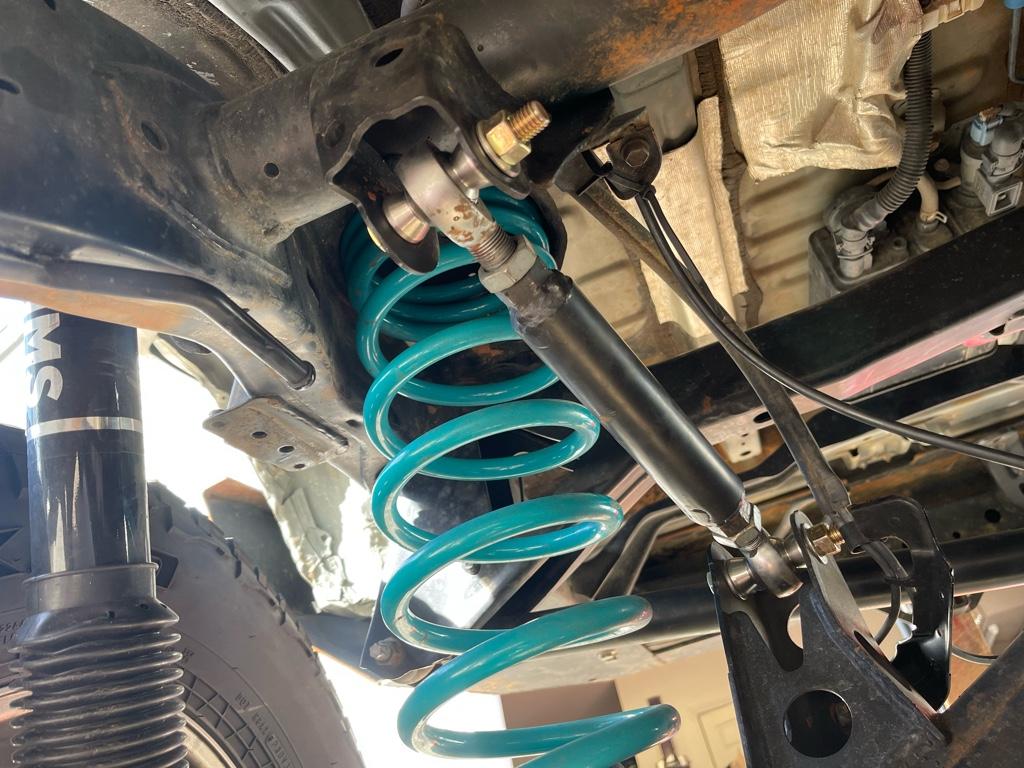
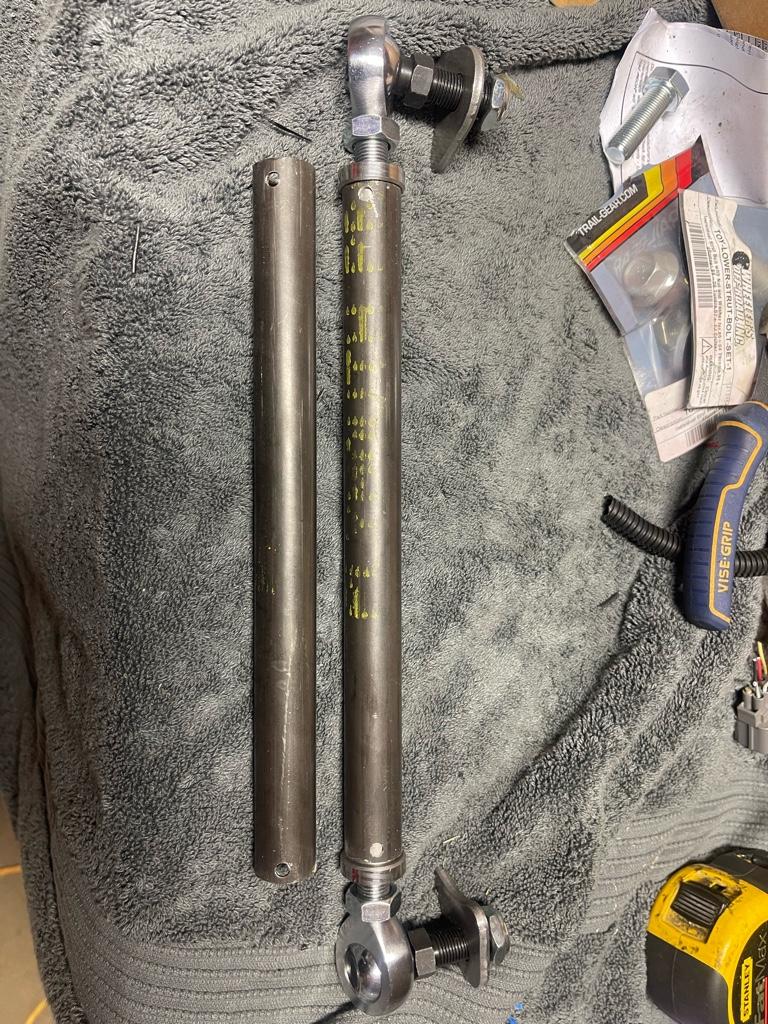
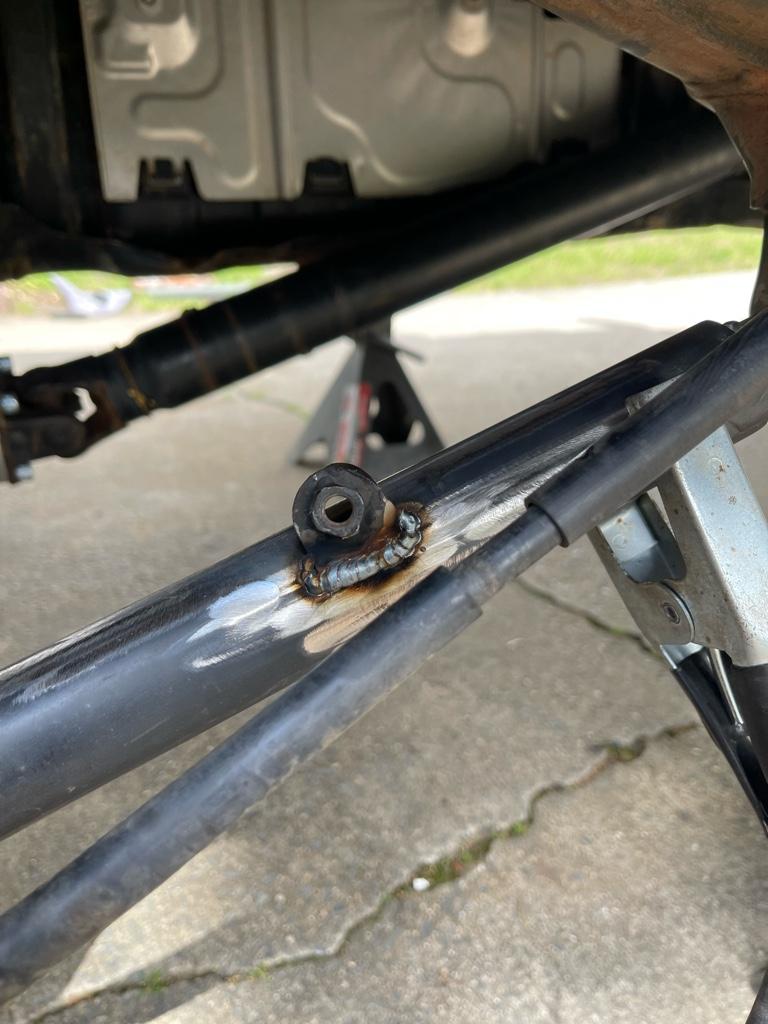
End links for the sway are cut and drilled for welding, 13.5inches overall with plus minus adjustment of 1 inch each way. I’ll mock it up like this and cut down if needed.

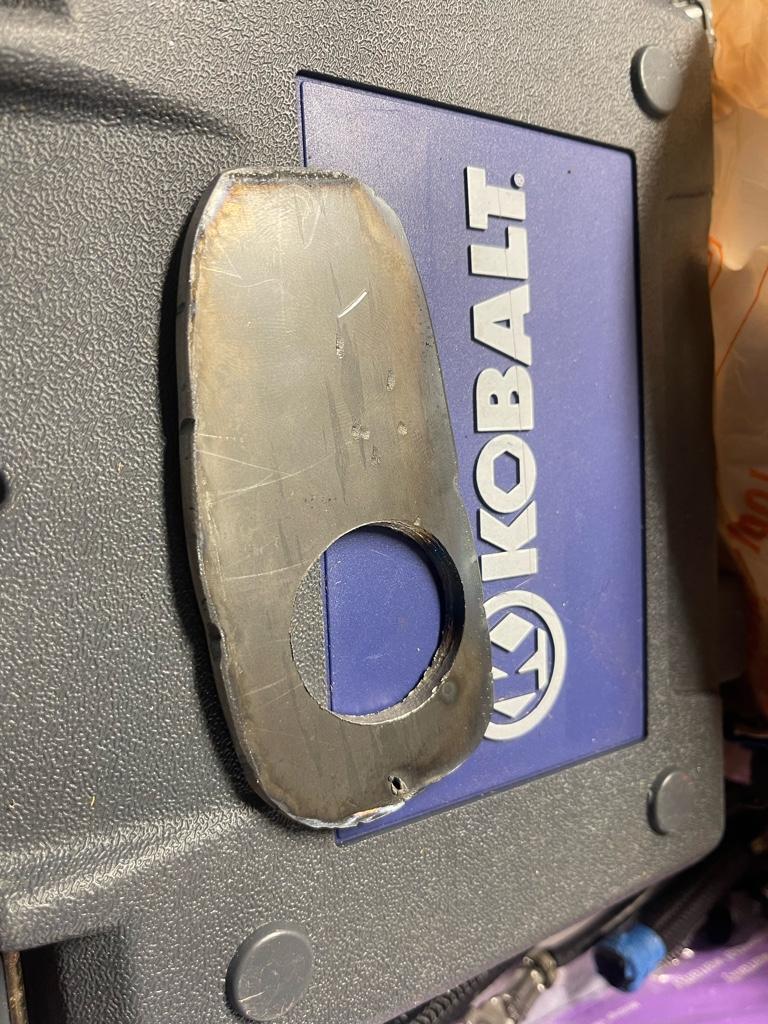
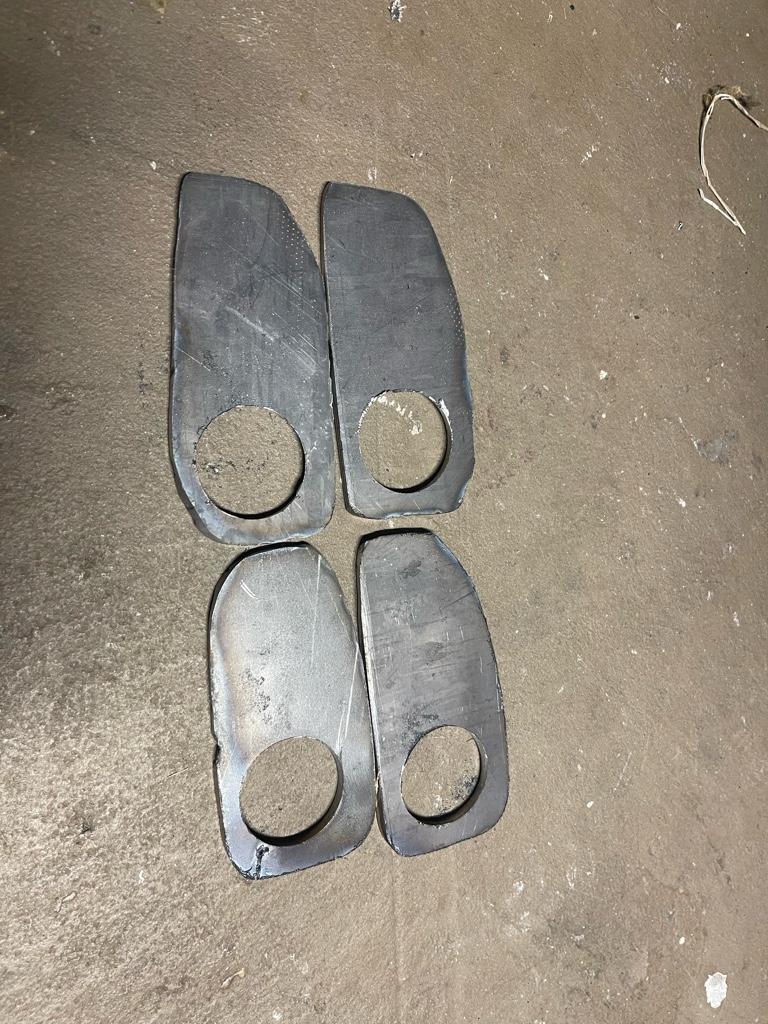
The plates for the sway bar tube are plasma cut and drilled. Not perfect all around but I didn’t feel like making too big a mess with the flap disc.. maybe later.. but you only see the outside ones and one at a time so I think it’s close enough. Function >form lol.

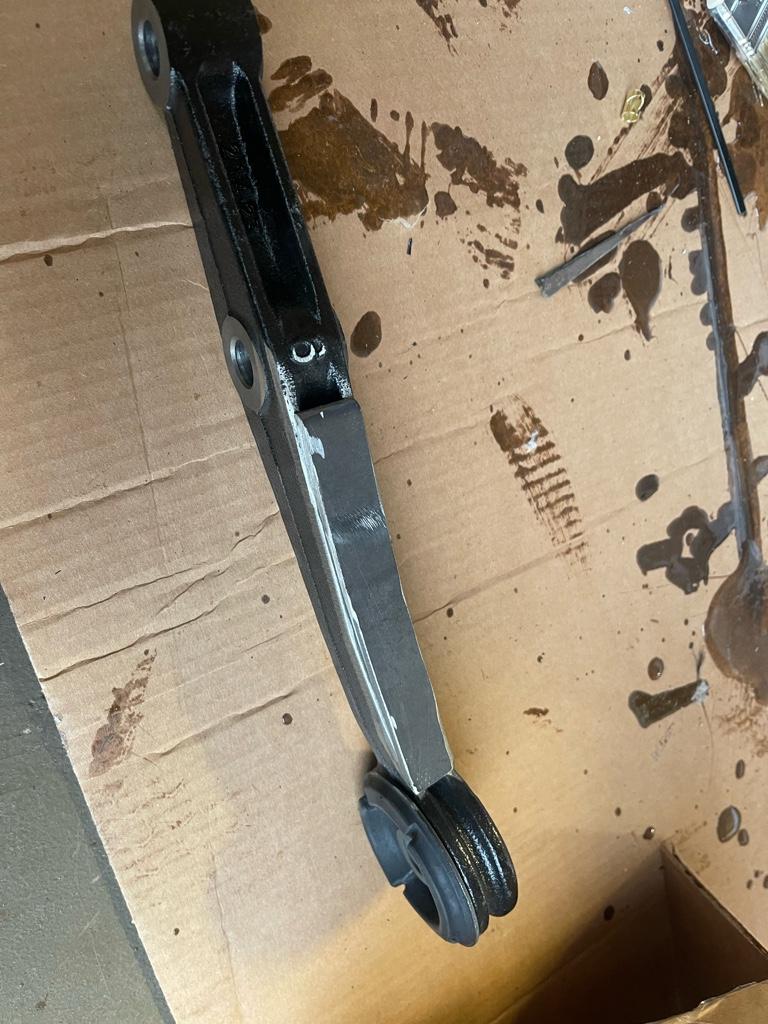
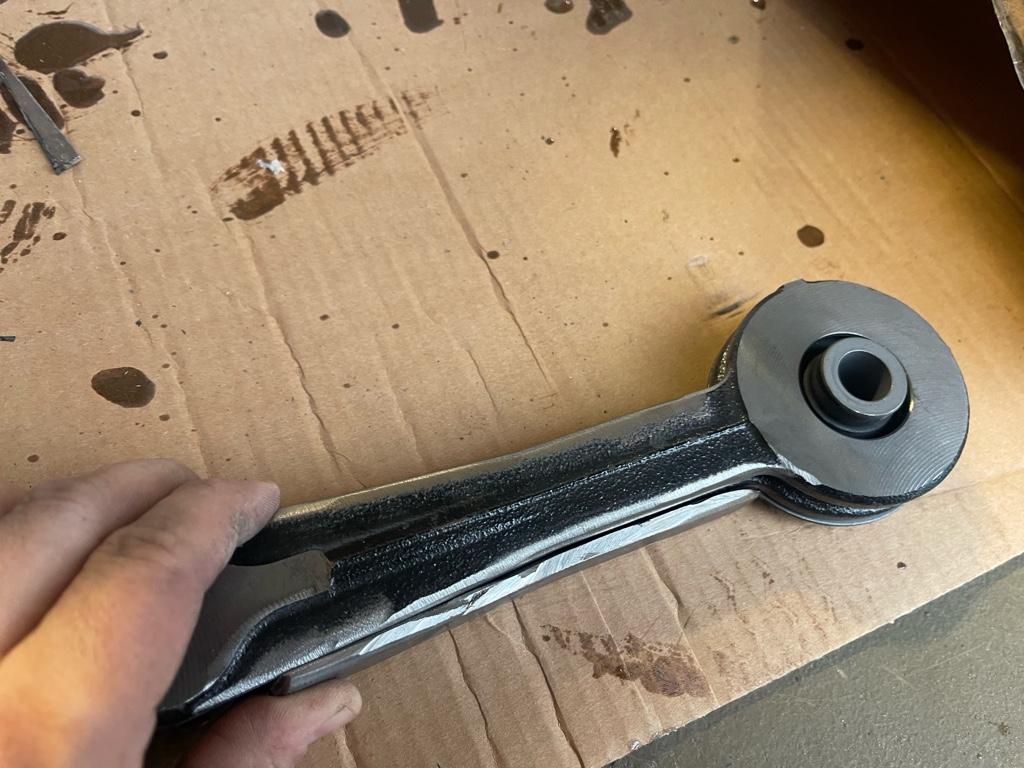
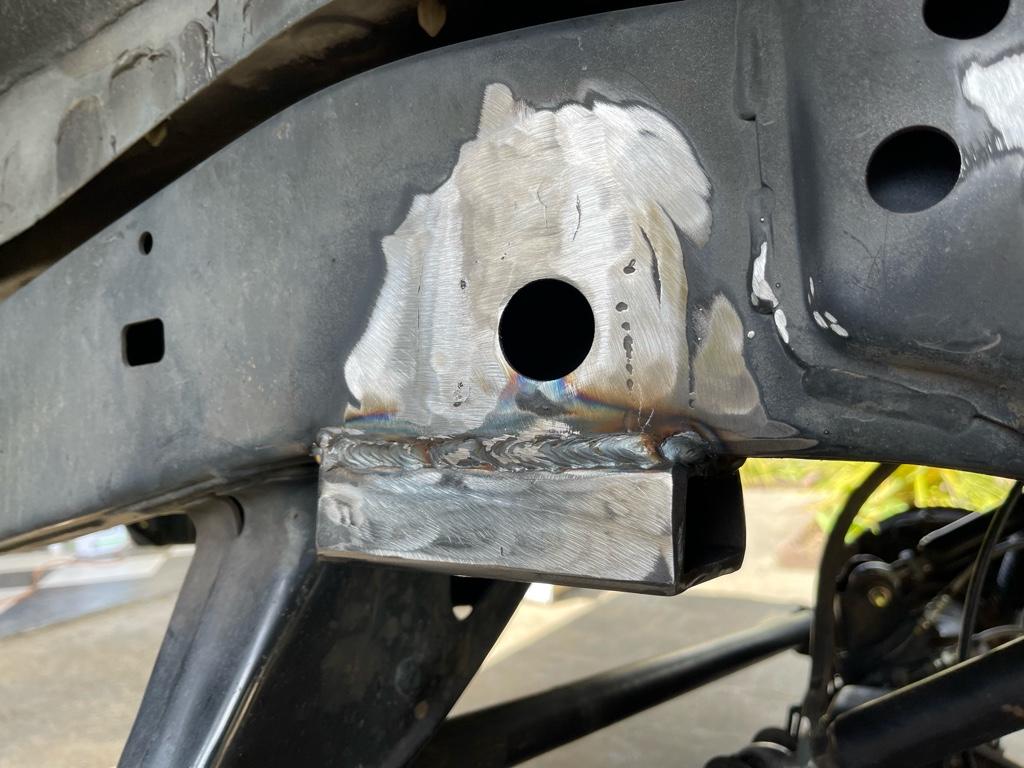
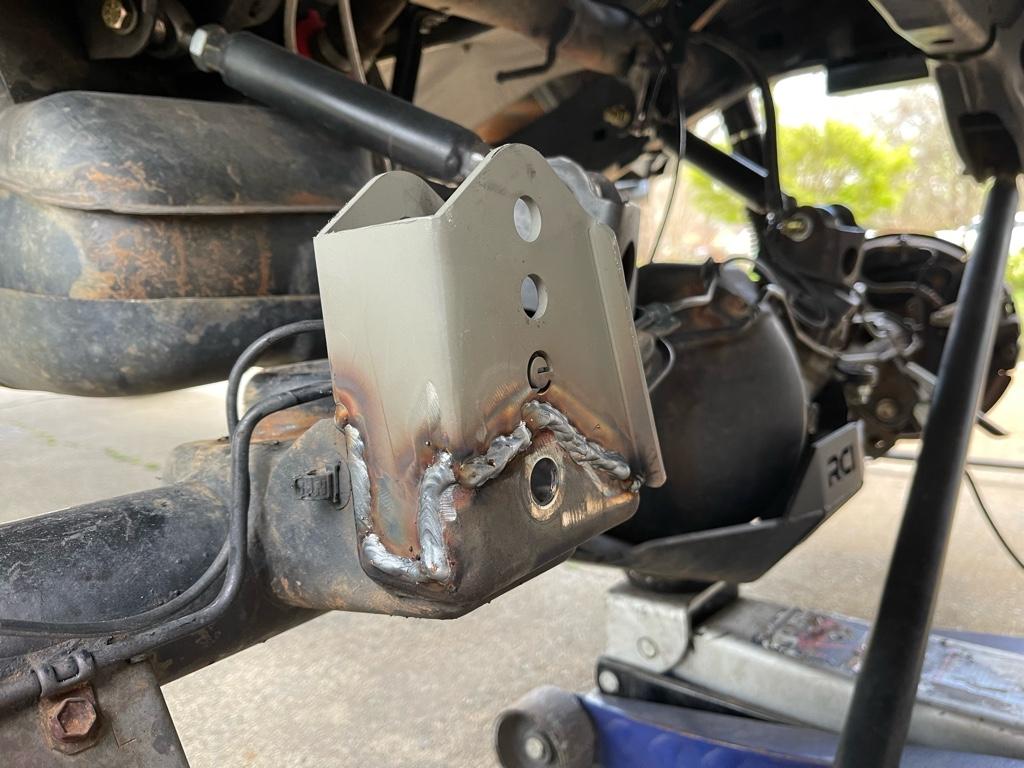
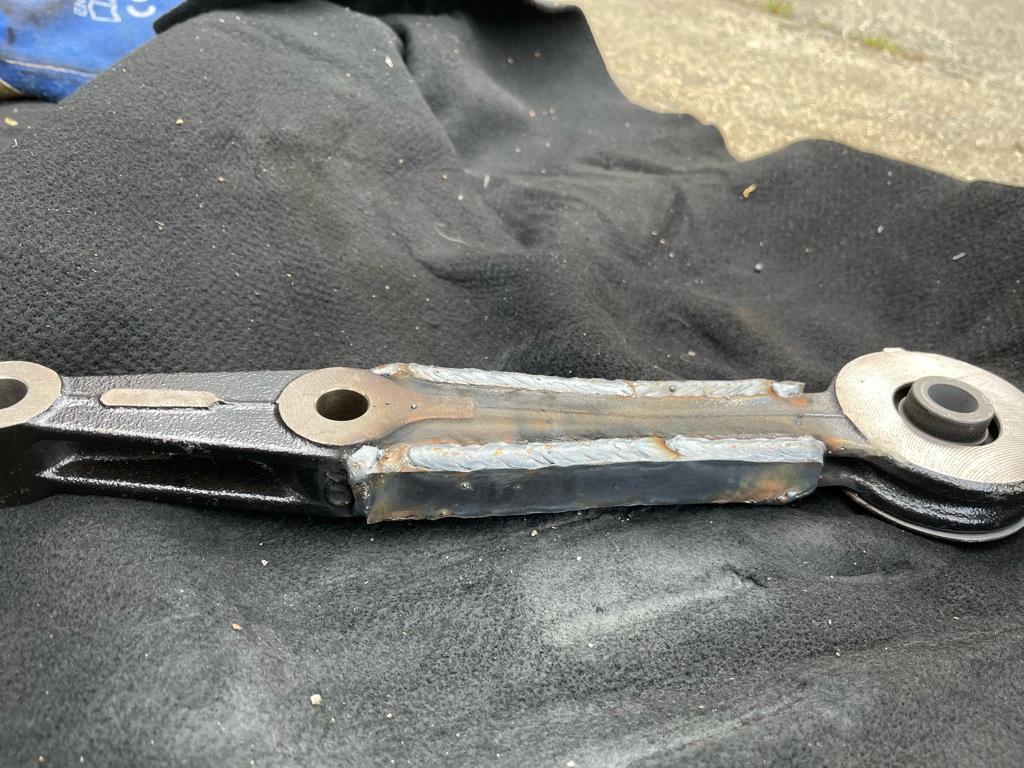
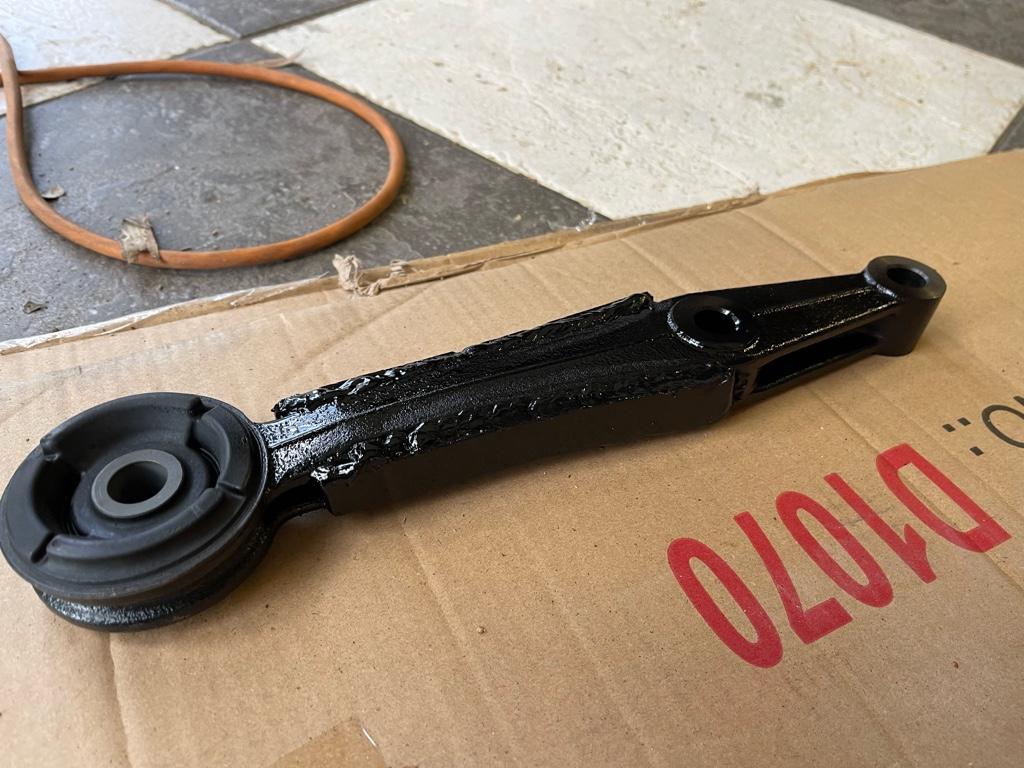
And I went ahead and cut and bent the support gussets for the diff mount arm I bought. Should be pretty stout. I believe this is the only ones that is at risk of failure .. the drivers side (I think I got it right?) only fails secondary once this arm goes. So I think I should be in good shape after this is welded and on.
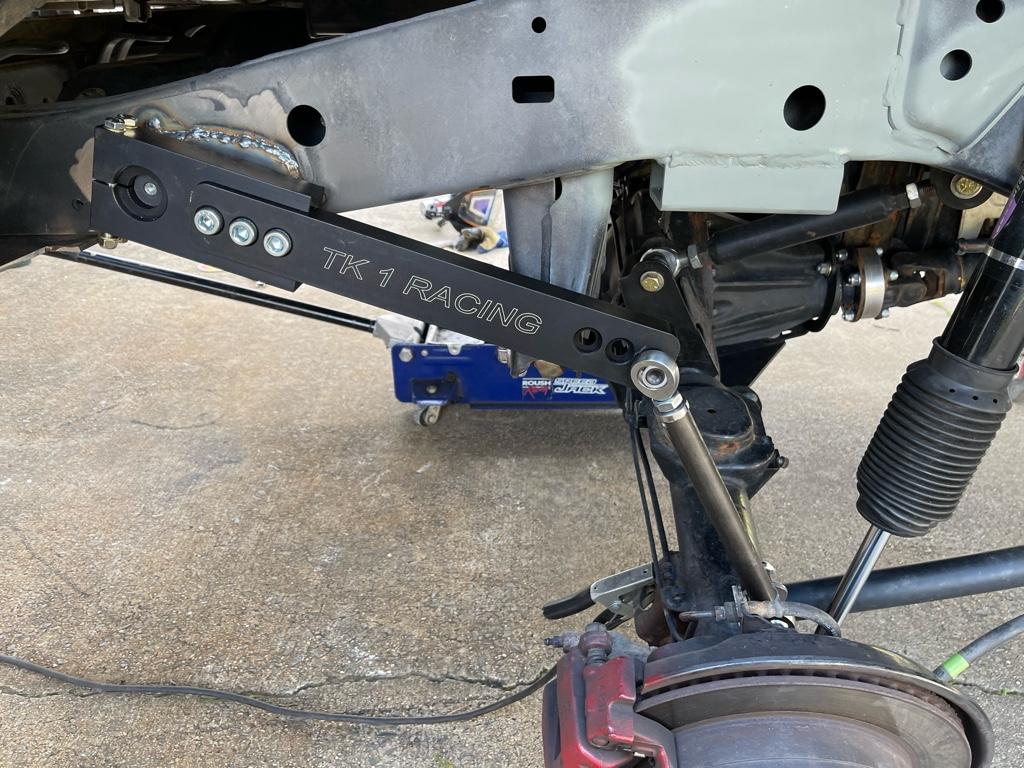
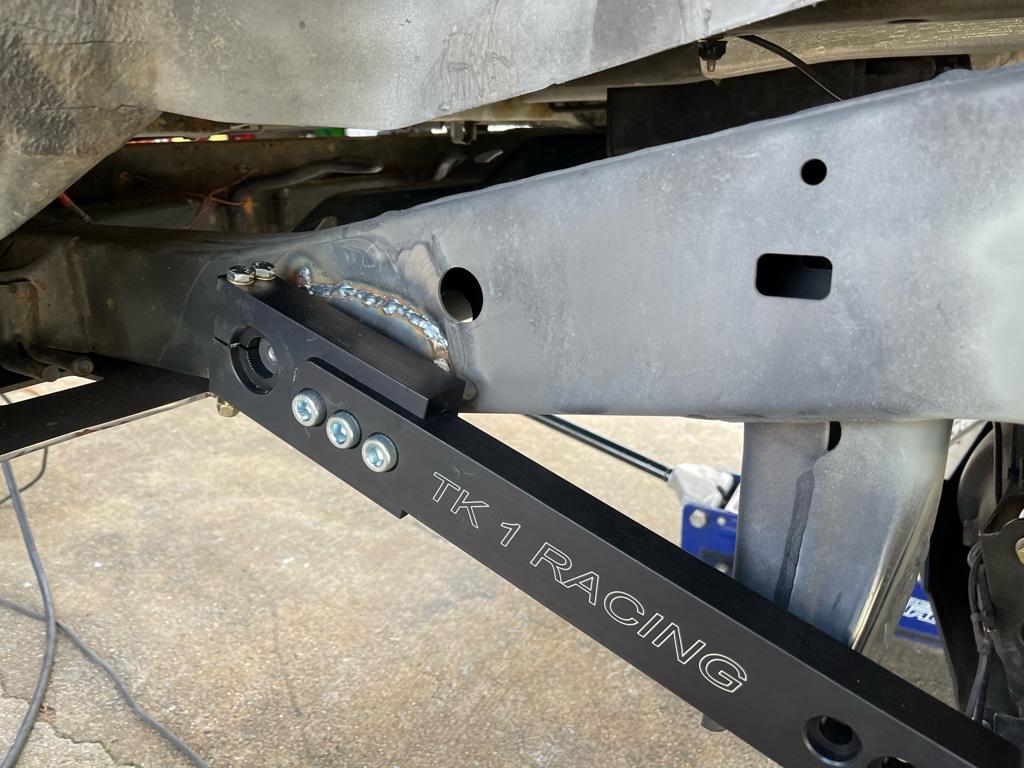
Only thing of concern is the rubber bushing, going to try and keep as little heat to that end as possible.. maybe just a couple of solid tack weld near the end with cools down time in between .. we’ll see how it’s feeling when I get to welding. Getting exciting. May be able to knock a lot of this out by the time the weekend is over

b45f2448e7a134b826a5cfe0d582fed0.jpg

2434ad463b701809020f66f1e7637bf8.jpg

8d791187111d14208fbe357ef7535bf2.jpg

16fb983df8eea2e358ca13ce4e1666a2.jpg

d3d2ac3701eb91387ff70a76fcb159d1.jpg

785c60978aa7545d3b89b08e050a4a32.jpg


Sent from my iPhone using Tapatalk
 
One other thing I plan to do either today (if the rain ends up stopping) or tomorrow is get the plasma cutter back out (it's stupid quick and fun, though definitely requires a ton of practice to cut straight) and chop off the body mounts and clean up the frame. I was going to wait to do it while I was at my parents place with the welder handy, but I don't drive it and plan on welding the relocated cab mounts by this weekend, so I don't see an issue with the rig sitting in the driveway for a day or two without 2 mounts in place. I'll measure the cab height and make sure I jack it back up to where it needs to be before getting the new one in place.

Once this is done I should be in pretty good shape for wheeling this season. The cam tab eliminator kit still hasn't shipped so I'm in no hurry to get the total chaos cam tabs welded in place and will tackle that later.


Also just found out that my fairly freshly rebooted RCV axle boot is torn on the drivers side again... yay.... These are life-time warrantied, but I haven't gotten a solid answer from them on whether or not things like torn boots not being replaced voids the warranty.. certainly doesn't detail this out on the website.
 
The ASB links are a great idea, looks like it will be pretty beefy. The TK system looks better than the Currie from what I can tell.

I've been thinking about my diff brackets as well. Where did you source the brackets?

I started welding on my Cam Tab Gussets from MC. I really SUCK at this welding thing lol.

So I payed my 23 yr old neighbor who is certified and works on the Tig crew fitting all the fuel and cryo pipes out at the Space Center. He finished all the stuff I had prepped and tacked up, and even cleaned up some of my slop that I started and decided I was making too much of a mess.

He likes my old Hobart 175 mig, so I can't blame my poor quality on the welder. Practicing on a table is a whole lot different than welding vertical or upside down in tight spots in the wind.
 
The ASB links are a great idea, looks like it will be pretty beefy. The TK system looks better than the Currie from what I can tell.

I've been thinking about my diff brackets as well. Where did you source the brackets?

I started welding on my Cam Tab Gussets from MC. I really SUCK at this welding thing lol.

So I payed my 23 yr old neighbor who is certified and works on the Tig crew fitting all the fuel and cryo pipes out at the Space Center. He finished all the stuff I had prepped and tacked up, and even cleaned up some of my slop that I started and decided I was making too much of a mess.

He likes my old Hobart 175 mig, so I can't blame my poor quality on the welder. Practicing on a table is a whole lot different than welding vertical or upside down in tight spots in the wind.

I feel you on that... its a whole different animal welding on the car, 100% agree. I'll try and have my brother help me out with some of the stuff if he's around.

I picked up the mount online from one of the toyota parts vendors. I typically go after the cheapest option google will bring up. With this one I had to find one in stock and ready to ship since I didnt' want to wait. Looks like Toyota of Hollywood is where I got it from.
 
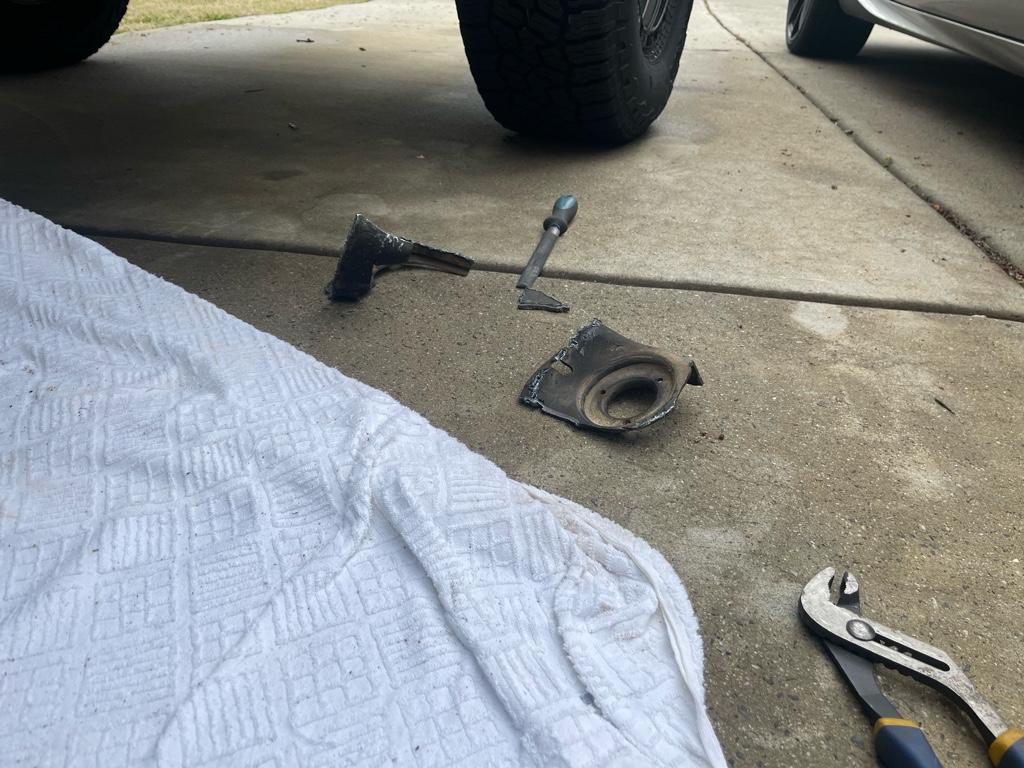
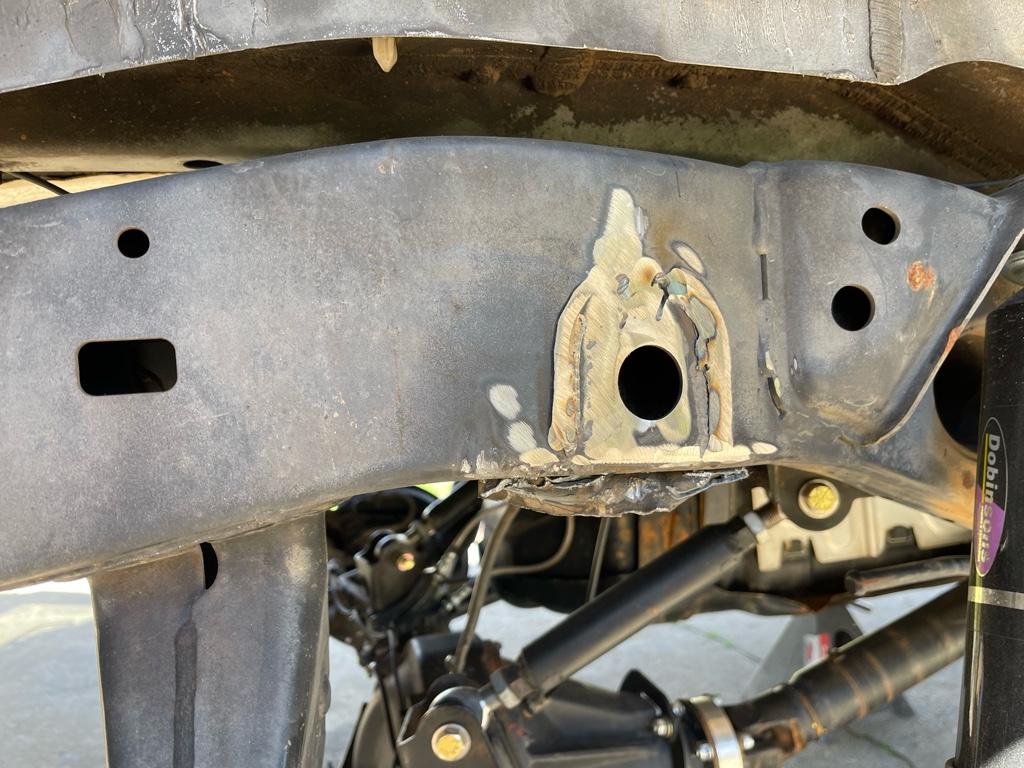
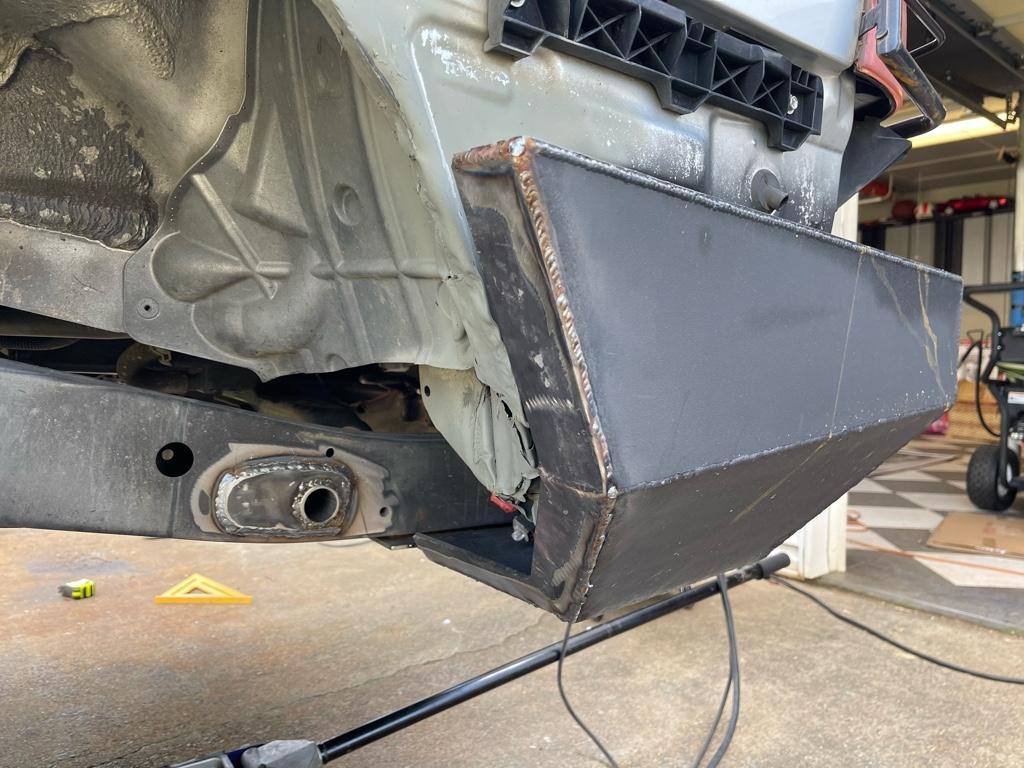
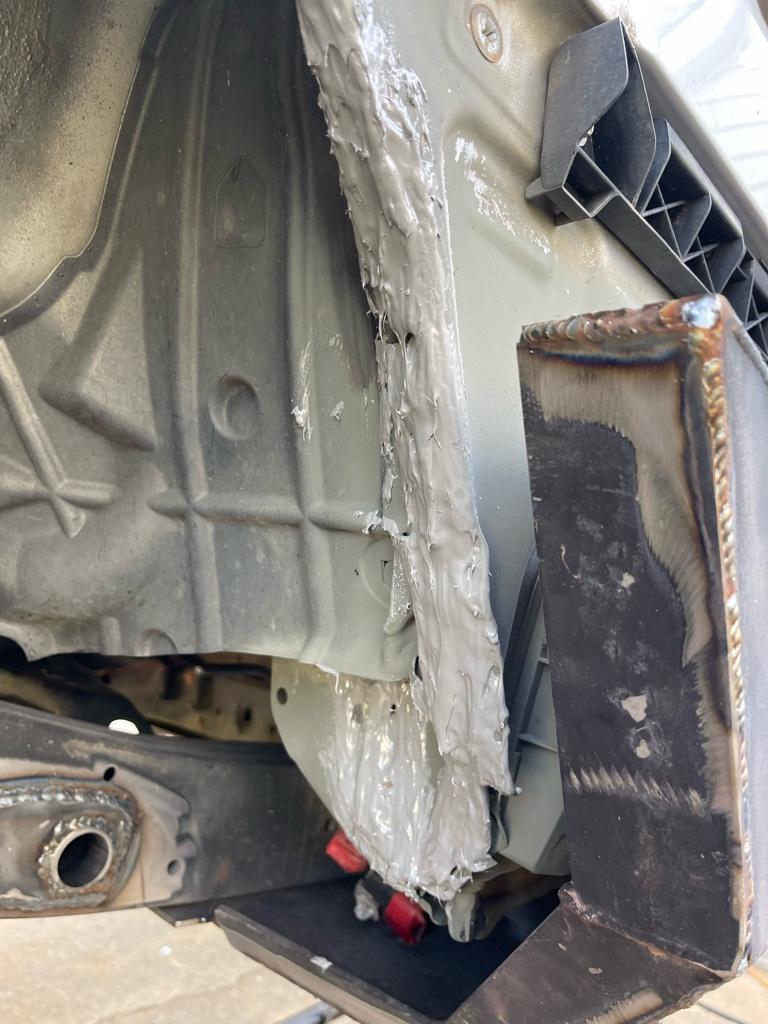
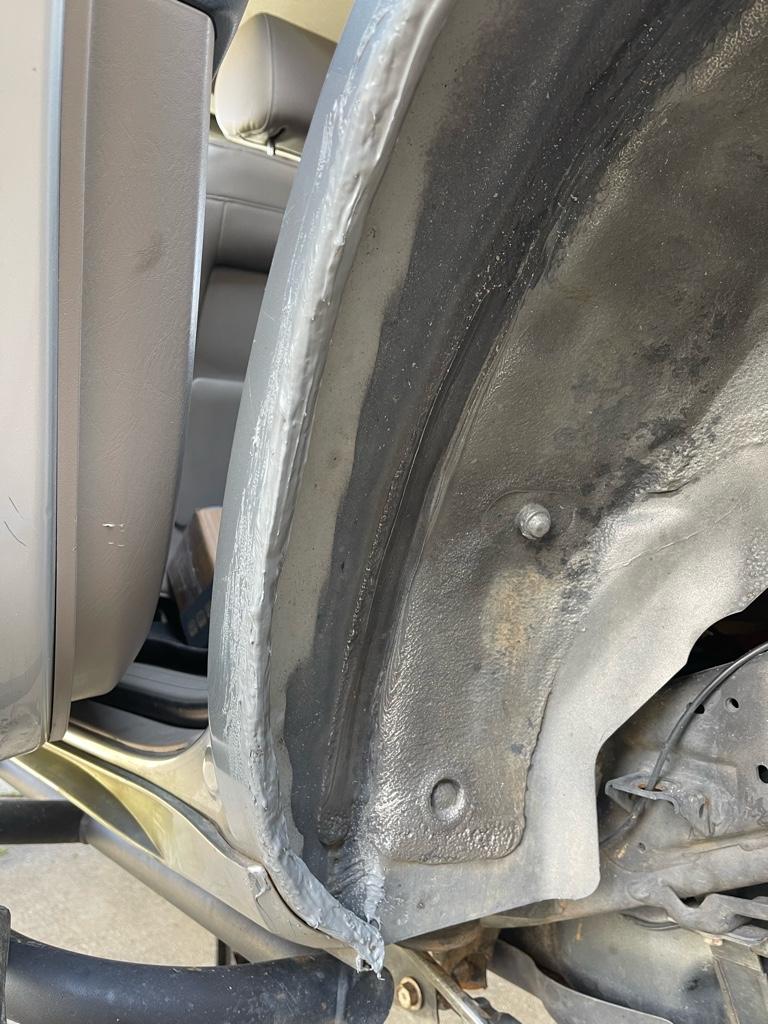
A little progress from today. The drivers side body mount is gone. It was a pain in the ass but definitely doable.. I think a carbide sawzall blade would have done the job less messy and painful.. but since I didn’t have access to that I went with my plasma cutter idea. Wasn’t all that terrible but I hate sparks plying all over me and having bit of metal stuck in every imagine place on my body. With that said.. there is certainly a better way to do it but it’s done lol. Aiming to get the passenger side done tomorrow.

Also decided to clean up and even out the sway bar mounting plates I made. They look a little more similar now

b698f60abcdd297f13ea27fb4c29d344.jpg

7535292ba28d154bced86330bfb9dd63.jpg

03037a563ee506997c12ed2d42f45bd3.jpg

8da2de0fa22f4fb1a105232259c916eb.jpg

b44b7650270d70126e54271d078721ba.jpg

5209cc958a0798d3797a5bcb64c69376.jpg


Sent from my iPhone using Tapatalk
 
That NTK body mount is looking nice! Did you finish up the rear sway bar?

working on it.. won't have a chance to get to the welder until tomorrow or saturday, so I'm just working on prepping as much as I can to expedite the process once I can make it over to my parents house and get the welder out. really wish I had one at the house.. would be super helpful to know out little things here and there in the evenings vs. dedicating an entire day to go weld lol.

Stay tuned.. definitely looking to have it done before the weekend is over..
 
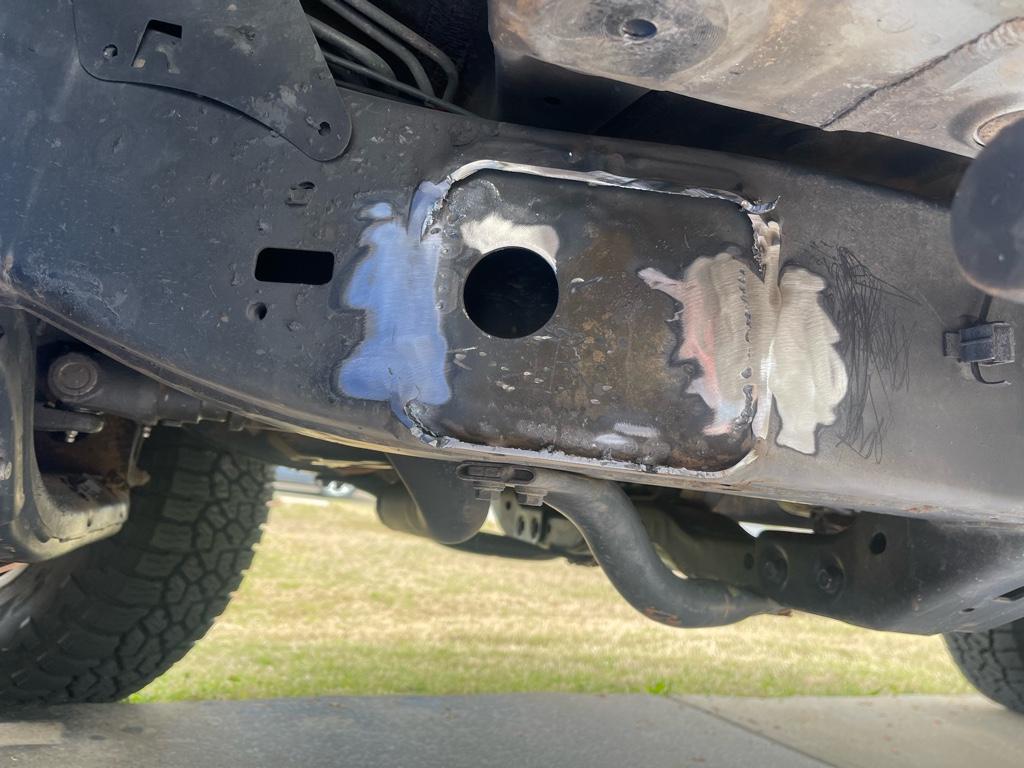
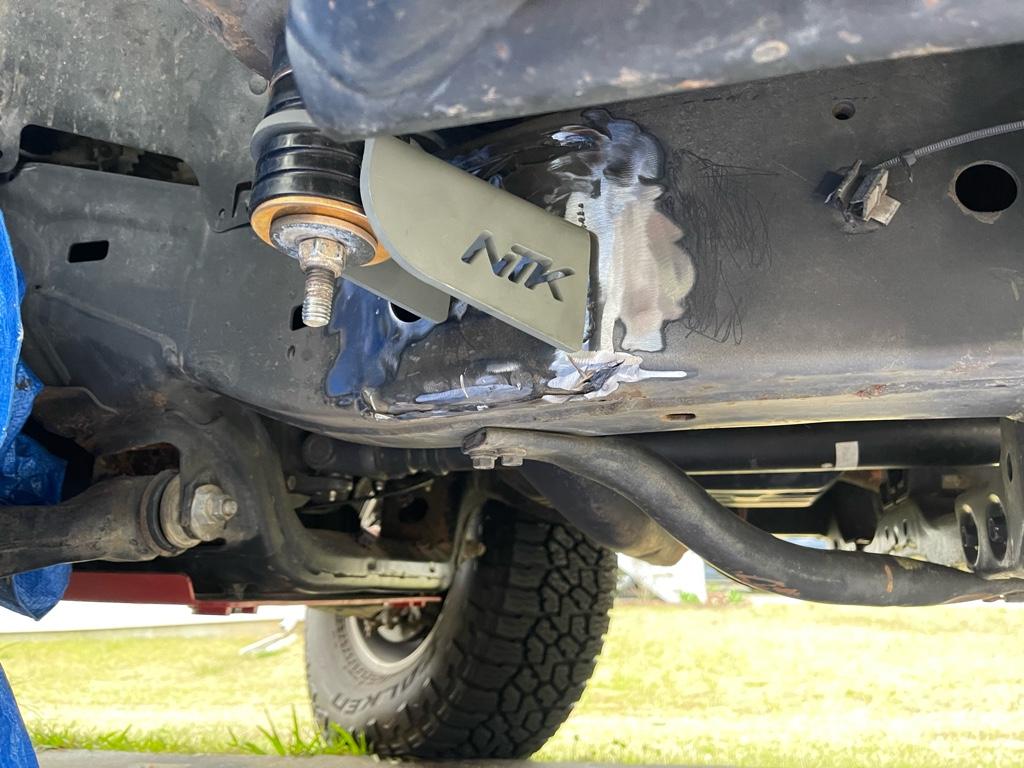
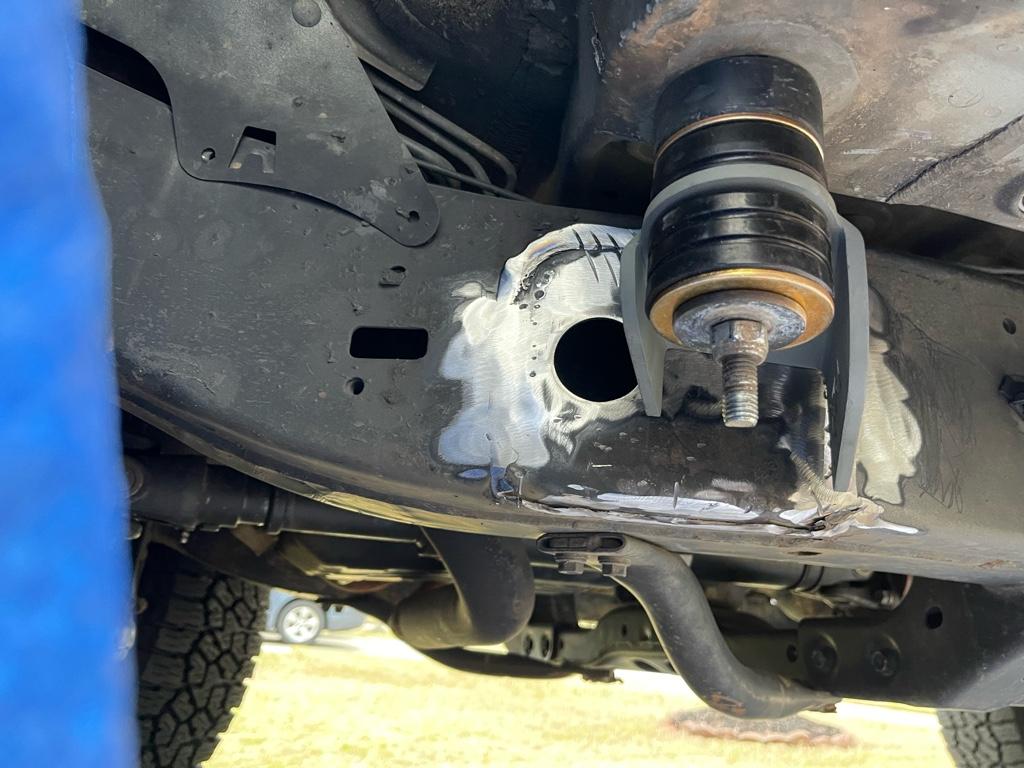
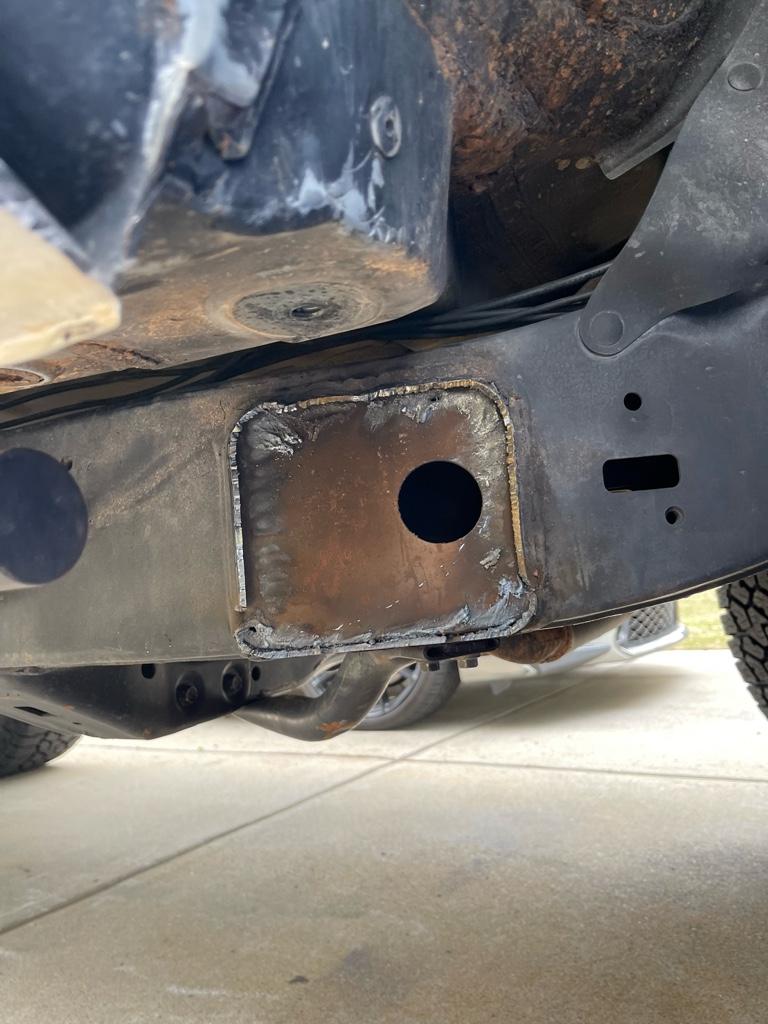
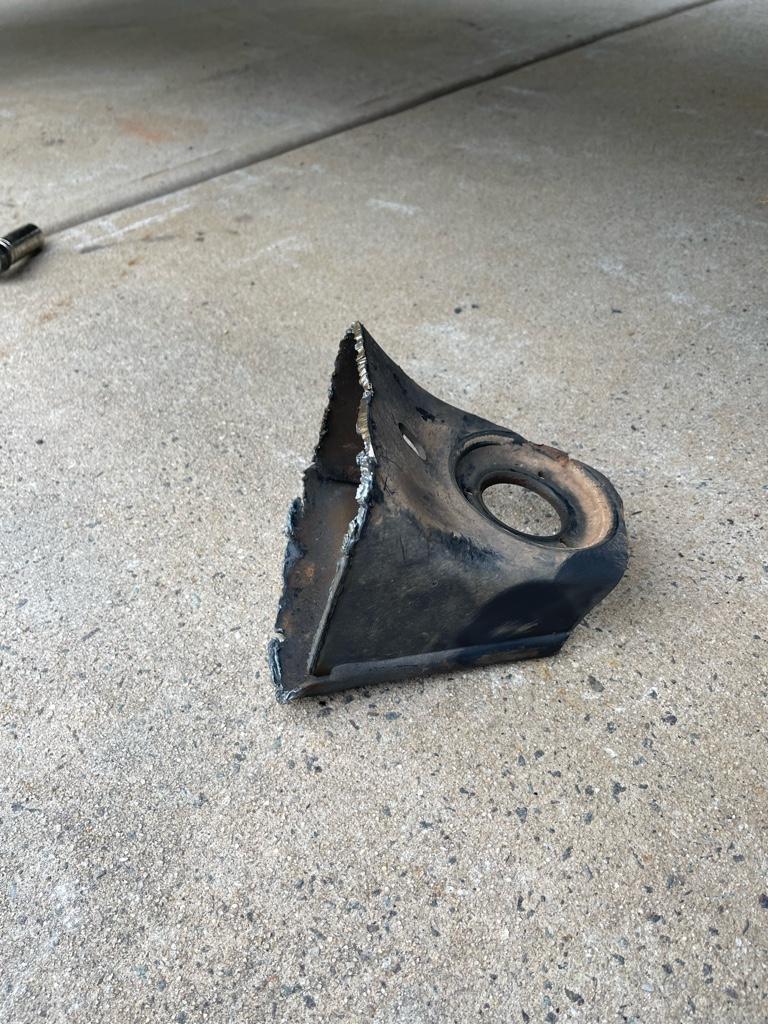
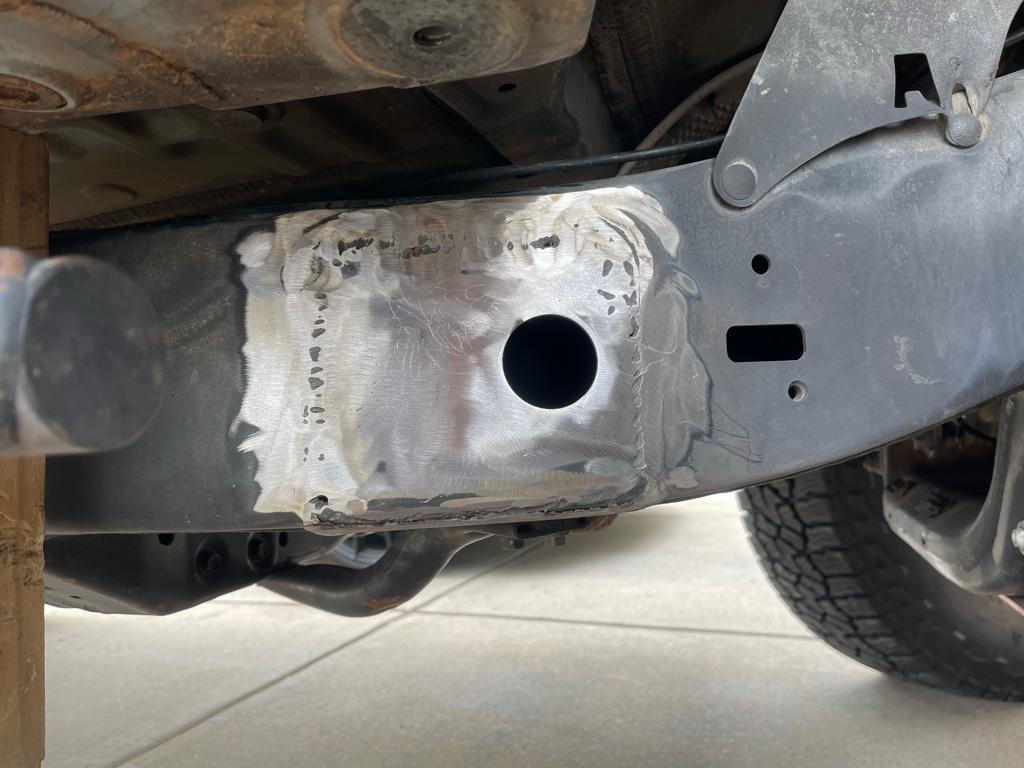
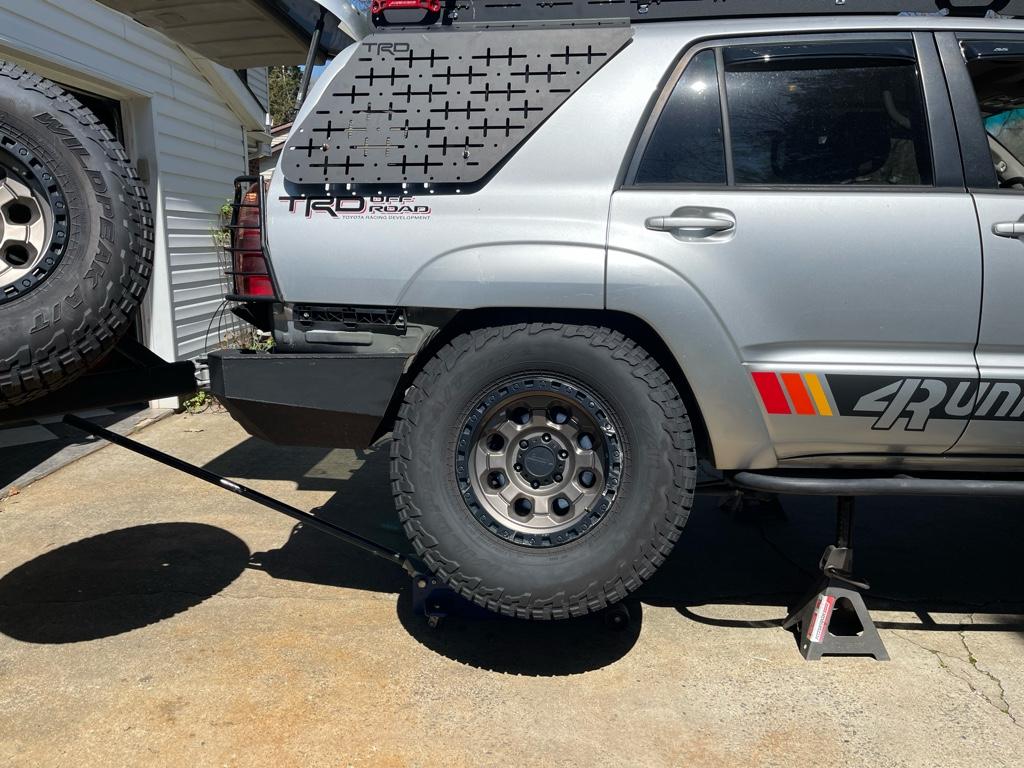
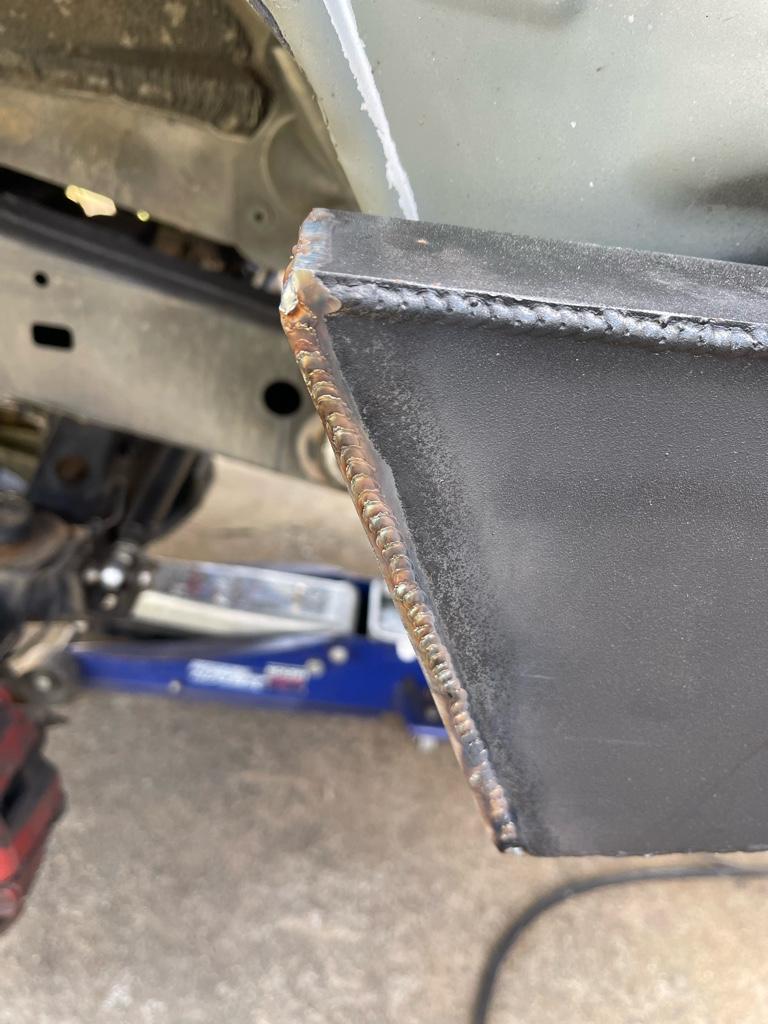
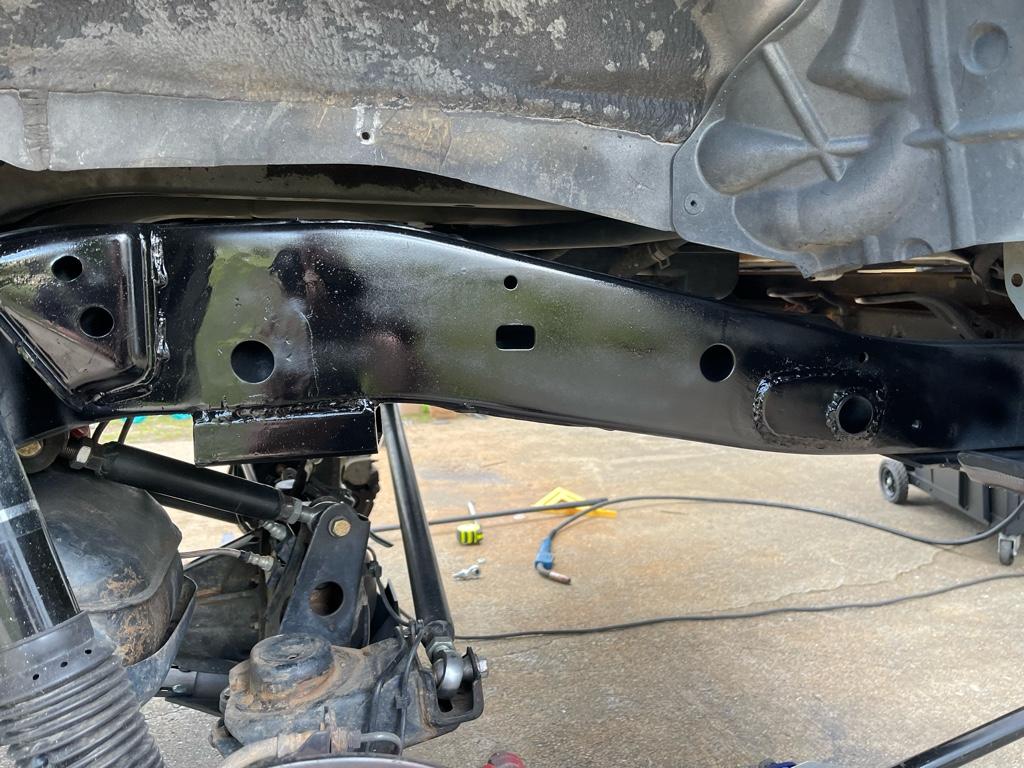
So attempt #2 went twice as smooth and twice as fast.. the trick? Jack up the body once you remove the rubber body mount pucks.. the body sags quite a bit and jacking it up gives an additional 2 inches of clearance to cut nicely across the top

Managed to get the entire mount off in one cut. Both sides are fully ground down and ready to weld.
dd9069af93fb9f4758fc36b7db2accdd.jpg

6ede3dbe135736e7ffd4bcdd805c0527.jpg

8824c9b117ad2a75aecddb69be0695c2.jpg


Sent from my iPhone using Tapatalk
 

Members online

Forum statistics

Threads
278,312
Messages
3,554,084
Members
248,016
Latest member
Advally Service

Trending content

Back
Top