
You are using an out of date browser. It may not display this or other websites correctly.
You should upgrade or use an alternative browser.
You should upgrade or use an alternative browser.
Black798's 98 limited build thread
- Thread starter Black798
- Start date

Black798
New member
Wheeler Lake
Yesterday my uncle and I headed up and ran wheeler lake. This was definitely the hardest trail Ive done to date. I made it up all the obstacles open open and my armor got a good workout, especially the sliders.
Didnt get any good pictures of the first obstacle but I did get some video that I will upload later.
Coming up the V. I struggled a bit on this one and put a good dent in my gas tank but made it up under my own power.
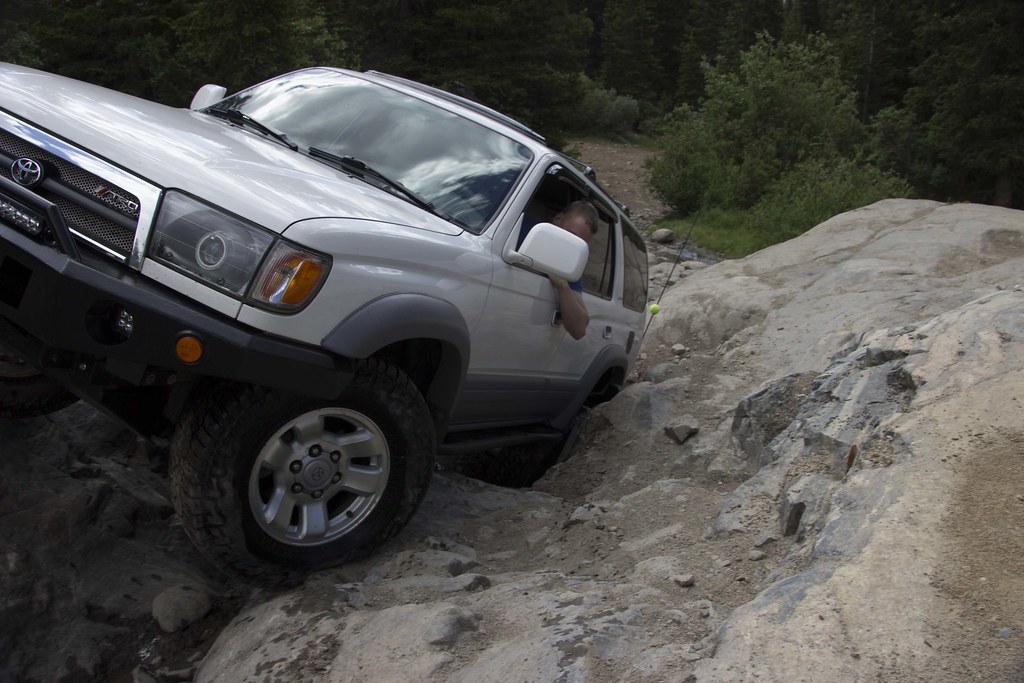 IMG_4926 by Phoenix Black, on Flickr
Watched this jeep almost flop after he accidentally popped the clutch in reverse.
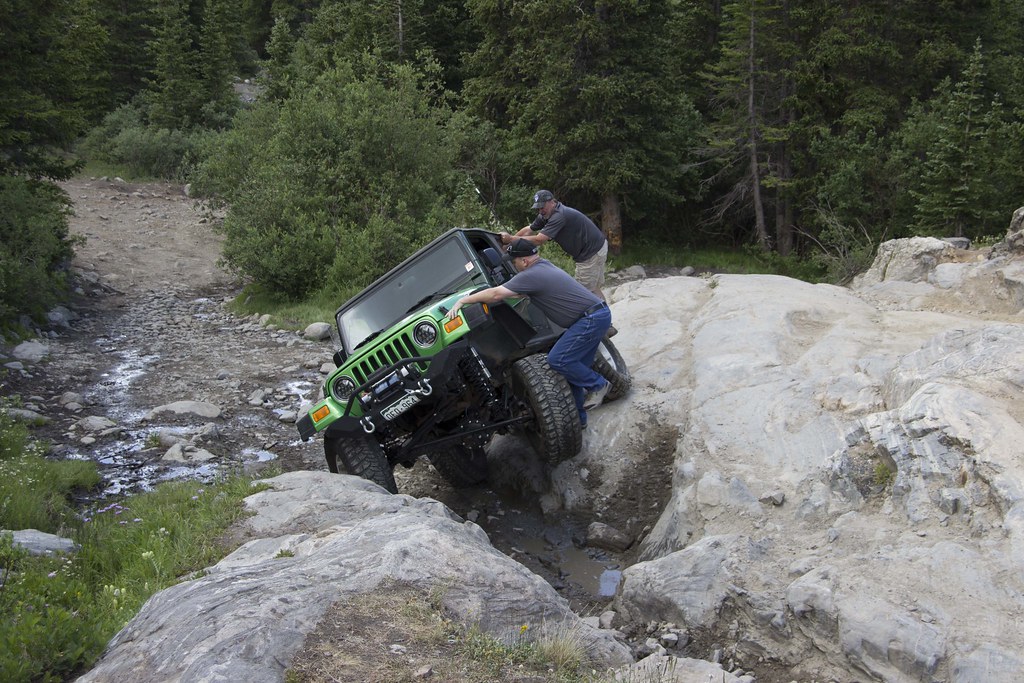 IMG_4968 by Phoenix Black, on Flickr
Posing up against a rock at the top of the trail
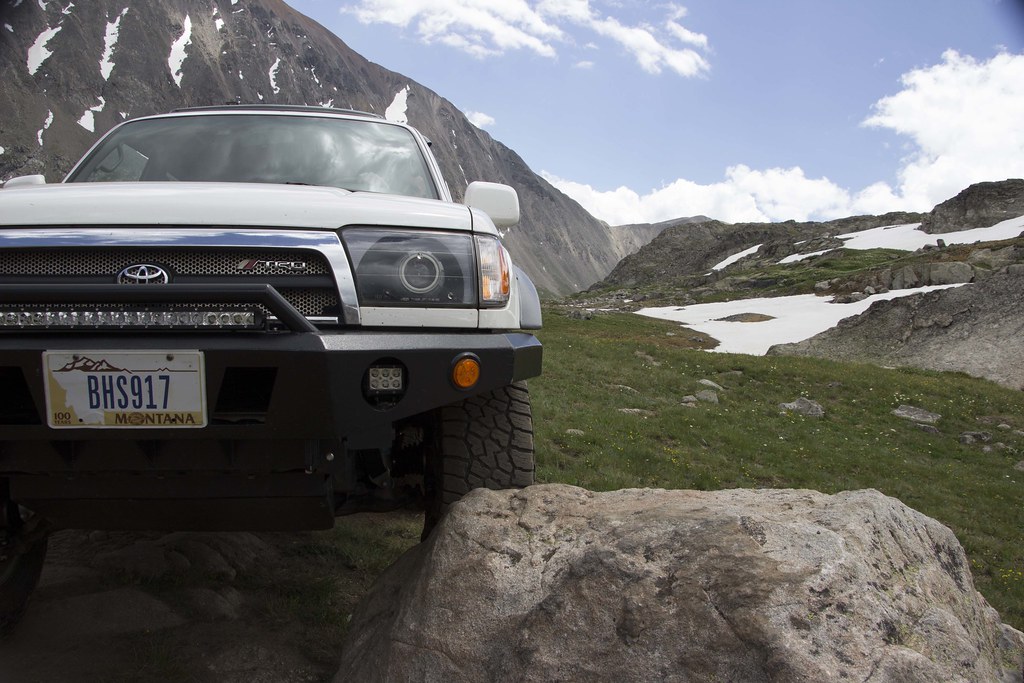 IMG_5063 by Phoenix Black, on Flickr
Coming down bowling ball hill
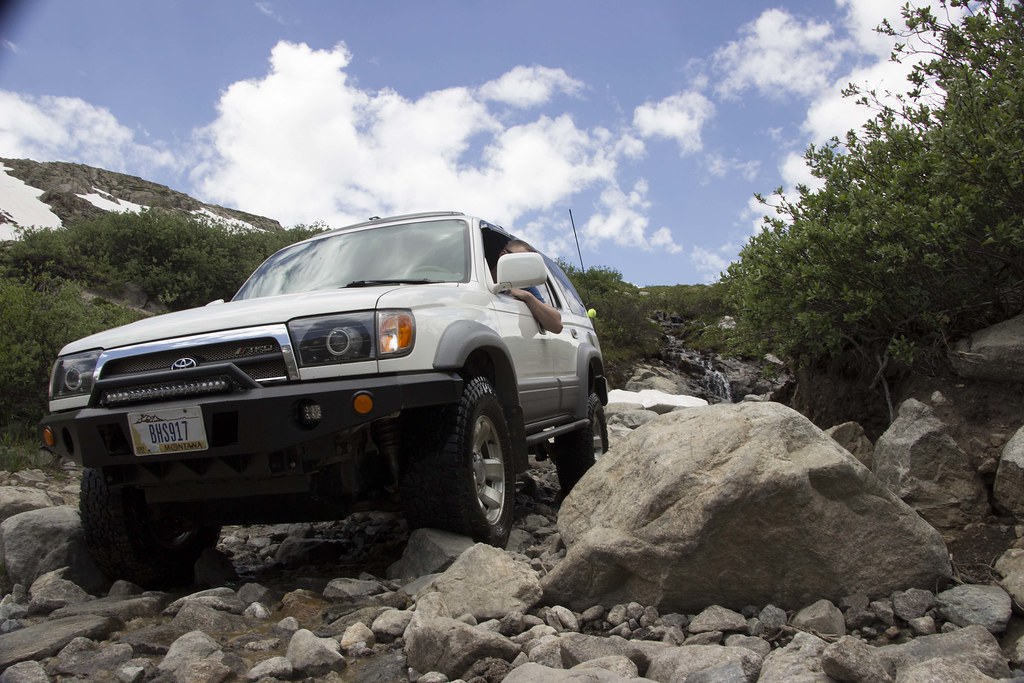 IMG_5082 by Phoenix Black, on Flickr
Coming back down the V, little bit of a pucker factor here
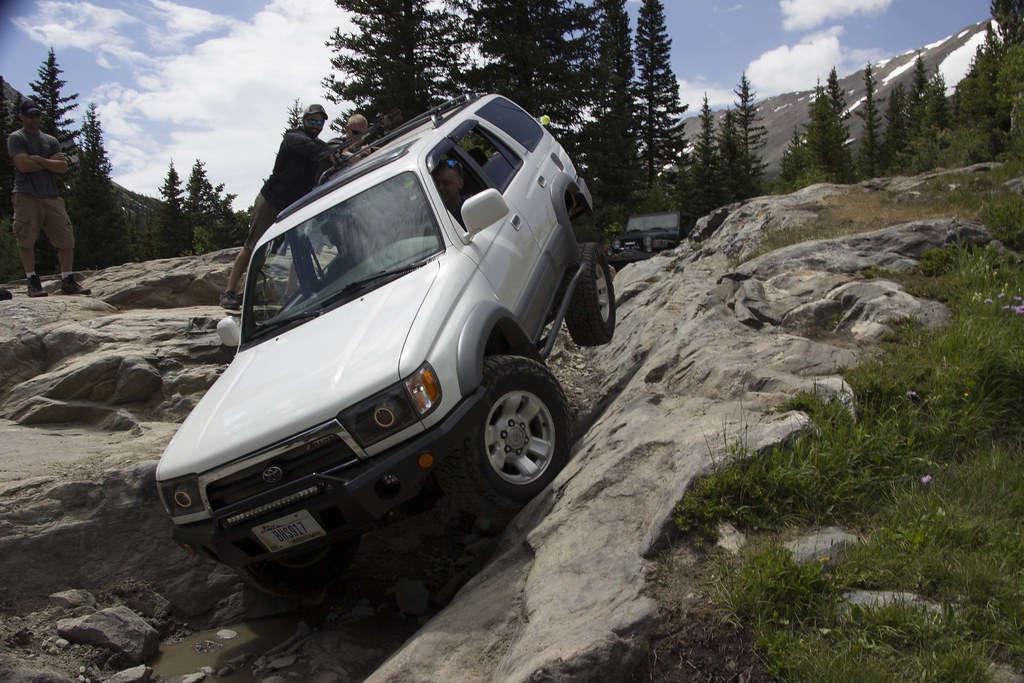 IMG_5111 by Phoenix Black, on Flickr
Got Flex?
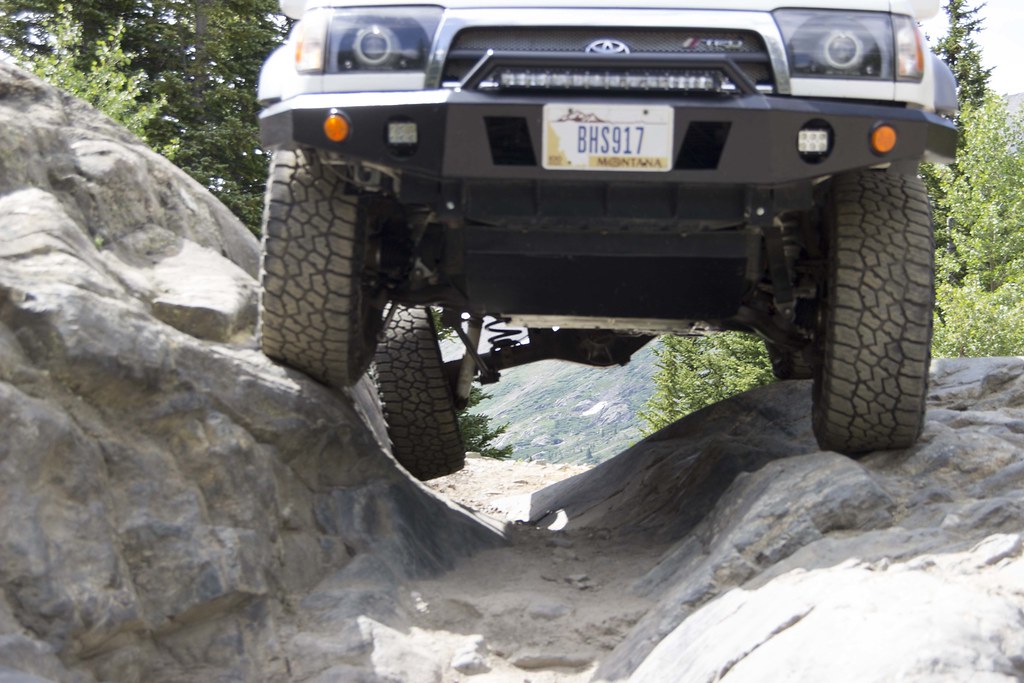 IMG_5196 by Phoenix Black, on Flickr
Absolutely one of my favorite trails, took a ton of pictures, these are just my favorites, and had a great time while not breaking anything major. My gas gauge is now stuck at 3/4 of a tank and my driveshaft rubbed the tank enough enough to shear the zerk off so I will be making a new tank skid soon and dropping the tank today to fix the gauge and the dent in it. [MENTION=118730]AssBurns[/MENTION] I take back what I said about feeling the need for a gas tank skid
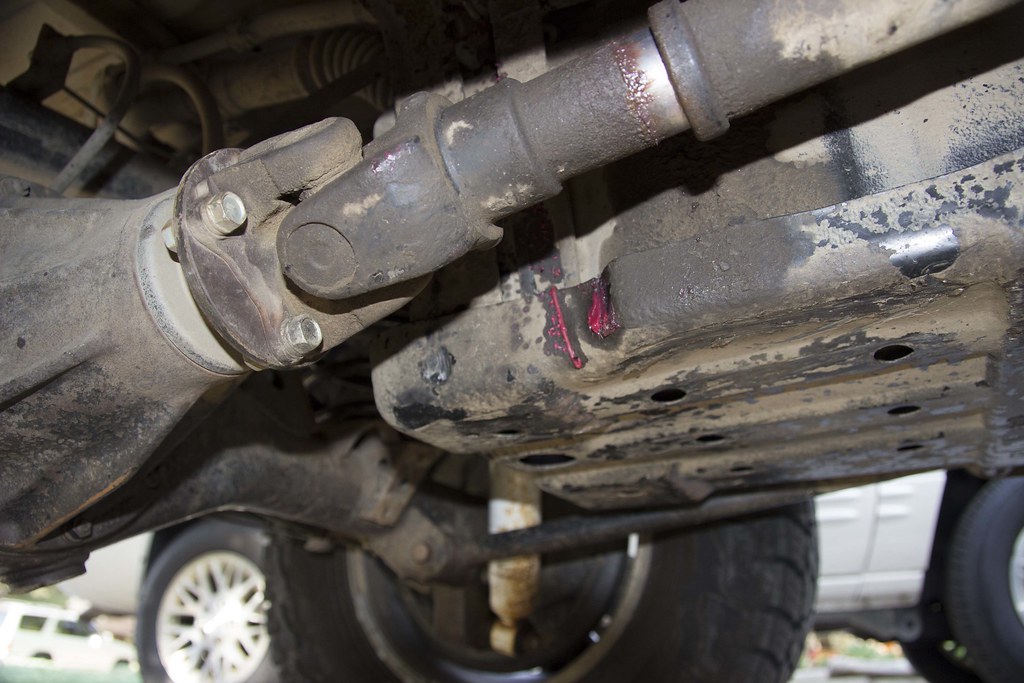 IMG_5251 by Phoenix Black, on Flickr
Cant really see the dent here but
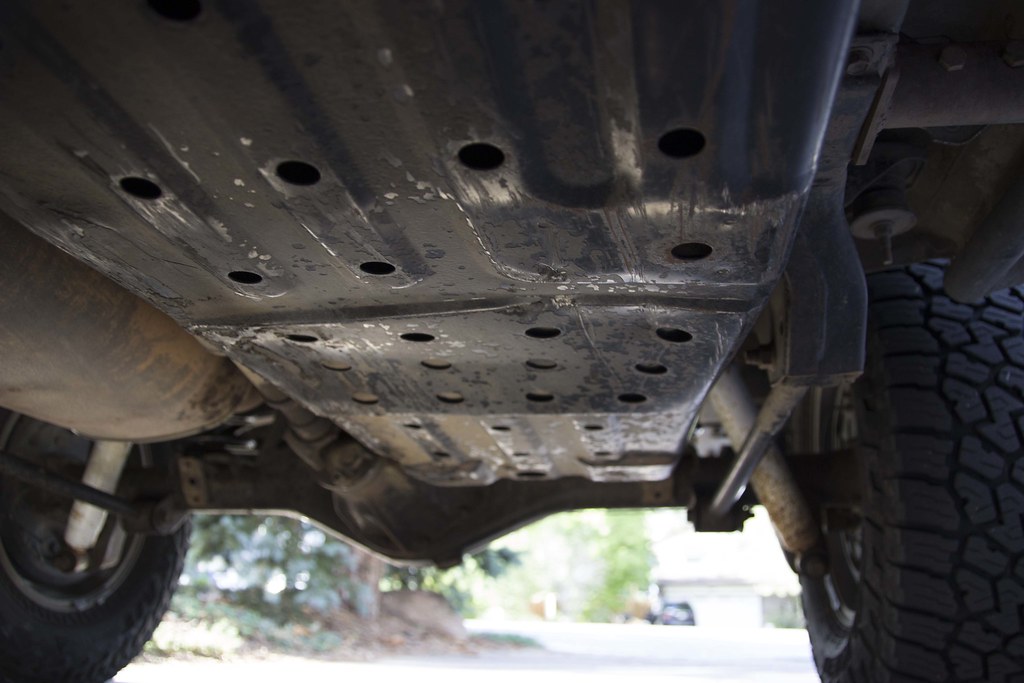 IMG_5248 by Phoenix Black, on Flickr
Yesterday my uncle and I headed up and ran wheeler lake. This was definitely the hardest trail Ive done to date. I made it up all the obstacles open open and my armor got a good workout, especially the sliders.
Didnt get any good pictures of the first obstacle but I did get some video that I will upload later.
Coming up the V. I struggled a bit on this one and put a good dent in my gas tank but made it up under my own power.
IMG_4926 by Phoenix Black, on FlickrWatched this jeep almost flop after he accidentally popped the clutch in reverse.
IMG_4968 by Phoenix Black, on FlickrPosing up against a rock at the top of the trail
IMG_5063 by Phoenix Black, on FlickrComing down bowling ball hill
IMG_5082 by Phoenix Black, on FlickrComing back down the V, little bit of a pucker factor here
IMG_5111 by Phoenix Black, on FlickrGot Flex?
IMG_5196 by Phoenix Black, on FlickrAbsolutely one of my favorite trails, took a ton of pictures, these are just my favorites, and had a great time while not breaking anything major. My gas gauge is now stuck at 3/4 of a tank and my driveshaft rubbed the tank enough enough to shear the zerk off so I will be making a new tank skid soon and dropping the tank today to fix the gauge and the dent in it. [MENTION=118730]AssBurns[/MENTION] I take back what I said about feeling the need for a gas tank skid
IMG_5251 by Phoenix Black, on FlickrCant really see the dent here but
IMG_5248 by Phoenix Black, on Flickr
AssBurns
New member
Black798;2743944[MENTION=118730 said:AssBurns[/MENTION] I take back what I said about feeling the need for a gas tank skid
Hahah I was looking at the pictures thinking "This guy must be a really good driver if he is running these kinds of trails and doesn't hit his gas tank ever". Then I saw your comment. Our gas tanks are like rock magnets. I hit my gas tank more thank my diff I feel like. Actually on my way to pull a new tank to repair last weekends incident.
Great pics btw! I like that one from the front showing the rear flexing. [emoji1303]

Black798
New member
Thanks man, its one of my favorites from the trip. Those rear arms have really put in a lot of work recently and the bushings are showing it a bit. Hopefully I can get another season out of them though before I upgrade to some beefier ones. Im trying to keep a tight budget right now because Id like to add a rear arb before next summer.
Black798
New member
Coney Flats
For my last trip in Colorado this year I decided to go run Middle Saint Vrain over to Coney flats. I wanted to keep it more mild than Saturday because I was without a spotter this time and I have to drive 700 miles back to Montana on Wednesday. It was a fun trail with great scenery and despite my best efforts I still managed to shear off another zerk on the driveshaft. I have already ordered steel for a new one along with the stuff for my rear tire carrier.
Pictures
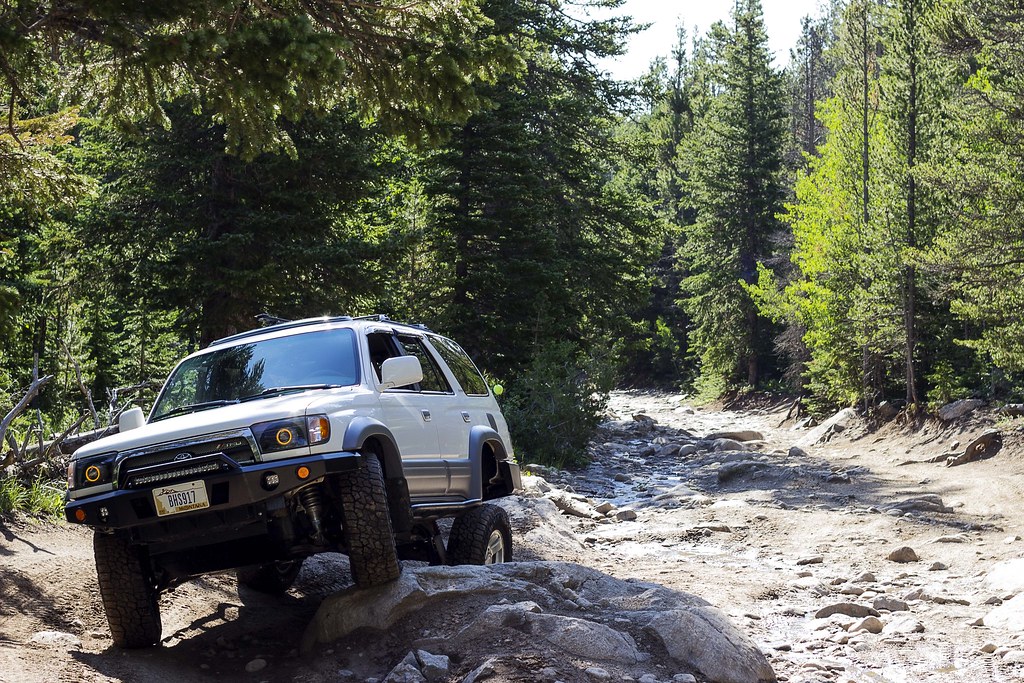 IMG_5269 by Phoenix Black, on Flickr
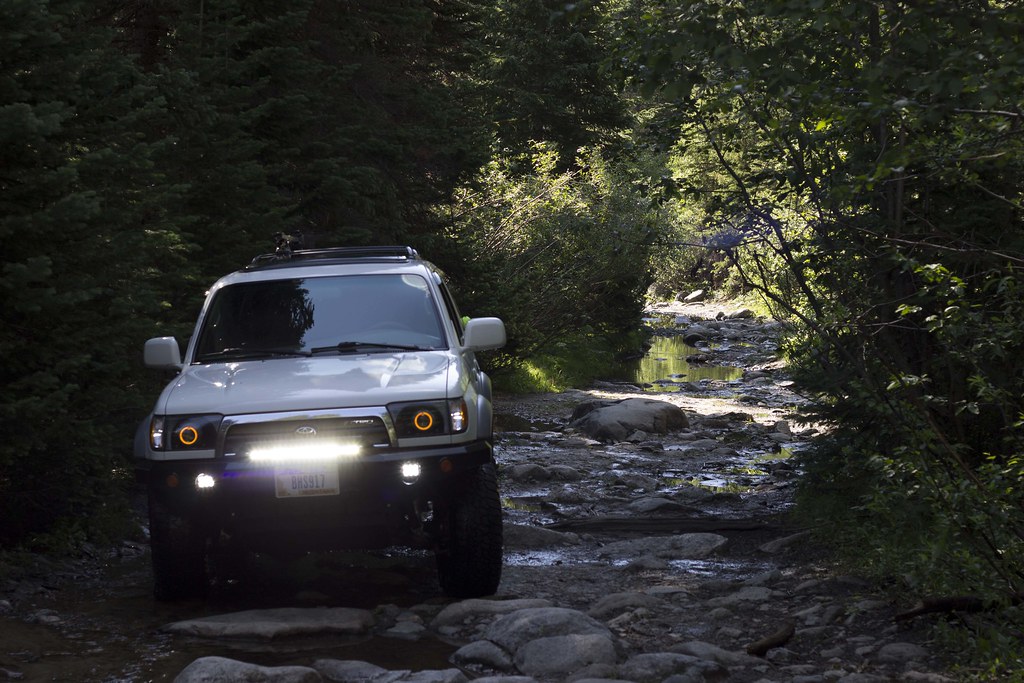 IMG_5270 by Phoenix Black, on Flickr
These trails had a lot of water crossings like this which I liked a lot. Especially the big "lake" at the top
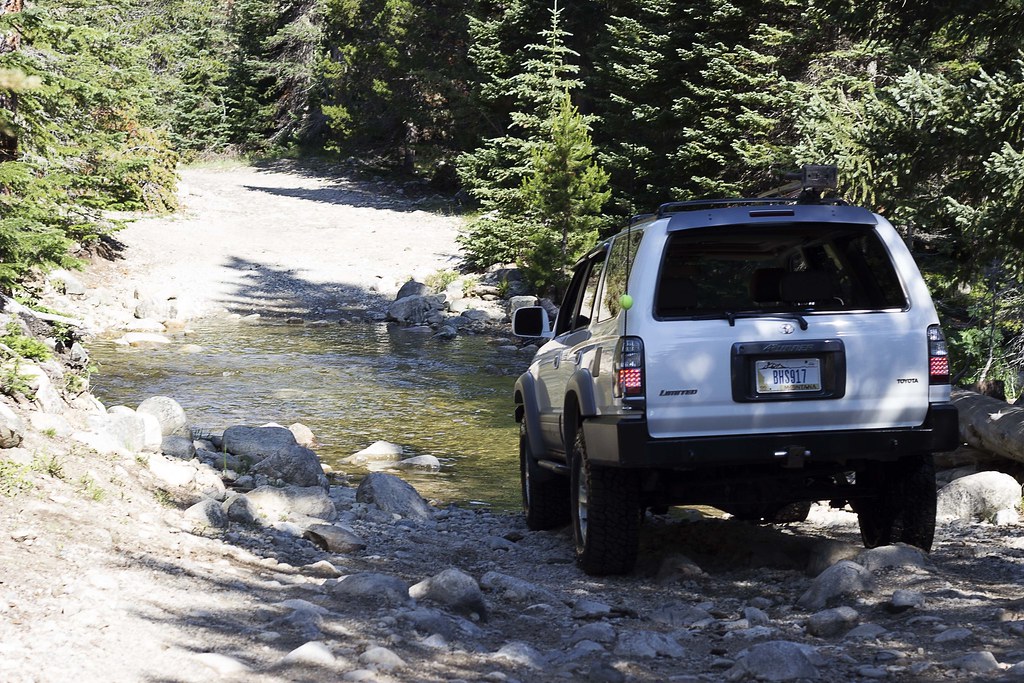 IMG_5279 by Phoenix Black, on Flickr
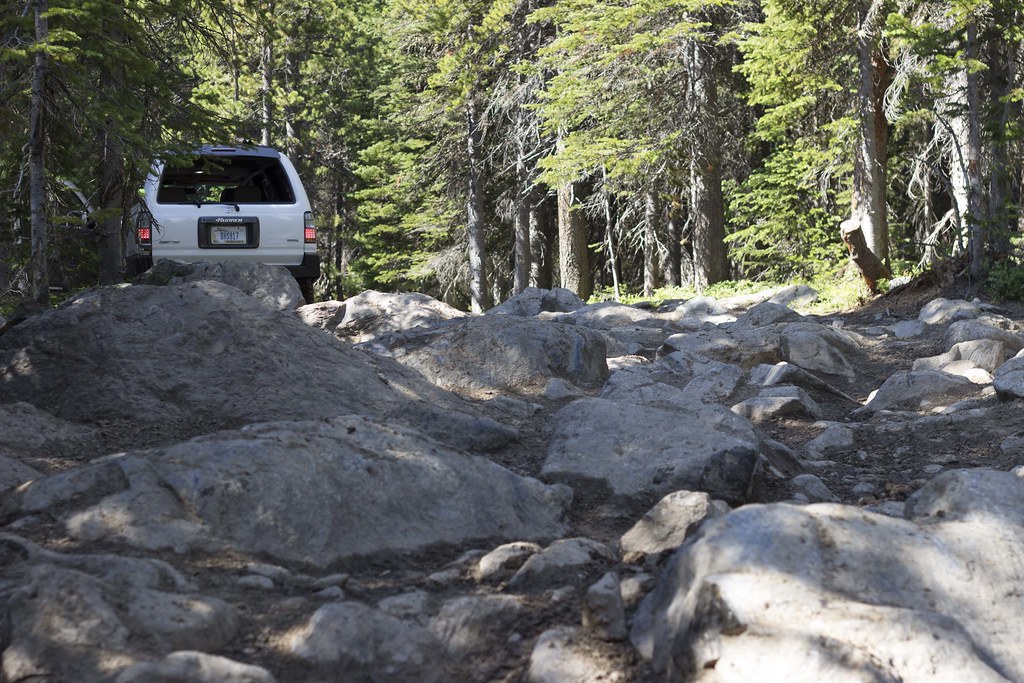 IMG_5285 by Phoenix Black, on Flickr
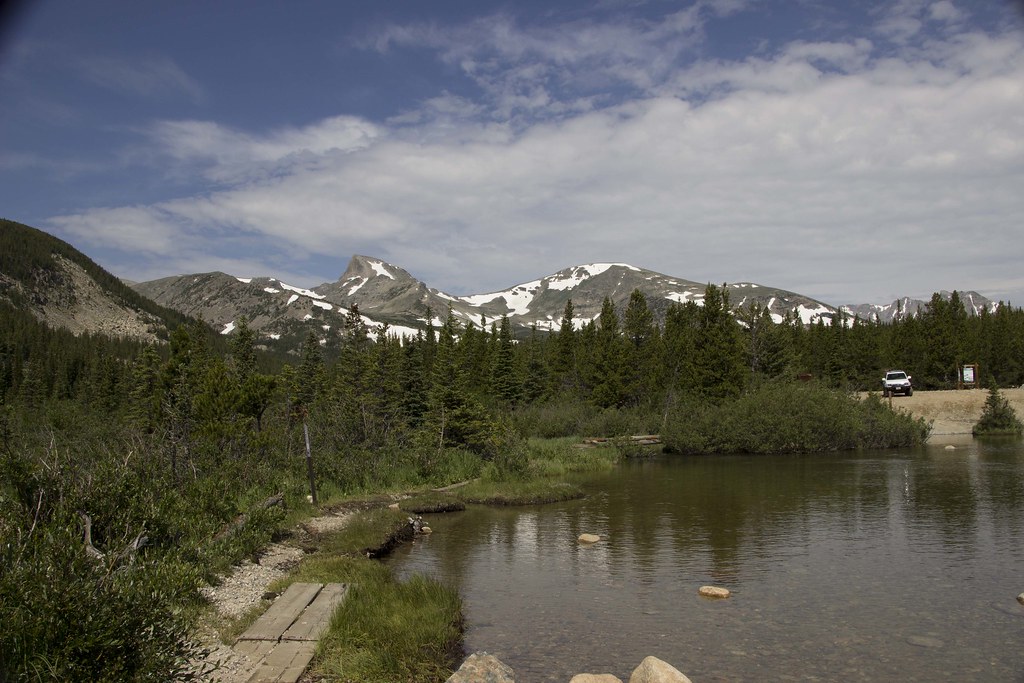 IMG_5292 by Phoenix Black, on Flickr
And just like every other trail it was over too soon.
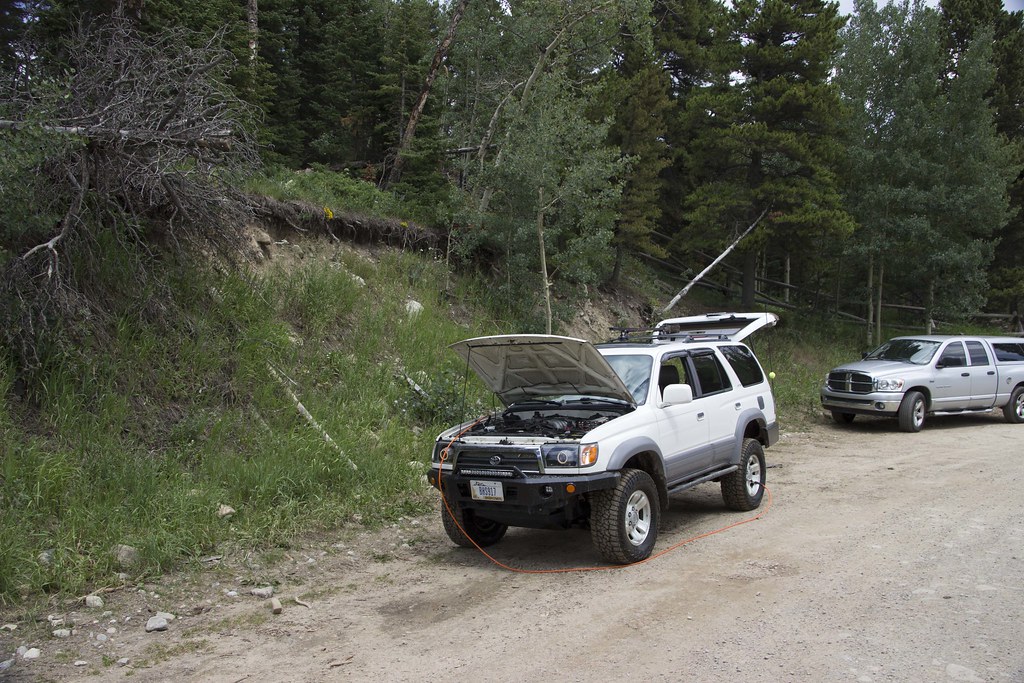 IMG_5303 by Phoenix Black, on Flickr
Also here are some short clips from the wheeler lake trip.
https://youtu.be/p-ZcwJB40cc
https://youtu.be/yfwLQ_kaUTQ
https://youtu.be/jM5E9dwxgYg
For my last trip in Colorado this year I decided to go run Middle Saint Vrain over to Coney flats. I wanted to keep it more mild than Saturday because I was without a spotter this time and I have to drive 700 miles back to Montana on Wednesday. It was a fun trail with great scenery and despite my best efforts I still managed to shear off another zerk on the driveshaft. I have already ordered steel for a new one along with the stuff for my rear tire carrier.
Pictures
IMG_5269 by Phoenix Black, on FlickrIMG_5270 by Phoenix Black, on FlickrThese trails had a lot of water crossings like this which I liked a lot. Especially the big "lake" at the top
IMG_5279 by Phoenix Black, on FlickrIMG_5285 by Phoenix Black, on FlickrIMG_5292 by Phoenix Black, on FlickrAnd just like every other trail it was over too soon.
IMG_5303 by Phoenix Black, on FlickrAlso here are some short clips from the wheeler lake trip.
https://youtu.be/p-ZcwJB40cc
https://youtu.be/yfwLQ_kaUTQ
https://youtu.be/jM5E9dwxgYg
Black798
New member
Panhard Lift
Today I used some left over 3/16 plate I had from the skids to make a panhard lift bracket. I haven't seen many people who have done the panhard lift so Ill give a brief explanation as to why I choose the lift over the drop.
Panhard drop vs lift
Theres a lot more science to this than I understand but the basics of it are your panhard travels in an arc as the axle moves inside of the suspension travel, this causes the axle to shift from side to side. In lifted applications such as this the stock bar rests at an angle rather than flat, there are two problems with this:
1.) it causes the axle to shift side to side more going over bumps since the bar is moving in a more severe arc
2.) having the bar at an angle effectively lowers the roll center which is the point the vehicle leans around going through turns.
One way to correct this angle is with a panhard drop, which in cases where the bump stops have not been extended is the only option, while the panhard drop corrects the angle. It moves the roll center down and away from the center of gravity which increases body roll.
The other way to correct this is with a panhard lift bracket on the axle end. This is only possible with extended bump stops, otherwise the bracket will contact the frame, but this both fixes the angle and raises the roll center bringing it closer to the COG effectively making the vehicle more stable in turns.
Here is a great thread that goes more in depth.
And another link explaining roll center
Onto the pictures.
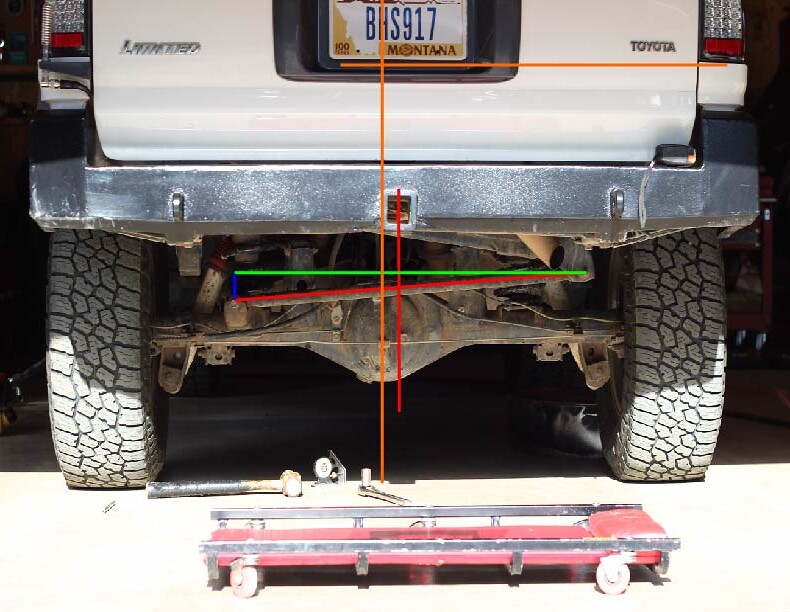
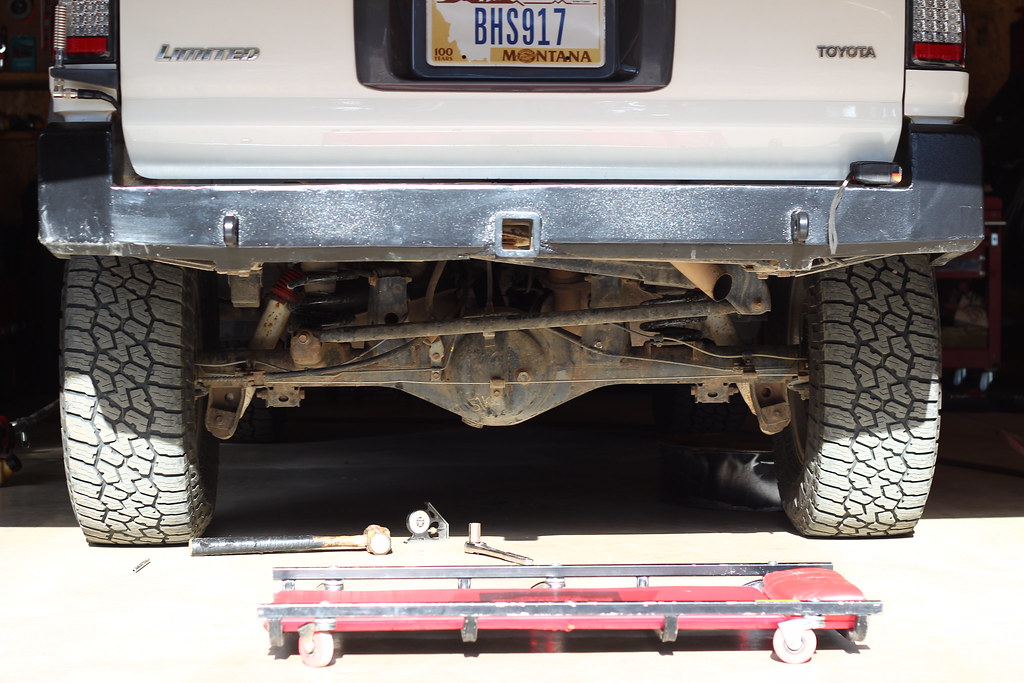
This illustrates the change in roll center by lifting the bar by 1.75 inches in my case. I was able to take the bar angle from 6 degrees down to 1
The intersection of the orange lines is the approximate COG, I pulled those measurements off of a thread on yotatech and while these measurments are different for everyones rig its close enough to show the idea. The intersection of the two red lines was the before roll center, the intersection of the green and red are the new roll center. You can see how the roll center is roughly 1.75 inches higher
 roll center by Phoenix Black, on Flickr
Before angle
 IMG_5317 by Phoenix Black, on Flickr
After angle
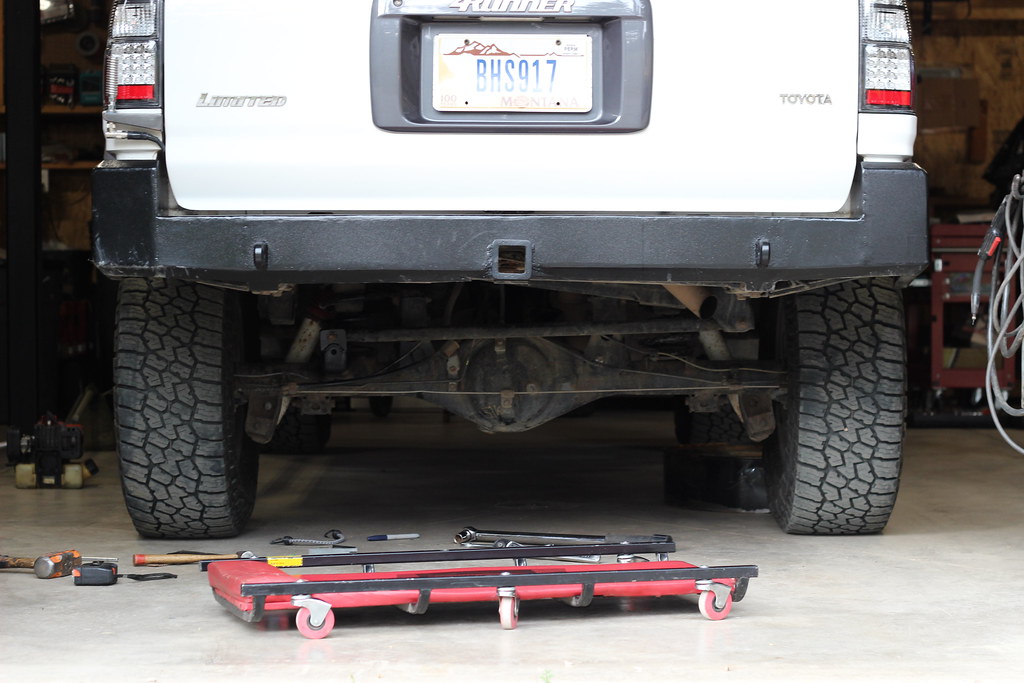 IMG_5321 by Phoenix Black, on Flickr
It is best to look at the before and after in a seperate window side by side to see the difference the best due to the difference in picture framing, I should have set up a tripod.
Close up
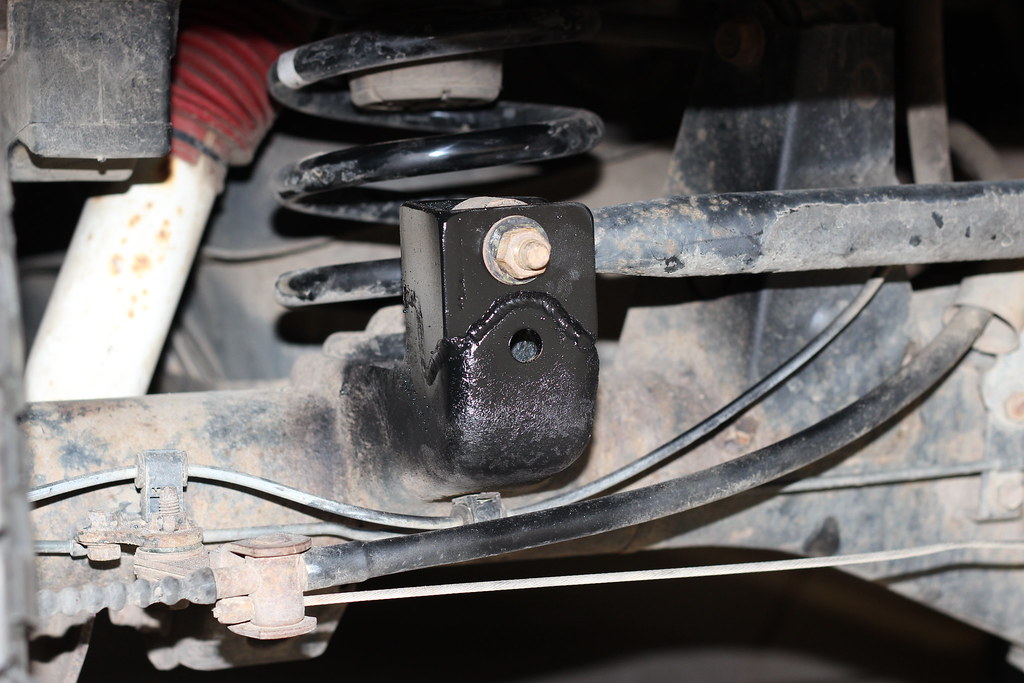 IMG_5322 by Phoenix Black, on Flickr
Today I used some left over 3/16 plate I had from the skids to make a panhard lift bracket. I haven't seen many people who have done the panhard lift so Ill give a brief explanation as to why I choose the lift over the drop.
Panhard drop vs lift
Theres a lot more science to this than I understand but the basics of it are your panhard travels in an arc as the axle moves inside of the suspension travel, this causes the axle to shift from side to side. In lifted applications such as this the stock bar rests at an angle rather than flat, there are two problems with this:
1.) it causes the axle to shift side to side more going over bumps since the bar is moving in a more severe arc
2.) having the bar at an angle effectively lowers the roll center which is the point the vehicle leans around going through turns.
One way to correct this angle is with a panhard drop, which in cases where the bump stops have not been extended is the only option, while the panhard drop corrects the angle. It moves the roll center down and away from the center of gravity which increases body roll.
The other way to correct this is with a panhard lift bracket on the axle end. This is only possible with extended bump stops, otherwise the bracket will contact the frame, but this both fixes the angle and raises the roll center bringing it closer to the COG effectively making the vehicle more stable in turns.
Here is a great thread that goes more in depth.
And another link explaining roll center
Onto the pictures.
This illustrates the change in roll center by lifting the bar by 1.75 inches in my case. I was able to take the bar angle from 6 degrees down to 1
The intersection of the orange lines is the approximate COG, I pulled those measurements off of a thread on yotatech and while these measurments are different for everyones rig its close enough to show the idea. The intersection of the two red lines was the before roll center, the intersection of the green and red are the new roll center. You can see how the roll center is roughly 1.75 inches higher
roll center by Phoenix Black, on FlickrBefore angle
IMG_5317 by Phoenix Black, on FlickrAfter angle
IMG_5321 by Phoenix Black, on FlickrIt is best to look at the before and after in a seperate window side by side to see the difference the best due to the difference in picture framing, I should have set up a tripod.
Close up
IMG_5322 by Phoenix Black, on Flickr
Last edited:
Black798
New member
Tire Swingout
It was a long day in the shop today but I was able to get a decent start on the tire swingout. Im stil waiting on a few parts to show up but I should have it done here in the next week or so.
First thing was the hinge, I went with the 4xinnovations hinge because it has a double shear design and IMO is the best designed hinge for the money. All I have to say it is super beefy and that Adam did a great job designing it.
All the hinge parts
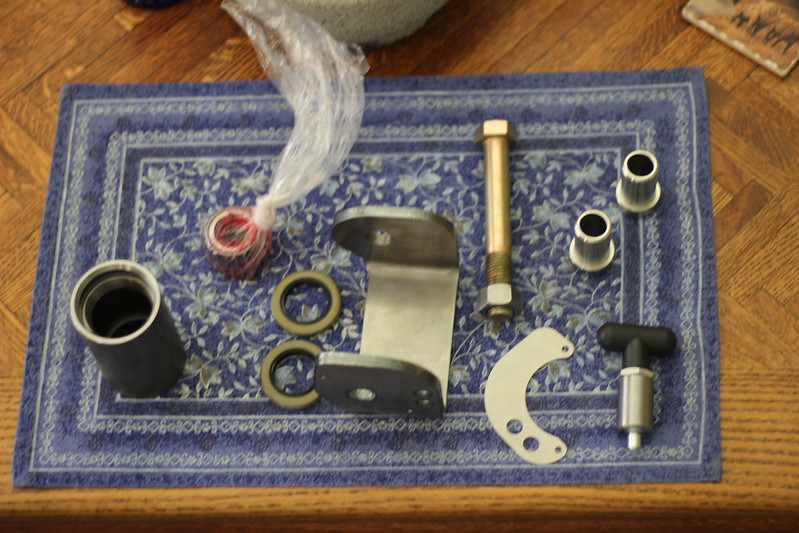 IMG_5348 by Phoenix Black, on Flickr
After I got that all welded on I started working on the main structure, its made out of 2x3 .120 wall tube. I wanted to keep the tire as tight and high as reasonably possible to keep from dragging it on obstacles.
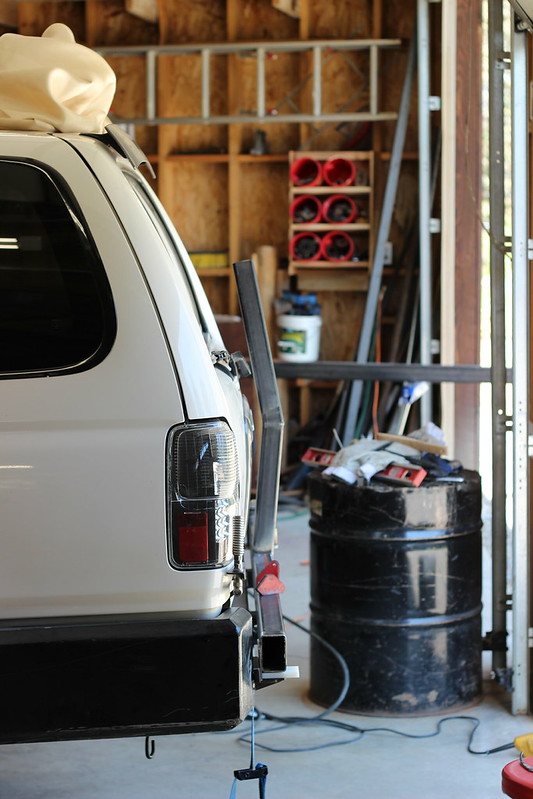 IMG_5366 by Phoenix Black, on Flickr
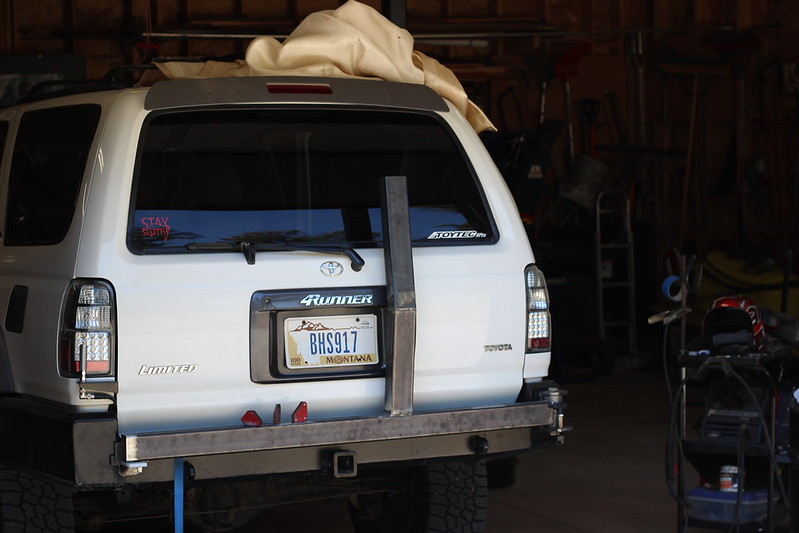 IMG_5367 by Phoenix Black, on Flickr
Added in some bracing and the mounting tube for the tire flange
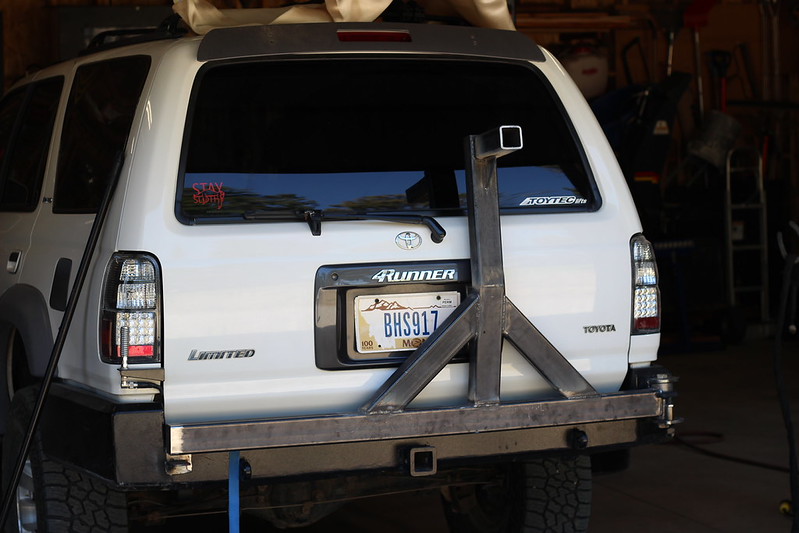 IMG_5369 by Phoenix Black, on Flickr
This was as far as I got today with getting the tire mounted. So far Im pretty happy with the fitment and how it is all coming together. Theres still a lot more work to do though. To be continued...
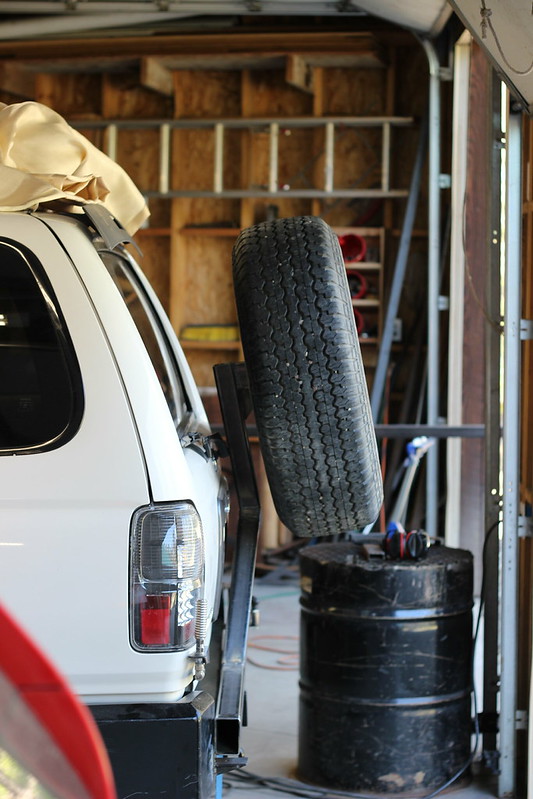 IMG_5372 by Phoenix Black, on Flickr
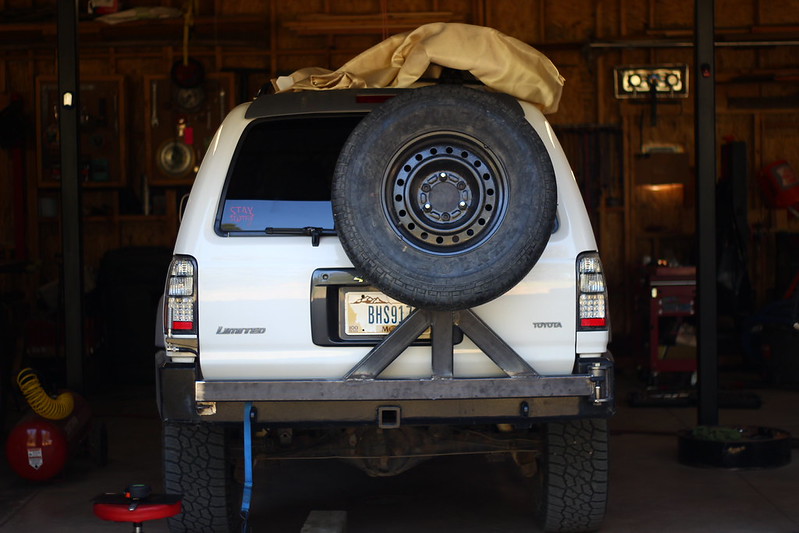 IMG_5377 by Phoenix Black, on Flickr
It was a long day in the shop today but I was able to get a decent start on the tire swingout. Im stil waiting on a few parts to show up but I should have it done here in the next week or so.
First thing was the hinge, I went with the 4xinnovations hinge because it has a double shear design and IMO is the best designed hinge for the money. All I have to say it is super beefy and that Adam did a great job designing it.
All the hinge parts
IMG_5348 by Phoenix Black, on FlickrAfter I got that all welded on I started working on the main structure, its made out of 2x3 .120 wall tube. I wanted to keep the tire as tight and high as reasonably possible to keep from dragging it on obstacles.
IMG_5366 by Phoenix Black, on FlickrIMG_5367 by Phoenix Black, on FlickrAdded in some bracing and the mounting tube for the tire flange
IMG_5369 by Phoenix Black, on FlickrThis was as far as I got today with getting the tire mounted. So far Im pretty happy with the fitment and how it is all coming together. Theres still a lot more work to do though. To be continued...
IMG_5372 by Phoenix Black, on FlickrIMG_5377 by Phoenix Black, on Flickr
spoonsports86
New member
tire carrier is coming along nicely
but is there a certain reason you mounted it so high?
but is there a certain reason you mounted it so high?

tS_kStin
Member
It was a long day in the shop today but I was able to get a decent start on the tire swingout. Im stil waiting on a few parts to show up but I should have it done here in the next week or so.
First thing was the hinge, I went with the 4xinnovations hinge because it has a double shear design and IMO is the best designed hinge for the money. All I have to say it is super beefy and that Adam did a great job designing it.
All the hinge parts
Good choice on the hinge! I used two of those for my dual swing out. I have had them on for almost a year and they still work just as good as when I got them.
Black798
New member
tire carrier is coming along nicely
but is there a certain reason you mounted it so high?
I think I'm going to lower it about 2 inches but I choose to put it at that height to avoid dragging the tire and putting extra stress on the latch or spindle and possible bending the swingarm when climbing or decending steep obstacles. It's a bit of a trade off between departure angle and rear visibility.
Good choice on the hinge! I used two of those for my dual swing out. I have had them on for almost a year and they still work just as good as when I got them.
Good to hear on the hinge. We should meet up and go wheeling sometime. I'm currently planning a trip into the tabacco roots here in the next few weeks.
spoonsports86
New member
I think I'm going to lower it about 2 inches but I choose to put it at that height to avoid dragging the tire and putting extra stress on the latch or spindle and possible bending the swingarm when climbing or decending steep obstacles. It's a bit of a trade off between departure angle and rear visibility.
ahh i see that makes sense. looks good either way
tS_kStin
Member
Good to hear on the hinge. We should meet up and go wheeling sometime. I'm currently planning a trip into the tabacco roots here in the next few weeks.
I'd be game for a Meetup for some wheeling. I am currently in Indonesia and for about a week after I get back I'll be jet lagged like crazy as I am 13hrs ahead if Bozeman time right now. I got some.buddies I could have come along as well who I have wheeled with a bit also.
Black798
New member
ahh i see that makes sense. looks good either way
Ive got quite a few little things planned for it before its done so it will probably take another few days of work but I think its going to look really good when its done. Devil is in the details
I'd be game for a Meetup for some wheeling. I am currently in Indonesia and for about a week after I get back I'll be jet lagged like crazy as I am 13hrs ahead if Bozeman time right now. I got some.buddies I could have come along as well who I have wheeled with a bit also.
That would be awesome. Ill shoot you a PM with my phone number so whenever you get back and are up for it just shoot me a text.

Black798
New member
Tire Carrier pt. 2
I finished the tire carrier this last weekend and am super pleased with the results. I had to add some more internal bracing to the bumper but the arm is super solid and doesnt move at all when going down the road. I didnt get to take many pictures because I was on a mission to get it done but heres a quick run down of what I did.
1st, I lowered the tires by 2 inches
2nd figured out the latch hook
3rd added the license plate frame and wiring guides
4th paint an old license plate to fill the stock location
5th paint and install.
For paint I tried something new, I used rustoleum professional gloss black enamel and I sprayed it through a cheap harbor freight hvlp paint gun. The finish came out decent but its a little soft, I think I can refine the technique and get much better results.
Pictures
Checking departure angle, should be sufficient
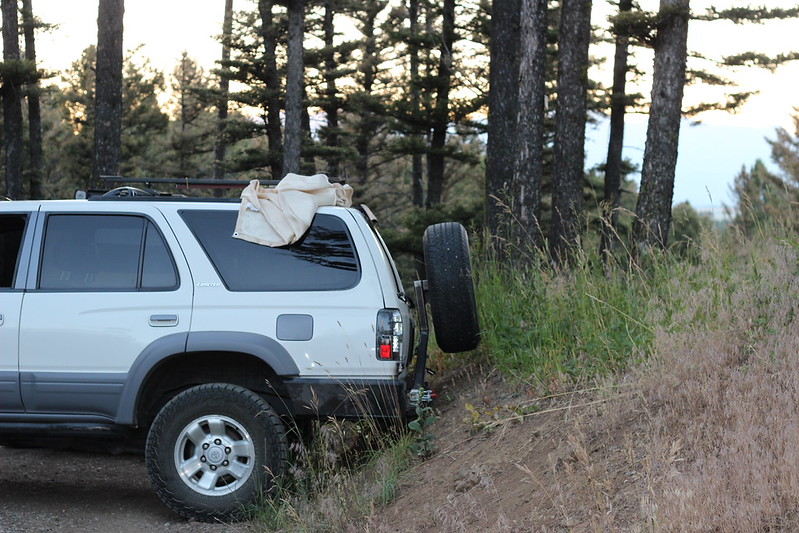 IMG_5394 by Phoenix Black, on Flickr
The latch catch. it preloads the arm up slightly so I am not wearing on the spindle.
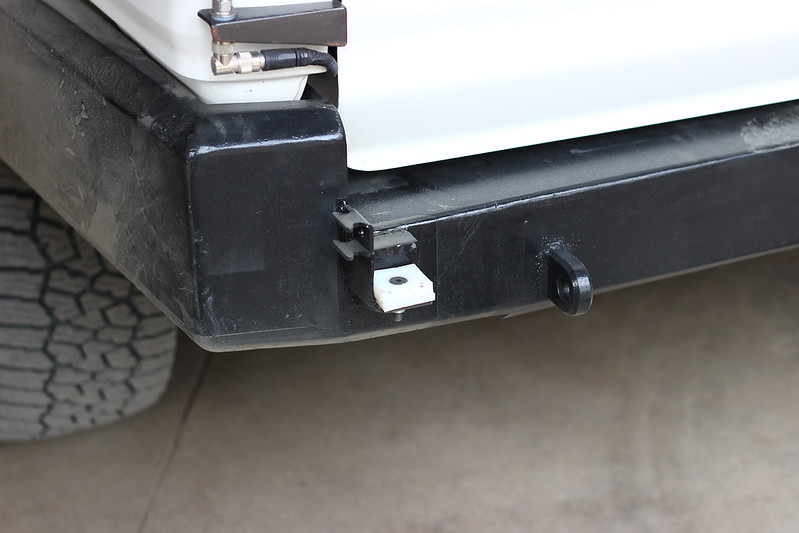 IMG_5404 by Phoenix Black, on Flickr
Nice clean wiring
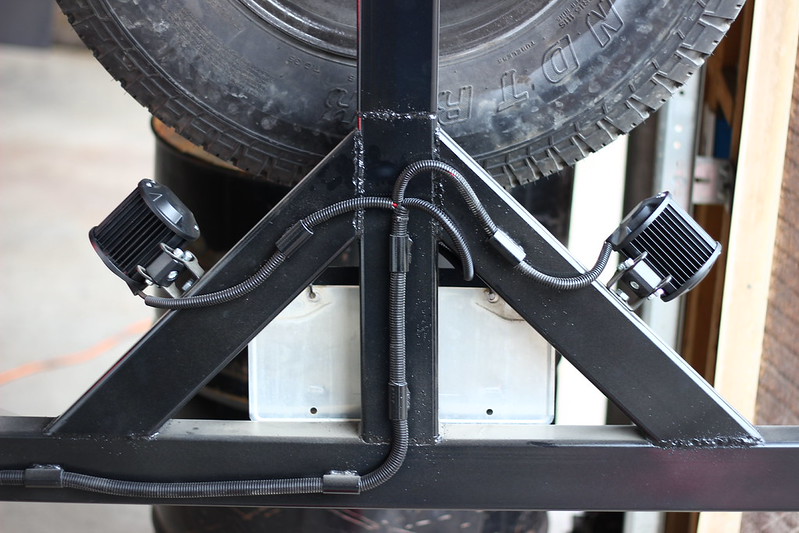 IMG_5406 by Phoenix Black, on Flickr
Reverse Light set up, I originally wanted the lights inside the triangles but they wouldn't fit, thank you BFAD for the mounting idea
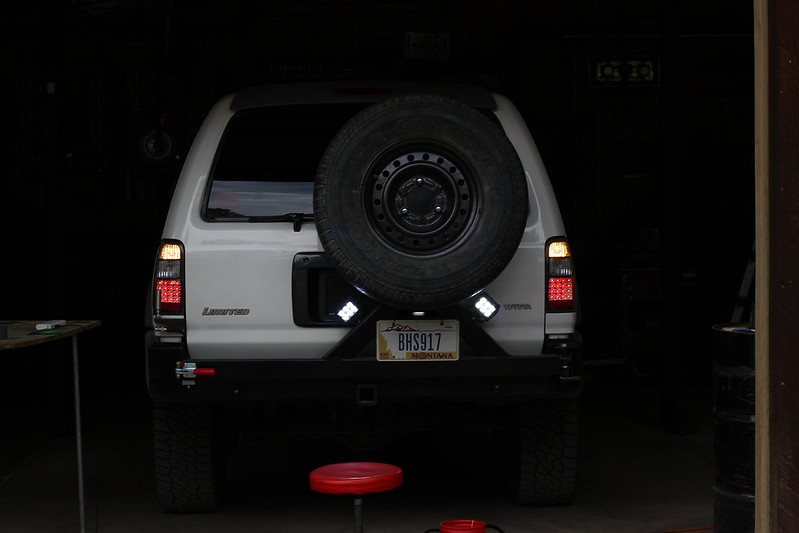 IMG_5412 by Phoenix Black, on Flickr
Closed
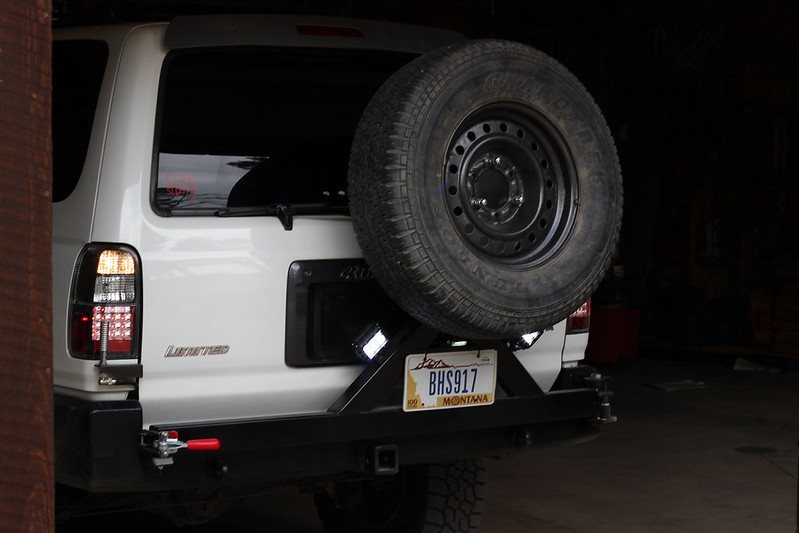 IMG_5417 by Phoenix Black, on Flickr
I also added some small lights in the hatch to put some more light into the area at night, I tied them straight into the regular dome light.
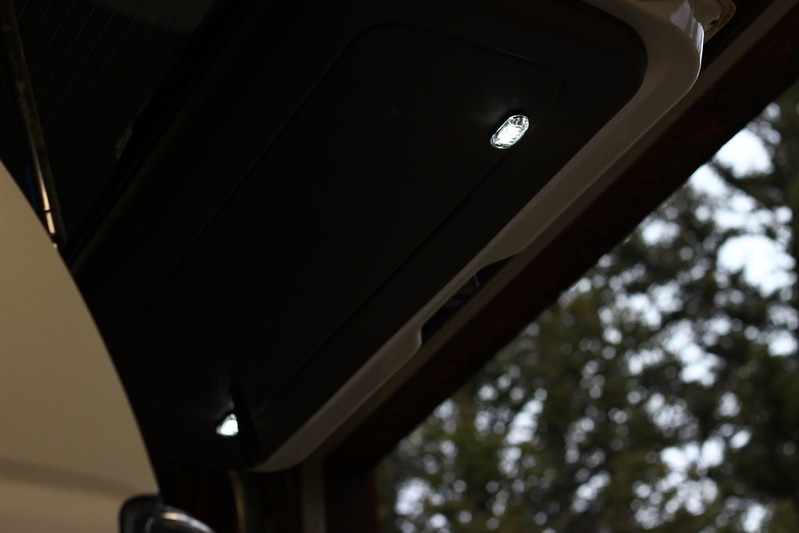 IMG_5429 by Phoenix Black, on Flickr
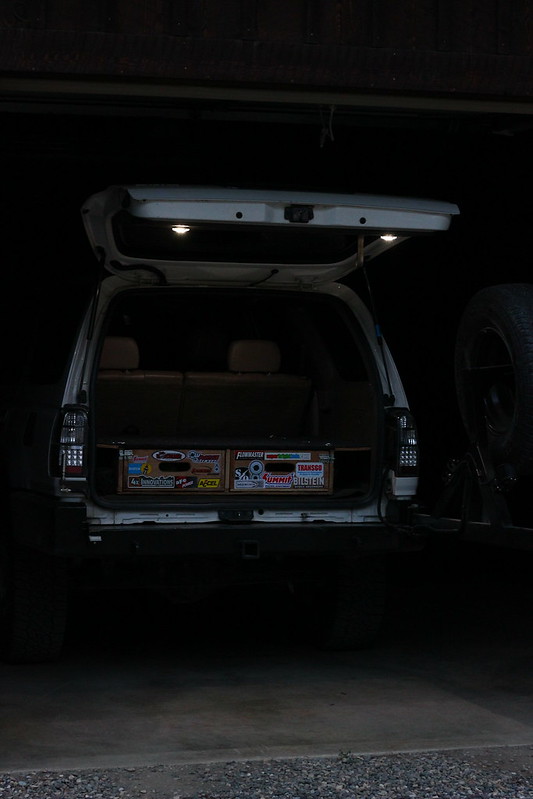 IMG_5444 by Phoenix Black, on Flickr
Theres still some little details to take care of but overall its done. Im also not the biggest fan of the stock spare look and I would like a full set of matching rims and as much as I love the stock 3 spokes I would like to upgrade and I really like the scs ray 10s. So a set of these in the matte gray variety may be in the somewhat near future....
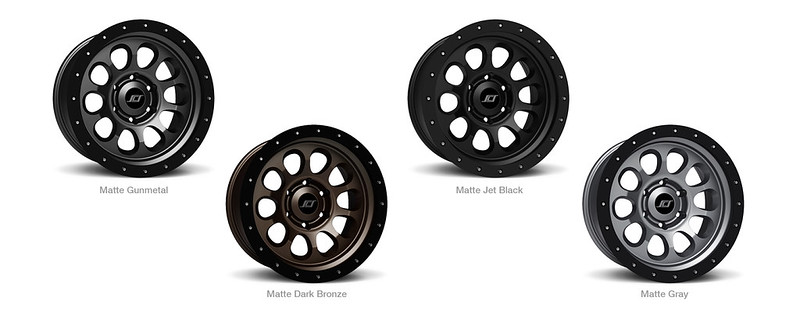 Ray10_LINEUP_zpsvnmlwrnf by Phoenix Black, on Flickr
I finished the tire carrier this last weekend and am super pleased with the results. I had to add some more internal bracing to the bumper but the arm is super solid and doesnt move at all when going down the road. I didnt get to take many pictures because I was on a mission to get it done but heres a quick run down of what I did.
1st, I lowered the tires by 2 inches
2nd figured out the latch hook
3rd added the license plate frame and wiring guides
4th paint an old license plate to fill the stock location
5th paint and install.
For paint I tried something new, I used rustoleum professional gloss black enamel and I sprayed it through a cheap harbor freight hvlp paint gun. The finish came out decent but its a little soft, I think I can refine the technique and get much better results.
Pictures
Checking departure angle, should be sufficient
IMG_5394 by Phoenix Black, on FlickrThe latch catch. it preloads the arm up slightly so I am not wearing on the spindle.
IMG_5404 by Phoenix Black, on FlickrNice clean wiring
IMG_5406 by Phoenix Black, on FlickrReverse Light set up, I originally wanted the lights inside the triangles but they wouldn't fit, thank you BFAD for the mounting idea
IMG_5412 by Phoenix Black, on FlickrClosed
IMG_5417 by Phoenix Black, on FlickrI also added some small lights in the hatch to put some more light into the area at night, I tied them straight into the regular dome light.
IMG_5429 by Phoenix Black, on FlickrIMG_5444 by Phoenix Black, on FlickrTheres still some little details to take care of but overall its done. Im also not the biggest fan of the stock spare look and I would like a full set of matching rims and as much as I love the stock 3 spokes I would like to upgrade and I really like the scs ray 10s. So a set of these in the matte gray variety may be in the somewhat near future....
Ray10_LINEUP_zpsvnmlwrnf by Phoenix Black, on Flickr
Last edited:
AssBurns
New member
Looks great! I might be using the same spindle. Still not decided how I want to design my swing out. The double shear design is pretty sweet and easy to mount and looks awesome. There is a pretty beefy single shear one that a few big manufacturers use that I can get from the actual machine shop at a discount. Not sure exactly which way I'm going though yet.
Also my CB antenna mount looks almost exactly like yours. Great minds think alike [emoji6]
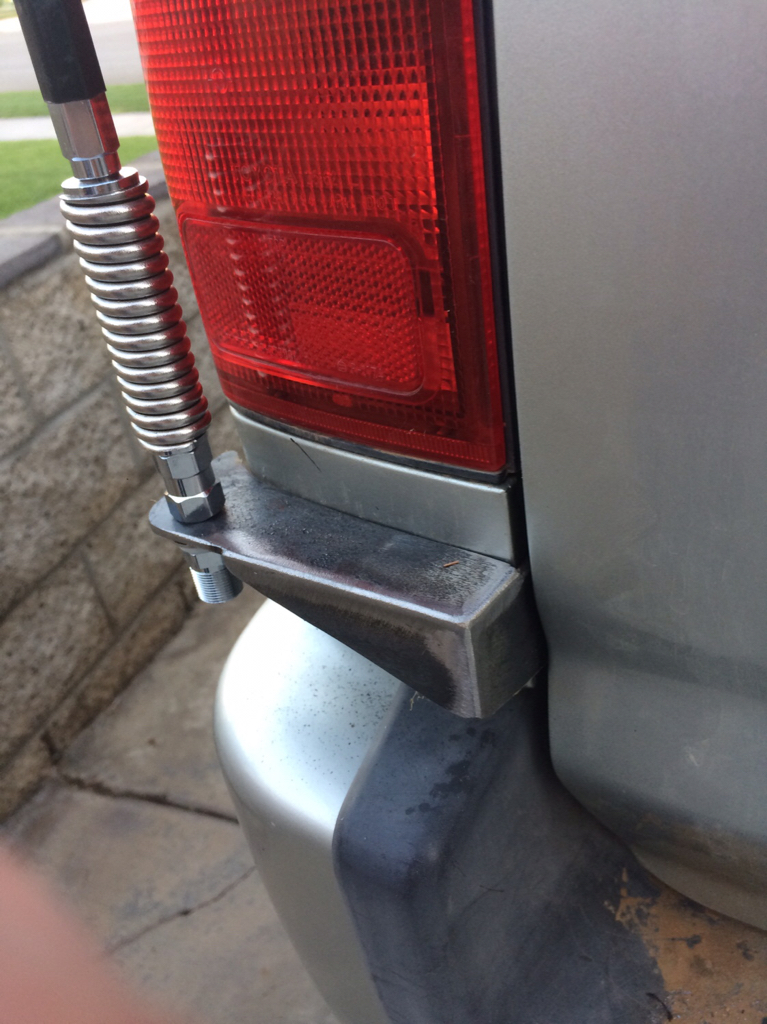
Also my CB antenna mount looks almost exactly like yours. Great minds think alike [emoji6]
Similar threads


- Replies
- 2
- Views
- 3K

- Replies
- 2
- Views
- 2K


