DIY: Interior LED swap (cluster, HVAC, switches, window, *steering wheel)

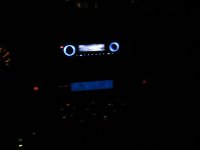
Finally got everything wrapped up. Just wanted to post some 'after' pics and say thanks for all the tips and the great write up! I took a lot of pictures of the process so if anyone wants more photos, just let me know.

I have a 2005 Sport so I'm posting a pic of the gauge cluster board 'cause it's different than the newer sports (Darkie's photos) and the board from the Limited, posted earlier in the thread. 20 LEDs still worked for my swap.

I also tried out a little mod I found. It requires peeling the LCD film (which makes the LCD read out visible) off the face of the LCD glass. I just used a decal scraper and carefully removed the film, then used bug and tar remover to get rid of the remaining glue. Then you apply 'reverse polarization LCD film' to the glass, making sure all the air bubbles are squeezed out. What you end up with are LCD readouts w/ a dark background and a white readout.

2005 Sport Gauge Cluster Board:

CarandVT081.jpg~original


After pics:

CarandVT096.jpg~original


CarandVT112-1.jpg~original


CarandVT113-1.jpg~original


LCD film:

CarandVT083.jpg~original


CarandVT085.jpg~original


CarandVT093.jpg~original
 
bump for a sticky.

Great write up. Makes me want to crack open the cluster and get to work.
 
Last edited:
HokieRunner,

Great job!! that LCD trick is funky. is the ODO background actually purple or is it just the pic?


if you plan on keeping your stock head unit, take a look at this:Link

Not exactly the same but the the disassembly/LED used may be similiar.

Looks awesome. I need to do this. The white looks so clean and "upscale"

if you can wait until feb, someone might do it for you :bigok:

I think I will attempt to do this in red. What LEDs you guys used? Where to find them?

I used PLCC-2 surface mounted LED's from Oznium.com for the cluster and steering wheel controls. for the rest i used some 3mm flat top LED's i got from ebay. for the switches and HVAC, you'll need 1/8W 1.2K ohm resistors for each light.
 
Last edited:
Great job!! that LCD trick is funky. is the ODO background actually purple or is it just the pic?

The ODO background is actually a dark blue (camera made it look purple). The LCD film is pretty cool stuff - it will make the LCD appear lighter/darker for every 90 degrees it's rotated. Depending on what color your actual LEDs are, the dark background will pick up a little of that color (ie. red LEDs will produce a dark red background w/ light red readout). I did this on the climate control readout as well, but the background light is less intense. Looks good at night, but can be difficult to read during the day. I'm looking into more powerful lighting options for behind the climate control LCD.

Here's where I read about the LCD mod. It has a write up w/ 'after' pics w/ different LED colors.
http://www.600rr.net/vb/showthread.php?t=135269
 
Darkie, I want to do this mod, but time is pretty tight, and my truck is my DD. Could I do the hard ones in a day or weekend? Also, I'm pretty confident about soldering. I'm no expert, but I've soldered a little bit, and its really not hard. What I don't know how to do is flux or desolder. Is this something that I should be saying, 'nevermind' to? Also, how does the white look in the daytime?

Also, on the surface mount LEDs how are they soldered on? Is it on the sides of the LED?
 
Darkie, I want to do this mod, but time is pretty tight, and my truck is my DD. Could I do the hard ones in a day or weekend? Also, I'm pretty confident about soldering. I'm no expert, but I've soldered a little bit, and its really not hard. What I don't know how to do is flux or desolder. Is this something that I should be saying, 'nevermind' to? Also, how does the white look in the daytime?

Also, on the surface mount LEDs how are they soldered on? Is it on the sides of the LED?

You should be able to knock it out in a day, easily. Make sure you have a fine tipped (point) soldering iron because it will make it a lot easier. I had to redo several LEDs cuz I was working w/ a fat tipped iron. There should be some videos on youtube that show the process for desolding/soldering surface mount LEDs.

Here's the basic process:
Apply flux on either side of the LED (where the existing solder is). Then heat one side w/ the iron, when the solder melts, lift that side of the LED up. Now, using tweezers, hold the LED while you melt the solder on the other side. When the solder melts, the LED should simply lift off the board. Then tin the pads and solder on the new LEDs. Make sure you have the cathode on the right side as well. Clean up the board w/ contact cleaner when you're done.

The LED contacts are underneath the LED w/ a little bit of the pad wrapped around the edges. The white look nice in the day time. The gauges light up nicely. The other buttons just appear white during the day, not necessarily 'lit', but it looks clean. Looks incredible at night and well worth it IMO.
 
Wow this is a great thread and I agree it should be a "Sticky Thread" While we are changing all of the Lamps for LEDs has anyone changed the cupholder Lights out? is it pretty easy? seems it would be. IF someone has already done it let me know..... Pictures would be good.

Andy
 
Wow this is a great thread and I agree it should be a "Sticky Thread" While we are changing all of the Lamps for LEDs has anyone changed the cupholder Lights out? is it pretty easy? seems it would be. IF someone has already done it let me know..... Pictures would be good.

Andy

You can see in Hokie's pics the cup holder lights changed to white.
 
I see it lit up that is why I am asking, I did not see it listed in the breakdown. Guess I will have to pull it apart to see. I was hoping maybe there was a picture or two of them being replaced :)
 
Wow this is a great thread and I agree it should be a "Sticky Thread" While we are changing all of the Lamps for LEDs has anyone changed the cupholder Lights out? is it pretty easy? seems it would be. IF someone has already done it let me know..... Pictures would be good.

Andy

I snapped a few pics of the finished product for you. The light for cupholder is a single wedge bulb in a 'twist in' bulb holder. Just slide out the bulb, and solder in the LED and resistor in its place. The light that illuminates the console shifter is the same type of light.

The wiring from the bulb holder has a disconnect point about 8" from the bulb. You can just disconnect it and take it inside to work on.

BostonCollegeGame043.jpg~original

BostonCollegeGame044.jpg~original

BostonCollegeGame045.jpg~original
 
Thanks for the Pics! I thought that I had missed something or that maybe some pictures got left out. I just got back on from checking it out and saw this post. It appears that the bulbs are the #74 bulbs, like in your glove box. I happen to have a pair on it's way from V-Leds and wonder how those will look. They are pretty bright so not sure how they will work. Still worth trying. Yours is definitely the cheaper alternative but since I will have extra worth the try. Thank you for the pics!!:party:
 
To Hokie or any others who have done this, do you lose the ability to see which gear you're in on the dash? I can't tell in darkie's pic, but in Hokie's it looks like he might be in park. Like, the white is more intense, but it doesn't change to green? Or does it?

Also, I bought a desoldering iron from radio shack along with a tinning container, and some flux 'gel'. The desoldering iron has a vacuum on it. Will this head be too blunt to desolder the joints?
dsc00404qu.jpg


And 'pad' connotes where you solder the joint on the board, right? So by tinning the pad, and fluxing it... I put a little bit of that silver stuff on the pad, some of that paste on it, then the LED, then just solder it, and clean the excess flux that didn't burn?

I'm an ammateur, I've done some soldering of wires before, but I never used flux, or tinning. But 2 years later and rear bumper lights still work great.


Thanks!
 
Last edited:
i did an easier switch just the bulbs in the climate control display but it looks super clean and was super easy only cost under a dollar for the 2 bulbs. sorry about fuzzy picture
 

Attachments

  • IMG_0470.JPG
    IMG_0470.JPG
    25.5 KB · Views: 3,242
I'll try the ones that I can, others will get the rest...

To Hokie or any others who have done this, do you lose the ability to see which gear you're in on the dash? I can't tell in darkie's pic, but in Hokie's it looks like he might be in park. Like, the white is more intense, but it doesn't change to green? Or does it?

In my setup, I did not change the gear selector LEDS. I left them stock, which on my 2009 4Runner, is green. Since the rest of the LEDs are white, the green LEDs do get a little washed out. I can still see what gear is selected, but it isn't as bright as it used to be. I find this to be the case only when the lights are in the ON position.

Also, I bought a desoldering iron from radio shack along with a tinning container, and some flux 'gel'. The desoldering iron has a vacuum on it. Will this head be too blunt to desolder the joints?

I didn't use a desoldering iron, or flux gel. I used solder wick, and solder that had flux in it. After I removed the stock LEDs, I did use a solder vacuum to try to get up all of the existing solder. Whatever was left, I picked it up with the solder wick.

And 'pad' connotes where you solder the joint on the board, right? So by tinning the pad, and fluxing it... I put a little bit of that silver stuff on the pad, some of that paste on it, then the LED, then just solder it, and clean the excess flux that didn't burn?

I didn't use any solder flux gel. I did tin the pad, which in my case, was to take a small amount of solder and apply it to the pad only. Once I positioned the LED, I applied the soldering iron tip and more solder to the place where the LED and the pad touched. This liquefied the solder, and once I took the iron away, cooled for a solid connection which I checked with a couple of AA batteries and some wire.

I'm an ammateur, I've done some soldering of wires before, but I never used flux, or tinning. But 2 years later and rear bumper lights still work great.


Thanks!

I'm definitely not a pro when it comes to soldering. I was able to get all of the LEDs to work, first time, with no issues. The one thing that I did after I soldered all of the LEDs was to try it out in the 4Runner before I put the needles back on. Take your time, be patient, and I'm sure it will turn out great.
 
This is a great thread, I've been wanting to change out my HVAC switches and the LCD color for awhile now.

I have the LCD out, and tested it with an LED but it's not a very uniform brightness. Did you have to angle the LEDs a certain way to make it look as good as it does in your pictures?

I keep getting dark spots etc no matter what I do.
 

Members online

Forum statistics

Threads
278,316
Messages
3,554,121
Members
248,016
Latest member
Advally Service

Trending content

Back
Top